Incorporate 2D art with 3D rendered imagery
David Weaver shows you how to create a stylish, photorealistic product render

08 Change the background colour to what you want it to be in the final image: this ensures that the colour seen through the glass will be the same as the final image background. Open up the Material browser and drag materials onto the relevant objects. When rendering, save the image as a TIFF with the alpha enabled.

09 In Illustrator, create a circle and fill it with black. Create more circles in the same manner at decreasing sizes. Stack the circles vertically with the smaller circles at the bottom of the stack, and space them out more than the circles at the top.
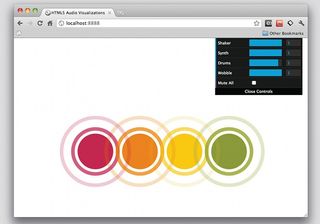
10 Drag a selection box over all the individual circles and group them together as an object. Drop the vector shape into the Brushes workspace on the right and create a new pattern brush. Create a no-stroked or filled circular path and apply the new pattern brush to that path. Create another larger circle filled with black and place it in the centre of the pattern shape. Group all the objects together, ready to copy and paste into Photoshop.
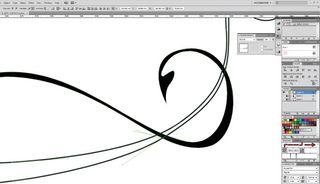
11 Using the Path tool, create a series of sweeping curved shapes. Once you have created a number of these intertwining vector shapes, block-fill them with a colour. Create additional leaf and cherry shapes for further detail to add to the sweeping curved shapes and, again, fill these shapes with a block colour.
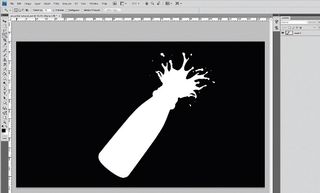
12 Open the KeyShot render in Photoshop. Hold Opt/Alt and double-click on the layer in the Layers panel. Doing this means additional layers can be placed underneath the render layer. Go to the Channels tab and Cmd/Ctrl-click on the alpha channel. Press Cmd Ctrl+Shift+I to invert the selection and delete. This removes the background colour, leaving only the bottle on a layer.
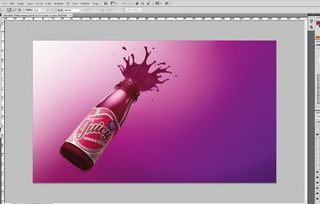
13 Create a new layer underneath the render and fill it with the same base colour that was used for the background in KeyShot. Using the Gradient tool, add highlights to one corner and a darker colour in the opposite corner.
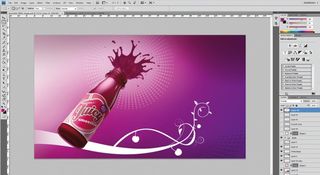
14 Import the vector artwork from Illustrator into the Photoshop image and arrange it behind the bottle. Experiment with the transparency levels of each of the vector elements. Next, add further gradients over the top of the vector work to give even more depth to the image.
Get the Creative Bloq Newsletter
Daily design news, reviews, how-tos and more, as picked by the editors.
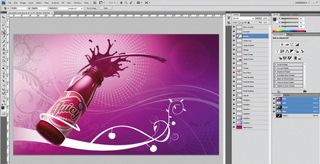
15 Add more vector artwork to the background and a trail of liquid using the same techniques covered over the previous steps. Remember, these tips aren’t just limited to food and drink images, or even product ads: incorporating 2D artwork with 3D rendered imagery is a powerful and potentially limitless way of creating digital imagery.

Thank you for reading 5 articles this month* Join now for unlimited access
Enjoy your first month for just £1 / $1 / €1
*Read 5 free articles per month without a subscription

Join now for unlimited access
Try first month for just £1 / $1 / €1
The Creative Bloq team is made up of a group of design fans, and has changed and evolved since Creative Bloq began back in 2012. The current website team consists of eight full-time members of staff: Editor Georgia Coggan, Deputy Editor Rosie Hilder, Ecommerce Editor Beren Neale, Senior News Editor Daniel Piper, Editor, Digital Art and 3D Ian Dean, Tech Reviews Editor Erlingur Einarsson and Ecommerce Writer Beth Nicholls and Staff Writer Natalie Fear, as well as a roster of freelancers from around the world. The 3D World and ImagineFX magazine teams also pitch in, ensuring that content from 3D World and ImagineFX is represented on Creative Bloq.

