How to quickly sculpt realistic 3D horns for a creature on iPad
Speed-sculpting advice.
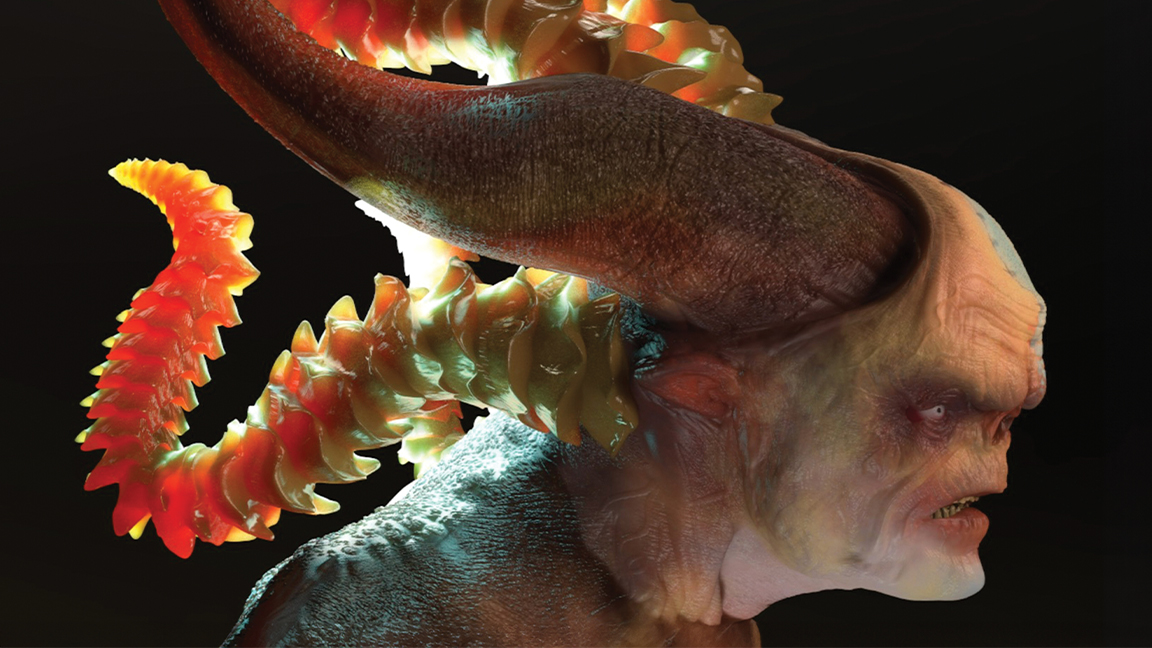
If you’re doing creature and character designs, at some stage you’re going to be asked to create horns. It’s not just dragons that need them; you might need to design a Viking helmet, aliens, real-world animals from a narwhal to a bull, and of course there’s always those pesky unicorns! And until ZBrush for iPad releases, the excellent Nomad Sculpt is a good app to use on iPad for 3D sculpting. (Don't have an iPad, read our iPad generations guide.)
Even if you’re a 2D concept artist, it helps if you can make the complex shapes in 3D for use as references in your work. It can be difficult to get perspective correct on creatures with complex horns, so being able to build them correctly, angle the models for your required point of view and then use that as reference is great. It even helps establish the correct lighting in your scene, as you can add and position lights in a way that you can then paint accurately.
There are so many ways to create horns for the plethora of creatures you may need to tackle. You can use basic polygonal modelling and build up the shape with accurate geometry from the start. That can be time-consuming but the end result is always pleasing, especially if you’re going to use subdivision modelling techniques to round off the shape.
There are so many ways to create horns for the plethora of creatures you may need to tackle
Secondly, one of my favourite ways is to use basic primitive shapes to build the horns. We call this blocking out, and it helps establish the shape, form and silhouette quickly. We can then refine them by using sculpting tools. As with all these methods, the last stage would be to sculpt details on the surface, including elements like scratches, calluses and all kinds of visual interest points.
A third way to generate horns would be to use repeated shapes along a spline, or some sort of cloning option as we see in programs like Blender, Cinema 4D, and Maya with MASH. We can do something similar in Nomad Sculpt by using the Curve tool and adjust the settings to suit.
In this short tutorial, I’ll show you how to create one piece of geometry and use that as the basis for making amazing horns. As we’ll be using Nomad’s Curve tool, the model is flexible enough to be changed and reshaped up until the last minute.
1. Starting off with a basic shape
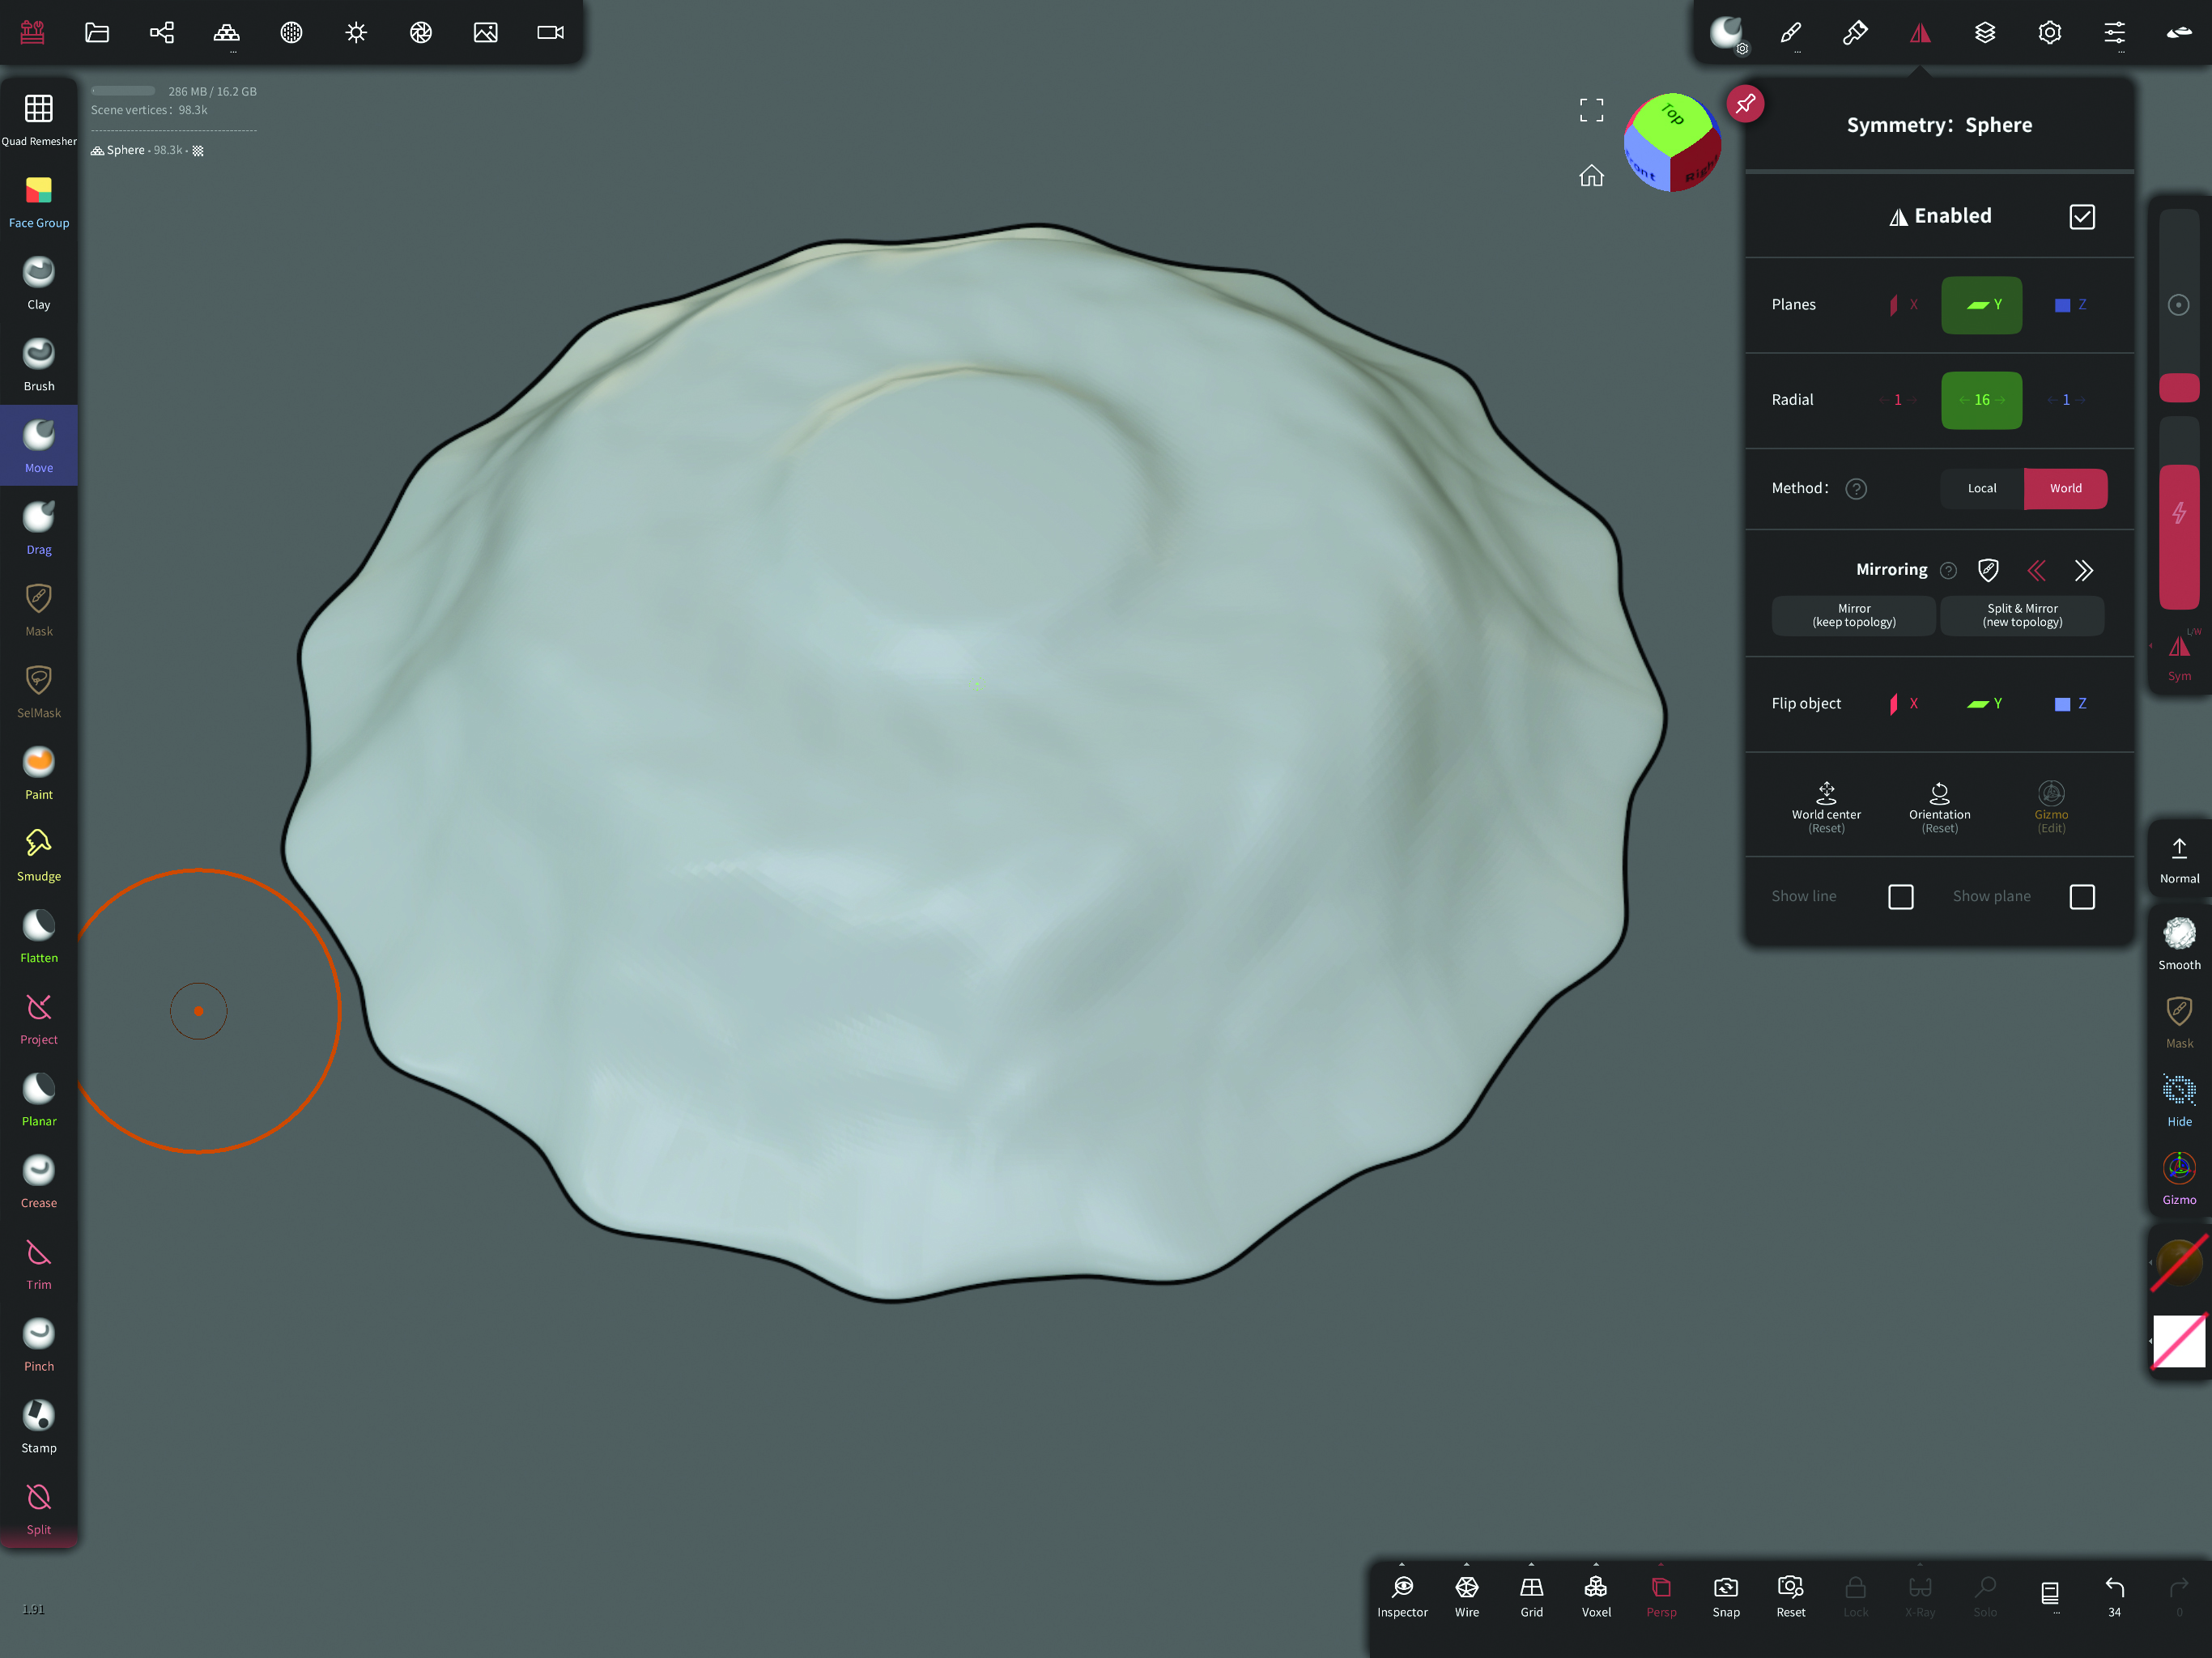
The first job is to make a basic shape from a sphere that will become a single, repeated shape. Switch Radial Symmetry on from the top menu and then use the Move brush to mess around with the shape a little. Pull out some jagged edges and try to make some interesting forms, but nothing too irregular. Try to make it interesting from a few different angles.
2. Making a point
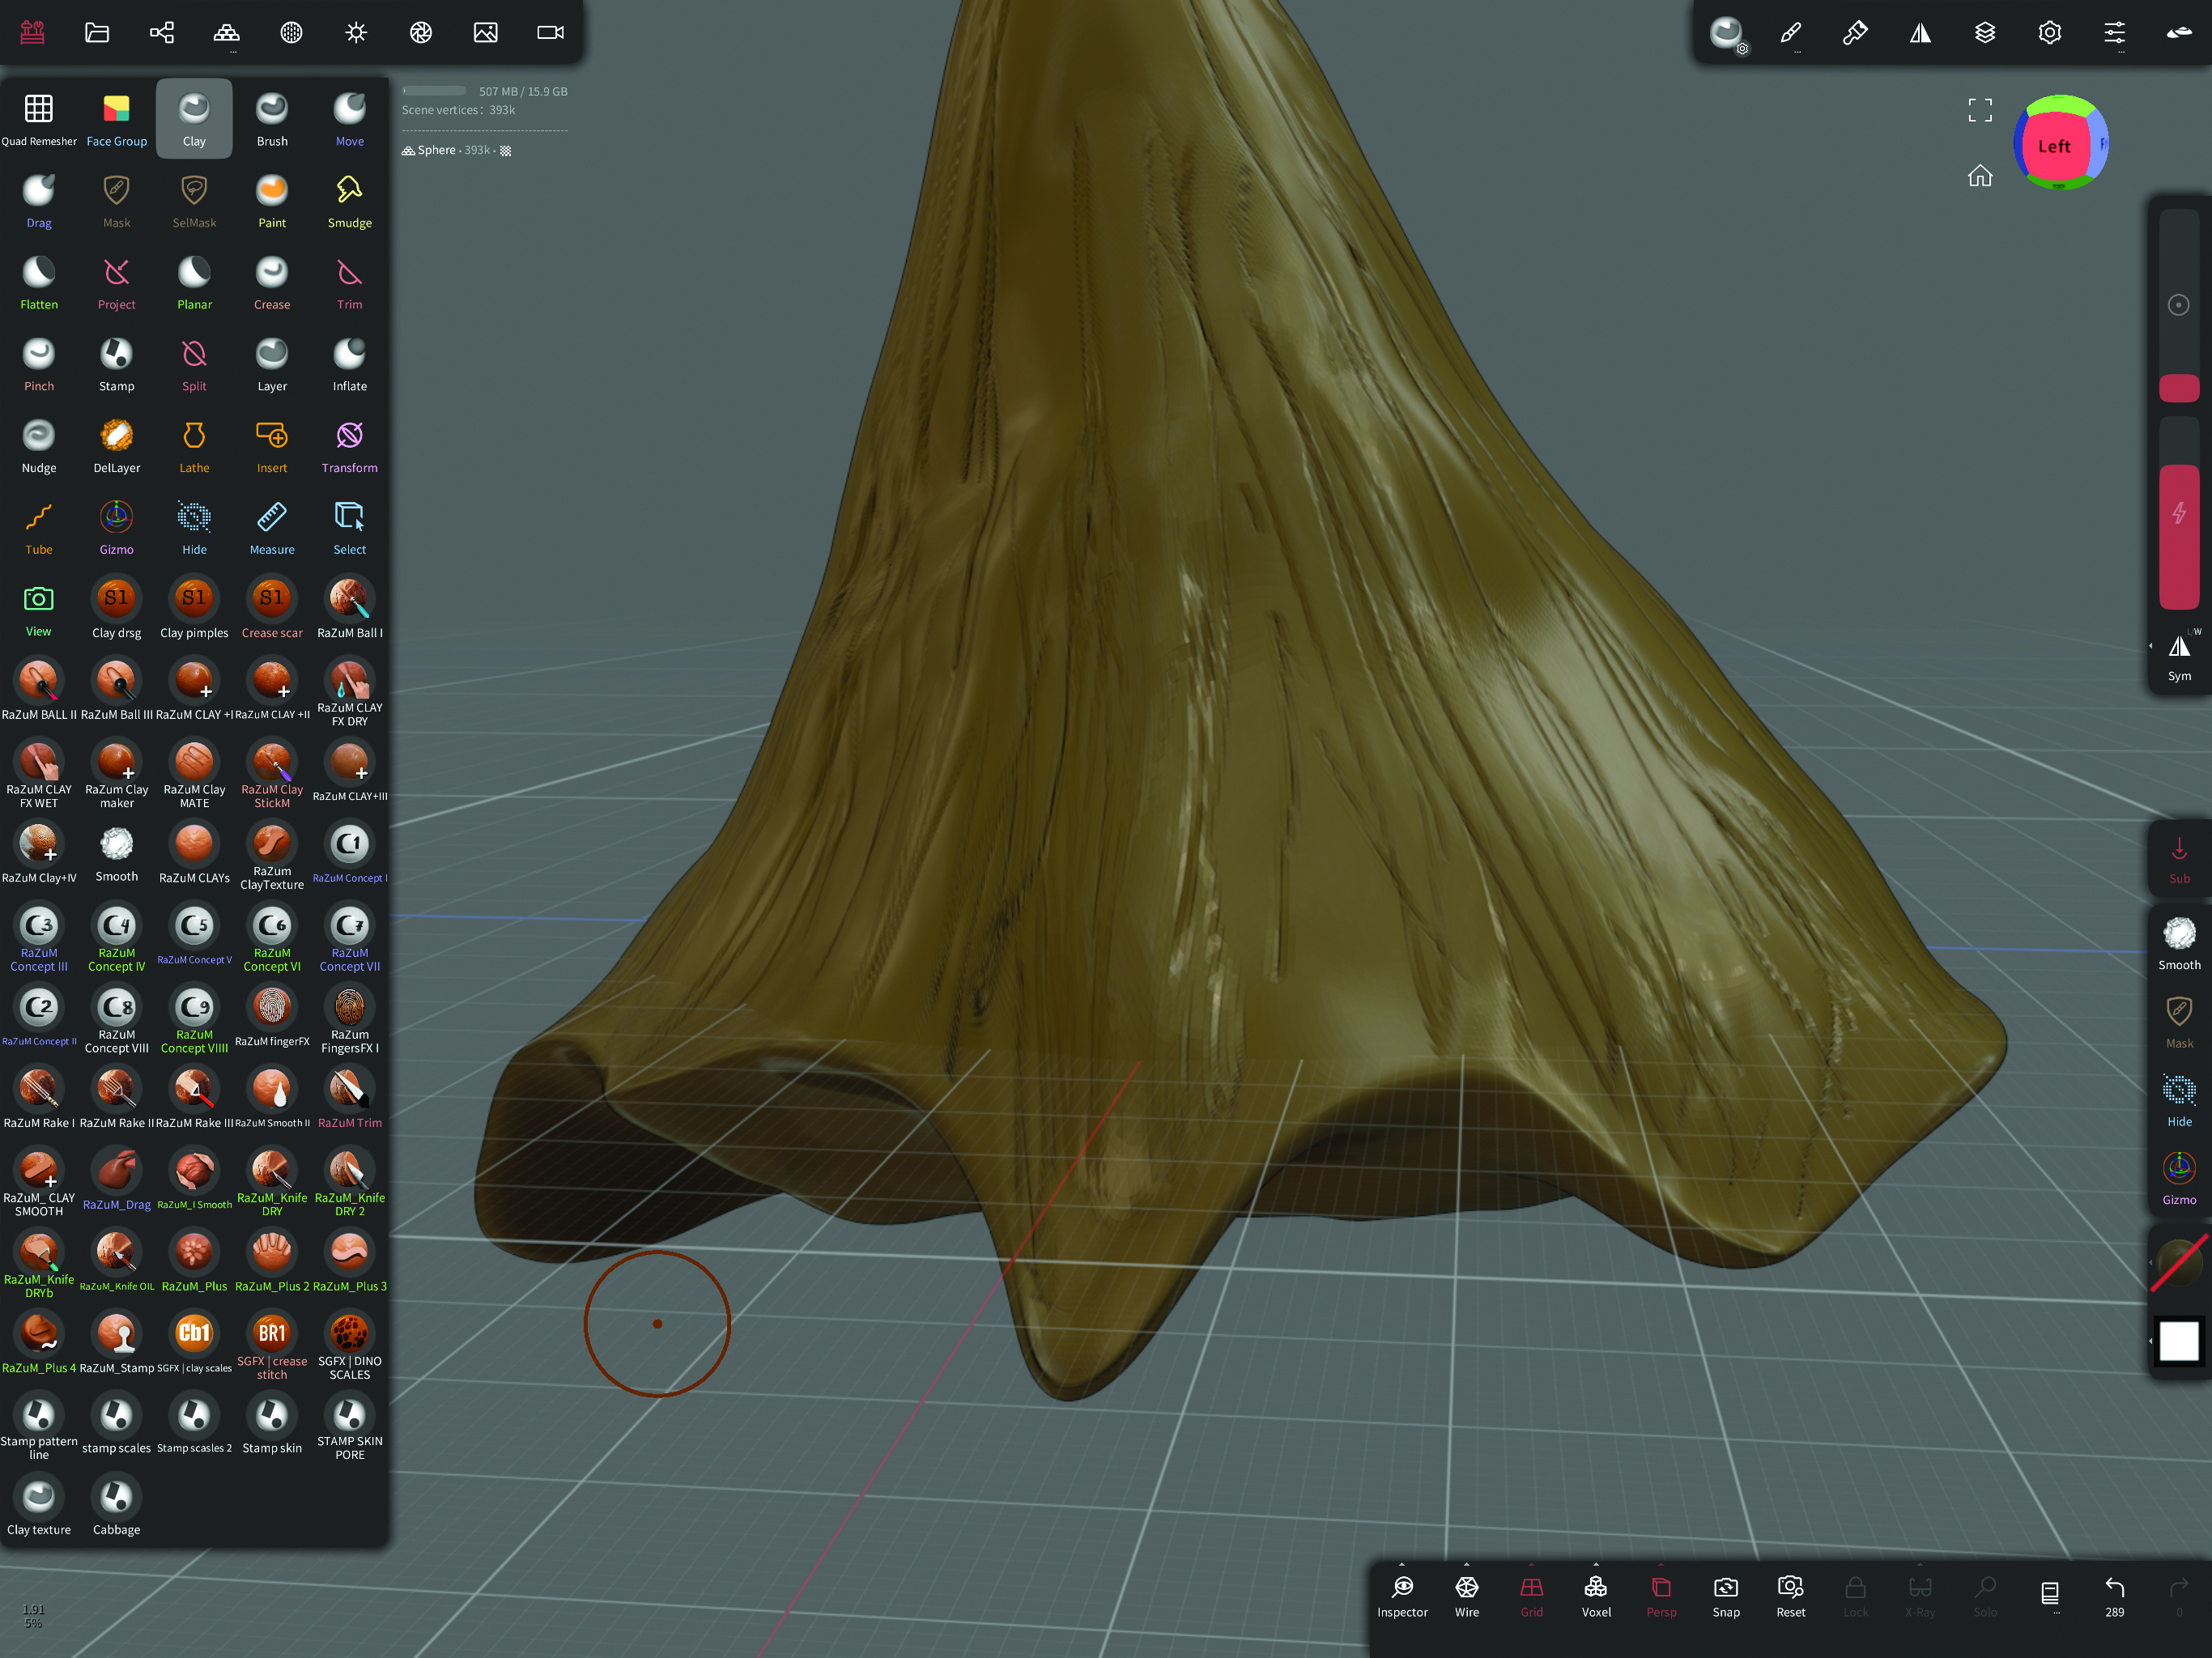
As the piece will be repeated along a spline, we need to make it suitable to be the body of the horn and the end point, so ensure that it comes to a point at the top end. Turn Symmetry off and make it more of an irregular shape now. You can use colour at this point with the Paint brush and also add some basic surface details using the Crease and Clay brushes.
3. Adding a curve
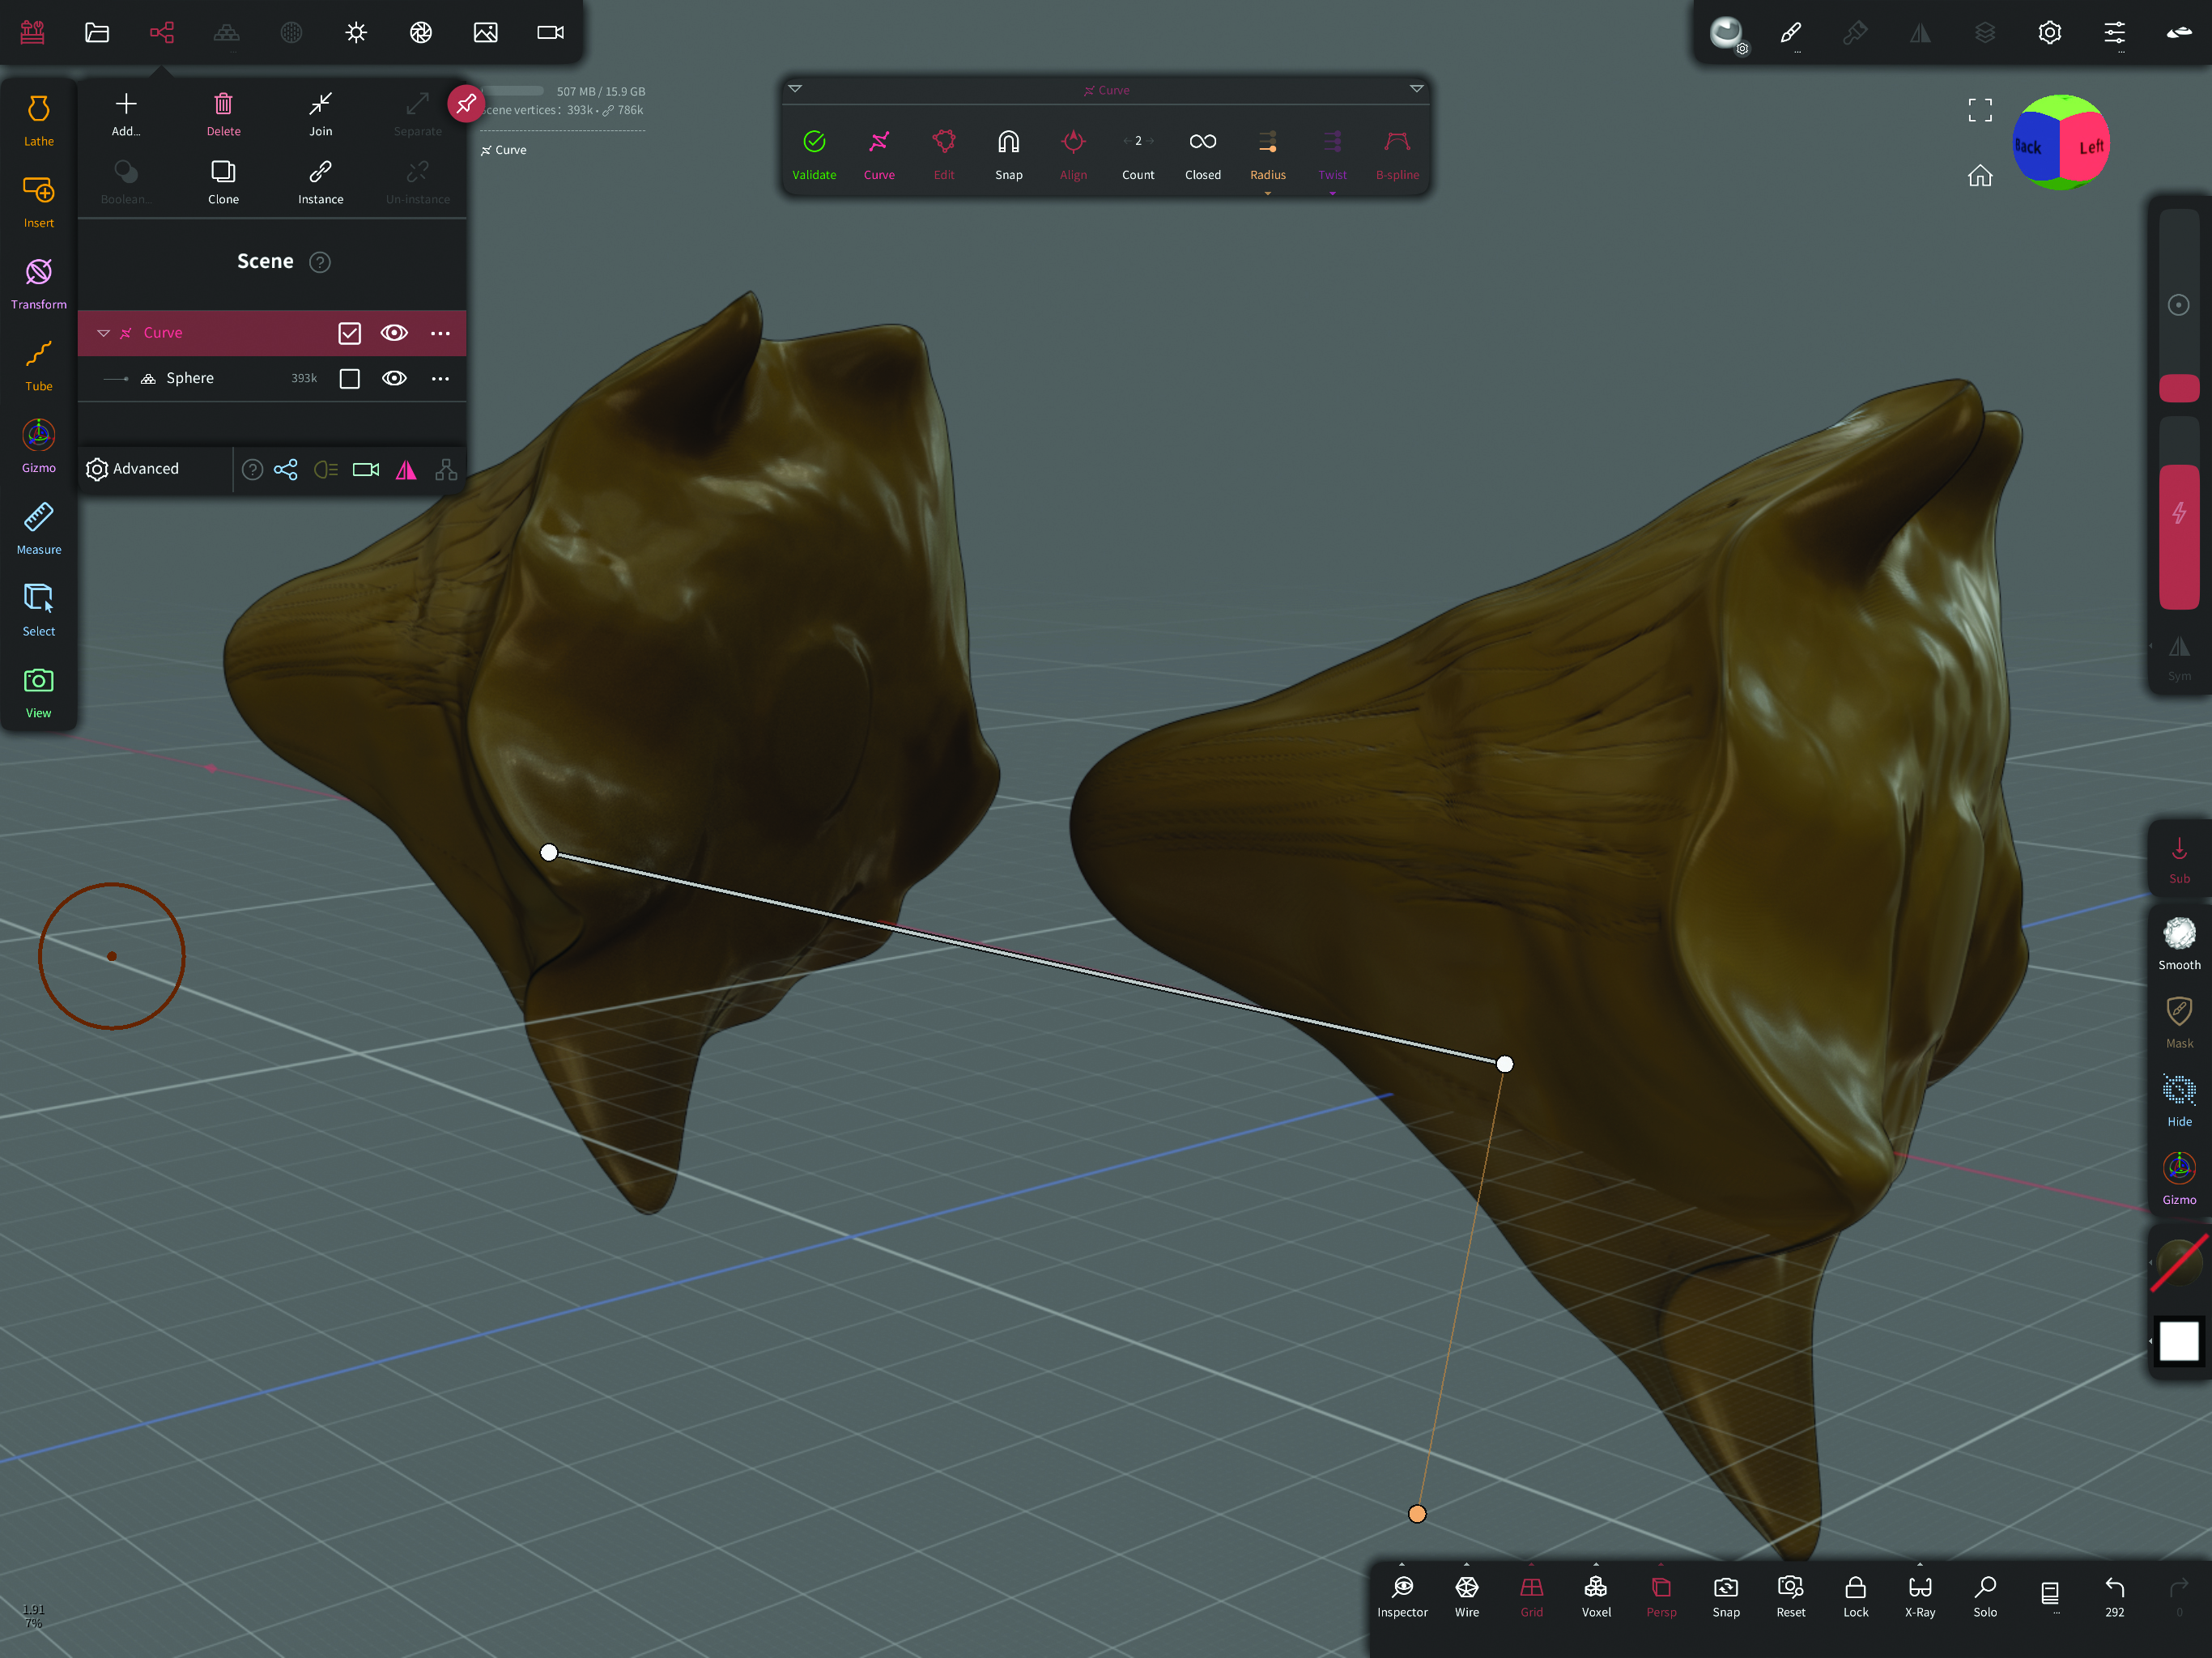
Choose Curve from the Add menu. Drop the piece of geometry you just made underneath the curve in the Scene menu and you’ll see two versions along a spline. You can now start to think about how many repeating pieces you need to get the right shape. Change the numbers at the top and see how many fit.
4. Repeating, scaling and twisting
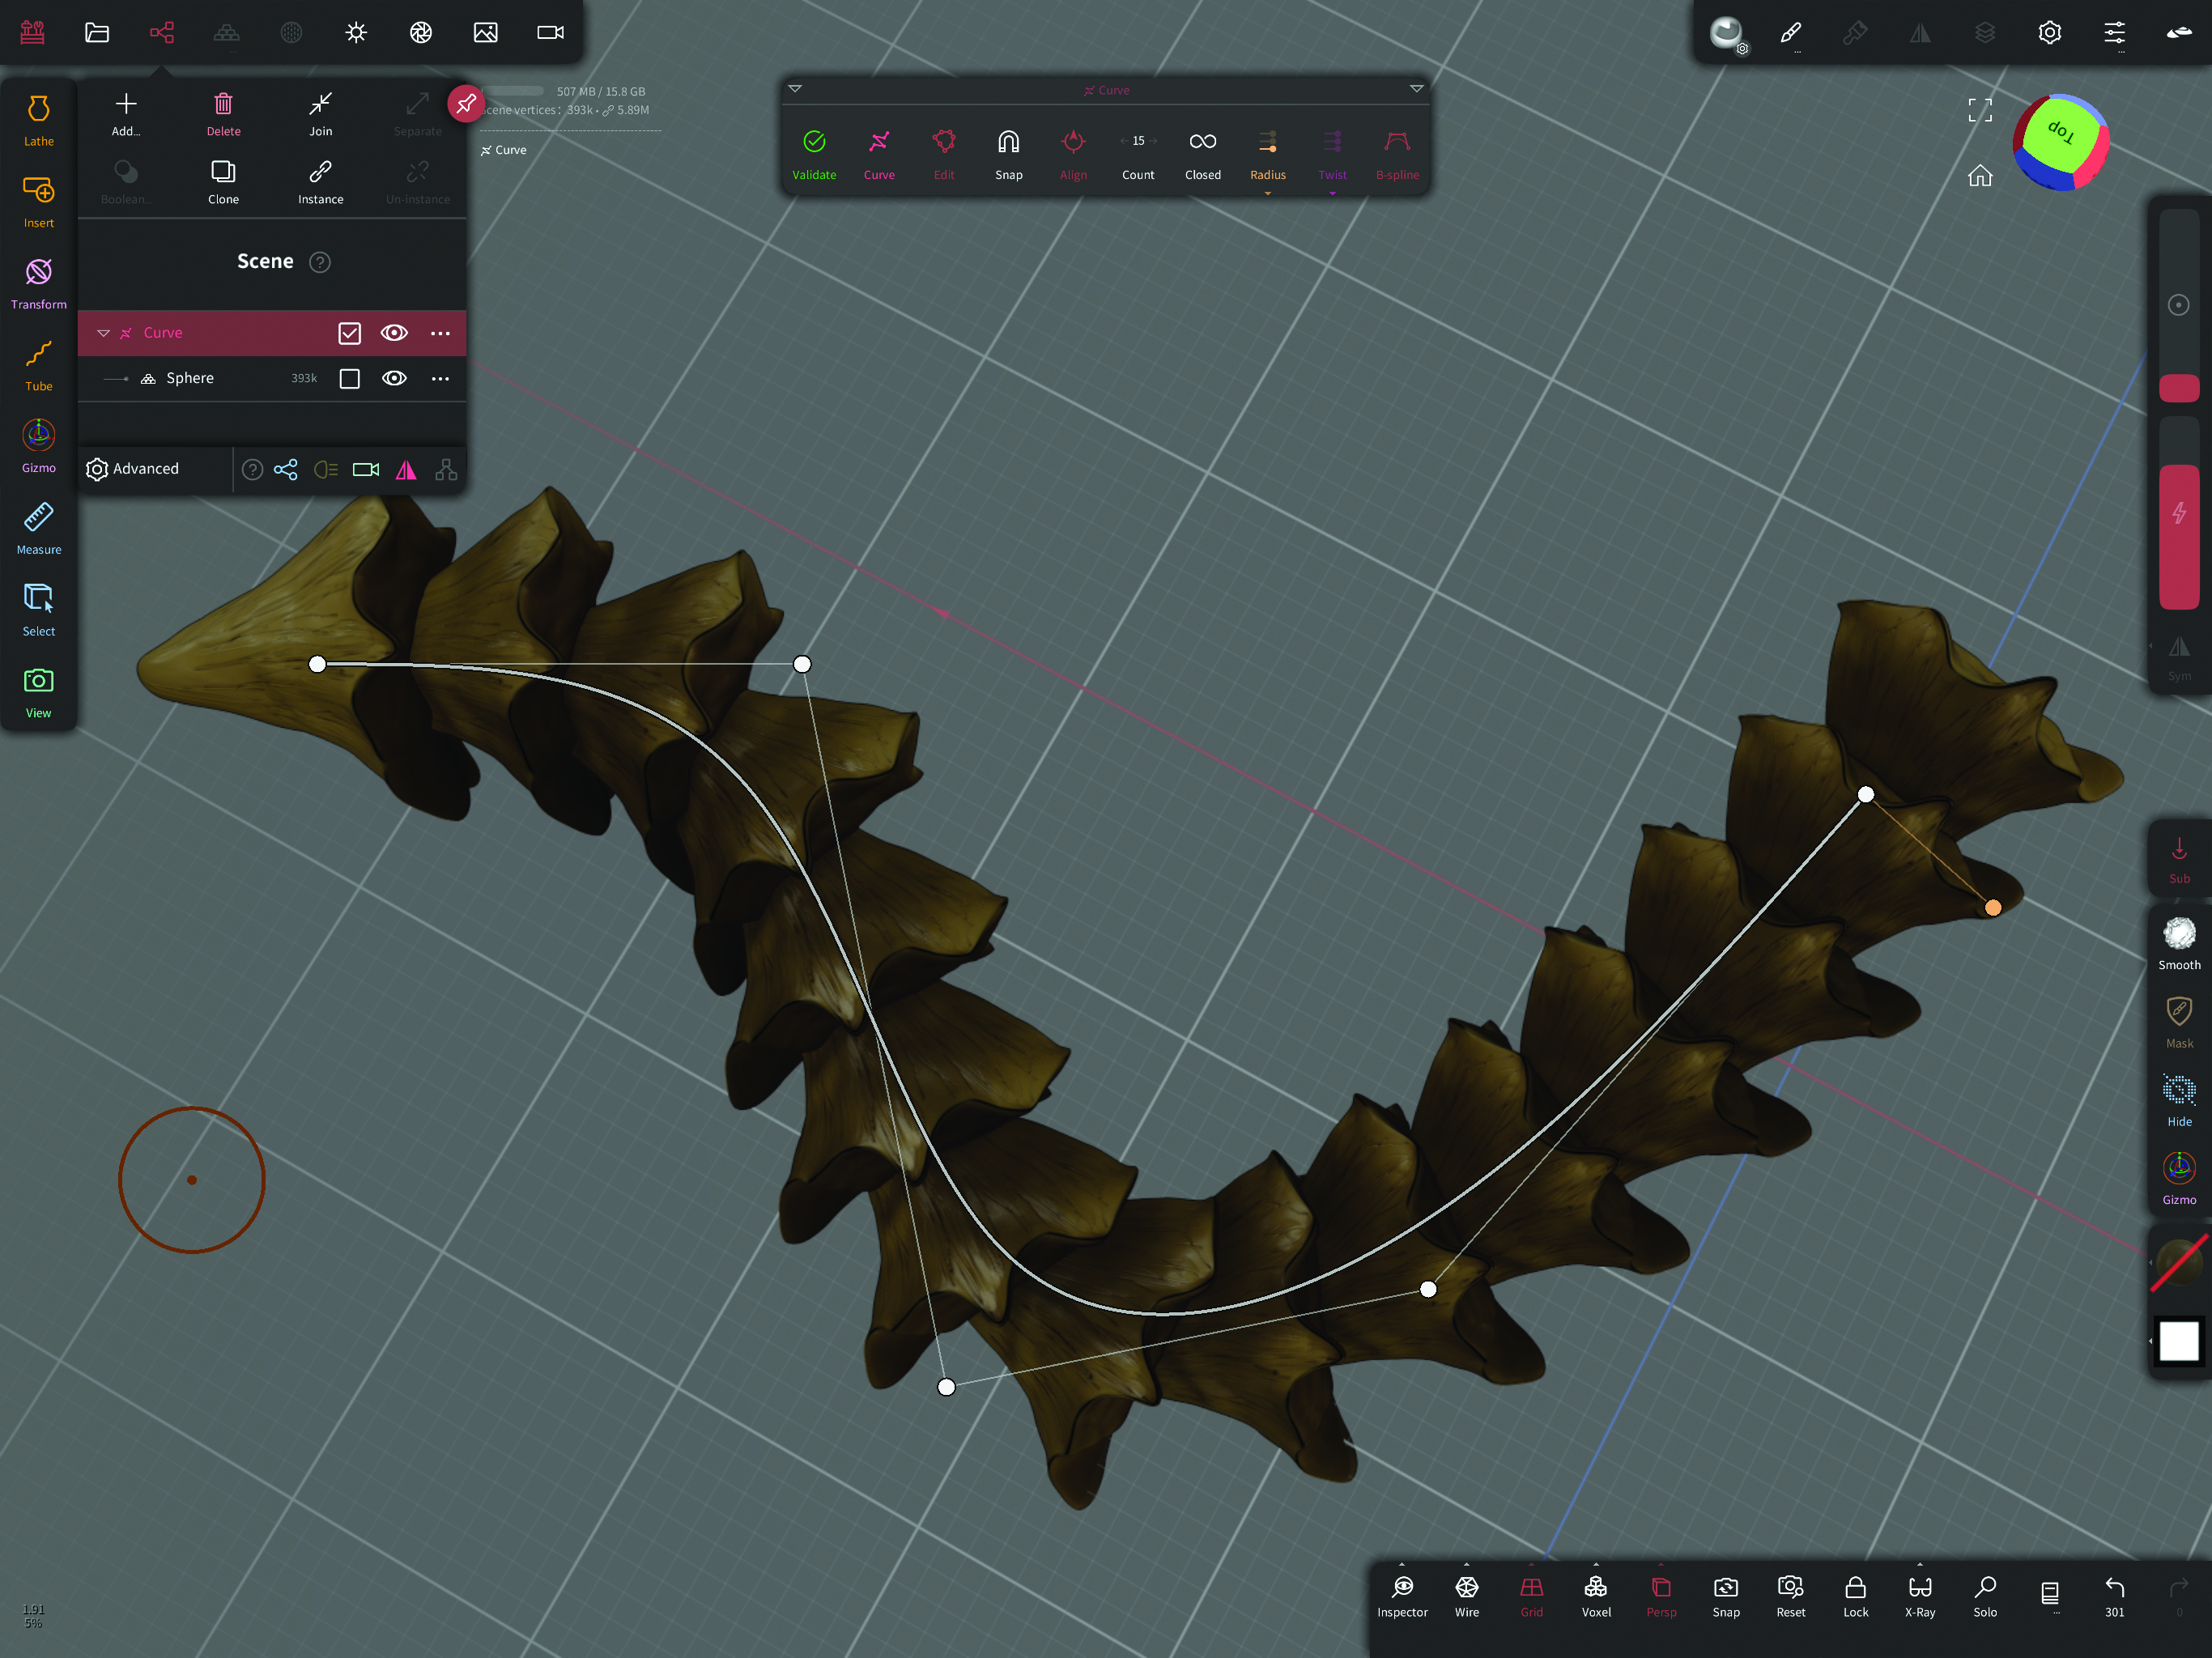
Now comes the fun bit. Add more points along the curve with a single click, then grab those points and move them as needed to make a cool shape. If you tap on the Radius button you can add more options that allow you to scale the horn either from one end to the other, or individually along the length. With this done, you can add these horns to your character and get the design worked out while the horns are still live.
This content originally appeared in 3D World magazine. Subscribe to 3D World at Magazines Direct.

Thank you for reading 5 articles this month* Join now for unlimited access
Enjoy your first month for just £1 / $1 / €1
*Read 5 free articles per month without a subscription

Join now for unlimited access
Try first month for just £1 / $1 / €1
Get the Creative Bloq Newsletter
Daily design news, reviews, how-tos and more, as picked by the editors.

Glen runs SouthernGFX, a small Cheshire-based studio specialising in character and creature design, which creates assets for TV and film. Clients include SKY, Wacom and Oculus Medium and the studio has an impressive project list that features 3D models for Game of Thrones' house sigils. He's been using and training ZBrush for over 15 years and is a Wacom Ambassador for the UK and Ireland.
