How to model pottery with a lathe tool on your iPad
Yes, you can use your iPad to create 3D models – and the Lathe tool in Nomad Sculpt makes it easy to make a convincing-looking vase in minutes
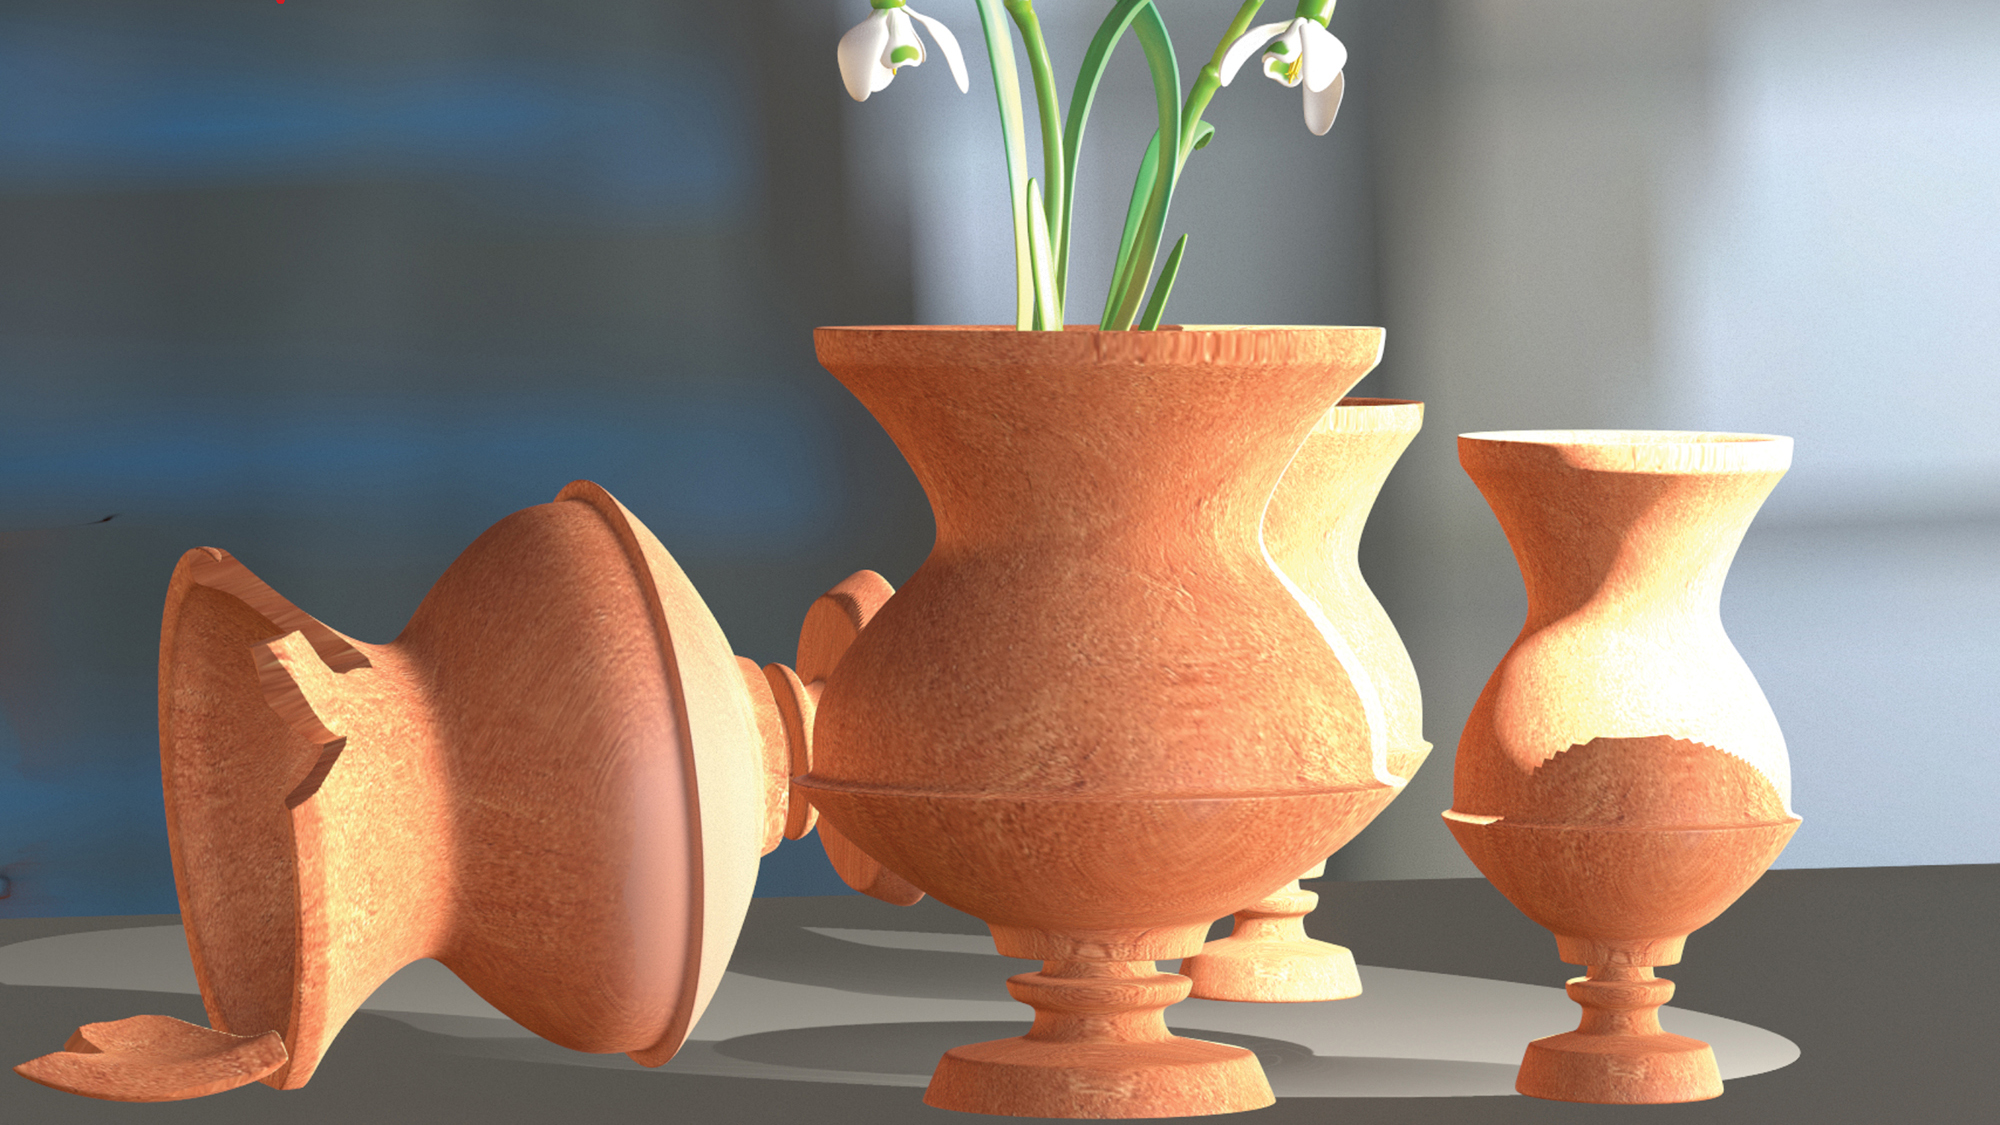
Ask a carpenter about a lathe and you may well be there for a while discussing different headstocks, faceplate or even swarf. And I thought 3D modelling had a lot of jargon! If you ask a 3D modeller the same question, you’ll get a whole different answer.
Lathing in the real world is taking raw material, usually wood or metal, and spinning it while you use tools to carve the surface. It’s used for creating engine parts, furniture, and a whole raft of other things. The 3D equivalent is based on that and it’s used in a similar way. Most 3D software has the tool and a good one for the iPad is Nomad Sculpt.
With the Lathe tool activated, you can lay down a curve or path using splines and points. The points are editable so you can move them to create a profile that will spin around a central point and effectively give you a lathed shape. It’s similar to a pottery wheel. A potter spins clay that’s moulded into a shape with their hands. The same theory is happening with the spline and points, it’s just quicker and less dirty.
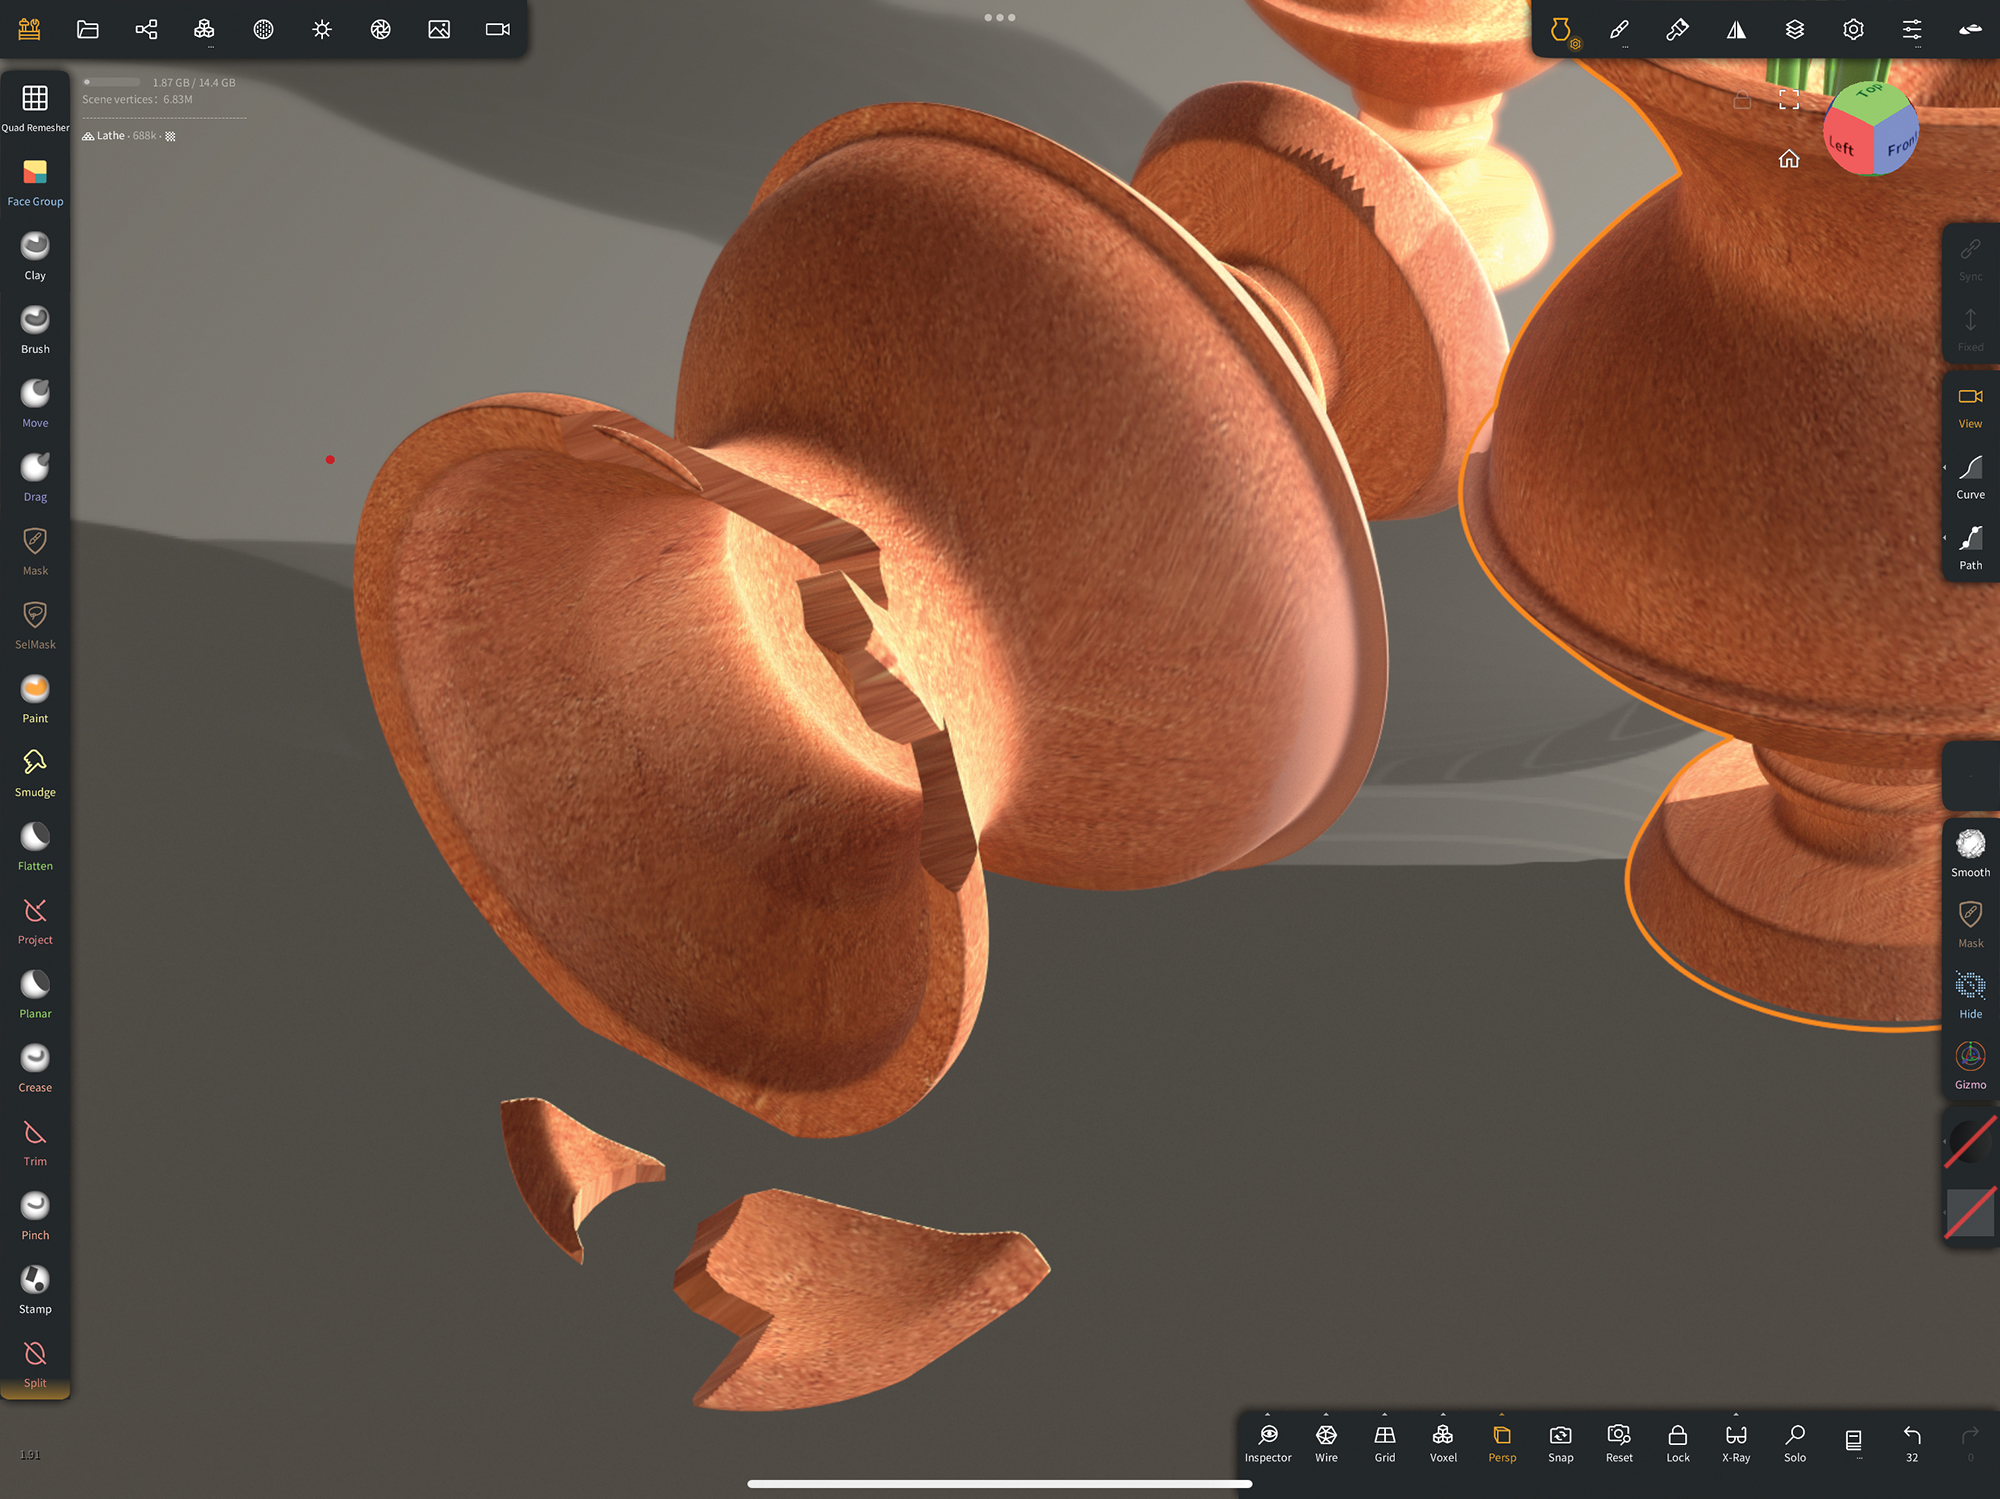
Creating something symmetrical can look a little too perfect. The trick is to break it up, so maybe take some chips out using Trim or Split. Either will remove a chunk from the model, but Split is best as you can use the pieces elsewhere.
The Nomad feature is powerful for a number of reasons. You can keep the model live for some time, which means you can make changes to the shape as you continue modelling other parts, such as handles in the case of digital pottery. The points can be set to curved or angled to create a sweeping, organic shape or a hard angle, so you can make mechanical-looking pieces with more hard edges. It’s a versatile tool and probably underused.
Once you have a design that works, it’s possible to freeze it in that state with the Validate button. You then have clean, efficient geometry to UV map and sculpt onto as needed. If you combine the Lathe and Tube tools, you can create an array of shapes and models, and even use these tools to design creatures. I mostly use it for complex engine parts for things like jets or turbines, as well as designs for vases, mugs and complex architecture.
01. Get set up
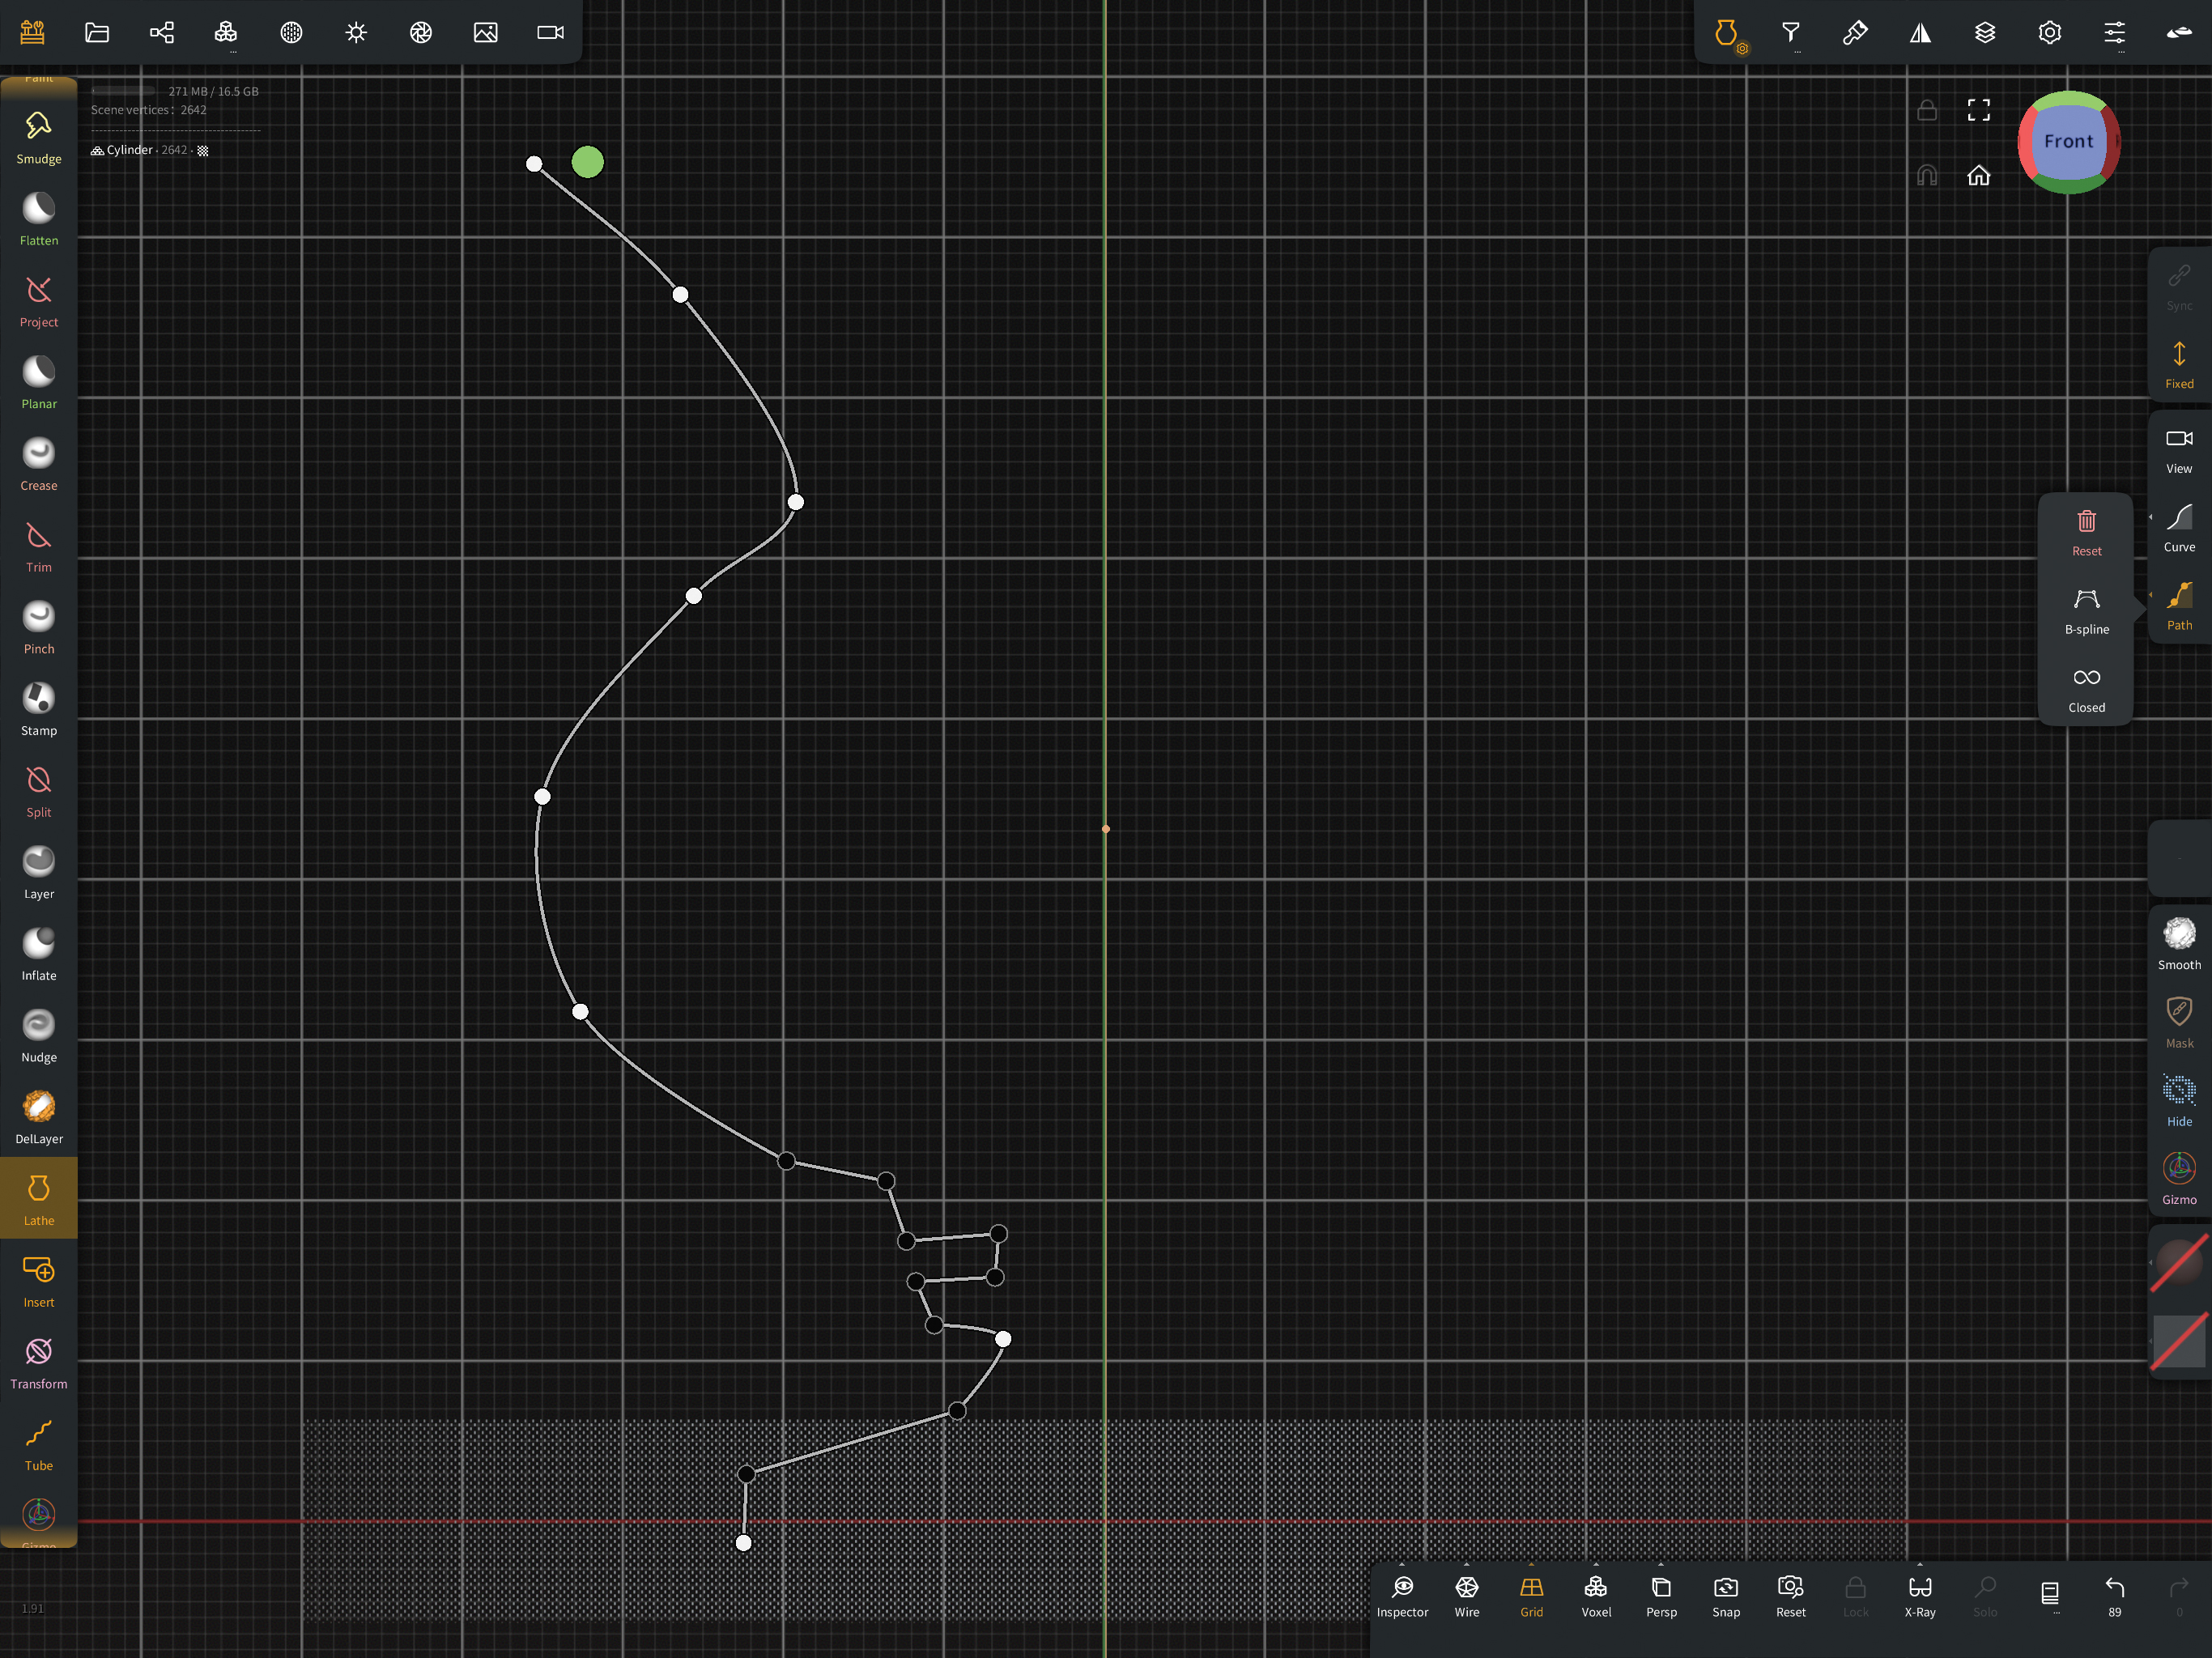
Pick the Lathe tool from the sidebar menu. You can choose between either Path or Curve type – I used Path. Turn the Perspective option off and snap the camera to the front view. Now start laying down points to create a profile that will be the shape of one side of your vase. Tap on the points that you want to become an angle.
02. Refine the shape
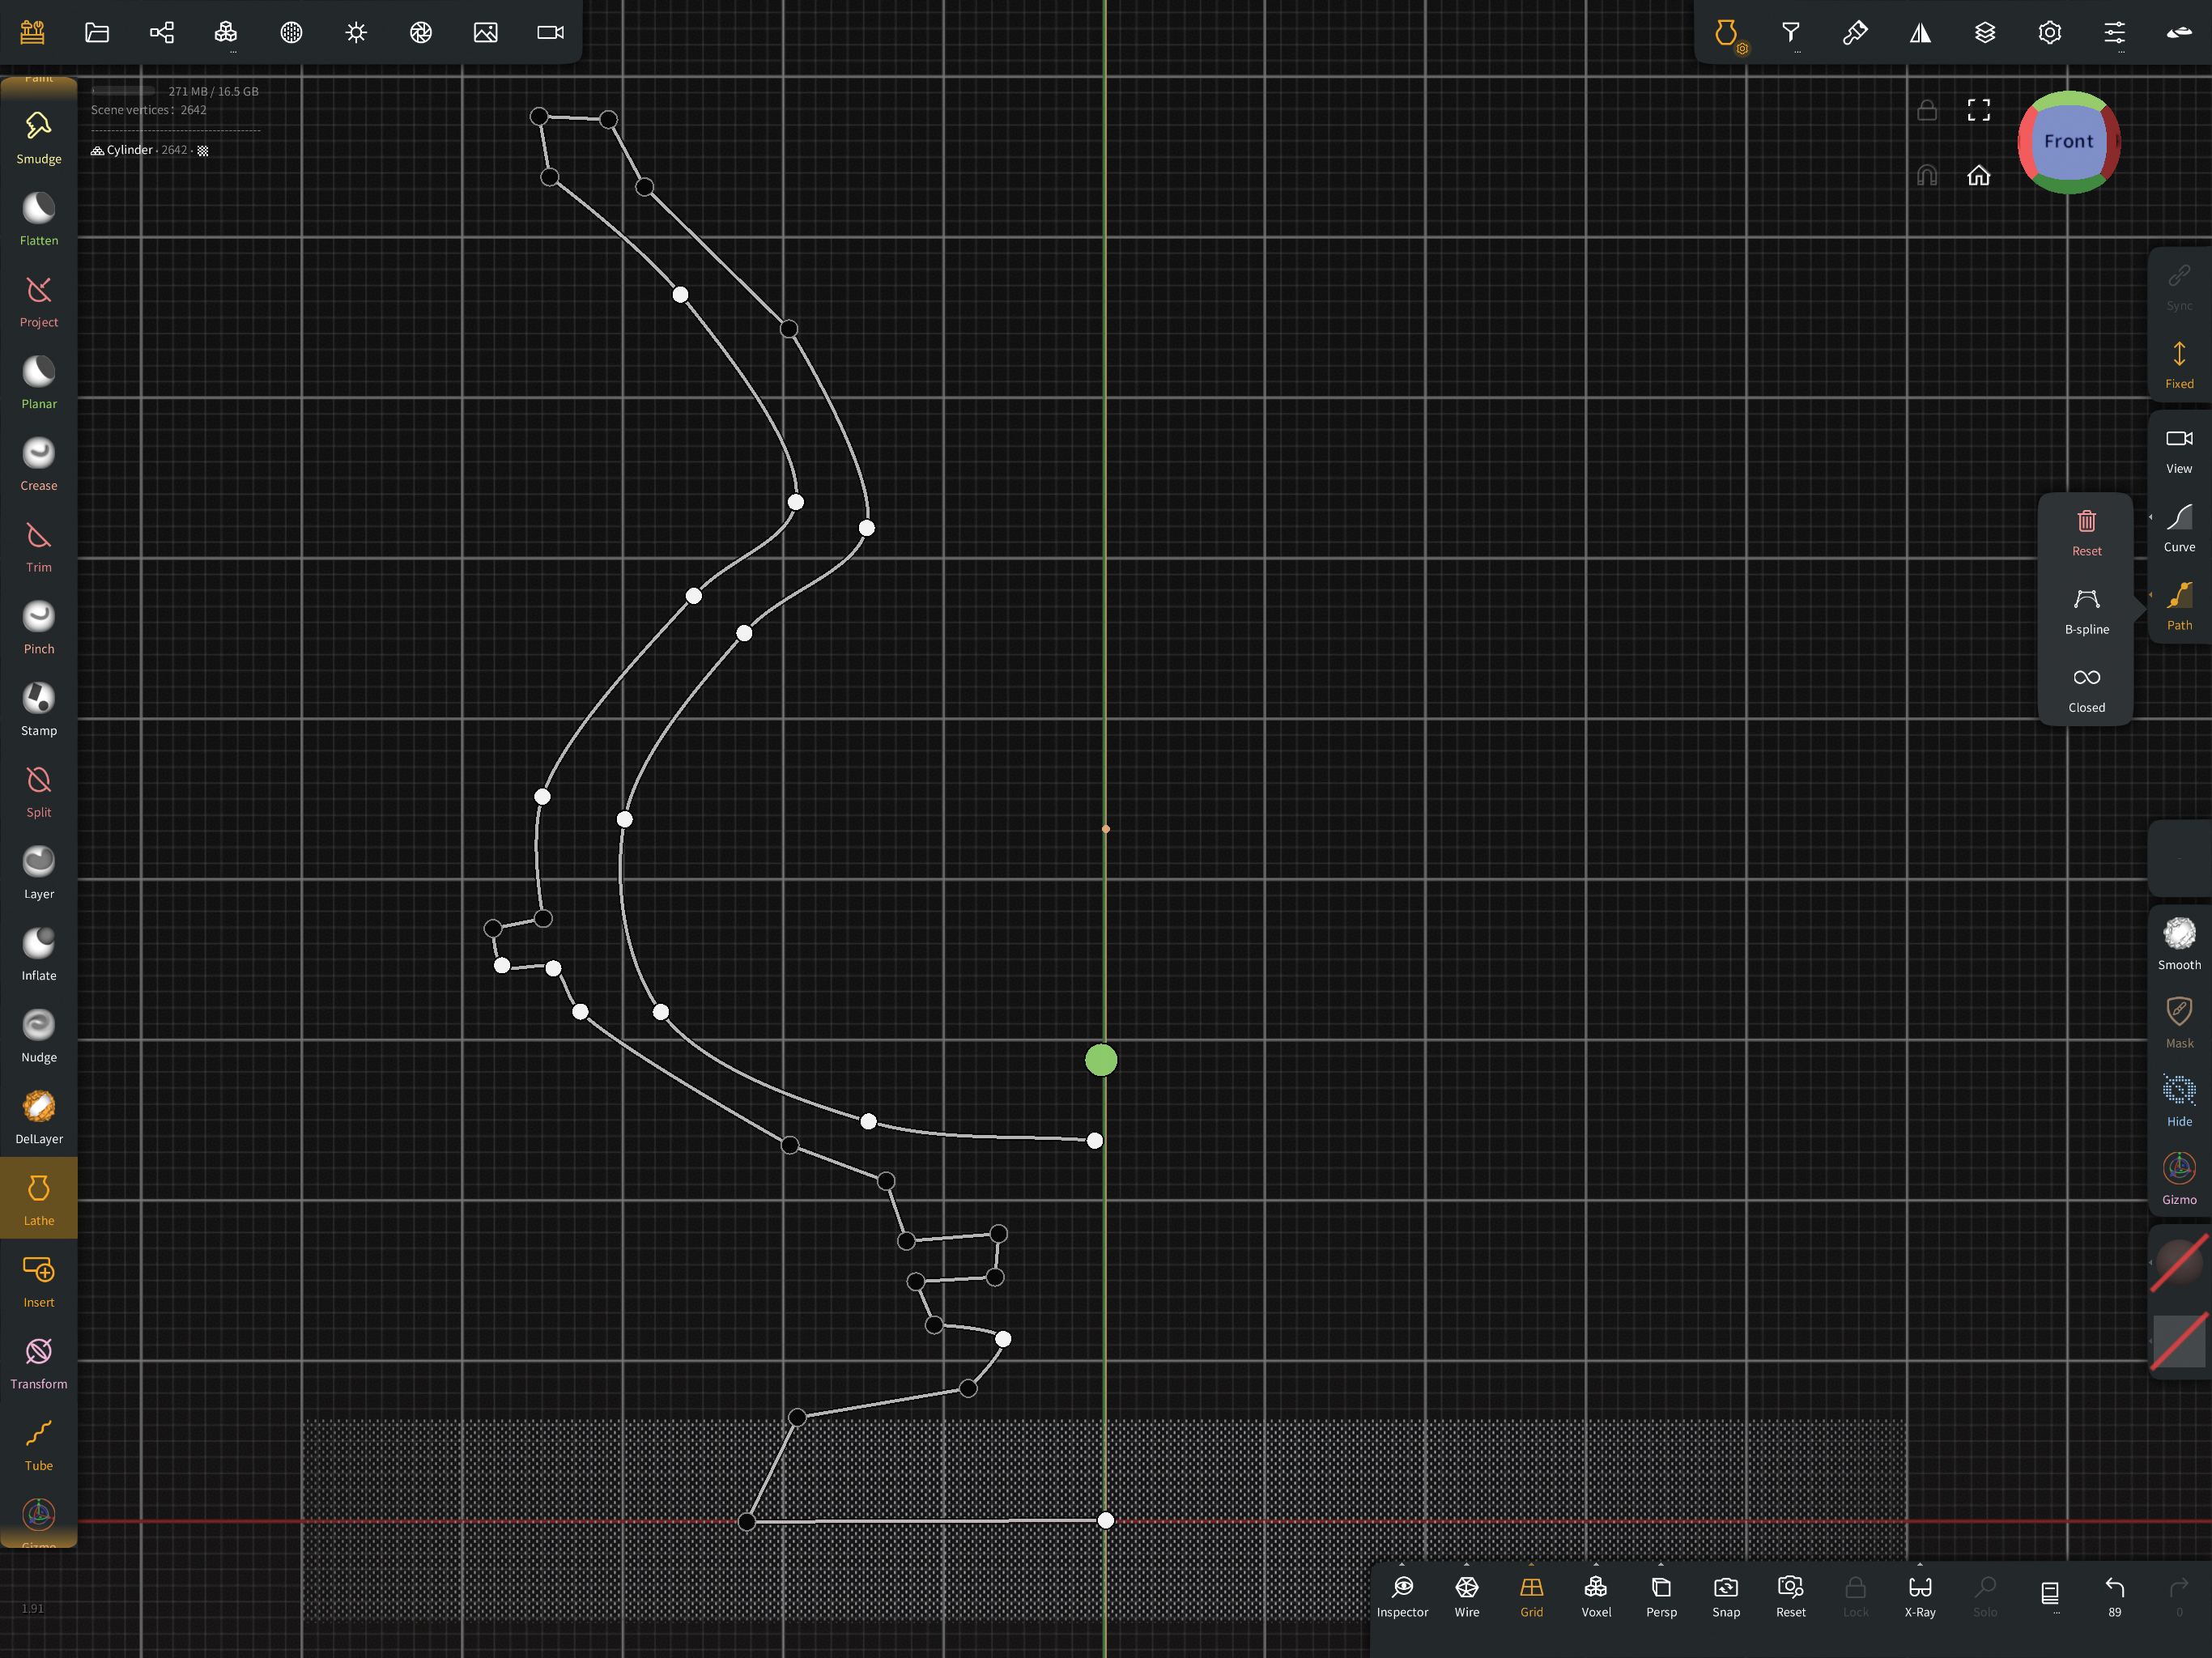
Continue adding more points along the spline and work all the way up to the top, then create more going back down into what will be the inside of the vase we’re designing. If you need to remove a point, simply drag it over to another point and it will disappear. You’ll be able to make amendments to this shape once the model has created, right up until you use the Validate button.
03. Make the geometry
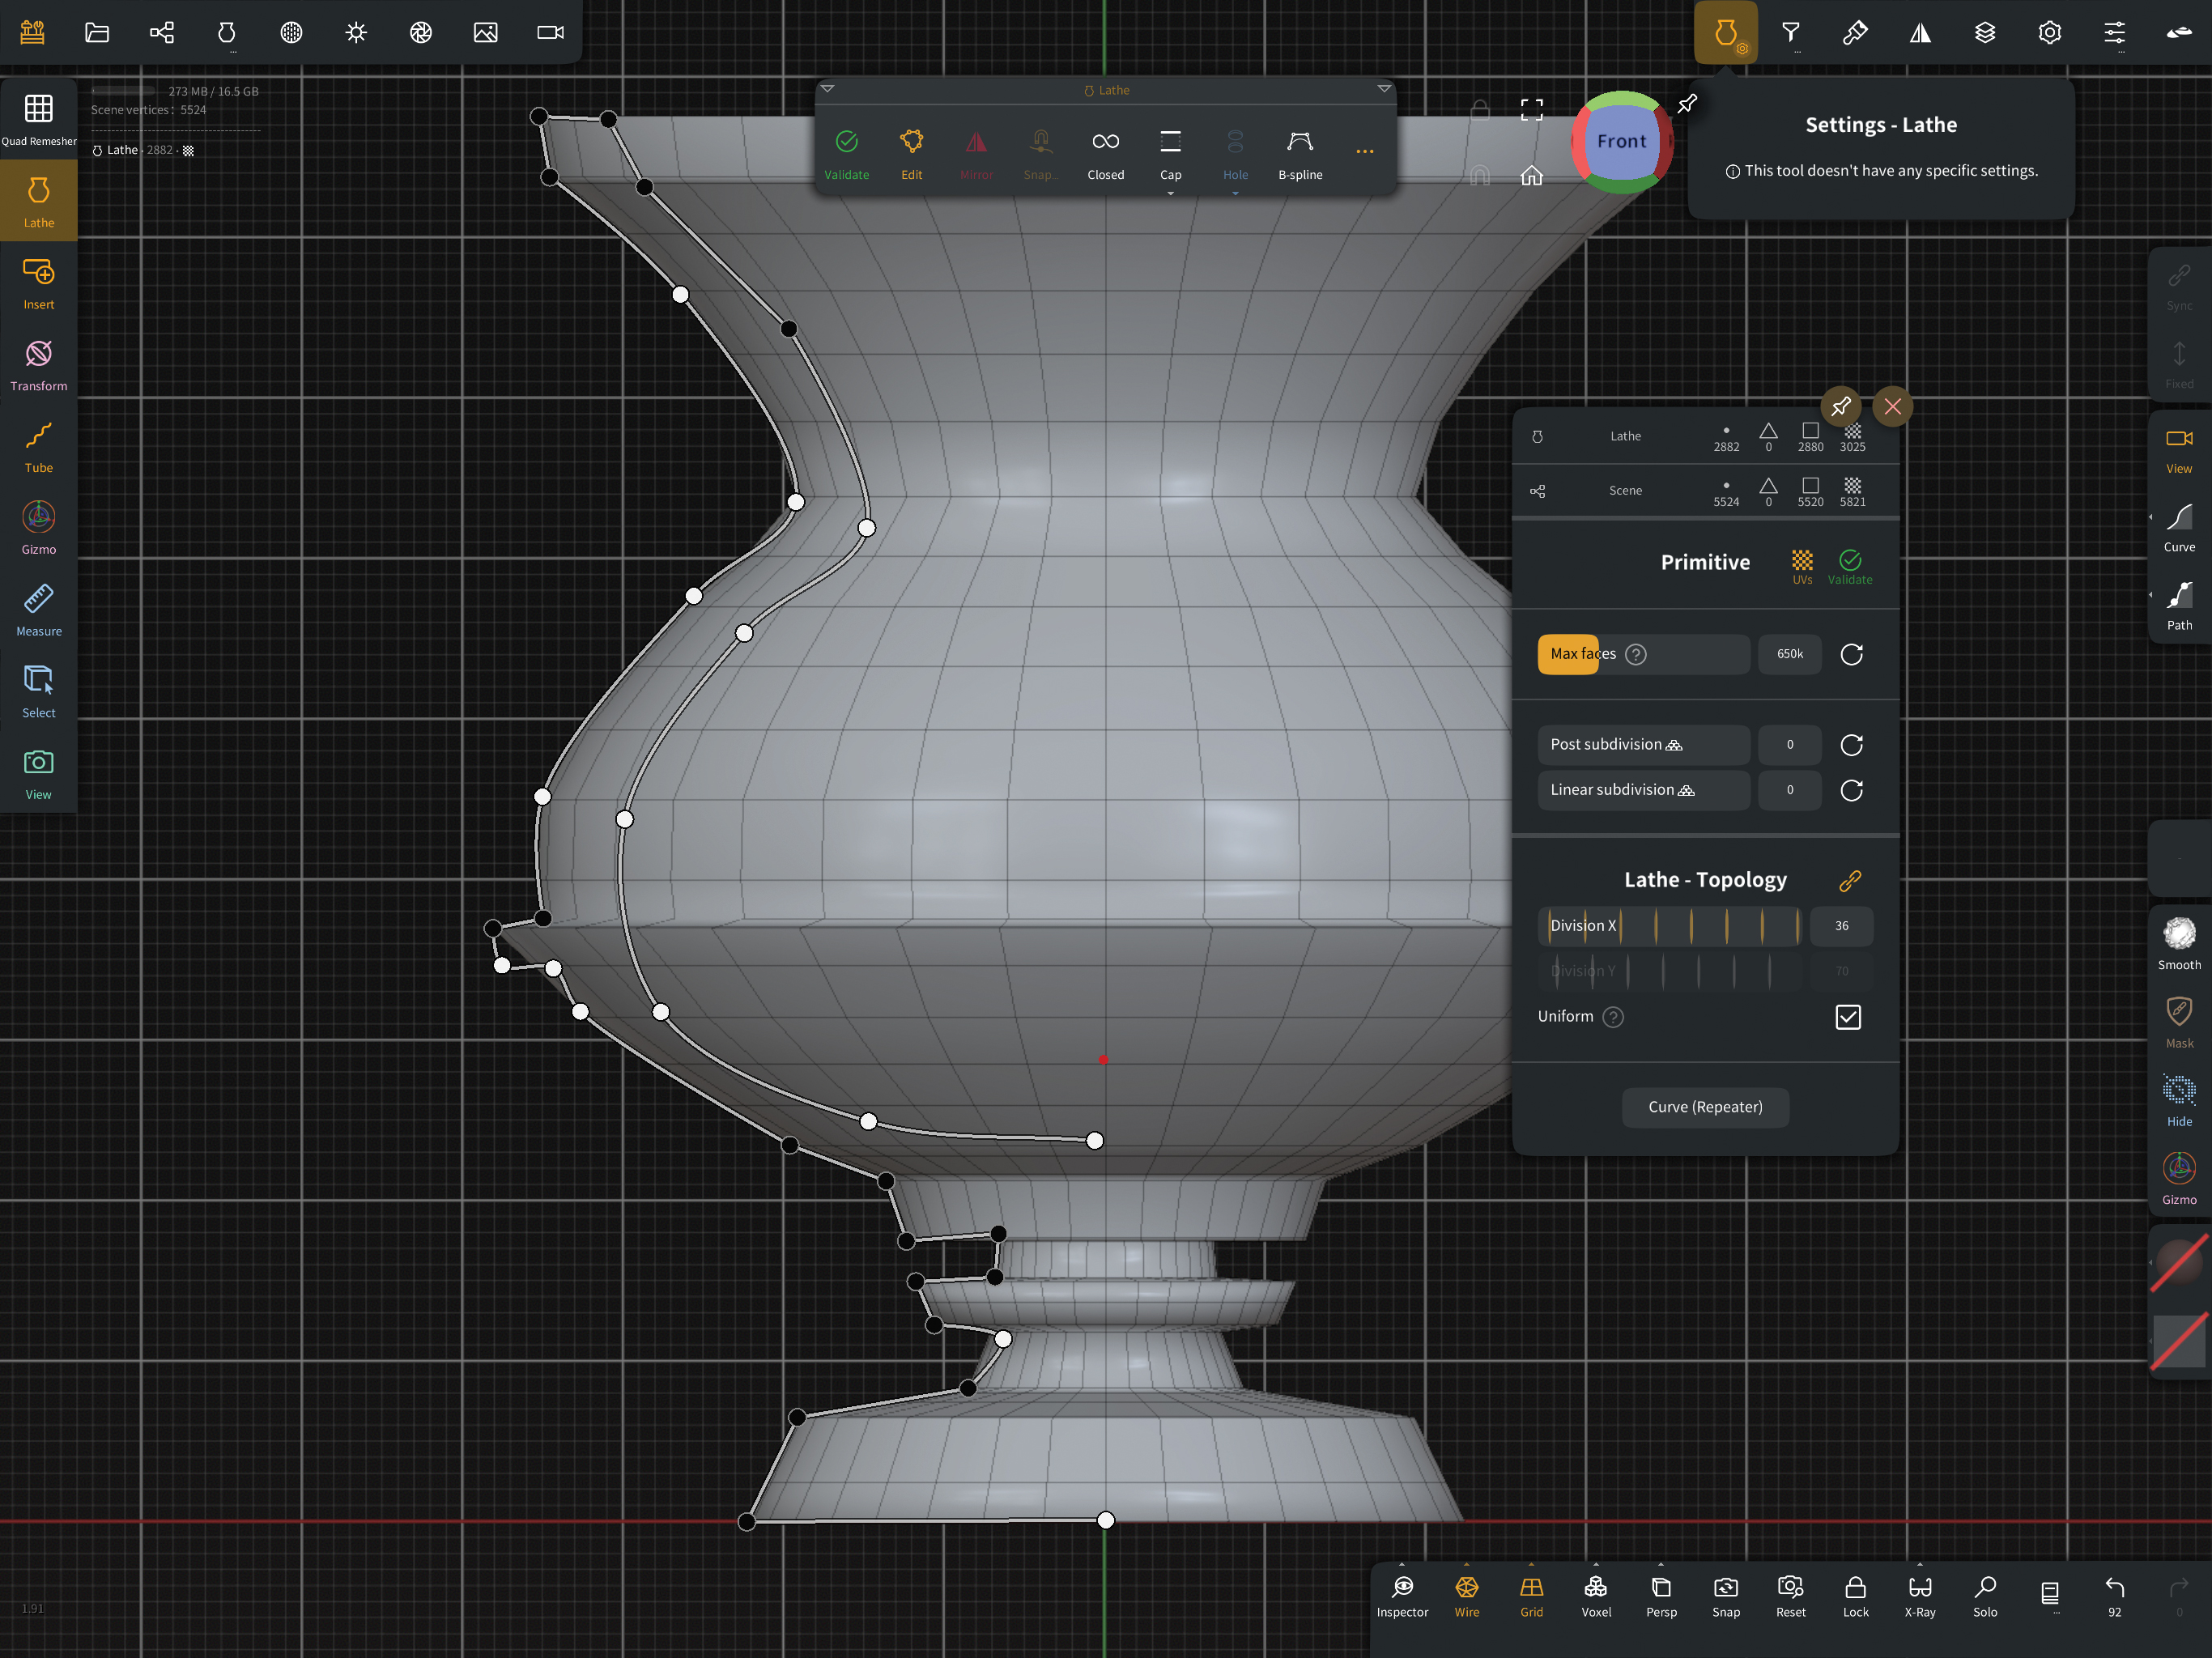
Once you have a profile you think will work, hit the dot at the end of the spline. This will create the shape based on your spline. There are settings at the top-right that allow you to change the density or number of polygons. Keep it as low as you can but retain the shape you’re looking to create. At this stage it’s still editable and you can tweak the entire model by moving a single point
04. Finish the mesh
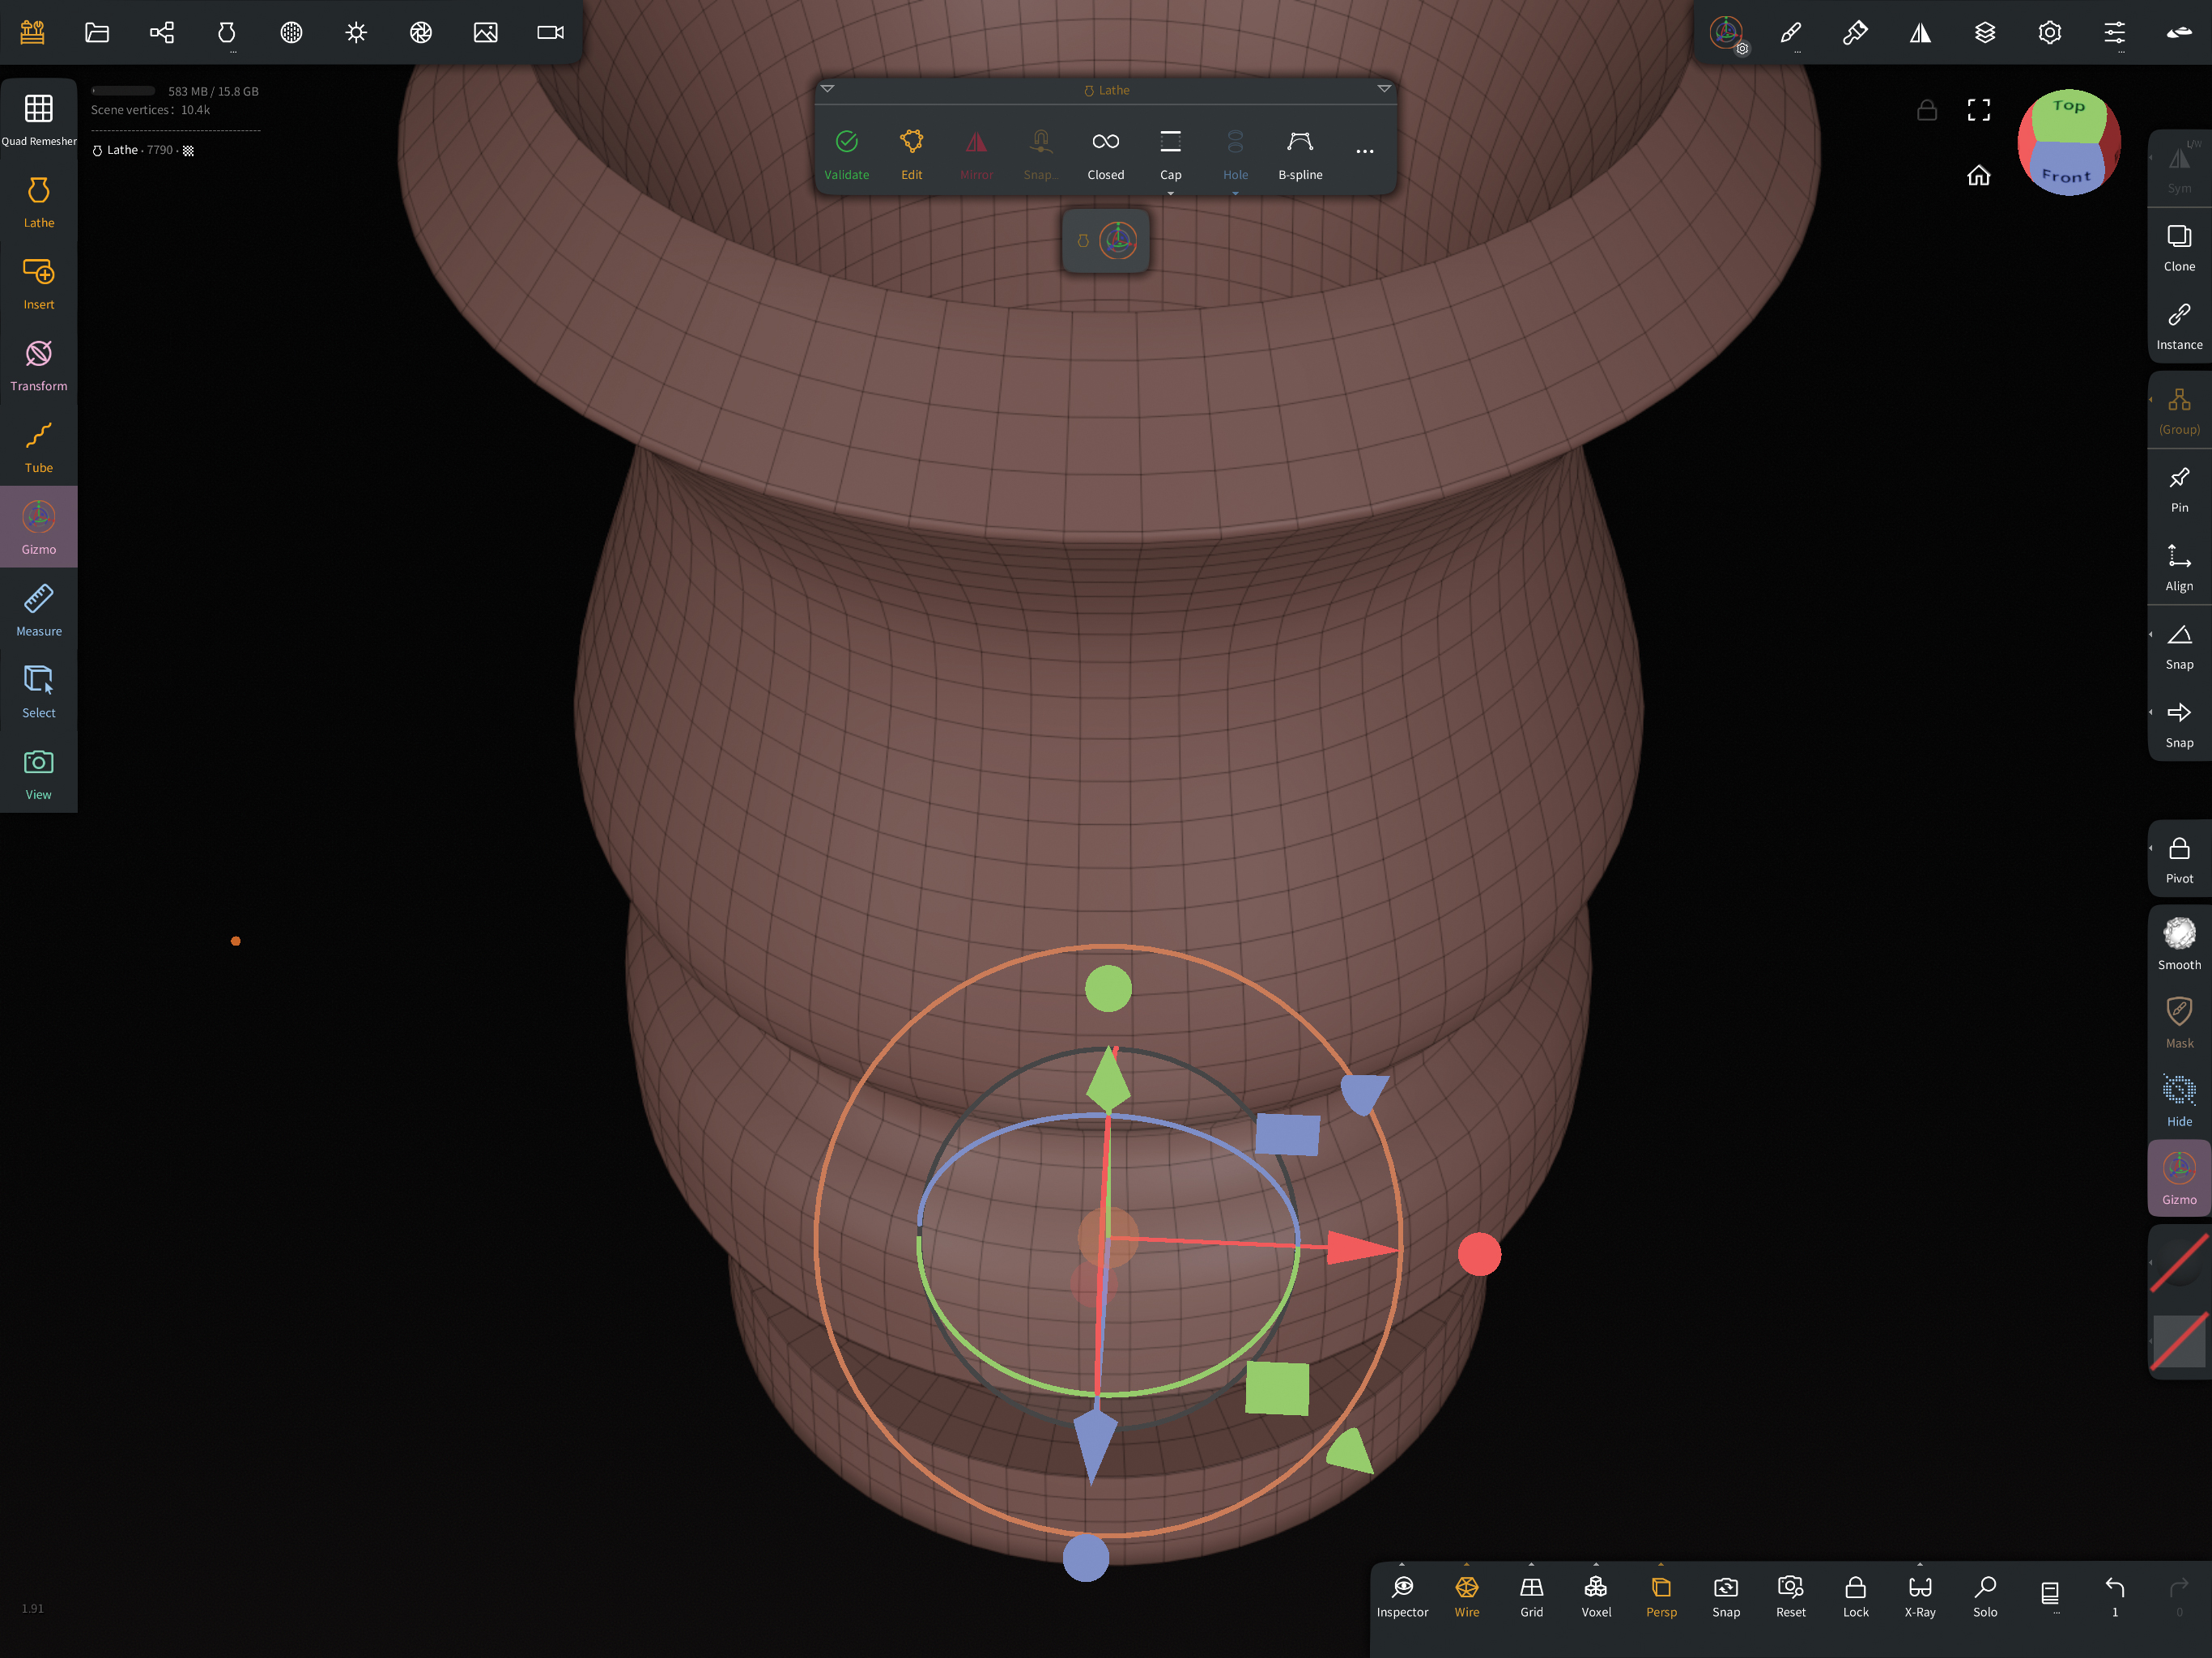
Once the geometry is to your liking you can click Validate, which will lock the model in its final state with the points no longer editable. Now go to the top Geometry menu and look for Miscellaneous. From the options, choose UV Unwrap to give the model some mapping coordinates. From this point on, you only need to texture your model.
Want a laptop rather than an iPad? See the best laptops for 3D modelling.
This content originally appeared in 3D World magazine.
Sign up to Creative Bloq's daily newsletter, which brings you the latest news and inspiration from the worlds of art, design and technology.
Glen runs SouthernGFX, a small Cheshire-based studio specialising in character and creature design, which creates assets for TV and film. Clients include SKY, Wacom and Oculus Medium and the studio has an impressive project list that features 3D models for Game of Thrones' house sigils. He's been using and training ZBrush for over 15 years and is a Wacom Ambassador for the UK and Ireland.
