How to master ZSphere basics on iPad
ZBrush for iPad is here to speed up your workflow.
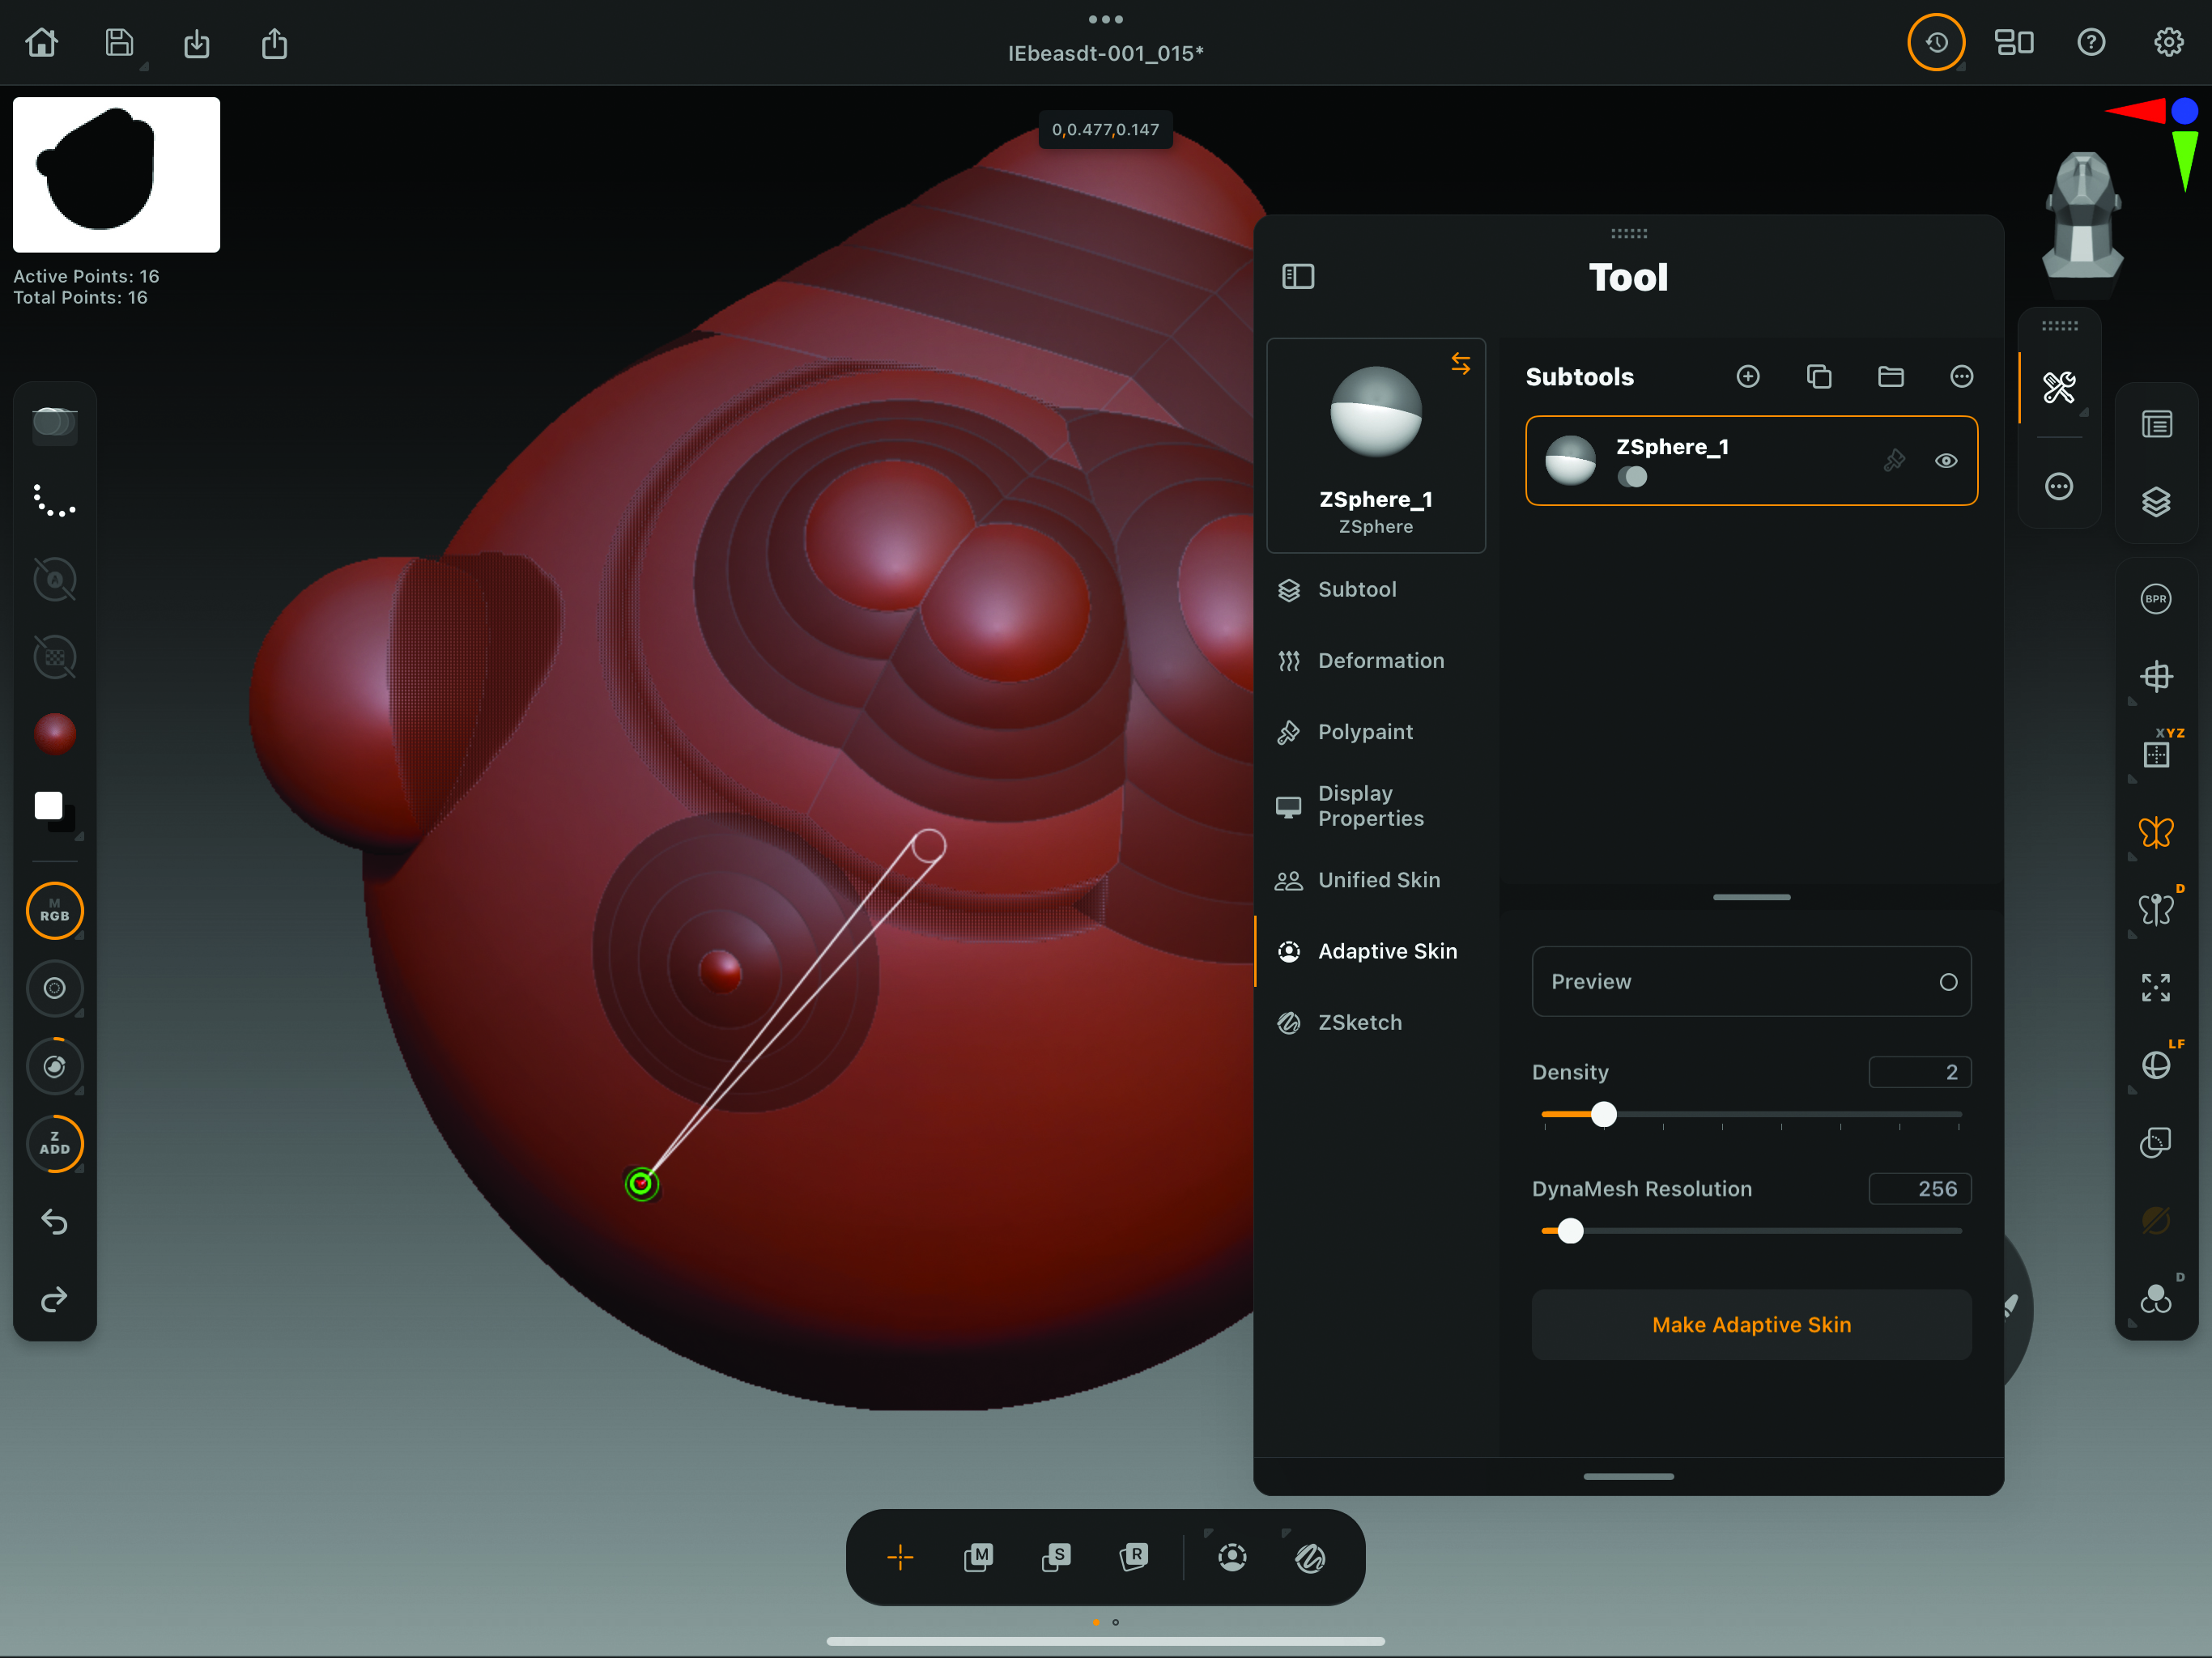
We often use Symmetry when making creatures. It’s the same with ZSpheres, but can be a little bit tricky to get just right when you want them dead on the centre line. When drawing a new ZSphere, if it’s preceded by a green dot it means it’s right on the centre, rather than two very small dots.
ZSpheres are a popular way of making a shape that an artist can then sculpt on, and until this year were only available in the desktop versions of ZBrush. But now ZBrush for iPad has landed thanks to Maxon. You may know that name if you use Cinema 4D.
So what are ZSpheres? Well, they’re a unique and intuitive method of creating base meshes in ZBrush. Instead of starting with polygons, you begin by placing and connecting ZSpheres, which act like the joints or bones of your model. These spheres are connected in a branching, organic way, allowing you to create a skeleton-like structure that can then be transformed into a polygonal mesh. This method is especially advantageous for organic modelling, such as characters or creatures, due to its flexibility and ease of shaping complex forms.
ZSpheres allow for rapid creation of basic forms, making it ideal for organic shapes like characters, animals, or even plants. The process feels almost like sketching in 3D, letting you focus on the overall structure rather than worrying about individual polygons. By using ZSpheres, you can block out a character’s silhouette or body in minutes. This is faster than manually extruding, pushing and pulling vertices in a traditional polygon modelling workflow. You can easily adjust the proportions and pose of the model by moving the spheres around. This flexibility is much more convenient than manually manipulating a dense polygon mesh.
ZSpheres are a powerful tool for quickly building base meshes in ZBrush and now ZBrush for iPad.
Once the ZSphere structure is complete, ZBrush can generate a mesh that you can further refine. It provides a good starting point for sculpting without worrying about the underlying geometry. ZSpheres can also be quickly reposed after the mesh is created; particularly useful when creating characters that need to be placed in different poses.
ZSpheres are a powerful tool for quickly building base meshes in ZBrush and now ZBrush for iPad. As mentioned, it particularly applies to organic models like characters and creatures. Their intuitive interface and the flexibility they offer for posing and adjustments make ZSpheres a strong choice compared to traditional polygon modelling and some sculpting methods. They allow artists to stay in the creative flow and rapidly iterate without getting bogged down by technical details.
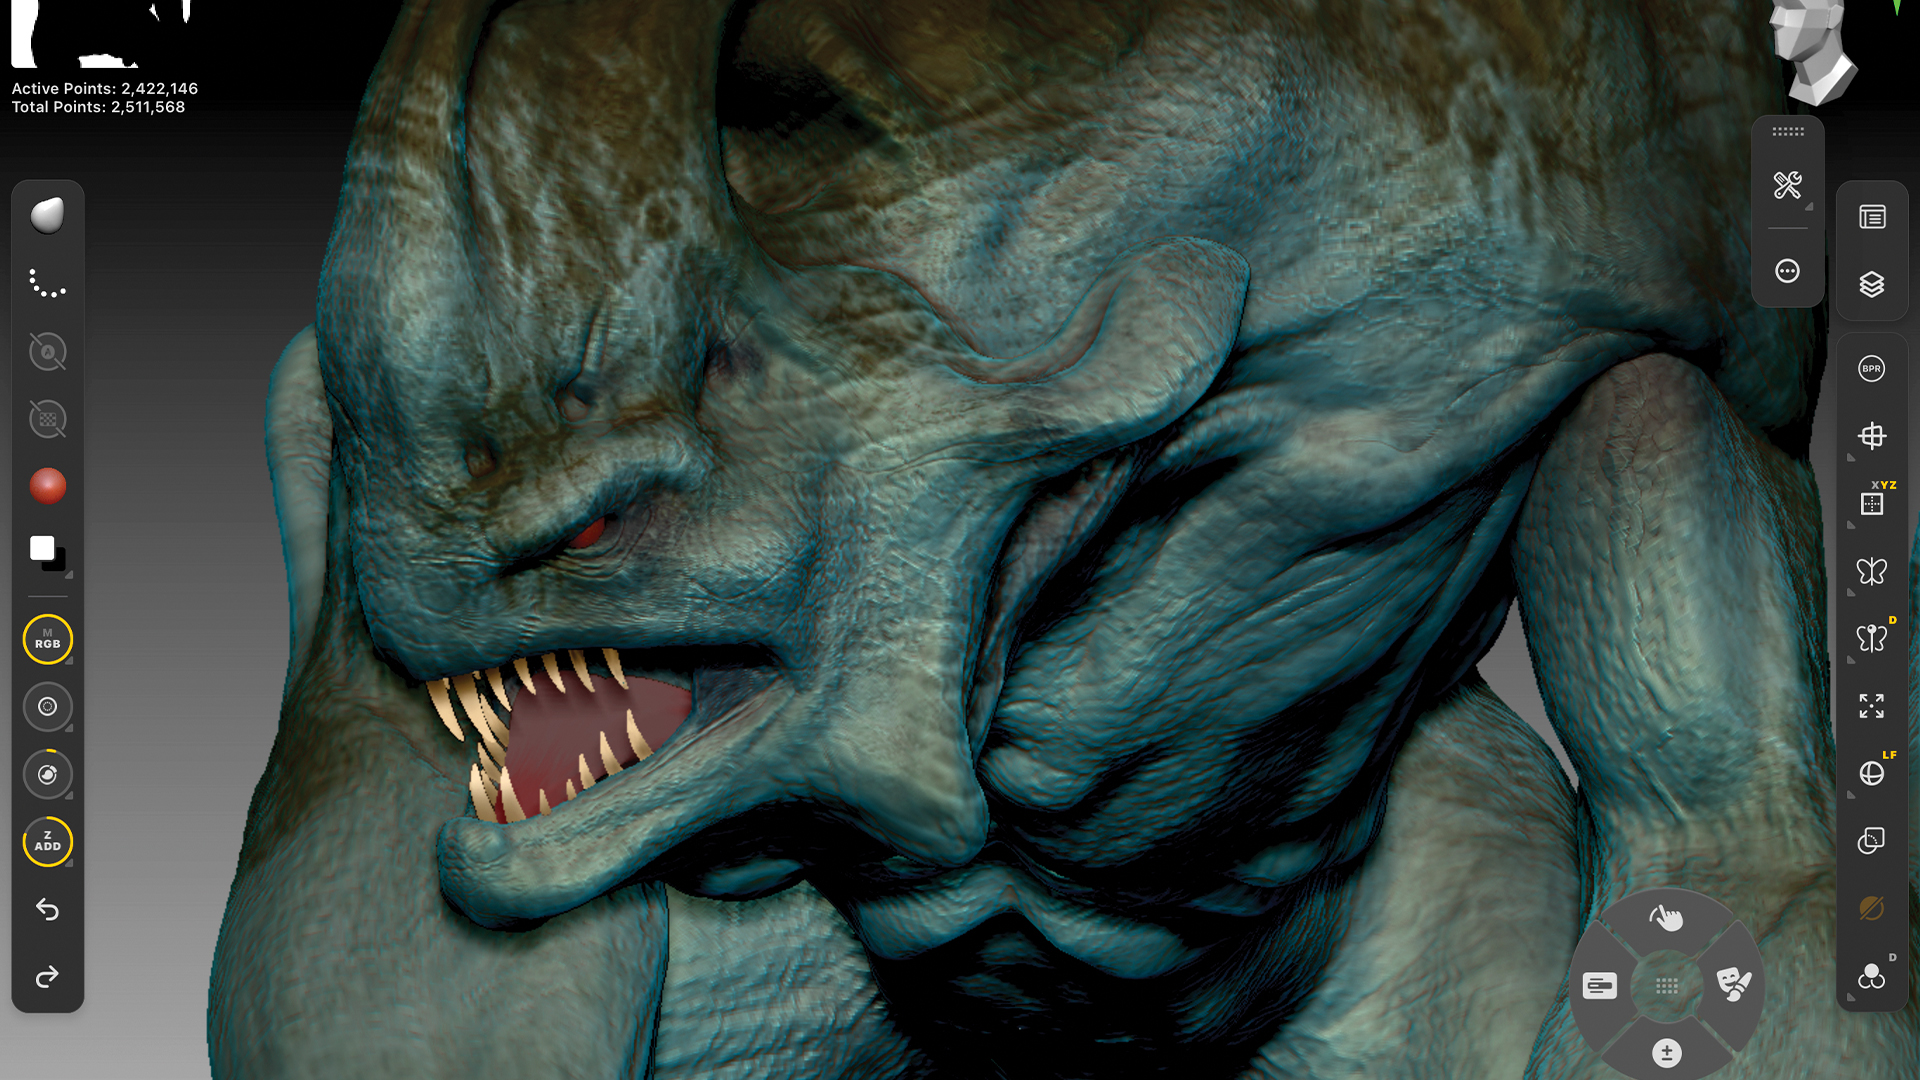
By learning to master ZSpheres, you can streamline your workflow and focus on what really matters. In this short tutorial, I’ll show you how the process works on the brand-new iPad version. If you're new to renderers, read our ZBrush for iPad review and check out our best ZBrush tutorials for more creative inspiration.
01. Start with a ZSphere
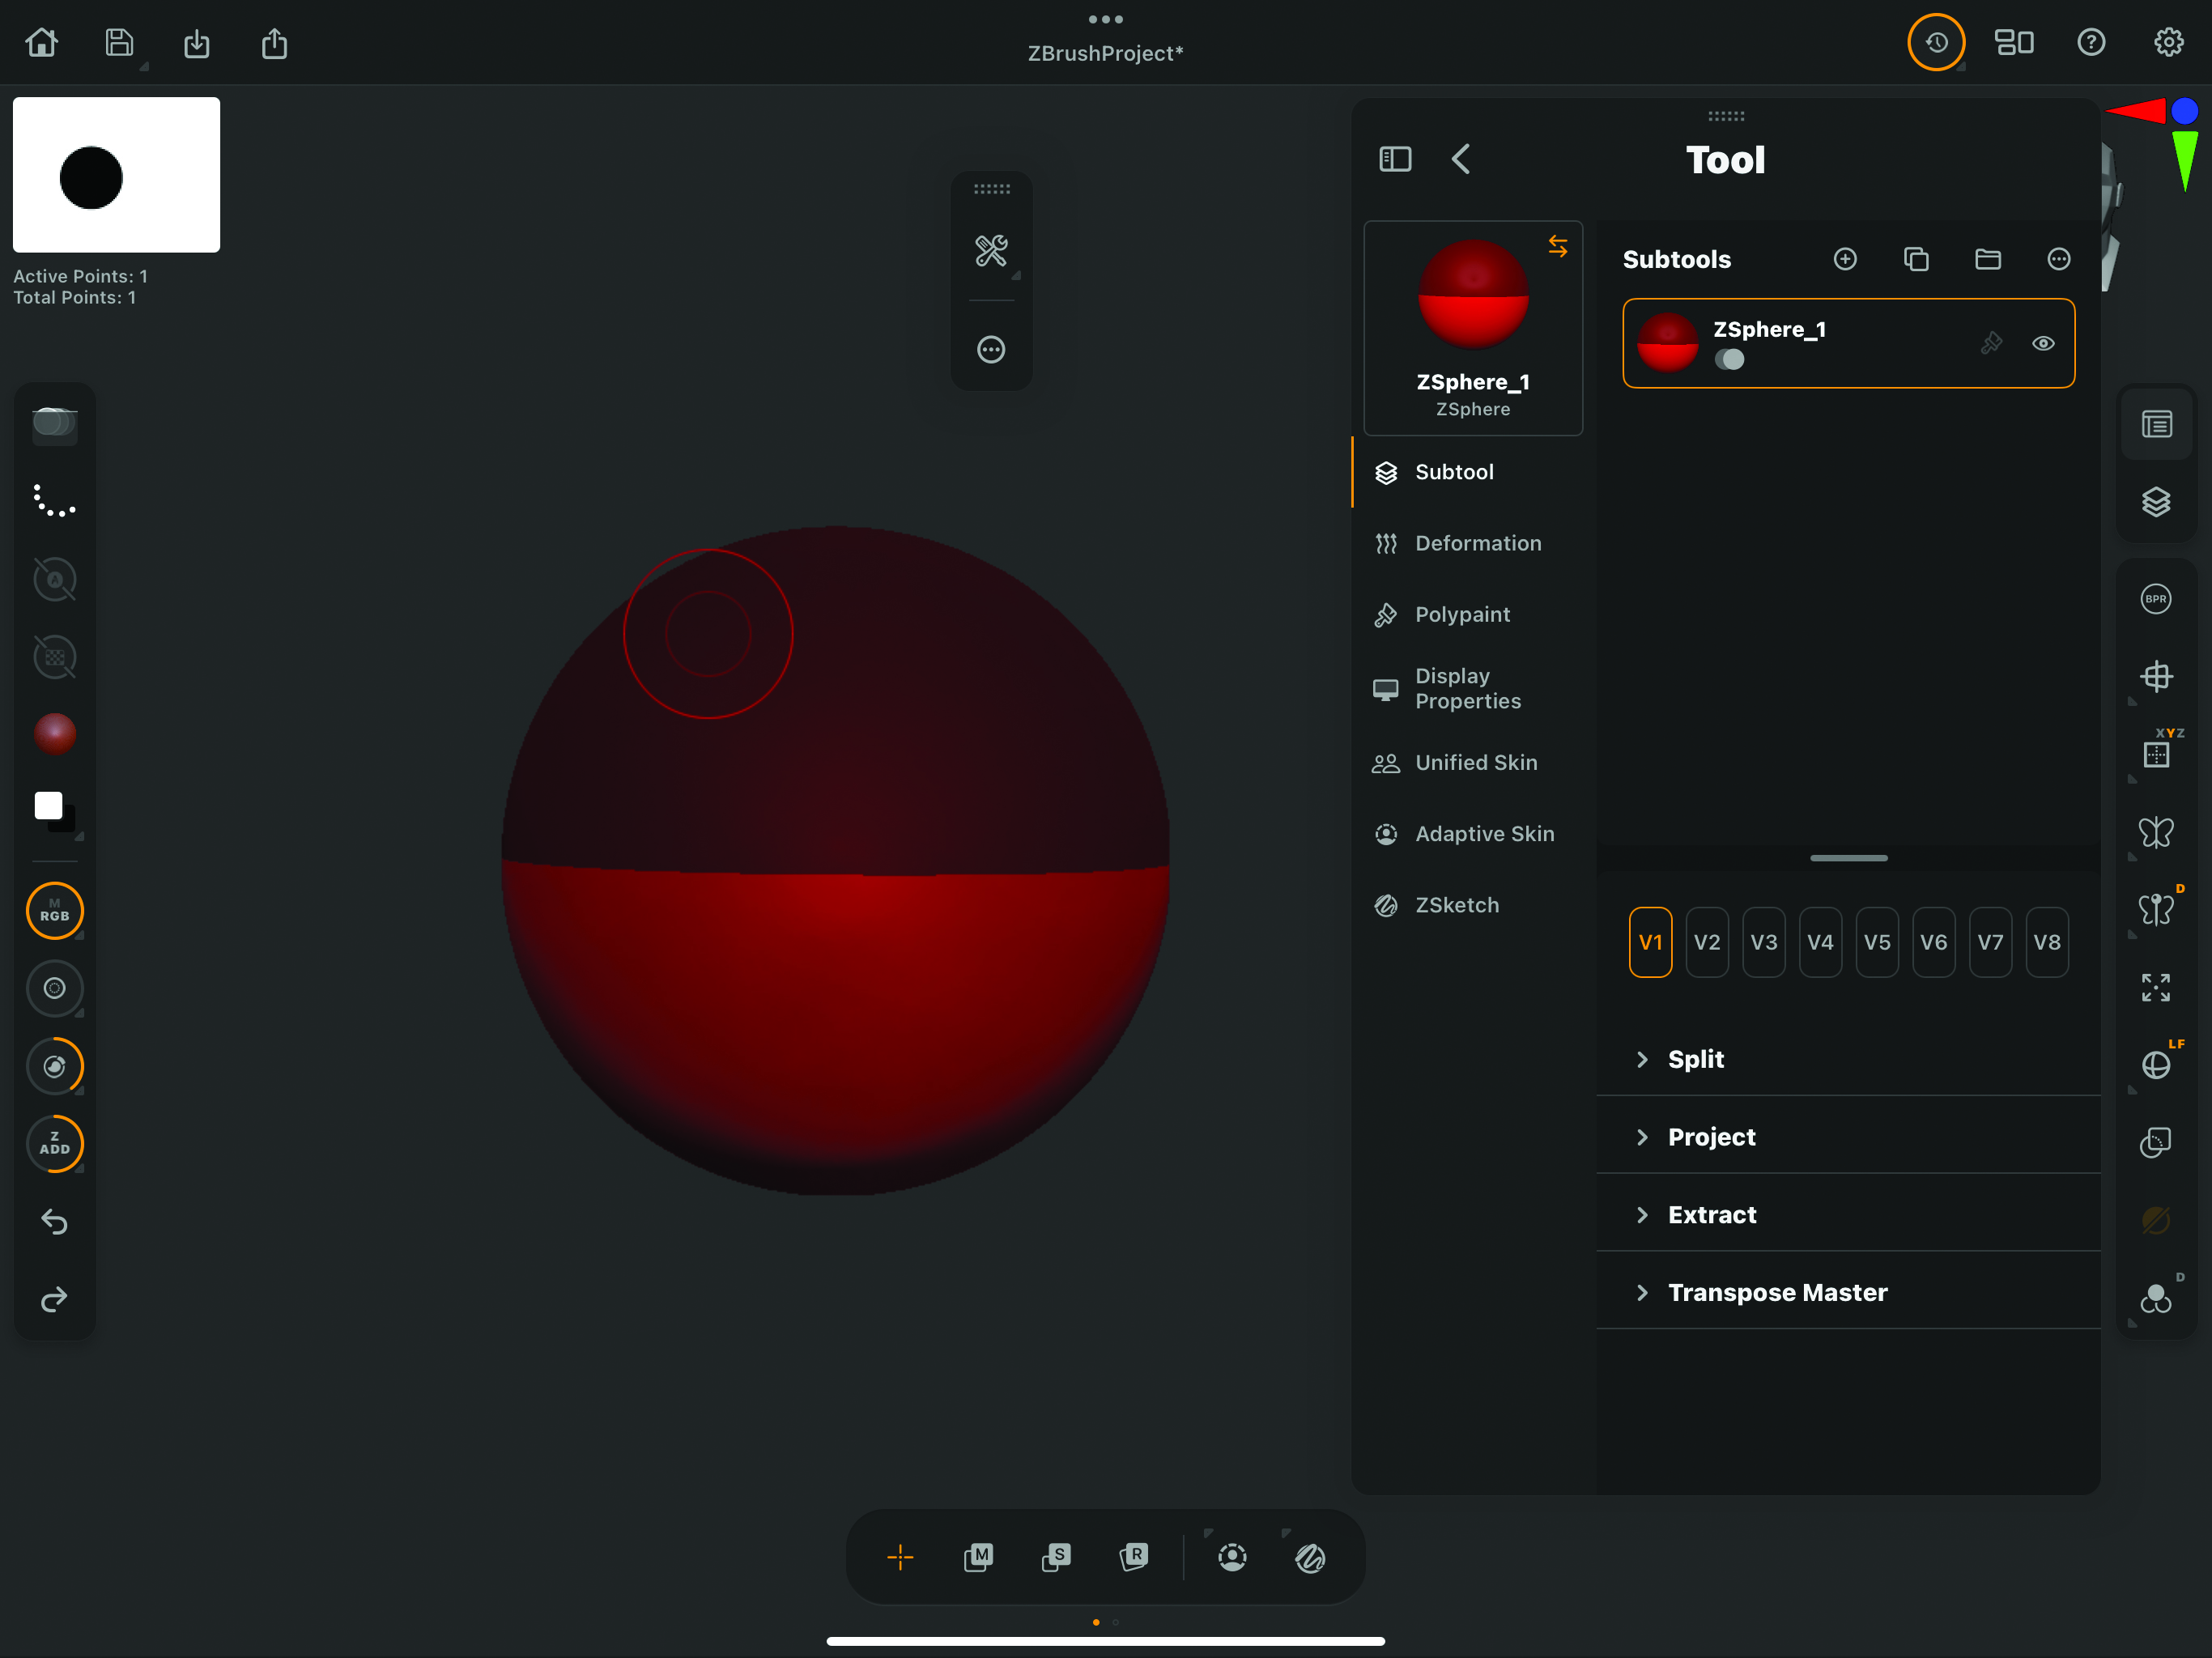
Open ZBrush on your iPad, start a new scene and then look for the Tool menu on the right of the screen. If you tap the little tool icon, at the top-left of the panel you’ll find a list of tools. At the bottom is a small red sphere – that’s the ZSphere icon. Tap on it and one will appear in your document window. You’ll also see a little menu at the bottom with +, M, R and S icons for Draw, Move, Rotate and Scale. You’ll be switching between these quite a lot.
02. Draw out ZSpheres
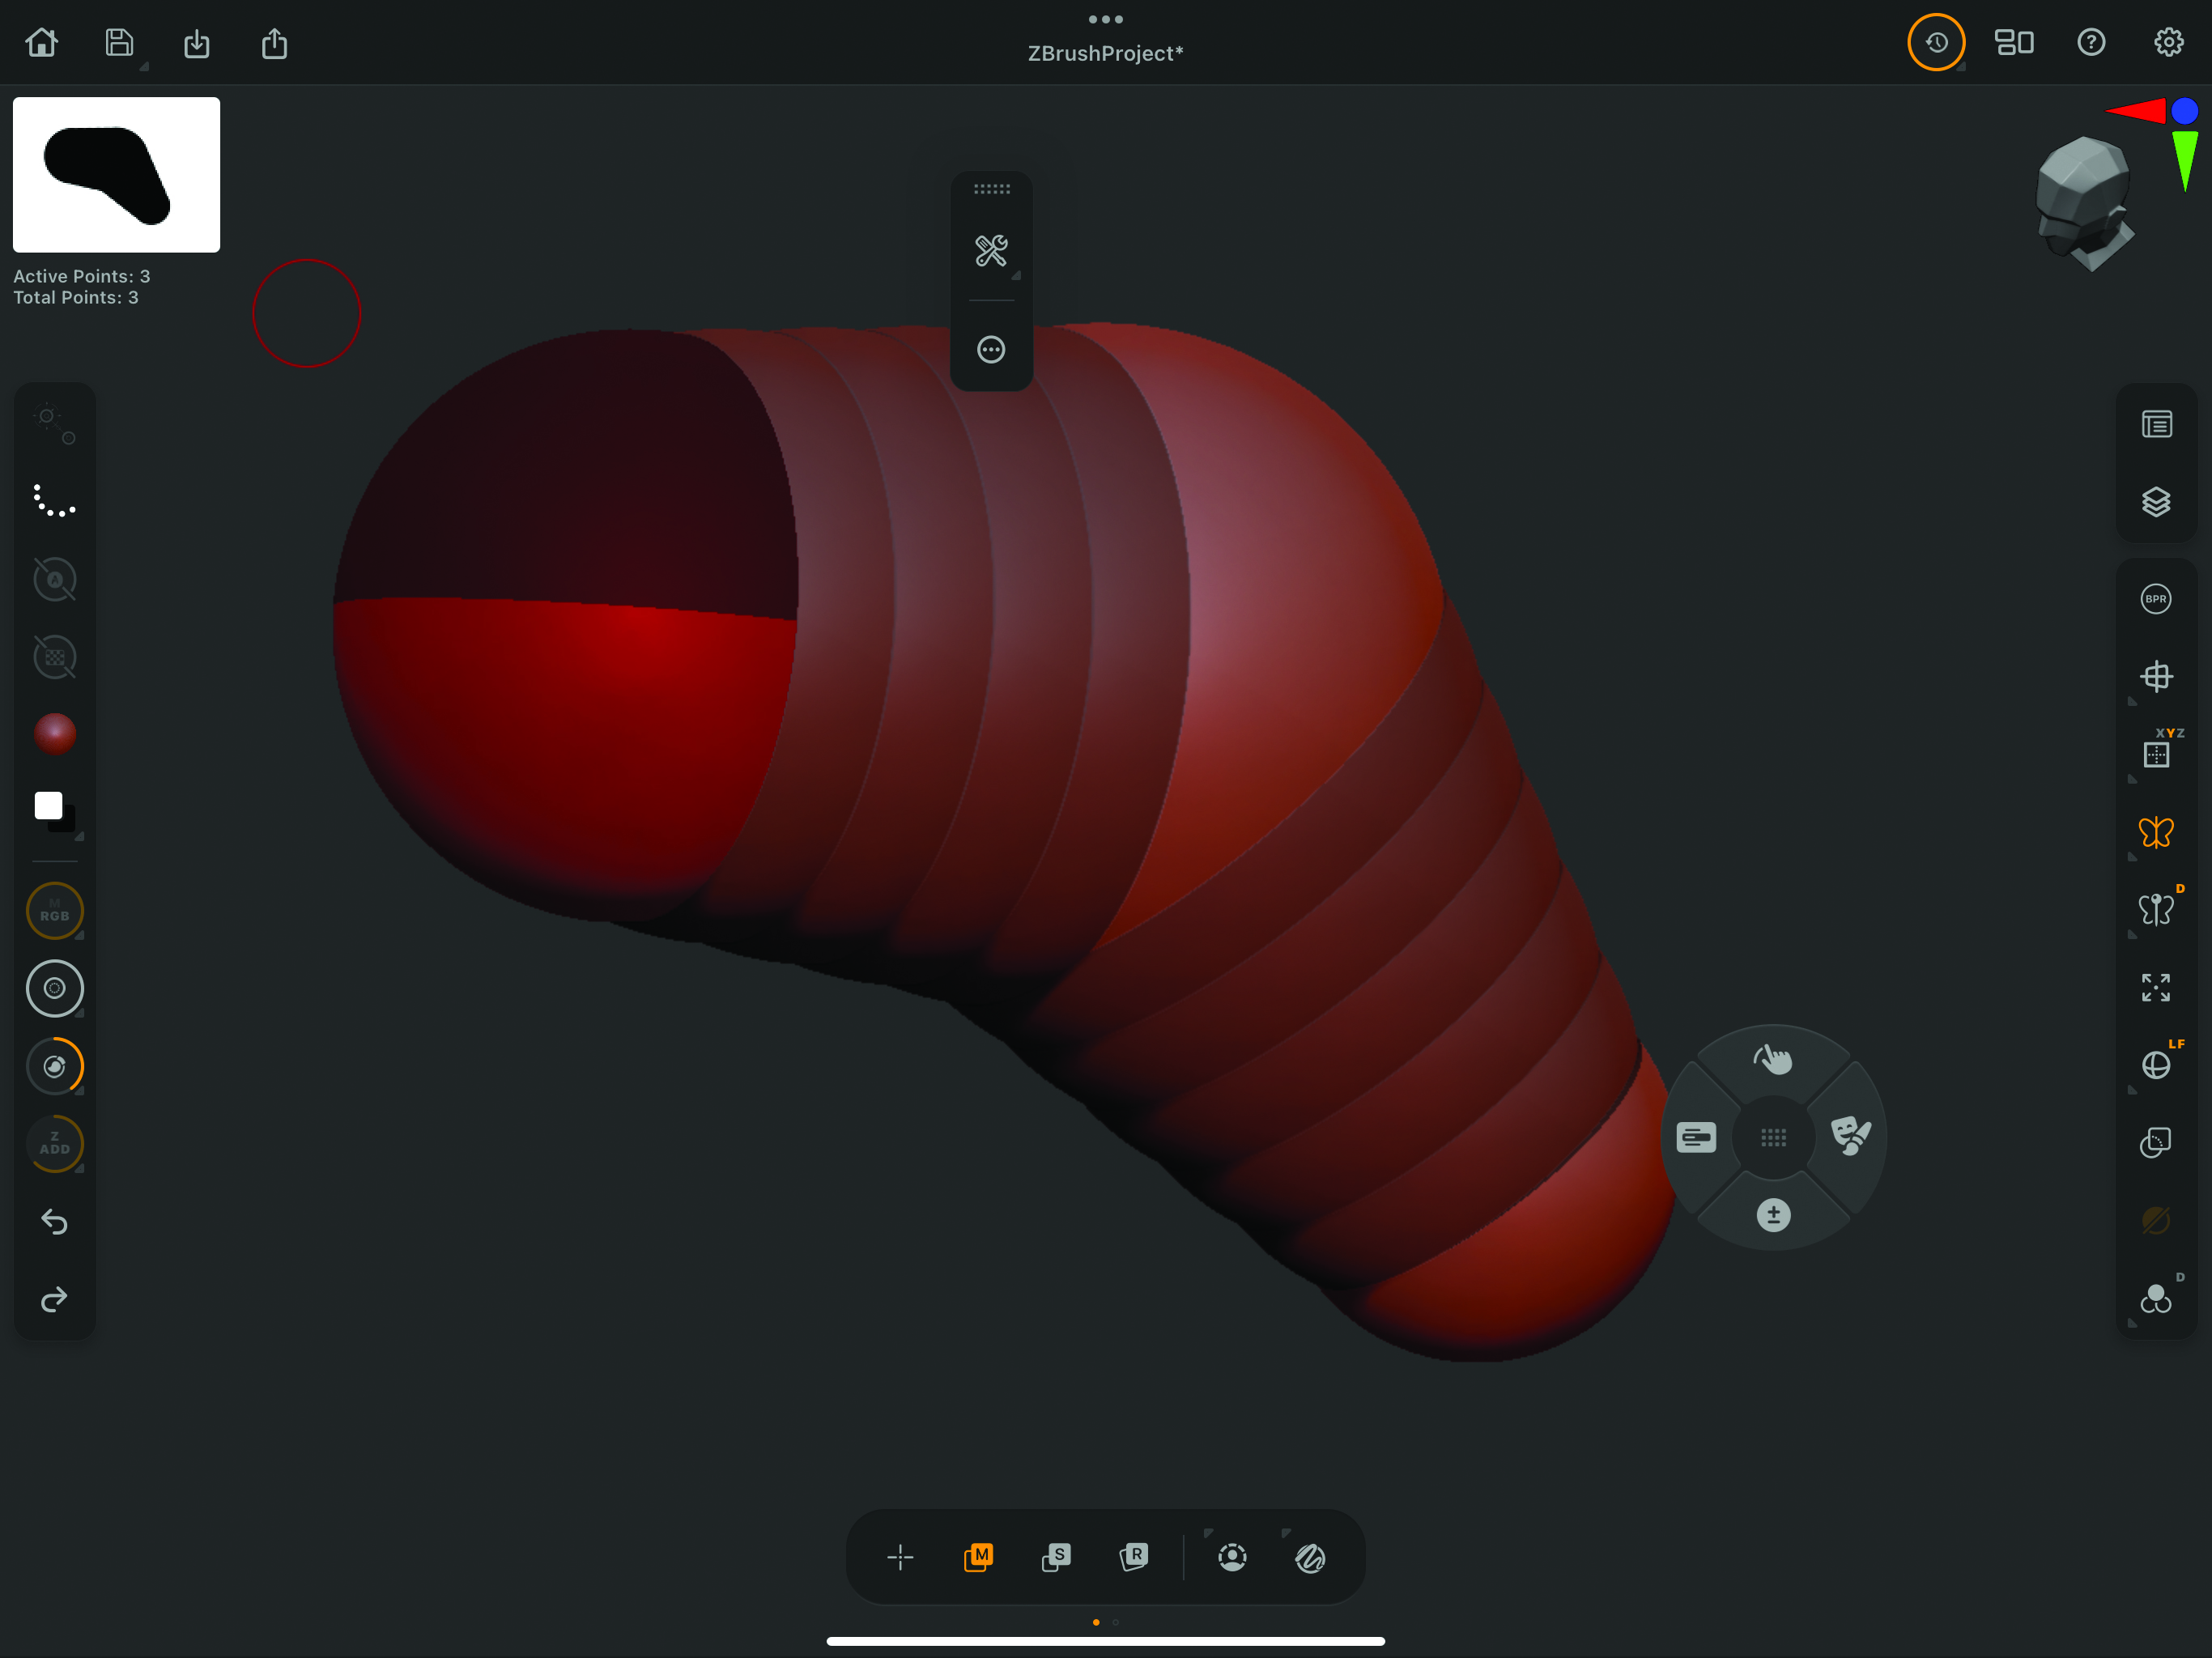
Make sure Symmetry is on in the right-hand menu, as most creatures are made with this option on. Now use the + sign at the bottom and draw a new ZSphere in the centre of the first one, then switch to M and move it out to one side. Now add another ZSphere placed between those two. You can Move, Scale and Rotate any ZSphere that you’ve laid down. Start to think about making a quadruped creature and begin making the back limbs by creating, moving and scaling new ZSpheres.
03. Block out the entire creature’s shape
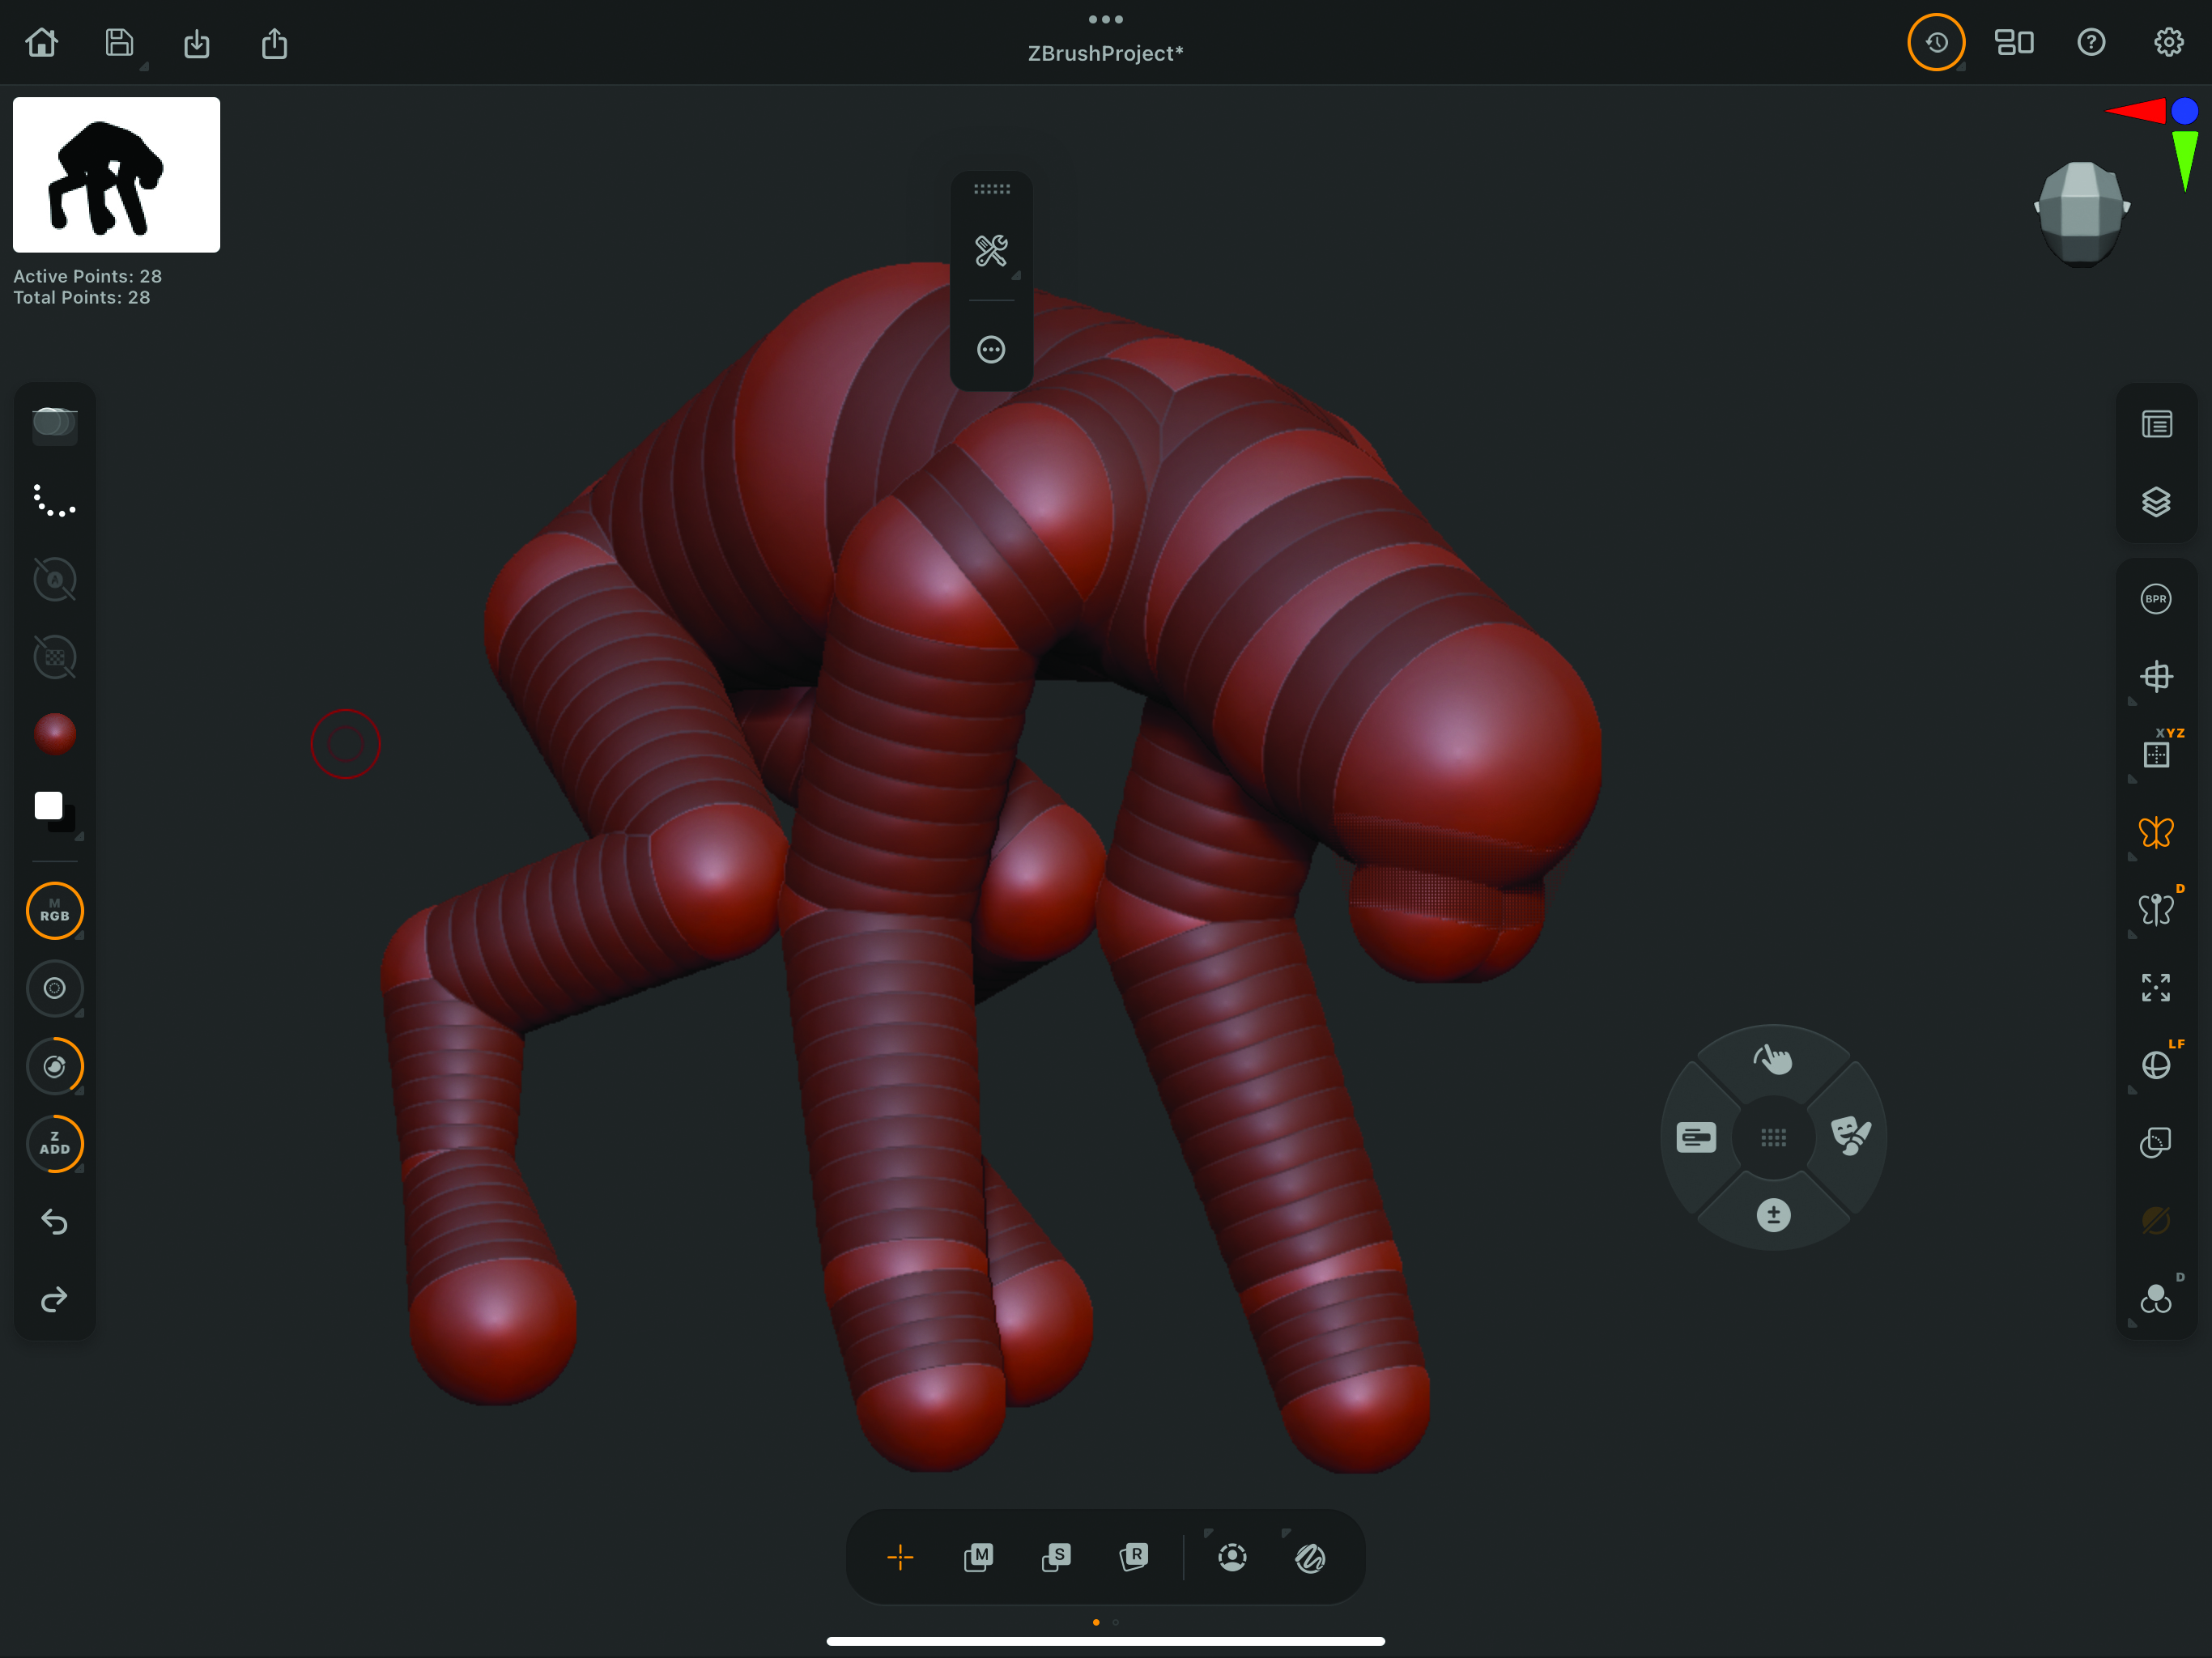
Work up a whole body to suit your design ideas. Don’t worry about any details, but just focus on the overall shape and form of the creature. For instance, don’t worry about fingers and toes as they can be sculpted in later. Worry about the volume of things like the chest, biceps, thighs and so on. You can add all the details you like down the line, but for now it’s about getting the blockout just right.
04. Make your geometry
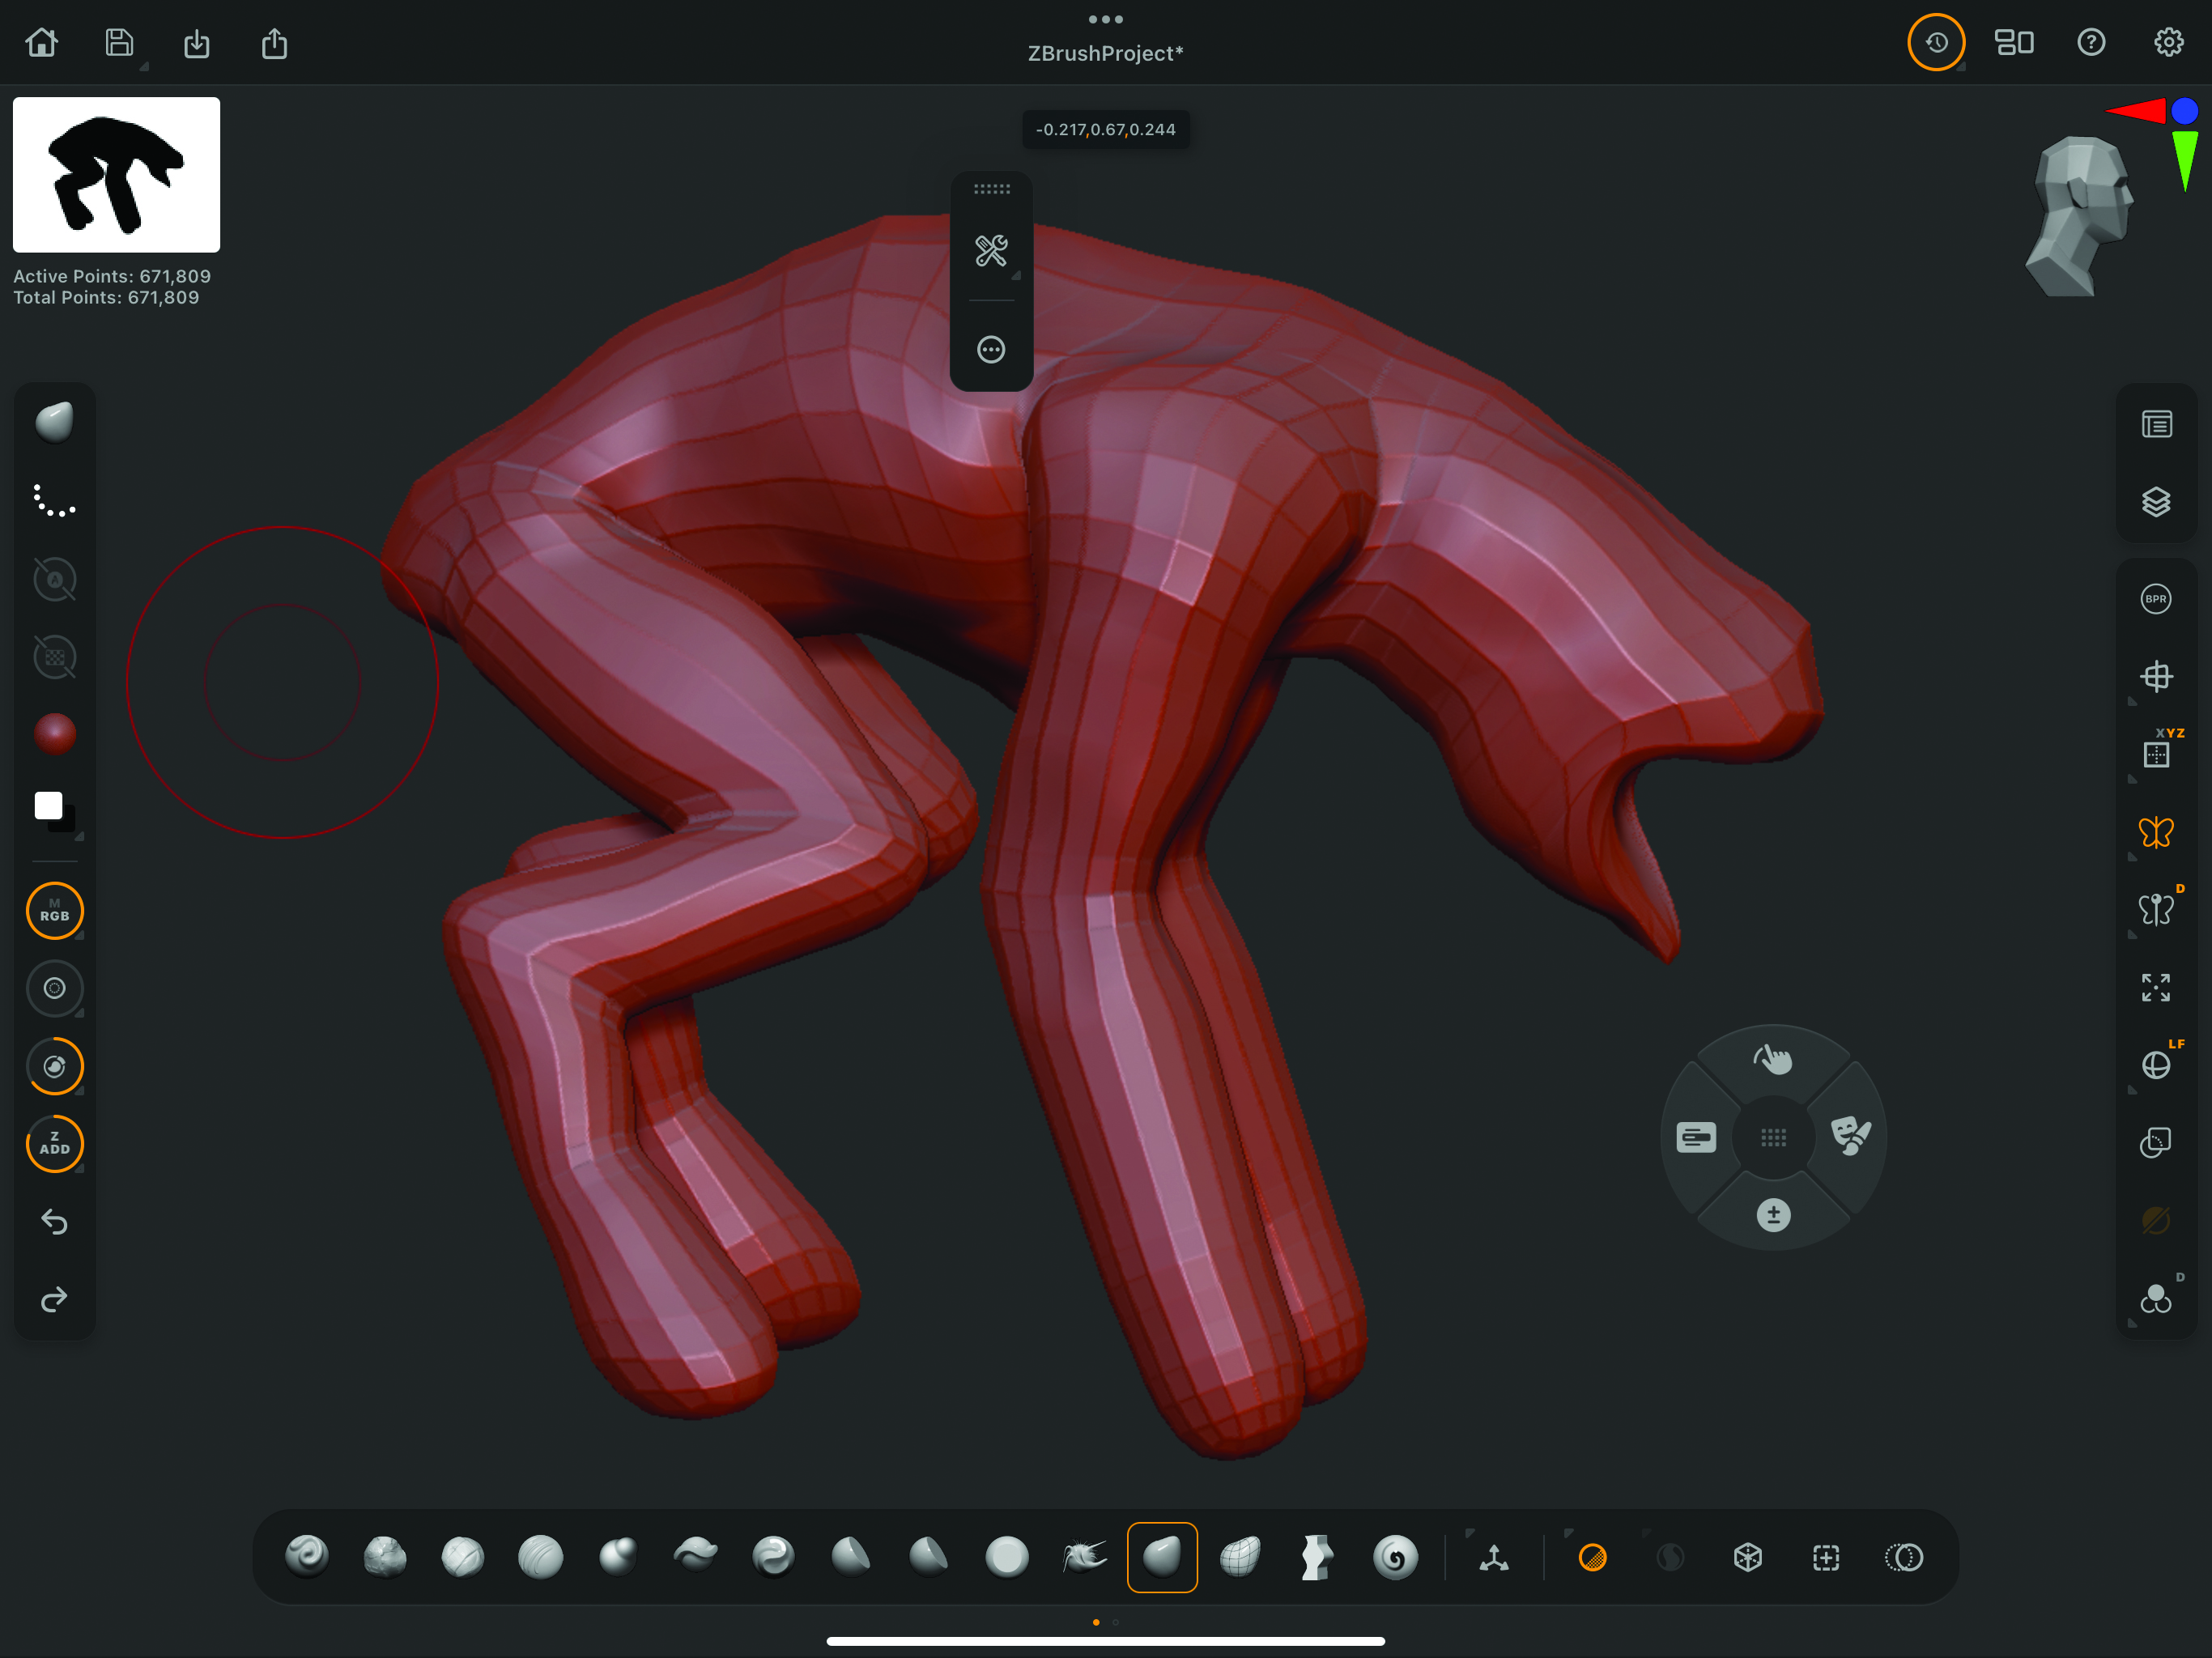
Once you’ve got the body sorted, you’re ready to convert it into polygons. If you’re using a keyboard with your iPad, you can hit ‘A’ to see what the model will look like. Press it again to return to the ZSphere mode. When you want to make the conversion permanently, go to Tool>Adaptive Skin to make the new mesh. This actually makes an entirely new mesh that can be found in the Tool menu, while leaving your ZSphere version there as well so you can make any iterations. Now you can sculpt, paint and texture the model to your heart’s content.
This content originally appeared in 3D World magazine. Subscribe to 3D World at Magazines Direct.

Thank you for reading 5 articles this month* Join now for unlimited access
Enjoy your first month for just £1 / $1 / €1
*Read 5 free articles per month without a subscription

Join now for unlimited access
Try first month for just £1 / $1 / €1
Get the Creative Bloq Newsletter
Daily design news, reviews, how-tos and more, as picked by the editors.

Glen runs SouthernGFX, a small Cheshire-based studio specialising in character and creature design, which creates assets for TV and film. Clients include SKY, Wacom and Oculus Medium and the studio has an impressive project list that features 3D models for Game of Thrones' house sigils. He's been using and training ZBrush for over 15 years and is a Wacom Ambassador for the UK and Ireland.
