Working as a 3D generalist, my interests span across multiple disciplines in the CG world, but when it comes to vegetation creation the first software that comes to mind is SpeedTree. This software package is used to create foliage for video games, movies and other visual effects.
There are multiple versions of SpeedTree, including a Pro version, an Indie release an a free version. There used to be a Modeler edition, which my tutorial uses. but for SpeedTree 10 that skew has been added into the main software. While the steps below refer to Modeler, everything is applicable to SpeedTree 10.
Using SpeedTree has added a whole new dimension to my work. The software’s procedural nature combined with manual and more artistic tools is a perfect blend between artistic control and efficiency. It provides a powerful yet flexible system for generating incredibly realistic vegetation including trees, flowers, ivy, and so much more.
Expert tip: Wonderful woodlands
(Image credit: Mario Leone)
SpeedTree’s extensive library offers a wide range of pre-made trees, plants and textures. Explore the library to find inspiration and quickly add high-quality textures or models to your projects.
In this article, I want to share the process for these procedural tools. I’ll explain everything from the basic starting points of tree creation to the more advanced workflows that add realism and detail. We’ll explore how to use the software’s parameters to generate custom tree structures, apply a variety of textures, and achieve lifelike vegetation. I’ll also discuss ways to adjust the size, shape and distribution of branches and leaves to make sure they look believable.
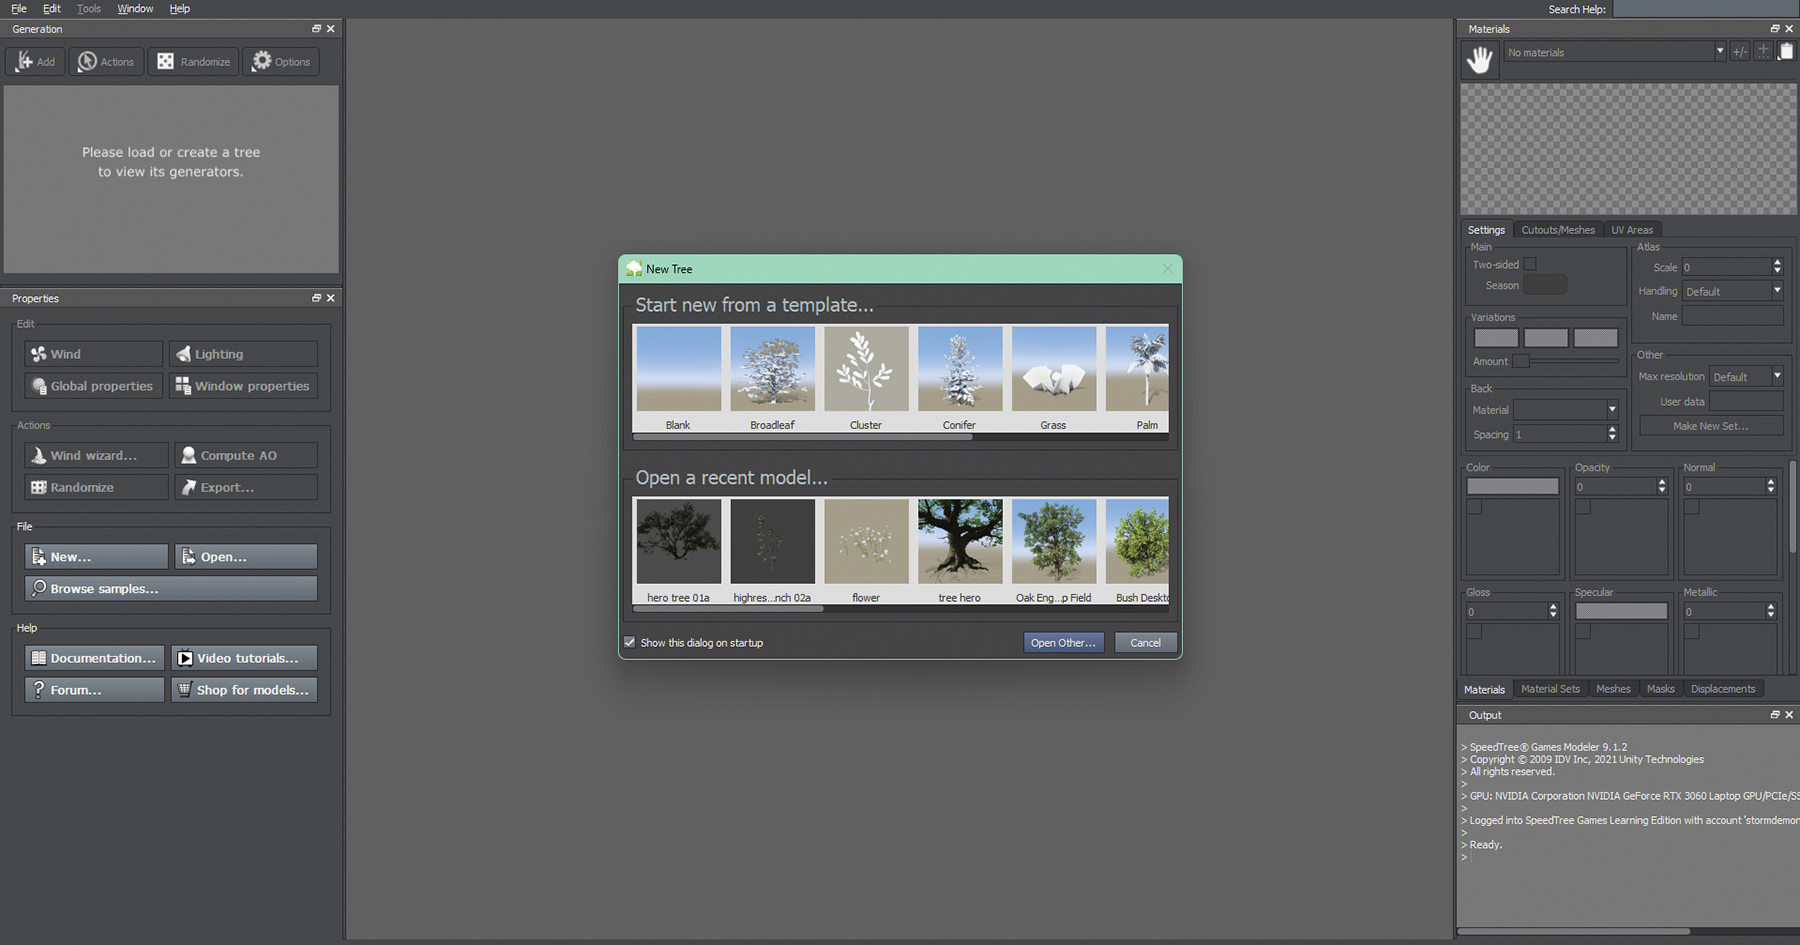
To begin using SpeedTree, first create your project. Open up the software and select a template that suits your needs. SpeedTree offers various templates, including broadleaf, tropical, vines and more, though you can always start off with a blank project. Once you’ve selected your template, save your project file to keep any progress secure. Take some time to familiarise yourself with the interface, which includes the main viewport, node graph and properties panel. Understanding these components is crucial as they enable you to navigate and manipulate your 3D models effectively.
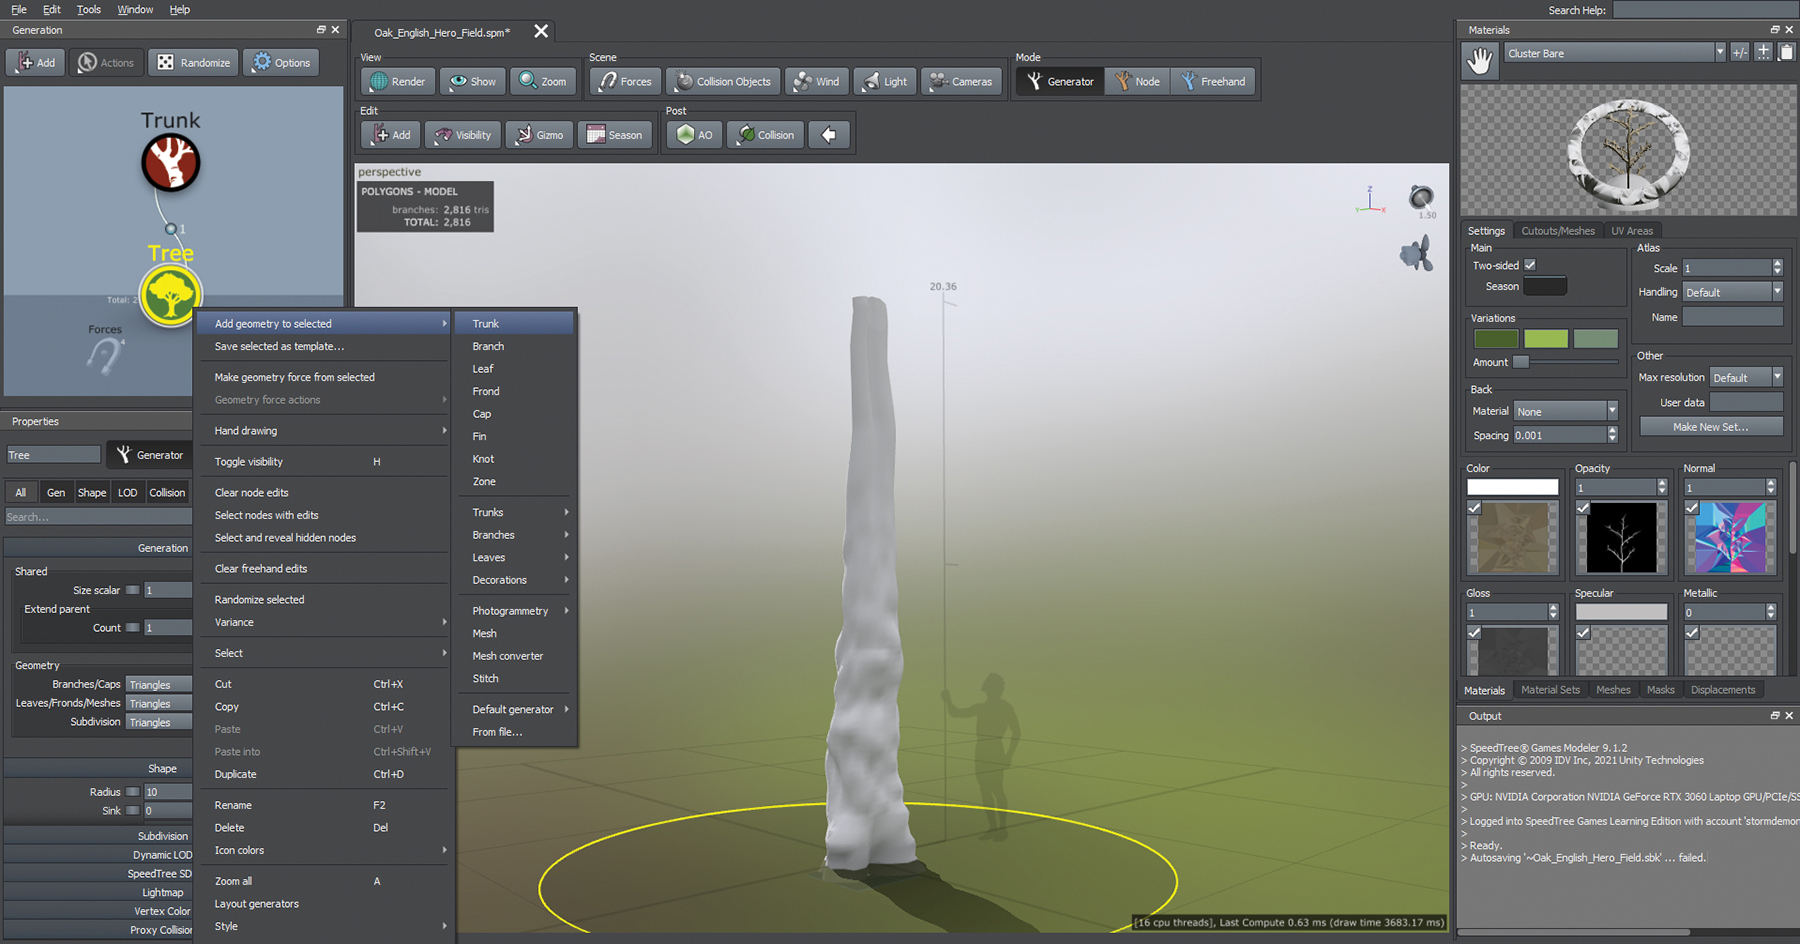
The trunk is the foundation of your tree model. In SpeedTree’s node graph, right-click on the pre-existing Tree node, select Add, and then choose Trunk to create a brand new trunk. Adjust the parameters in the Properties panel to the left such as the Length, Radius and Curl to shape the trunk as you desire. To create a tree that has multiple trunks (also known as a bifurcated trunk), increase the Number parameter. This will split the trunk into two or more sections, giving your tree a more complex structure to work with.
With the trunk now in place, the next step is to add some branches. Follow the same procedure as before, but this time select the Trunk node and choose Big Branches to generate the primary branches. Customise the Length, Gravity and Distribution to match your tree species. For my tree, I’m setting the mode to Proportional Steps. Next, add secondary and even tertiary branches using the same logic for a complex and realistic structure. As shown, I repeated this step multiple times to create a detailed branch hierarchy.
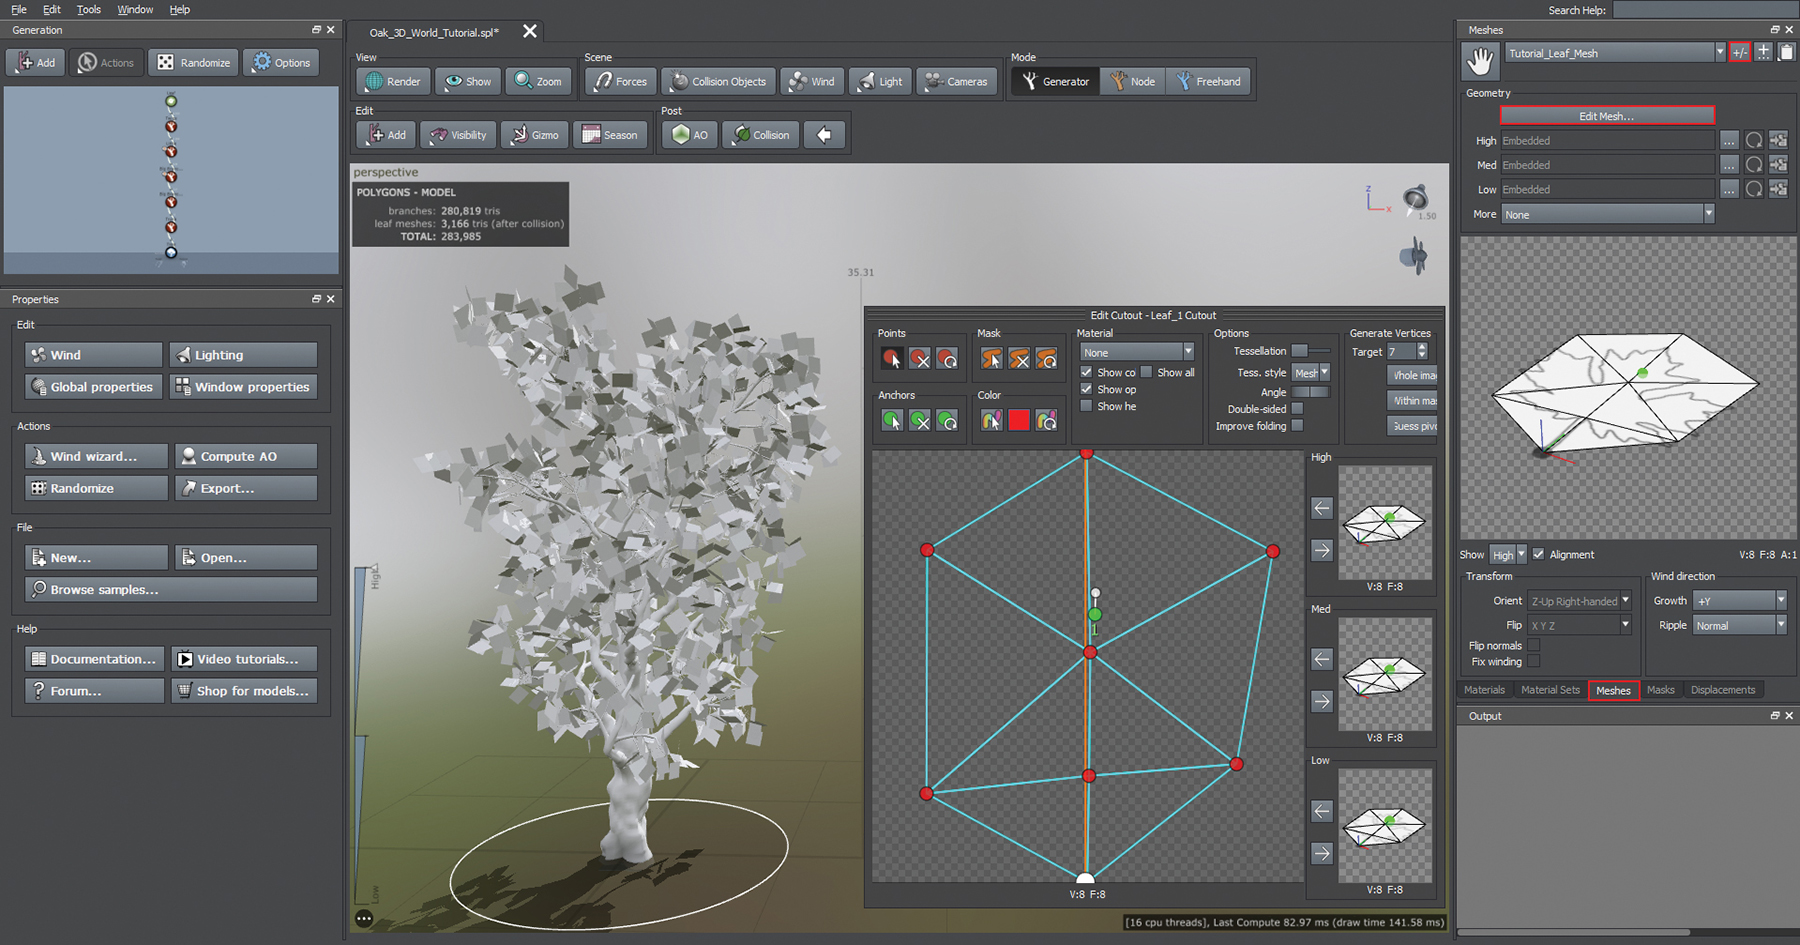
When it comes to creating leaves, SpeedTree isn’t exactly straightforward. Start off by adding a Leaf Mesh, and you’ll now see simple white planes that we need to create a mesh and material for. Let’s begin with the mesh. Go to the Meshes tab to the right-hand side of the interface, click the +/- icon to create a new mesh, rename it, and click on Edit Mesh. This menu allows you to shape your leaves as you desire, so get creating! With the shape in hand, our leaf now needs a material to complete that realistic appearance.
In the Material panel, which is located near the Meshes panel we just used, create a new material using the same steps as before. In the ‘Cutout/Meshes’ submenu, ensure that SpeedTree recognises the mesh you previously created. Next, click on one of the maps listed, which will open a pop-up window, and select from multiple preset leaf textures. To assign it, just use the hand icon to drag and drop it onto the leaves. You can do the same for the trunk as well. Be sure to experiment with different settings until you’re satisfied with the look.
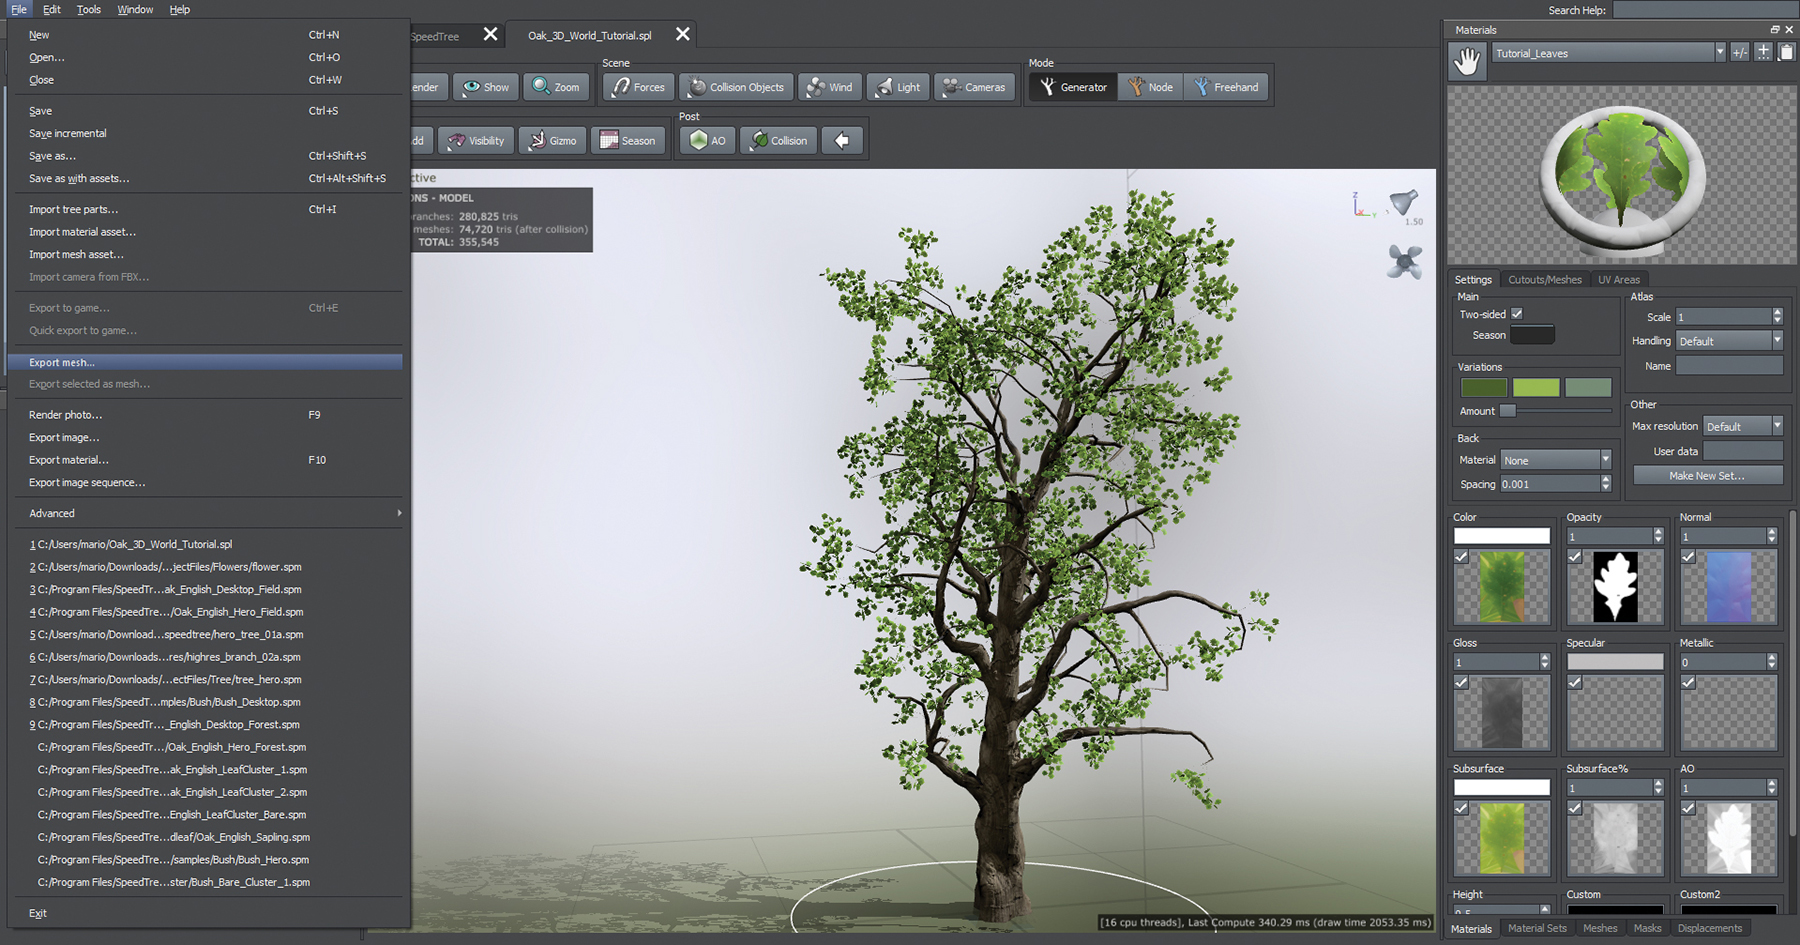
Once you’ve completed your tree model, you can export it for use in your projects. SpeedTree supports various export formats, including FBX, OBJ and Alembic. Choose the format that best suits your workflow and software requirements. Before exporting, optimise your model by reducing the polygon count and ensure textures are correctly applied. SpeedTree’s export options allow you to fine-tune settings for compatibility with game engines and rendering software. Save your exported model and integrate it into your 3D scenes.
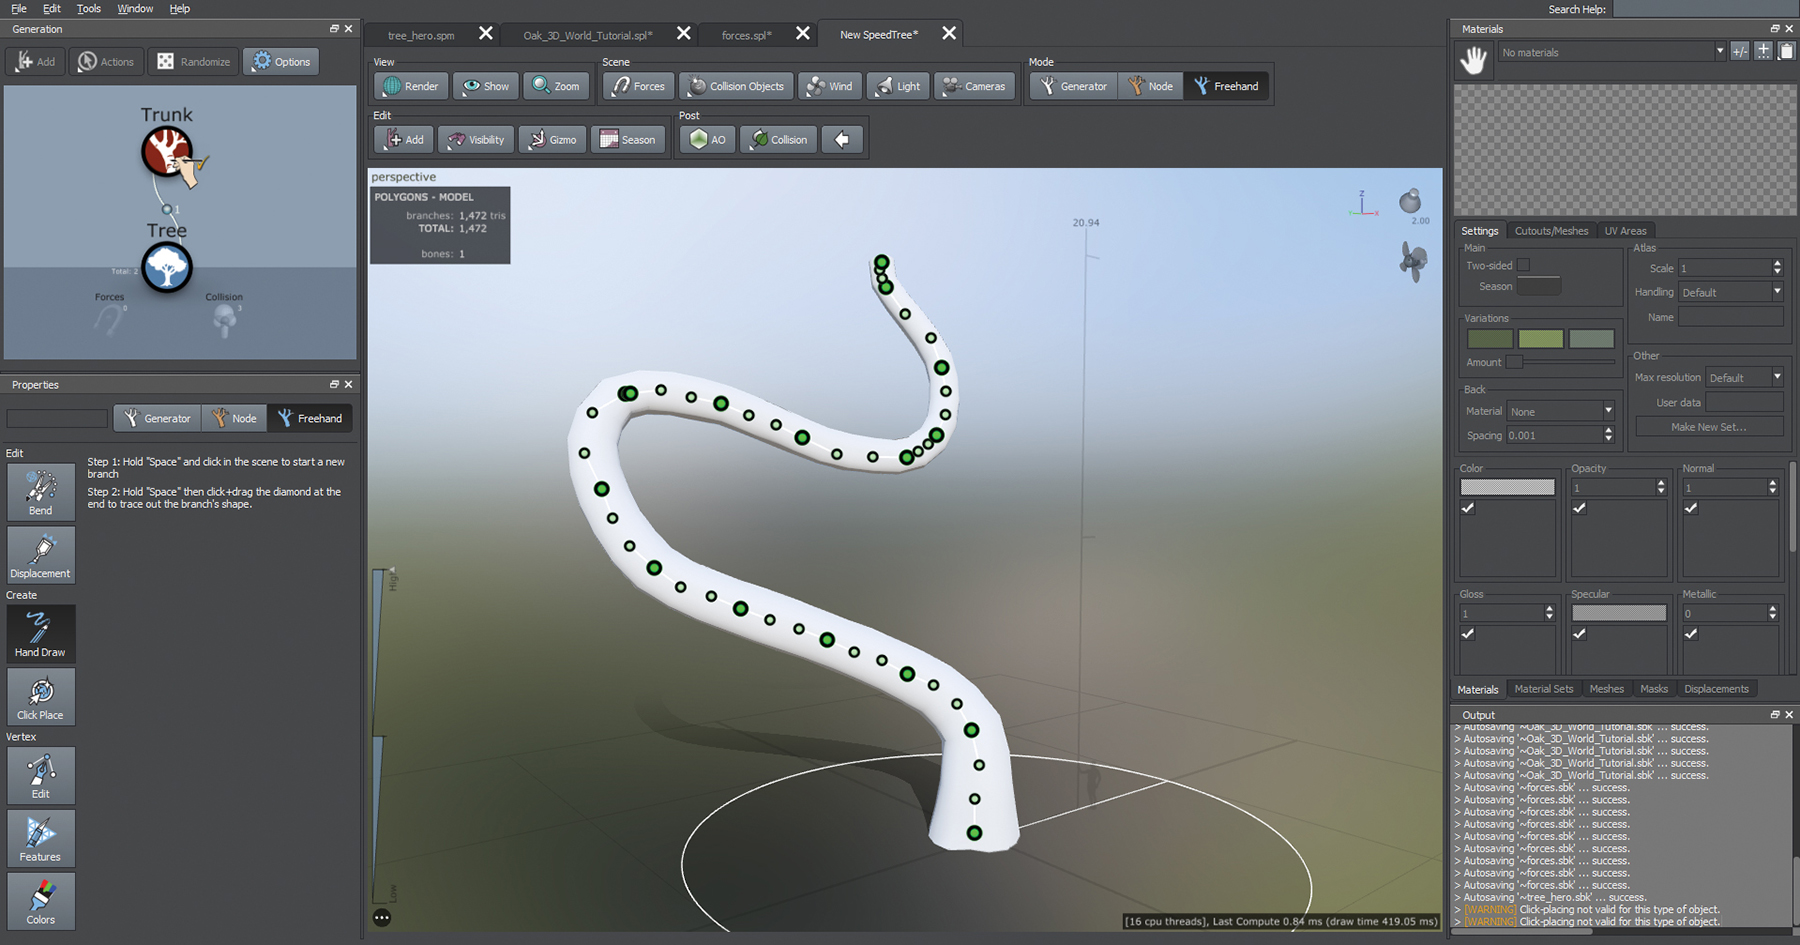
Begin by selecting your desired tree model and switch over to Freehand mode. Here you can draw the main trunk or some branches by holding the Spacebar and dragging your cursor to shape your tree. These branches will form smooth Bézier splines, which allows for natural curves. Adjust them in real time to achieve the desired shape and structure.
After drawing, enter Node Selection mode to manipulate control points on the branches. Use these points to refine the rotation, position and scale of each branch. This step is essential for adding depth and natural variations to your tree model, which will ensure a realistic appearance.
Selecting the Bending option in the Freehand mode lets you manually edit pre-created branches, blending procedural techniques with extra adjustments. This feature gives precise control over the area of influence, enabling you to move or rotate branches to your heart’s content.
Get the Creative Bloq Newsletter
Daily design news, reviews, how-tos and more, as picked by the editors.
Thank you for reading 5 articles this month* Join now for unlimited access
Mario is a an Adobe Certified Professional in Photoshop, Premiere Pro, and After Effects. He is also a Houdini specialist, and has three years of experience in photography and two years in the VFX / animation industry.
You must confirm your public display name before commenting
Please logout and then login again, you will then be prompted to enter your display name.