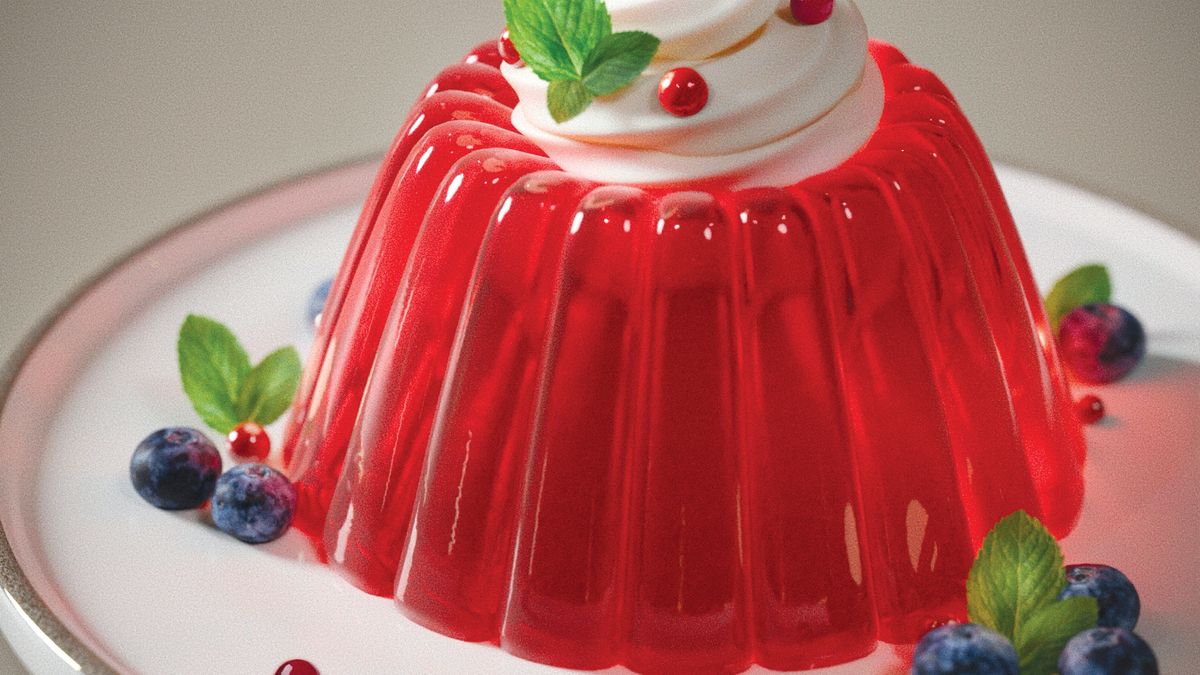
How to make a realistic jelly material in Blender
Recreating the translucency and reflectiveness of a jelly can be a challenge, but Blender’s material toolset makes it a doddle

This short project is a real sweet treat, as I’m going to show you how to prepare a realistic jelly material in Blender – you’ll have to provide the strawberries and cream yourself, though! This is a relatively straightforward procedural recipe, and can be done in three quick minutes.
Before we get into this, make sure the render engine in Blender is set to Cycles in order to get more realistic lighting compared with EEVEE (then see the best Blender tutorials).
To make your jelly even more interesting, you can use a Glass BSDF shader. Mix it with the main material we’ve already created, set the Roughness to 0.115, and adjust the Mix shader to 0.500. This will give your jelly an even more appealing look.
Begin by adding a circle and editing the vertices to make it a jelly shape.
Now we want to apply a new material to the model. Give it a suitable name – following a methodology for material names is always a great idea – and then enable the Use Node option in the Shader panel. To make our jelly just right, we’ll need the following nodes: Fresnel, Voronoi Texture, Color Ramp, Normal Map, Translucent and Add Shader, with the default Principled BSDF too.
Start with the Fresnel node, which needs an IOR value of 1.500, and must be connected to the Color Ramp. Give the Color Ramp a shade of red and then link it to the Translucent node, and the Base Color of the Principled BSDF. Next hook the Voronoi Texture to the Normal Map, which then connects to the Normal input of the Principled BSDF. For the parameters of these elements, set the Voronoi Scale to 300.000 and Details to 1.000, with the Strength of the Normal Map at 0.050. This will add a soft, realistic surface texture to make our jelly look extra tasty.
The final connection is linking the Principled BSDF to the Translucent by using the Add Shader, which then links to the Material Output. Set the Metallic of the Principled BSDF to 0.500 for depth and better reflections, the Roughness to 0.025 and the Transmission and the Coat to 1.000. Lastly, the Sheen should be 0.500. These are my recommendations, but feel free to have fun experimenting with different parameters.
Need new kit? See the best laptops for 3D modelling (and other 3D modelling software options).
This content originally appeared in 3D World magazine.

Thank you for reading 5 articles this month* Join now for unlimited access
Enjoy your first month for just £1 / $1 / €1
*Read 5 free articles per month without a subscription

Join now for unlimited access
Try first month for just £1 / $1 / €1
Get the Creative Bloq Newsletter
Daily design news, reviews, how-tos and more, as picked by the editors.

Pietro is a freelance 3D artist and YouTuber with more than 10 years of experience in different fields of 3D production, from animated movies to VFX and game production. He shares many of his creations on his YouTube channel @PietroChiovaro.