How to set up a scene with Cineware
Digital artist Mike Griggs reveals how to use After Effects and Cinema 4D to create VFX scenes that work.
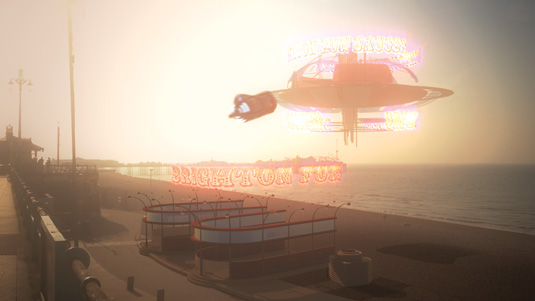
In this tutorial, we get stuck into modelling elements in Cinema 4D and using Cineware to help get us set up for our main animation render, which will help us set up our render passes. To create these and get the best-looking shot possible, we'll use the new rendering features of Cinema 4D R15, such as the improvements in the global illumination engine and the new network rendering tool Team Render.
01. Sketch the design
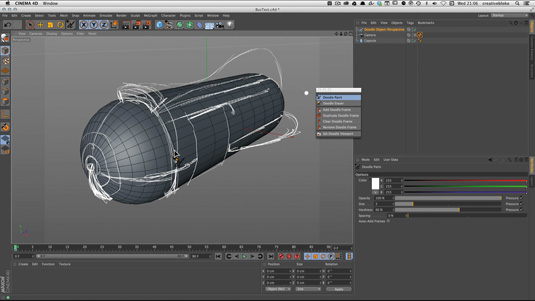
Create a model for the bus. We will use parametric objects and Cinema 4D's excellent spline and cloning modelling workflow. Create a capsule for the main body of the bus. While traditional sketching with pen and paper is handy, making it an integrated part of the 3D creation process can be laborious. Thankfully, Cinema 4D has its own set of basic sketching tools, which can really help you with laying out a design.
Once you have your capsule at the correct size, and orientated in a view where you would like to sketch, create a camera and switch to its view by pressing the white square. In the Object list switch to it View and create a doodle object (go to Tools>Doodle>Doodle Paint).
The doodle object enables you to draw on a quick mock-up of a design. Switch the view back to the default camera and put a protection tag on the doodle camera. Increase the resolution of your doodle, save the texture and sketch away. Pull out the doodle sketch palette to give you a reference to refer to and edit.
02. Modelling the bus
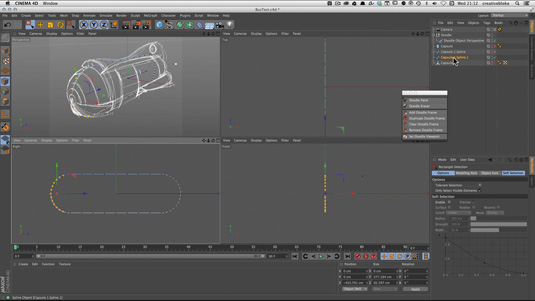
Make a copy of the capsule and make it an editable object. Use the Edge Loop selection tool to select a complete loop of the capsule, and then convert it to a spline by going to Mesh>Commands>Edge To Spline. This gives a looped spline, which you can copy and remove sections from to create the shaping splines for elements such as the wing.
To create objects such as the main fairing that wraps around the bottom, top and end of the bus, make a copy of the capsule spline, uncheck the Close Spline button and parent it to a sweep nurb. Then adjust the profile of the sweep using the curve in the Details palette of the sweep nurbs.
Repeat this process by making duplicates of the sweep nurb's object stack for other 'rib' elements on the craft, including the wings. The great thing about this workflow is that every model element is live and can be adjusted as you design. For the rest of the bus segments, use C4D's Parametric and Cloning tools to add detail to the nose and rear of the ship.
Daily design news, reviews, how-tos and more, as picked by the editors.
03. Modelling the other elements
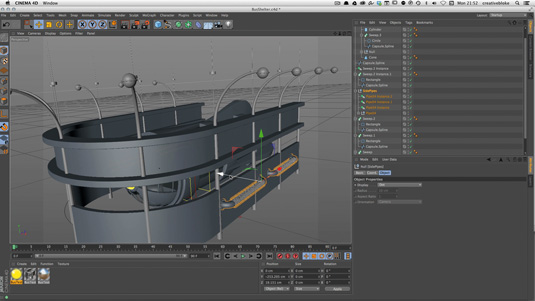
For the shelter, the modelling process is much the same. Here, I use some existing stock elements. Again, you can start working with a new model, but at the end of the bus process you may notice that the Cinema 4D UI starts to slow down, this will only get worse when we combine the models together in the main animation scene.
This is the catch of using C4D's parametric modelling system, as the more objects C4D has in the object list, the slower it gets. One way to combat this is to combine the objects and get rid of the models you do not need using the Objects>Connect Objects and Delete command in the Object List menu. I could also use Xrefs to manage the scene, which load instances of separate C4D files into your master scene, but this can create file logistic headaches.
Thankfully you can reduce the amount of detail shown in the viewport by going to Options>Level of Detail and selecting Medium Setting in any viewport window.
04. Adding texture
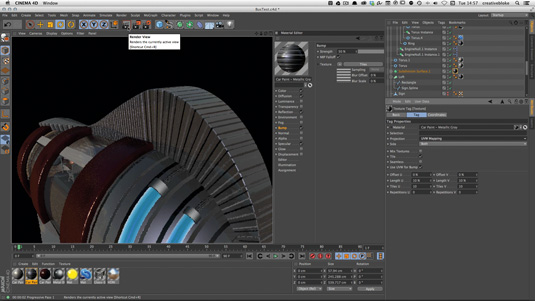
You can texture using a combination of the material that comes with C4D Lite and Cinema 4D Studio, using the car paint texture for the majority of metal work. To add panelling to the fairing, use the Layer command throughout a range to load up a tile bump texture element, which you can configure into a tile pattern to give the impression of metal tiles.
Then select the fairing objects texture tag in the object list, which lets you access the mapping controls for this texture. Leave it set to UVW Mapping, but increase the tiling number to create a size and proportion of tile that you're happy with. Also create some luminous textures for the engines and nose lights for the engine; use the fresnel texture channel in the luminous tab to give a gradient to the luminosity's colour.
05. Place models in the scene
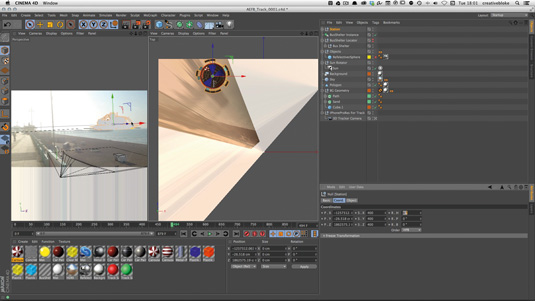
Now it's time to add all your completed models into your tracked scene. Again, use the projection mapping toolset to help place the objects. To place the saucer, you can project onto a huge polygon object so you get a rough approximation of where the pier end is in relation to the camera and place the saucer accordingly.
Once the objects have been placed, start to use layers to help organise your scene and switch elements on and off as you work in your master scene.
Fill out other details, such as the kerb where you want to place your shelter. Then copy in your shelter model after grouping it using the Object List’s Objects>Group Objects. Next, go to Edit>Select Children in the Object list to make sure you're selecting all the objects in the object tree in your shelter model, which you can paste into your master object and position where you want it.
Then instance the shelter group by selecting it and selecting an instance object to create a second shelter. Position it beside the original model. Repeat this process to get the bus model into the master tracked scene.
06. Animate the buses

To animate the buses, earlier in the modelling process, you will have created a controller to open and close the door, which you can then attach to a null object and then be set as a slider on the UI when the controller null is selected.
To animate the main bus movement, create two curved splines between the bus shelter and the saucer and use the follow path tag on the master null of the Bus Group, this snaps the Bus to the curved path. Set keyframes to create the initial take off and to orientate the bus to the right direction.
All you need to do to make your bus zoom in X, Y and Z space to the saucer is to animate the position on the path slider. Use the same system for the instance of the bus model. Using this method makes it much easier to 'art direct' the acceleration, as due to the foreshortening of the camera the buses fly away to quickly. Compensate for this by making the distance covered by the bus in the foreground much shorter by keying the Position Along Path slider.
07. Cineware workarounds
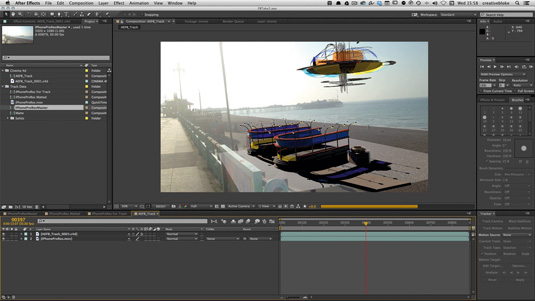
Once the scene has been set up and you've applied some secondary animation, such as opening doors and spinning Ferris wheels, check how the scene looks in After Effects.
It's now that we have to harden ourselves to the realities of Cineware: we will need to use global illumination (GI) to render the scene, as it gives more realistic shadows, but using GI drastically reduces the speed of the Cineware plug-in.
This can be offset by the inclusion of the new Team Render settings within Cinema 4D to allow easy rendering across multiple computers on your network; it is therefore quicker and easier to use Cinema 4D to manage the render in this case. However, there are still numerous ways that Cineware can be used: for example, for look development, as well as equally useful object matte creation.
08. Create a matte
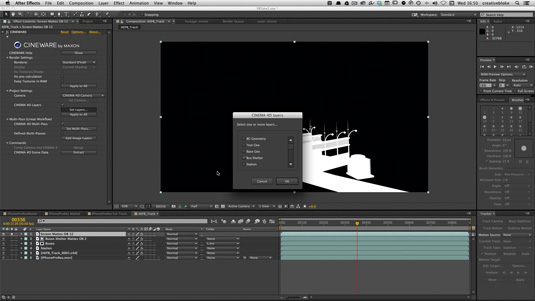
One of the more tedious processes in Cinema 4D is creating alpha mattes - not because the mattes in Cinema 4D aren't very good, but because when you set up an object buffer (the name Cinema 4D gives to an alpha matte) there wass never a good way of naming the
matte when it was exported.
Cineware fixes this and allows you a method of previewing your matte in After Effects before you start to render. This is a huge timesaver, especially when creating mattes for animation asses. To create a matte for the bus shelter, attach a compositing tag to the bus shelter and in the Object Buffer tag tick which number you want to use. To save Object Buffers in Cinema 4D, Multipass needs to be activated in the Render>Edit Render Settings dialog.
Cineware has direct access to the multipass controls once it has been activated and Enable multipass has been selected in the Cineware layers effects control in After Effects.
To add an object buffer to your multipass list, right-click on the multipass title in the render dialogue and select Object buffer. Make sure you have the relevant object buffer for the bus shelter chosen and rename the object buffer title.
09. Using Cineware to preview render passes
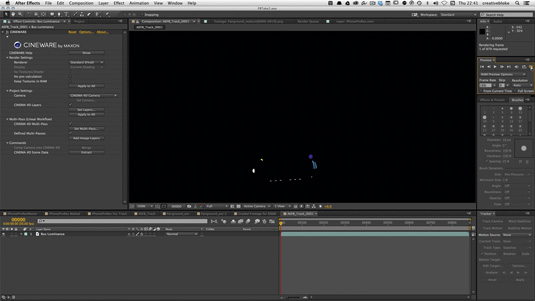
Using object buffers to create mattes also enables you to really start properly thinking about how you want your shot to look. This is much more straightforward to achieve in After Effects than it is in Cinema 4D, as you have the vast array of After Effects’ image plug-ins to hand, each of which can be used on a Cineware layer as if it were a rendered still.
Once Cineware has cached the Cinema 4D file into After Effects, you can separate out the individual passes that you want to use using the same multipass pass method that you used to create object buffers, and you can start to get an idea of which multipass layers will be important to you, which can make your render more efficient as you will only render the layers that you need.
10. Set up GI and render passes
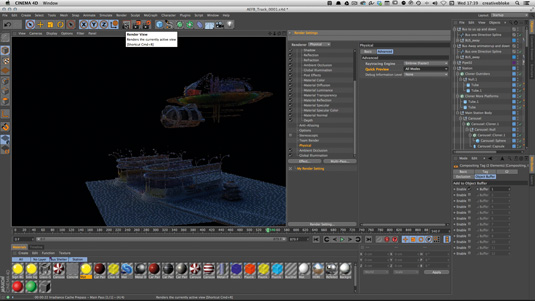
Once you have decided which render layers are needed, refine the GI settings. Do this by playing with the new presets, which can be found by adding the Global Illumination setting to your render settings in the Edit Render menu. Use the render preview window.
Make sure you get a GI look that balances realistic shadowing with retention of detail and lack of noise. Once you're happy with the render setting, save it at as high a bit depth as file space will allow, along with a selection of passes and the destination path for the render files.
11. Team Render setup
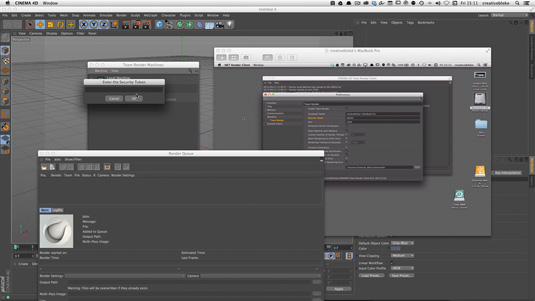
The next step is to render the scene in Cinema 4D. To do this, I use Team Render, which distributes the render tasks across as many machines as I have available, which in my case is three.
There are a couple of caveats when using Team Render: first of all, if you are using any plug-ins with Cinema 4D, which are being used by your Cinema 4D file, you need to ensure that these plug-ins are copied from your Cinema 4D file into each of the plug-in folders of the Team Render app on your other computers.
The other - more serious - thing to watch out for is that as we are using a Global illumination setting, the GI cache files are much larger than they would otherwise be and are created on each respective Team Render client machine.
To overcome this, ensure that the Team Render preference for each of the client machines are pointing to external large drives away from the main OS drives. If you don’t do this, your client machines can quickly fill up and slow down.
12. Checking your render progress
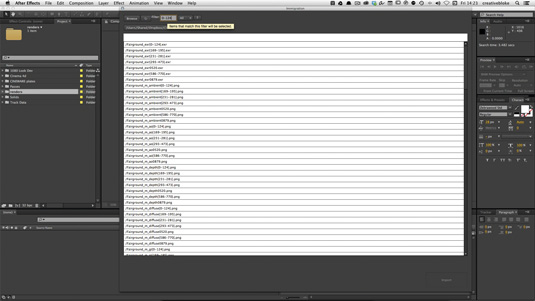
Set the render off, with all the associated GI settings. As I was rendering at full HD, it took a couple of days to render out everything. I had a couple of methods of watching progress aside from using the render queue.
If you render to Team Render Viewer, you can see every frame pop in as it comes in. It also allows you to spot the gaps, but there is a more robust method of viewing your progress using After Effects.
Import the render passes into After Effects using the Immigration plug-in Immigration works with render files from any application and can sort through a folder of render passes and organise them by filename and number.
Once the render passes have been loaded in AE, every time you reload them, the render updates with the correct number until it is full. By using AE you can see where the render gaps are as Team Render splits the renders out to the clients at random points throughout the timeline, so if there’s a specific part you want in a hurry, you can focus your resources on rendering the frames you need.
13. Colour correcting for distance
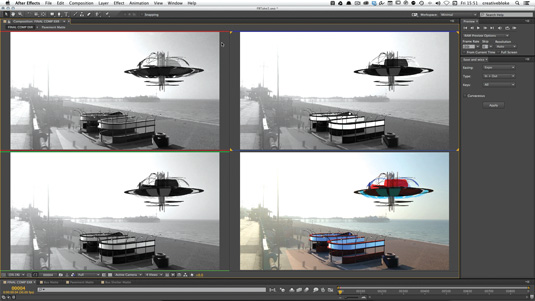
Once you have completed the renders, you can get on with the business of compositing. While Cineware is intended to be part of this process (and ideally replace the Cinema 4D render process), the advantages that Team Render offers mean that Cineware should be seen as an aid for visual effects workflows rather than a replacement for the traditional workflow.
Start to add depth to your composition once you've separated out the saucer using an After Effects Mask. Add the Levels filter to the render layer and set After Effects to show all three colour channels (Red, Green and Blue) along with the full colour image, and work through each colour channel with the Levels effects until the brightness and contrast of the saucer matches that of the pier in the backplate. Repeat this process for the bus and the shelter.
14. Adding lens blur
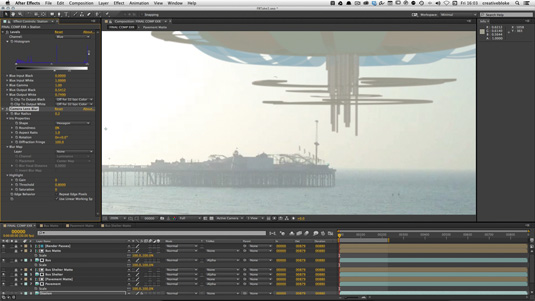
To enhance the level of depth you've created with the levels adjustment on the modelled elements, use a small amount of Lens Blur to remove the 'perfectness' of the rendered elements, to bring your CG image in line with the resolution of the iPhone camera.
While it feels wrong to diminish the detail that you spent so long modelling, this is what creating realistic VFX is all about: your CG needs to sit convincingly in the backplate.
15. Refining the look and shadows
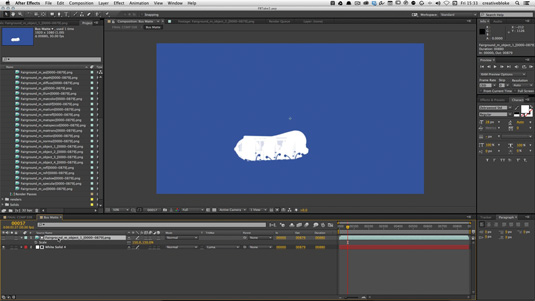
Next, work on refining the shadows of the bus shelter using mattes that you rendered and set up in Cineware, alongside the masks. To apply the mattes to a layer in After Effects, create a composition for each matte, which has the rendered matte used as a Luma TrkMat above a white solid.
This enables you to use the choke range of filters in AE to increase or decrease the edge of the matte, which is useful for compensating for the ragged edge of a render. Use the pre-composed matte as a TrkMat set to Alpha above the render layer you want to work with in your After Effects Composition.
16. Add animated text
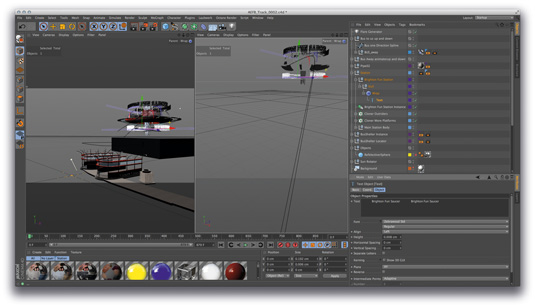
Add custom elements, such as illuminated wrapped text, and enhance the reflections on the bus to make it more distinctive. The text can be added either in Cinema 4D or After Effects. To make the text for the saucer, create a type object in C4D and use a wrap modifier to make it cylindrical; create an instance of this group of objects and place it above the saucer, and animate both rotating slowly.
Set this up as a simple render in C4D (with no GI) and only render the luminous channel after applying a luminous texture to the text. Then use your layers control to render only the text layers and bring this into AE. Now use the layer controls in AE to create a semi-transparent layer.
17. Finishing the shot with plug-ins
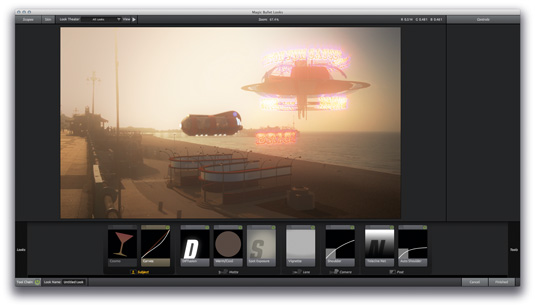
All the elements we want are now in the shot. To finish the shot and give it a bit of extra pop, you could use some third-party After Effects plug-ins. In this final stage, I add a lens flare by placing a light at the approximate location of the sun and use Video CoPilot's Optical flares
to create a 3D flare, which does a good job of covering the initial flare problems I had in the original plate, and makes them look intentional.
For the final colour grade, I use Magic Bullet Looks to give the shot a more 'sunrise' look and feel. As you can see, Cineware does not replace the render time working between Cinema 4D and After Effects, it offers up a multitude of ways of streamlining your VFX workflow, and has greatly enhanced the efficiency of the way these two great applications work together for creating VFX. So no matter how big or small your budget, now you can create successful VFX scenes.
Words: Mike Griggs
Mike Griggs is a freelance concept 3D, VFX and mograph artist working across TV, exhibition and digital design. This article originally appeared in 3D World issue 179.

The Creative Bloq team is made up of a group of art and design enthusiasts, and has changed and evolved since Creative Bloq began back in 2012. The current website team consists of eight full-time members of staff: Editor Georgia Coggan, Deputy Editor Rosie Hilder, Ecommerce Editor Beren Neale, Senior News Editor Daniel Piper, Editor, Digital Art and 3D Ian Dean, Tech Reviews Editor Erlingur Einarsson, Ecommerce Writer Beth Nicholls and Staff Writer Natalie Fear, as well as a roster of freelancers from around the world. The ImagineFX magazine team also pitch in, ensuring that content from leading digital art publication ImagineFX is represented on Creative Bloq.
