How to seamlessly integrate CG and live action
VFX supervisor Gavin Greenwalt on the new tools that can help you quickly take shots from pre-production to delivery.
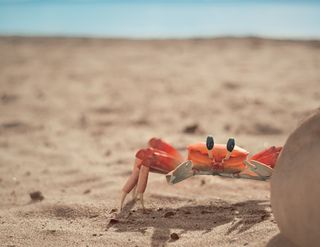
The core of great VFX remains the same, but new tools are constantly changing how we work. The new ones I've added to my belt recently are photogrammetry and real-time raytracing. Photogrammetry, the process of building 3D elements from photography, has been around since the 1990s, but Autodesk's 123D makes it free, easy to use and, most importantly, reliable.
Similarly, while real-time raytracing has been a dream since the dawn of computer visualisation, Imagination's Caustic Visualizer for Maya delivers on the promise of WYSIWYG interactivity.
This tutorial looks at the creative and technical choices I made during a shoot to deliver an animated crab for Crab Panther, a 30-second spot for Jewelers Mutual Insurance Company. We worked closely with its agency Laughlin Constable, which provided the concept and art direction, and its creative team was on site throughout production. The techniques used in this tutorial should be applicable to any major 3D and compositing applications.
01. Pre-production tasks
As a VFX supervisor you have two complementary jobs. During pre-production, the first of these is to devise a plan of action that will deliver the best possible effect within the budget and schedule. Although discussions will undoubtedly begin in earnest with the storytelling.
During pre-production the producer and director depend on you to give them accurate estimates of time and cost for each effect. It's their job to make their budget and schedule add up, but they're looking to you for ways to deliver the vision with minimal compromise.
Finding creative ways to crack the time/quality/price paradox is the name of the game. There are many effects that appear difficult but are pretty easy - and vice versa - to those who aren't visual effects experts. Helping the production team to work out which is which to get the most bang for their buck is key.
02. Ensure efficiency

When you arrive on set, the director and DP should be familiar with the plan of action; your job is to be an advocate for the artists 'back home'. This mostly consists of collecting the information and reference needed for the artists and making small tweaks on set that can save hours down the road in post.
03. Collect details on the set
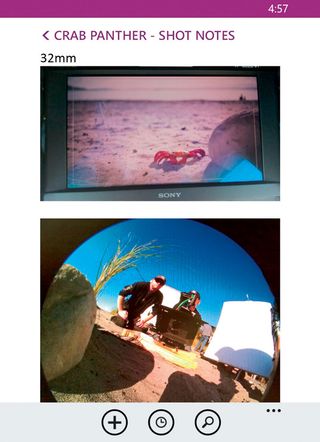
Once you are on set, there are three really important pieces of information you need to achieve for live action integration; camera statistics (position, lens and sensor size), set reference and lighting reference.
I've found that the application OneNote is very useful, and I have it on my phone. I will take a photo of the field monitor for framing reference and then enter the key information such as camera height, camera type, resolution and focal length for each camera setup.
04. Survey and measure
It can be very difficult or even impossible to accurately survey a natural location. Laser scanning sets with Lidar is becoming more affordable, but it remains expensive and labour intensive.
Instead I have started using Autodesk's 123D as a cost-effective reference tool where I need to carry out highly detailed set surveying. 123D generates a full 3D mesh from nothing more than a series of photos taken around a set or object.
05. Photograph the scene
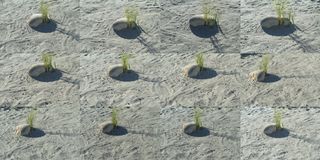
To capture a scene, take a series of shots in an imaginary circle around the subject. I recommend a focal length of about 40mm (full frame equivalent) and, if you are using a camera with a large sensor, such as a DSLR, keep your aperture high so that everything is in focus.
If possible, try to put the background plate camera at noon in your circle. If the set is very dark I also recommend shooting each shot with and without flash from the same position. 123D is impressive but it's not magic - it requires detail in order to triangulate each pixel, so if you can't see the shape in the photo, the software won't be able to either.
06. Capture lighting reference
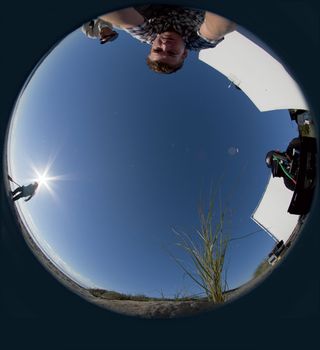
Now that we've logged the camera info and captured the set geometry, we need to move on to lighting reference. I recommend using a fish-eye lens and a panohead to capture a number of HDR spheres from the location.
In this instance, I could disrupt the sand between shots and with a clear bluse sky, our 123D geometry will be supplying the lighting reference, but even so, always shoot some behind-the-scenes-style photos for your artists. There's no such thing as too much reference.
07. Shoot clean plates
The last thing I recommend capturing when possible is a clean plate. A clean plate is a photo without any actors, foreground elements or atmosphere. For this crab shot I requested two clean plates from the DP in the pre-production meeting.
Since the depth of field in these shots was going to be very shallow, I requested one clean plate with the lens stopped way down in order to have a fully in-focus plate for ensuring the 3D camera was aligned, as well as a source for texture extraction camera projection.
08. Rack the focus
As well as the plate mentioned in Step 7, I also requested a second plate where the camera assistant would rack the focus from the foreground to background in order to give the compositor the ability to refocus the plate in post if the camera assistant was a little off their marks. Armed with your background footage, clean plates, camera information and set/lighting reference, it's time bring it all together in 3D.
09. Create background (BG) geometry
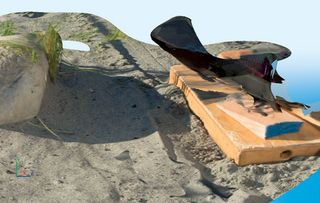
Load your on-set photos into 123D. Be sure to include your deep-focus clean plate from the hero camera in the photos. It'll take a few minutes to process in the cloud, but when it's done you should have a 3D scene of the set in front of the camera and even your background plate camera solved all in one step.
10. Generate the BG geometry
Once you've successfully generated your scene and solved your cameras, export the scene as an .fbx. When you export an .fbx out of 123D, the texture it generates will probably differ in colour and contrast from the background plate. It helps with the lighting to open the texture in Photoshop and match the colour to the BG plate.
11. Check Maya's material settings
You need to change some settings in Maya. To enable the Pro Materials run the MEL command: optionVar -iv "MIP_SHD_EXPOSE" 1; also run: select -r miDefaultOptions; in order to tweak Maya's IBL defaults.
With the miDefaultOptions object in the Attribute Editor, open String Options and set Environment Lighting Mode to Light. At this point, import your animated 3D character and the .fbx from 123D into the scene. Select the 123D scene and be sure to enable Double Sided in its render stats.
12. Set up your camera

Now switch the perspective to the camera. Choose the Visualizer view and, to add the BG plate, select the camera and add a mip_rayswitch_environment shader to the Environment Shader slot. In the shader's Background Map slot add a mip_cameramap, and in the cameramap's Map slot you can now add a mental ray Texture node.
13. Check your camera match
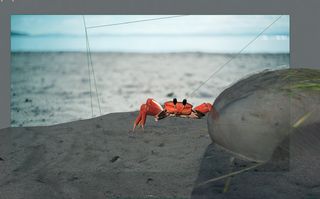
123D should have set the camera parameters, but you may need to tweak the camera to match the background using on-set data, and tweak the camera with the ground opacity at 50 per cent until the textured geometry and BG plate match.
If it's a moving shot or 123D doesn't work at all, an application like NukeX, PFTrack, Boujou or After Effects may be needed. With the mesh generated in 123D you can pull out accurate 3D survey points for your matchmoving software.
14. Match the sun
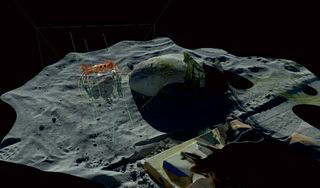
It's time to start matching lighting. Since this is an outdoor daylight scene, we'll create a directional light to emulate the sun. Instead of trying to guess exactly where the sun was relative to the camera, we're able to perfectly match the inclination and direction of the sun.
To match the sun's position with Visualizer we're going to just 'trace' the shadows in the viewport. Rotate the directional light until the shadow in the viewport matches the shadows in the 123D texture.
15. Add the sky light
To match the ambient lighting of the sky, use Maya's IBL. In the render settings dialog, select Visualizer as your renderer, and in the Indirect Lighting tab click the Create button for IBL. The sky was clear blue, so I set the IBL's colour source to Texture and pick a similar blue colour.
Under Render Stats uncheck Primary Visibility and enable Global Illumination. Now we're getting bounced light naturally from the sand, rock and other scene geometry without having to fake it with an array of lights or an HDR map. This automatically gives the CG object a physically accurate lighting solution.
16. Refining the lighting and shaders
Visualizer for Maya has a 'what you see is what you get' viewport. To apply the final polish and finish to your scene, set up the viewport so that you can see a facsimile of the final composite as well as being able to lay the groundwork for the final render layers.
17. Using Hypershade
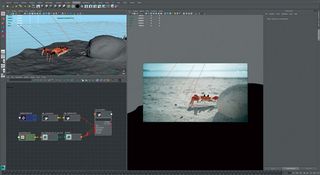
In Hypershade create a new mip_rayswitch material, which allows us to use different materials for what the camera sees and what GI or the reflection 'sees'.
In the eye slot choose mip_matteshadow - this is what the camera will see. Then within the matteshadow material, use a mip_cameramap for the background texture, choosing the background plate for the image.
18. Final adjustments
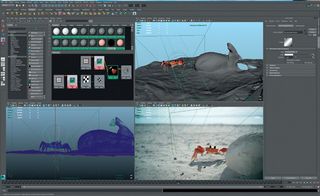
For the rest of the slots (Reflections, GI etc) we'll connect the Lambert shader from the 123D scene. Looking at the scene through the Visualizer viewport, we now have the crab casting a shadow on the background and proper occlusion from the foreground rock.
Using this near-final composite view you can tweak the lighting and shaders until you're happy with the image. Next, set up DOF to match the background plate in the viewport.
19. Setting up the render layers
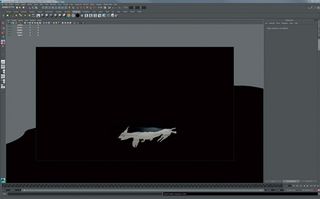
The final step in Maya is to set up our render layers for output. Create two new render layers by copying the master layer. Name one Beauty and the other Shadow.
In the Shadow layer select the Ground object, and in the Rayswitch node right-click on Eye Ray and choose Create Layer override. In the mip_MatteShadow material, add a layer override for the background map. Then right-click again and choose Break Connection. Create a layer override again on the Shadow's colour and set Shadow Colour to White.
20. The Shadow layer
Select the camera, go to the mip_rayswitch_environment shader and create an override on the BG shader. Select your CG object, open the Render tab in the Attribute Spreadsheet, then type 0 into the fi rst fi eld of the Primary Visibility column. You'll now just have white shadows on a black background.
21. The Beauty layer

In the Beauty layer, select the ground, break the eye shader and create a Lambert shader in its place. Set the Diffuse Colour to Black, and under Matte Opacity set the Matte Opacity Mode to Black Hole. Repeat the changes to the mip_rayswitch_ environment that you made in the Shadow layer to this layer as well. That's it for render layer setup - the next step is to set up your paths and hit Render.
22. Composite the render layers
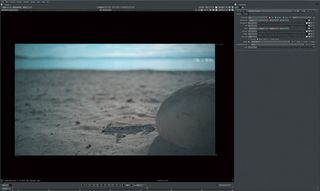
In Nuke, load up the background plate, the Beauty layer and the Shadow layer. Using the Shadow layer's red channel as a Luma Mask for a Grade Node, darken the plate to match the shadows that exist in the BG, then comp on the Beauty layer.
Take the clean plate that's in focus and cut out a tiny little corner of the foreground rock to defocus and place in front of the crab. By layering the rock on top as a tiny patch there will be no fringing between the crab and the rock, and we won't have to eat into the rock's matte to ensure there's no sand behind it.
Finally, hit Render and send it off to the colourist for the fi nal grade. Tools like 123D and Visualizer make it easier than ever to match the real world, but don't forget that ultimately it's art and you're an artist; reality is just a starting point, it's your job to improve upon it.
Words: Gavin Greenwalt
Gavin Greenwalt has been a VFX supervisor and senior artist for Straighface Studios in Seattle for seven years. This article originally appeared in 3D World issue 178.

Thank you for reading 5 articles this month* Join now for unlimited access
Enjoy your first month for just £1 / $1 / €1
*Read 5 free articles per month without a subscription

Join now for unlimited access
Try first month for just £1 / $1 / €1
Get the Creative Bloq Newsletter
Daily design news, reviews, how-tos and more, as picked by the editors.
The Creative Bloq team is made up of a group of design fans, and has changed and evolved since Creative Bloq began back in 2012. The current website team consists of eight full-time members of staff: Editor Georgia Coggan, Deputy Editor Rosie Hilder, Ecommerce Editor Beren Neale, Senior News Editor Daniel Piper, Editor, Digital Art and 3D Ian Dean, Tech Reviews Editor Erlingur Einarsson and Ecommerce Writer Beth Nicholls and Staff Writer Natalie Fear, as well as a roster of freelancers from around the world. The 3D World and ImagineFX magazine teams also pitch in, ensuring that content from 3D World and ImagineFX is represented on Creative Bloq.
