How to sculpt a rig-ready 3D creature
Lead modeller at Framestore Adam Dewhirst explains how to use retopology tools to create a character ready for rigging.
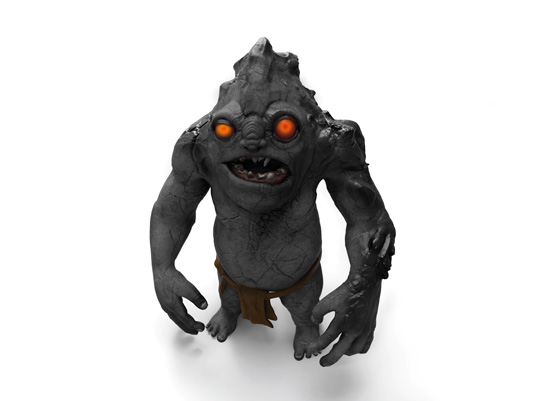
Creating a good base mesh is vital if you intend to animate your characters. In the past this would have been done painstakingly, polygon by polygon, in a 3D package like Maya or 3ds Max. However, with the recent addition of retopology tools to sculpting packages like Mudbox and ZBrush, it's become increasingly easier to simply retopologise your concept sculpt as part of the process of its creation.
This gives you a complete and usable model in as much time as it took to conceive: the benefits of this are enormous, as modellers need not to be confined by lack of technical skill and can be free to sculpt in a creative and limitless way.
Here, I'll walk through how to turn a loose 2D sketch into a fully functioning animation-ready model, using Mudbox's retopology tools and the new retopology tools in Maya 2014.
Article continues below01. Starting out and reference
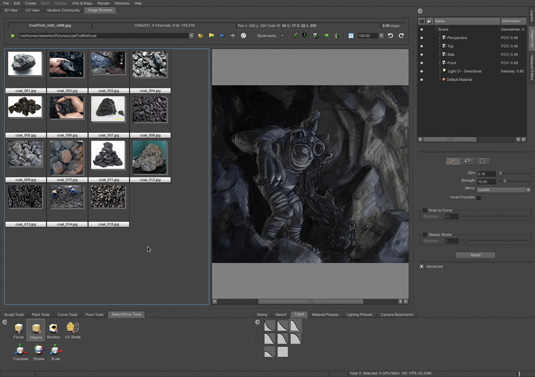
For this tutorial I’m using a concept by Dan Mason. I work with Dan at Framestore, so I got to talk through a few ideas first. The concept for this character was something dark and a little sad, a creature that lives in darkness.
I wanted something that could fit into a number of worlds - Lord of the Rings, Harry Potter, Narnia - so we decided on the idea of a Coal Troll, a being whose only existence was to gather and collect coal. Dan suggested that after some time he might start to look like the thing he collected. For this reason, my starting point was to collect reference of coal, rocks, caves and any creatures that I thought were relevant.
02. General shaping
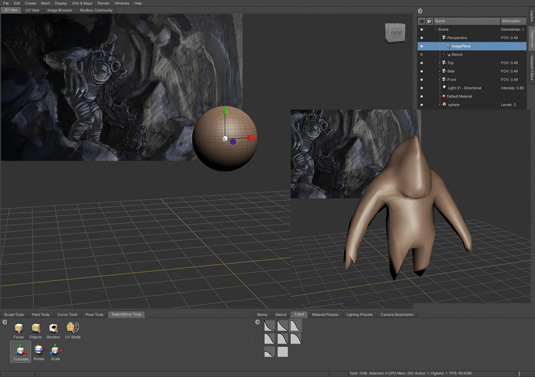
Start out with a sphere in Mudbox - normally I would start out with a human figure, but I'm keen to prove that this Coal Troll can be modelled entirely from a sphere.
Mudbox may not have DynaMesh to play with, but using the retopology toolset will allow us to increase the polygon spread as we go. Working in a similar way, start by using the Grab tool to pull out very basic limbs and a torso; this is the rough blocking.
Sign up to Creative Bloq's daily newsletter, which brings you the latest news and inspiration from the worlds of art, design and technology.
03. Add the clothing

The only part of the model we're not making from scratch in Mudbox is the loincloth - for this we use a simple cylinder in Maya as the belt, and extrude two cubes to make the hanging cloth. It's important to keep the geometry as basic as possible so we can refine the shape in Mudbox later on.
04. Retopologise
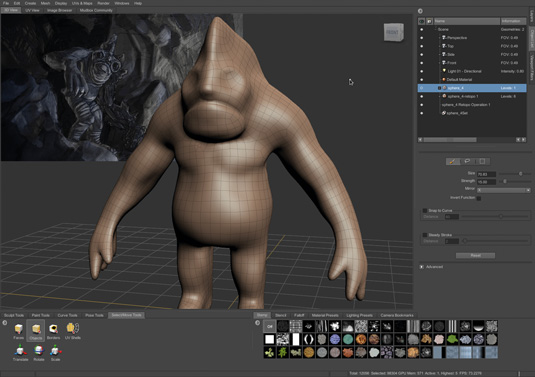
We don't want to spend too much time refining this, but we do need to step up a few subdivision levels early on and use the Wax brush (on a high-strength setting) to shape the sculpt a bit more. As we're going to need a better spread of polygons to continue, it's time to retopologise (go to Mesh>Retopologise>New Operation). We're only changing two things: Target Base Face Count up to 5000 (as it’s the whole figure) and Face Uniformity to 0.5.
05. Refining the shape
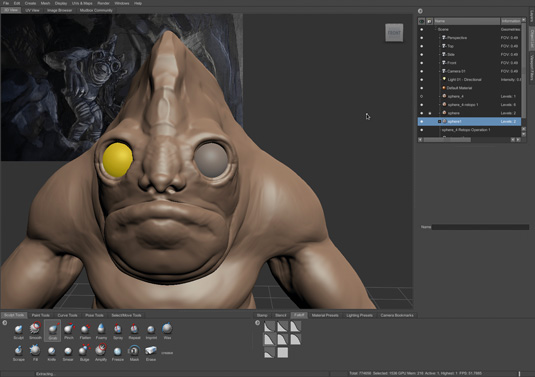
The topology at this stage isn't perfect, but as it's not going to be the
final mesh, it's enough to work with for now. Use the Wax brush to build up the muscle shapes and refine the figure, and next we’ll drop in two spheres for the eyes. To do this, go to Create>Mesh>Sphere. Duplicate the sphere, then go to Mesh>Flip Mesh>Around X.
06. Adding the mouth
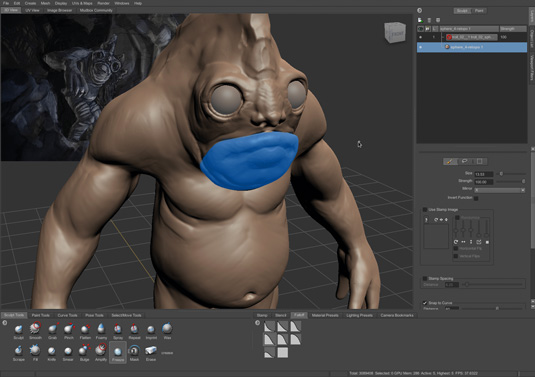
This character may need to open his mouth, so we want to model
in a mouth cavity just in case. I'm going to use the Freeze tool to mask the mouth out, and then go to Edit>Inverse Freeze. Now you can use the Grab tool to pull the jaw down.
07. Second retopology
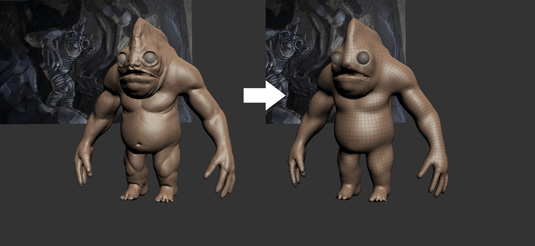
After further refining with the Wax and Grab tools, retopologise again, as we have a lot more surface area inside the mouth and also we’re going to need to start working up the other areas, such as the hands and the feet. Use the same retopology settings that we used the first time. Now we have a vastly superior mesh to the sphere we started with.
08. Adding teeth and gums
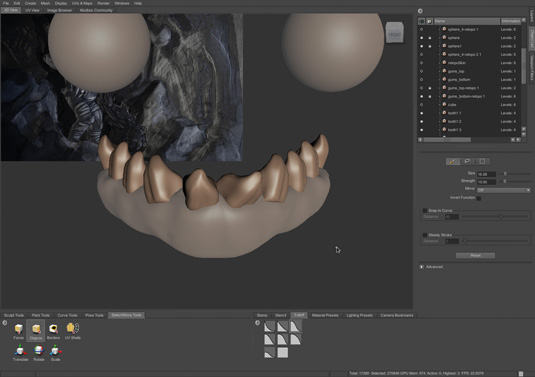
The gums are created from simple spheres, and then shaped using the Grab tool. It's a good idea to run a basic retopologise on this. To make the teeth, create a single tooth from a cube and duplicate it, laying it out with the Transform tool under the Select/Move tab. Use the Flatten tool to bash the teeth in so they start to look like lumps of coal. Use the Pinch tool to sharpen up the edges.
09. Final shaping of the hands
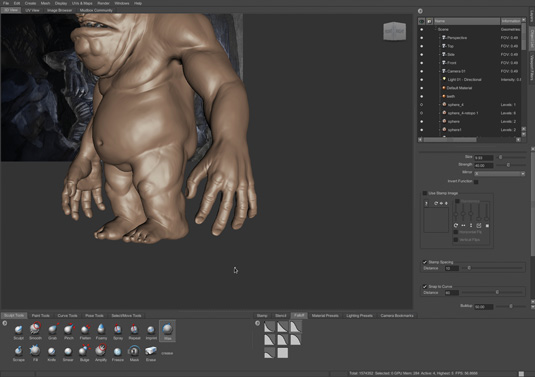
All the elements we need are now present, so it's time to refine the detail. This is where you want to give your model a bit more love, working up the hands, feet and so on by using good references from the internet or your own library.
We're also going to freeze everything except the area directly above the eyes, so that we can pull out some eyelids. Although they would be pulled back in the pose we’re modelling, we want them to be quite prominent for the basic bind pose in case the animation requires a more prominent blink.
10. Add guide curves for final retopology
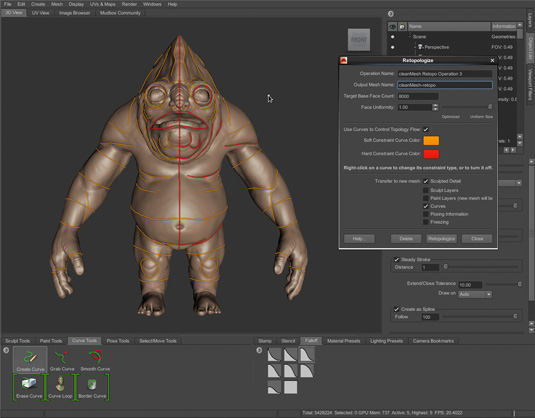
Now all the basic forms have been sculpted, we're ready to do the final retopology pass in Mudbox. For this, it's best to lay down some guide curves - the most vital is a loop around the centre line in X. To do this, go to Curve Tools>Curve Loop. Make sure Mirror Tool is turned off, Snap is turned on, and that Plane is set to X.
Click on the middle of your model, then use the Curve Loop tool to define areas around the arms, neck and legs. With the window open, right-click on the curves and define them as a soft or hard constraint: we want the centre line and the eye and mouth loops to be hard constraints, to ensure edges are there.
11. Maya clean-up
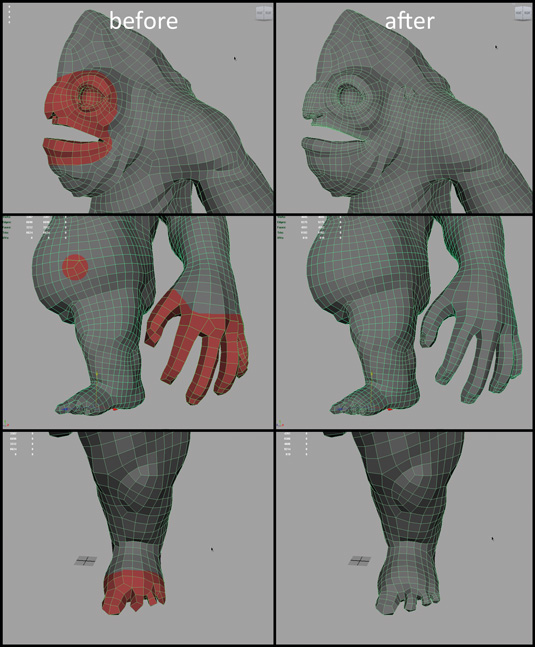
Knock the subdivision down to its lowest level and import the mesh into Maya to clean up a few errors. The main thing you want to do is delete half the mesh, duplicate and flip it so that it's symmetrical (symmetrical retopology tools are coming in the next release of Mudbox). There are a few areas here that need cleaning up.
Maya 2014's new topology tools allow you to set a Transform Constraint, which lets you import your high-res sculpt into Maya and use it as a mesh to snap your new topology to. You can set this up by turning on the new topology tools using the new icon next to the Attribute Editor icon.
12. Basic UVs in Maya
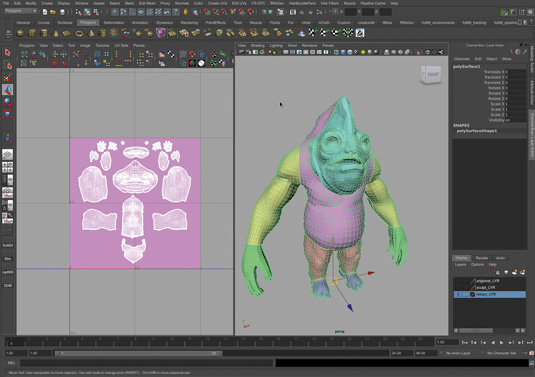
In order to deliver your ready-to-rig sculpt you will also need displacement maps from Mudbox, so we'll need to create some UVs. It's best to do this before bringing the model back into Mudbox. First divide the mesh up into sections; assign a colour to each section to identify them. These UVs are basic - a simple cylinder map in most cases. We want to create UV shells of each section.
13. Unwrap in ZBrush
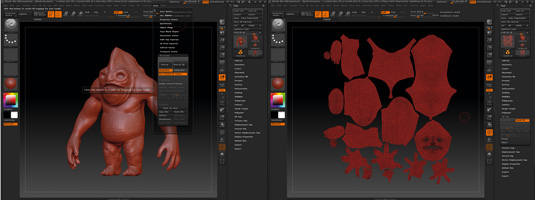
Import the (half) mesh into ZBrush as an .obj file. We're going to use the UV Master to unwrap the mesh using the existing UV shell as a guide - this will do a much better job of unwrapping the UVs than Maya’s Unfold option. Go to ZPlugin>UV Master, making sure that Use Existing UV Seams is on, and then hit Unwrap.
14. Transfer attributes in Mudbox
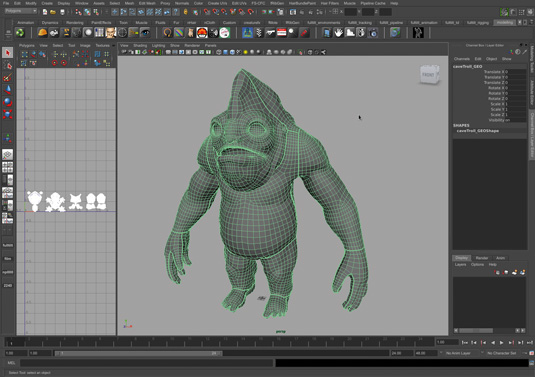
We now have a good base topology with UVs. Import that back
into the Mudbox scene. With our new base mesh selected, I’m going to run Transfer Attributes. Go to Mesh>Transfer Attributes and select your target model (new topology) and your source model (sculpt), then transfer the details over. You may have a few stray vertices to clean up afterwards.
15. Add the asymmetrical detail
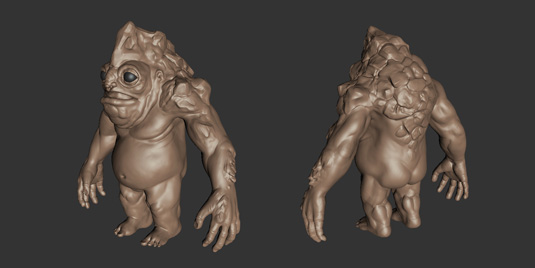
We want to add some asymmetrical details - as in the concept - down one side of his back and arm, which should make him look a bit more distinctive and give him character.
Create a new sculpt layer in Mudbox, and use the Wax tool again to build up some rocky surface detail. During the retopology phase, make sure to add some extra loops around the shoulder with this in mind, so you have plenty of surface area to play with.
16. The Detail pass
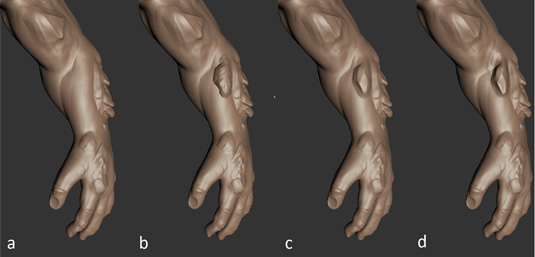
Next we want to add some detail down the arm, so create a new Sculpt layer and use a stamp, set to Randomise, to create a subtle crack down the rocky arm. Setting this detail on a layer means we can ramp it up or down depending on how much of an effect we want. Set your shader to a darker, more coal-like colour, so we can get a better feel for the character.
You can add individual layers for particularly prominent components, such as the crack down his shoulder and the facial detail - all this work should come out in the displacement map. To finish the Mudbox scene, set up some basic lights and shaders and bring all the elements together, then wrap up the sculpting and export the displacement maps.
17. Clean up and finish

Finally, import all the base meshes back into Mudbox - the nails, teeth, gums, and clothing, as well as the main body. We're going to run the Maya Cleanup tool to check for any errors; although most of these would be fixed when we retopologised, it's good to catch them now. We also need to group and name the model, and check all the normals are facing the right way.
I can't emphasise enough how important this final stage is: so many models I receive are not clean. You should always clean and check your models before you deliver them. And that’s it, we're finished! In the future you may want to create some nice colour maps, but what we have created in a short amount of time is a named, UVed, well-topologised mesh that’s ready for animation - and we have done the majority of that work in Mudbox!
Words: Adam Dewhirst
Adam Dewhirst is a lead modeller at Framestore's film VFX branch in London. He has worked in the industry for almost ten years for studios like Cinesite, Double Negative, MPC and Passion Pictures. His film work includes The Golden Compass, The Dark Knight and World War Z. This article originally appeared in 3D World issue 179.

The Creative Bloq team is made up of a group of art and design enthusiasts, and has changed and evolved since Creative Bloq began back in 2012. The current website team consists of eight full-time members of staff: Editor Georgia Coggan, Deputy Editor Rosie Hilder, Ecommerce Editor Beren Neale, Senior News Editor Daniel Piper, Editor, Digital Art and 3D Ian Dean, Tech Reviews Editor Erlingur Einarsson, Ecommerce Writer Beth Nicholls and Staff Writer Natalie Fear, as well as a roster of freelancers from around the world. The ImagineFX magazine team also pitch in, ensuring that content from leading digital art publication ImagineFX is represented on Creative Bloq.
