How to create a realistic liquid-metal effect
Discover how to create lifelike liquid metals in Cinema 4D with these insightful tips.

Before diving in to this Cinema 4D tutorial, I would begin by finding images of melted metal, liquid spills and drips of paint for reference – it depends how you want your drips of metal to look and how thick/thin you want them. I just grabbed some images from Google and Shutterstock with liquid splashes in interesting shapes.
From there I took each one into Illustrator and drew around the outline of the splashes using the Pen tool. Then I saved them as Illustrator 8 files and imported the outlines into Cinema 4D. You can just as easily use your splash images as a back-plate in C4D, and use the Pen tool within C4D itself to create your outline – it's purely down to whatever you find easiest!
Once you have your outline in C4D, you just want to extrude it and pop a cap onto the front face. I then brought this extruded shaped into ZBrush to start sculpting into it (again if you feel more comfortable sculpting straight in C4D, then you can do that!).
I found the Inflate tool was really great for this project; I used it to create a thick inflated edge around the lip of the metal so it sat on top of the surface it was on nicely.
Begin by finding images of melted metal, liquid spills and drips of paint for reference
You can get some great highlight detail here too once everything is all textured and lit. Repeat this process for each spill or you can take a few at a time if they sit well together in a group.
You can continue to sculpt into your meshes within C4D until you're happy with the results. I also found the Soft Selection tool was a great help to tweak the shapes of the spills. Select Vertices selection mode and tweak the Radius and Strength of the Soft Selection tool to effortlessly change the shape of your model whilst still maintaining your smooth sculpted mesh.
Once you've finished sculpting, add lights and textures to your scene. You can use the preset Car Paint material within C4D (it's a great starting point for your liquid metal texture), or you can create one from scratch.
Add some noise into the Reflectance channel to add some discrepancy to your highlights. Try a few interesting HDR images and several sources of lights to really help show movement across the liquid, and show the thickness of the melted metal.
01. Find reference imagery
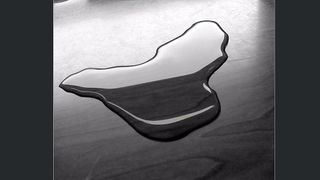
The first thing to do is an internet search to find reference images for liquid metal – try searching for mercury metal, paint splashes and spilled liquid. Try to get a selection of natural, interesting shapes and sizes. Bring these images into Cinema 4D or Illustrator and create a library of splash outlines ready for you to extrude in 3D.
02. Let the sculpting begin
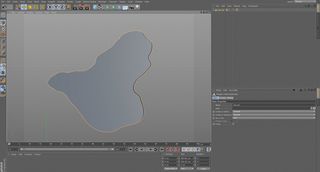
In C4D, you want to extrude each group of outlines and add a cap onto the front of each mesh. You then subdivide and start sculpting within C4D or ZBrush. Use the Inflate and Smooth brushes to create the most organic shapes. Experiment with how thick or thin you want your pools of metal to be – keep looking at your reference images to check it's looking real.
03. Tweak the positions
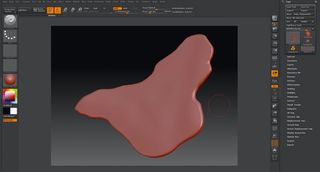
Once all melted metal meshes have been sculpted, place them onto the surface you want them sitting on. If any edges aren't sitting the way you want, select the vertices and use the Soft Selection tool to pull the edges onto the floor or to tweak the outlines of the spills. This method gives you a lot of control whilst still maintaining your smooth sculpted mesh.
04. Finishing touches
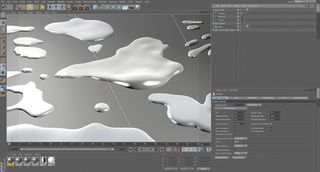
Once you're happy with your models, introduce your metal material and start playing around with HDRs and various light setups to really show off the smooth curved edges of your melted metal pools and any thickness you've added. You want your metal to look as natural as possible, so the more hints of sculpted detail and noise within the reflectance the better!
This article was originally published in 3D World magazine issue 208. Buy it here.

Thank you for reading 5 articles this month* Join now for unlimited access
Enjoy your first month for just £1 / $1 / €1
*Read 5 free articles per month without a subscription

Join now for unlimited access
Try first month for just £1 / $1 / €1
Get the Creative Bloq Newsletter
Daily design news, reviews, how-tos and more, as picked by the editors.
