How to create neon typography in Cinema 4D
Audiovisual producer Christiano Piers explains how easy it is to produce a neon effect in Cinema 4D.

Working with neon lights in any 3D software demands special attention, especially when working with reflective materials.
Having said that, it's quite easy to produce a neon effect in Cinema 4D, and, as I will show you, if added to a good construction of splines and typography, and finished in Photoshop, you can get a very interesting look. It's important to observe the interaction between the real-life lights and the objects, so you can simulate the same effects on your material.
Cinema 4D has one of the friendliest interfaces on the market, so applying a neon light to a scene is simple. The material sets and the lights that illuminate the final scene will give a special touch to your project.
There are many great Cinema 4D tutorials around. In my example, I've created some text using a stylised font with the Text tool – unlike the other elements in the scene that were initially sketched in Illustrator and saved as Illustrator 8 – allowing you to create a series of elements to compose the final scene, and thereby saving you time.
With the .ai elements imported in Cinema 4D, connect the splines to the extruded objects. To get some volume you can adjust Caps within the Extrude tool.
The 70s typography was duplicated many times and interleaved between extrude and sweep to create volume and rounded contours, using a circle inside the sweep within the text to generate neon tubes on the typography shape.

Change the caps to get different shapes and use materials with vibrant, reflective and specular colours. Use some material on the lamps and the tube around the 70s with the Luminance on.
Light the scene using a three point light setup: Key light, Fill light, Rim light. Try different positions or use more than three points until you get the result you wish.
When rendering, use the Standard setup with Ambient Occlusion and Global Illumination. Once the render is finished, take it to Photoshop and finish the composition with a few colour corrections to improve the glow.
01. Creating the typography
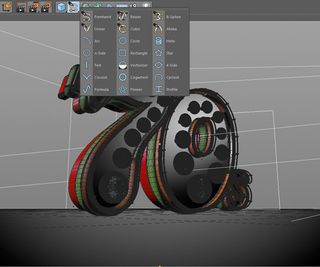
In Cinema 4D select Text on the top tool bar. Choose the size and style of the font, then type the text in the available space. The text will appear automatically on the main screen.
02. Get the neon effect
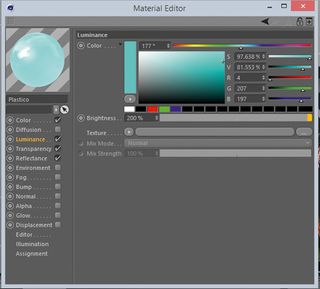
Go to Materials>New Material. Click on the material, activate the Luminance and set the Brigthness between 200 per cent and 600 per cent. Adjust the cursor for the colour you wish, viewed in the preview window.
On the material, go to Transparency and make the object 60 per cent translucent and 30 per cent reflective. Enable the Reflectance option.
03. Lighting the scene

Go to the menu and add three lights to the scene. Using the three-point-light technique, set the lights. When setting up the lights, go to Type>Area to adjust the Intensity values to get the result you wish.
You can use another fill light, adjusting the parameters by clicking Shadow>Shadow Maps (soft) to diffuse the hard aspect generated from the other points of light.
04. Render Setup
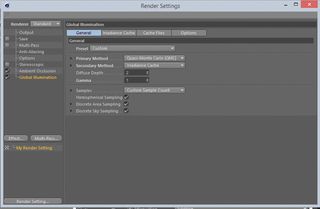
Use Ambient Occlusion and Global Illumination with the standard setup. Make a preview to check the light positions. Move the lights closer or further away from the typography to get the results you want.
Once the render is finished, open it in Photoshop and finish with some curve layers to highlight the colours and the glow.
Words: Christiano Piers
Christiano Piers has been an audiovisual producer for nine years specialising in video editing, motion design and video direction. See his work at here.
Liked this? Read these!

Thank you for reading 5 articles this month* Join now for unlimited access
Enjoy your first month for just £1 / $1 / €1
*Read 5 free articles per month without a subscription

Join now for unlimited access
Try first month for just £1 / $1 / €1
Get the Creative Bloq Newsletter
Daily design news, reviews, how-tos and more, as picked by the editors.
The Creative Bloq team is made up of a group of design fans, and has changed and evolved since Creative Bloq began back in 2012. The current website team consists of eight full-time members of staff: Editor Georgia Coggan, Deputy Editor Rosie Hilder, Ecommerce Editor Beren Neale, Senior News Editor Daniel Piper, Editor, Digital Art and 3D Ian Dean, Tech Reviews Editor Erlingur Einarsson and Ecommerce Writer Beth Nicholls and Staff Writer Natalie Fear, as well as a roster of freelancers from around the world. The 3D World and ImagineFX magazine teams also pitch in, ensuring that content from 3D World and ImagineFX is represented on Creative Bloq.
