How to create a creature for the big screen
3D artist Tyler Bolyard reveals how to model a creature like Louis from Disney’s The Princess and the Frog.
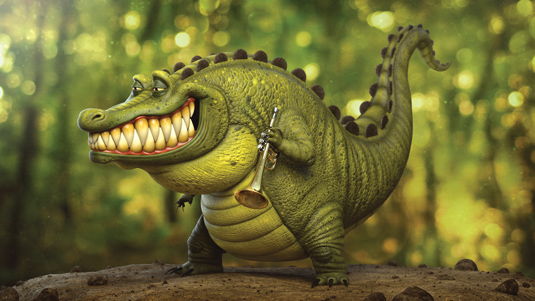
My typical workflow when starting a piece is to begin in ZBrush and start sculpting right away. With tools like Dynamesh, it's so easy to just jump right in and start blocking out a character relatively quickly. Let's get going...
01. Blocking out the basic model
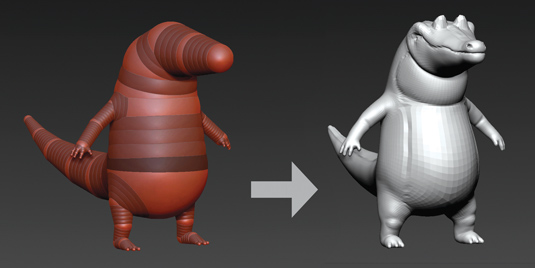
There are multiple ways to begin modelling by using base meshes, box modelling and so on, but if getting to the sculpting stage as quickly
as possible is the order of the day, use ZSpheres.
Try to think of ZSpheres like an armature in traditional clay sculpting, and keep it simple. For more freedom during the sculpting process, turn your adaptive skin mesh into a Dynamesh, since it will be retopologised anyway.
02. Sculpting primary forms
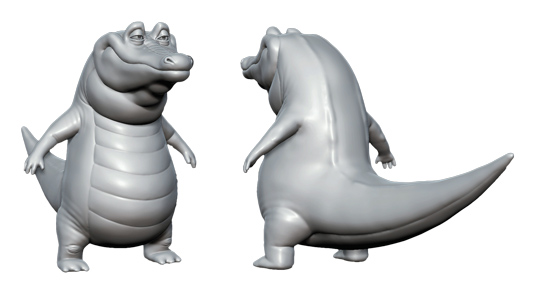
Next dive into the sculpting and use a combination of the Move, Standard and Clay Buildup brushes to establish the model's main forms. It's best to concentrate on the big overall forms first and work your way down to the details last.
Keeping the topology as low as possible, for as long as you can, will help give you clean forms and eliminate lumpy geometry.
03. Drawing new topology
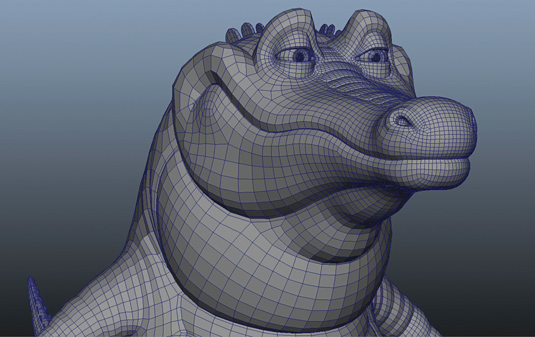
Once all of the main features of the character are blocked out, take it into Maya for retopology within NEX. This step can be quite tedious and boring, but if you want a character with nice topology and the ability to be rigged and animated it’s worth it.
If you're not confident with organic topology, it's best to use reference to ensure your mesh has proper edge flow.
Get the Creative Bloq Newsletter
Daily design news, reviews, how-tos and more, as picked by the editors.
04. Laying out the UVs
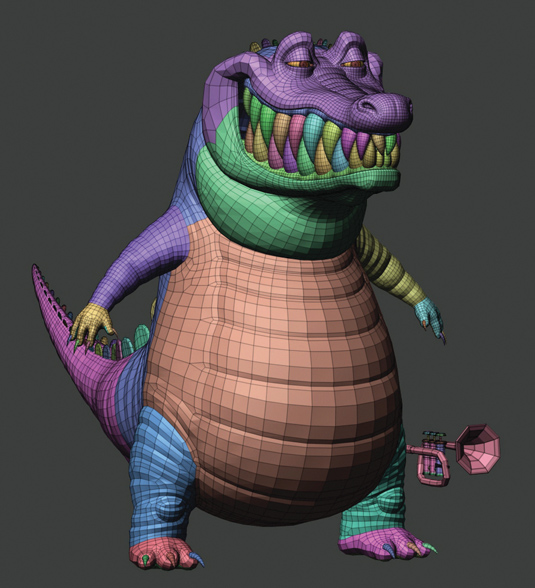
Many programs have algorithms for laying out UVs in organic models, but we'll use ZBrush's UV Master in conjunction with Maya. Planar project the entire character in Maya and separate the UV islands, choosing where you want the main seams to be.
Take the mesh into ZBrush and Auto Polygroup by UVs, then use UV Master to attract the rest of the seams, and unwrap.
05. Project and detail sculpting
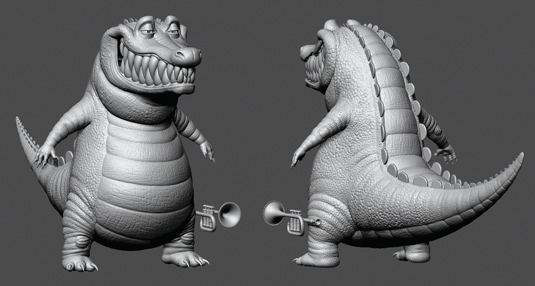
Once the model is retopologised and the UVs are set, bring my new mesh into ZBrush and use Project All to get the sculpted forms onto the new topology. You'll often need to mask out certain areas - like the mouth and eye bags - to protect the new topology.
Then go to town sculpting all the fun little scale and wrinkle details, using alphas as a base and sculpting into them until you’re satisfied with the results.
06. Painting texture maps
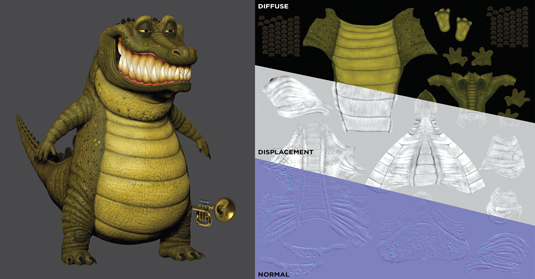
When texturing stylised characters it's often best to paint the textures directly in ZBrush using Polypaint. It’s good to stay in one program, and the brushes and masking features offer a lot of versatility. Use the Cavity Mask feature extensively in this project to give the scales and wrinkles as much depth as possible.
07. Creating the pose
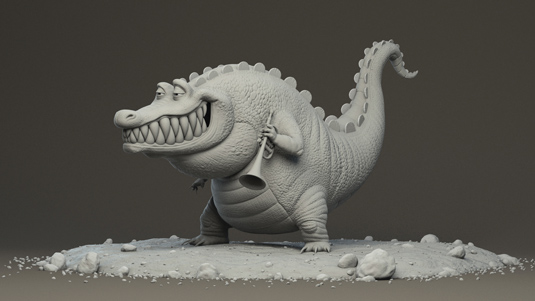
Transpose Master is great for posing characters, but there can be some stretching when deforming a mesh. To get around this, you'll often have to resculpt and repaint certain areas after posing.
08. Lighting the scene
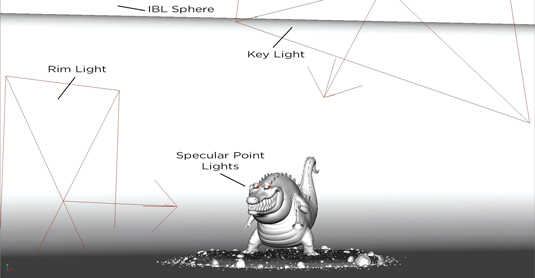
When lighting a scene it's best to start off with one shader for everything, because it enables you to see how the lights are affecting the model void of materials and textures. Keep the lighting simple and almost always start off with a dome light HDRI for GI.
From there add in key, rim and fill lights to make the character pop out from the background. A nice trick for achieving believable eyes in characters is to light link point lights to the eye geometry to get nice specular highlights.
09. Setting up shaders
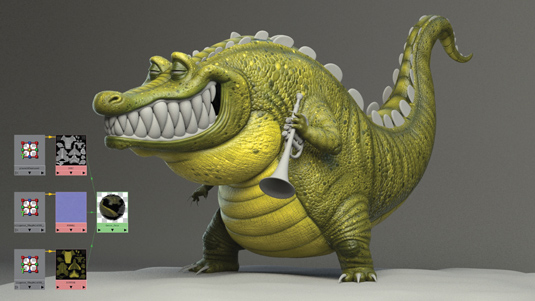
V-Ray offers a variety of physically accurate material attributes to achieve very realistic results within your renders. When shading characters it's best to use the V-Ray SSS2 with varied settings for skin, gums, teeth and eyes.
For all other objects, use the standard V-Ray material and tweak the IOR (Index of Refraction), reflection and refraction settings to achieve the results you are aiming for. When beginning shading, it's best to do so without texture maps as it allows you to see how the material is truly behaving and is easier to dial in the correct attributes.
10. Rendering and compositing
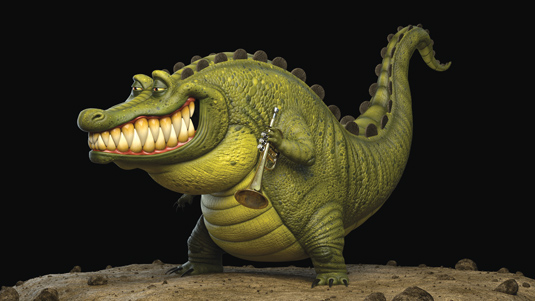
When doing personal work don't get too caught up in render passes; instead you should try to get the image as close as you can in the render and then use compositing for minor tweaks and colour adjustments. The main passes to use are Beauty, Ambient Occlusion and ZDepth - it's often best to keep it as simple as that.
Always work in a linear fashion and render your passes out as 32-bit .exr files. For stills use Photoshop for compositing; it doesn’t allow you to edit .exr files so use Nuke to convert your .exr images to .tif format
Words: Tyler Bolyard
Having graduated from Gnomon School, where he specialised in modelling and texturing, Tyler Bolyard is now freelancing for Gentle Giant Studios in Burbank, California. This article originally appeared in 3D World issue 178.

Thank you for reading 5 articles this month* Join now for unlimited access
Enjoy your first month for just £1 / $1 / €1
*Read 5 free articles per month without a subscription

Join now for unlimited access
Try first month for just £1 / $1 / €1

The Creative Bloq team is made up of a group of art and design enthusiasts, and has changed and evolved since Creative Bloq began back in 2012. The current website team consists of eight full-time members of staff: Editor Georgia Coggan, Deputy Editor Rosie Hilder, Ecommerce Editor Beren Neale, Senior News Editor Daniel Piper, Editor, Digital Art and 3D Ian Dean, Tech Reviews Editor Erlingur Einarsson, Ecommerce Writer Beth Nicholls and Staff Writer Natalie Fear, as well as a roster of freelancers from around the world. The ImagineFX magazine team also pitch in, ensuring that content from leading digital art publication ImagineFX is represented on Creative Bloq.
