How to create a 3D leak effect
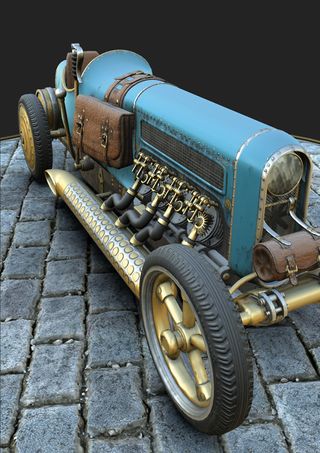
Technical artist Nicolas Wirrmann looks at how to make fluid leaks with Substance Designer’s mesh data baking tools.

Texturing a 3D object most of the time consists of adding subtle details that would have been produced naturally by nature and the passing of time. Painting such details by hand is a time-consuming task and texture artists commonly use a variety of tools to help them with this process: ambient occlusion maps to simulate dirt accumulation, curvature maps to determine convex/concave areas, and so on.
These maps are generally extracted from the geometry, and used as masks in the authoring tool when creating the texture. But there are still some effects that are difficult to achieve by hand, especially because of the UV orientation. One is directional leaks of fluids, such as oil or water.
Substance Designer from Allegorithmic is mainly known as a texture compositing tool, but it also offers mesh data baking tools allowing the user to compute ambient occlusion, curvature, world space normals, position and many more maps. In order to create a leaking effect, we will first need the position map, and then we'll use one of the filters from the library.
01. Bake the position map

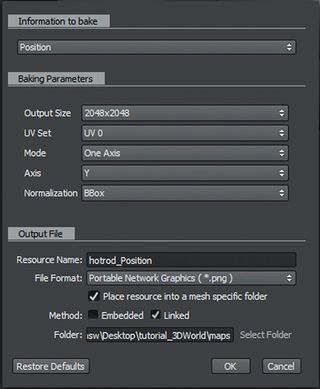
Link your UV mapped object (.obj or .fbx) in a new package, right- click on the mesh resource and select Bake Model Information. In the baking window, select Position as the information to bake.
Change the Mode to One Axis then select the world axis along which the leak will be oriented. Change Output File Format to .png, and a new bitmap is added to your package. The position map returns a greyscale value corresponding to the geometry position in object space.
02. Create the leak effect

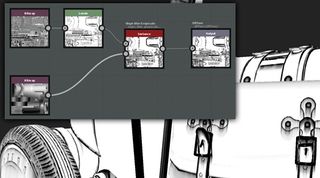
Create a new graph (right-click on the package, then select New>Graph). Drag and drop the position map into the graph. Click on the node, change the colour mode to Grayscale and set the Output Format to 16 Bits Per Channel.
Drag and drop the Slope Blur Grayscale filter from the library (type 'slope' in the search field). Plug the position map into the second input and a dirt map into the first. In my case, I used a curvature map as leaks often come from small concave areas.
03. Final settings

Click on the Slope Blur node in your new graph and set the Samples parameter to 32 and the Mode to Min. Next, change the Intensity value in order to adjust the leak's length. That's pretty much it!
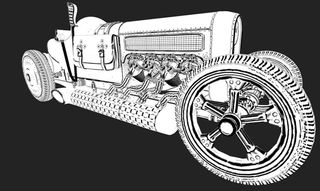
You can now play with the dirt map input, blending it with noises in order to randomly mask the leaks over the surface. You could also use this technique if you wanted to create a brushed metal aspect over a whole object without worrying about the orientation of the UVs.
Words: Nicolas Wirrman
Nicolas Wirrman is a technical artist fascinated by photorealism. He works for Allegorithmic as product designer on Substance products. This article originally appeared in 3D World issue 180.

Thank you for reading 5 articles this month* Join now for unlimited access
Enjoy your first month for just £1 / $1 / €1
*Read 5 free articles per month without a subscription

Join now for unlimited access
Try first month for just £1 / $1 / €1
Get the Creative Bloq Newsletter
Daily design news, reviews, how-tos and more, as picked by the editors.
The Creative Bloq team is made up of a group of design fans, and has changed and evolved since Creative Bloq began back in 2012. The current website team consists of eight full-time members of staff: Editor Georgia Coggan, Deputy Editor Rosie Hilder, Ecommerce Editor Beren Neale, Senior News Editor Daniel Piper, Editor, Digital Art and 3D Ian Dean, Tech Reviews Editor Erlingur Einarsson, Ecommerce Writer Beth Nicholls and Staff Writer Natalie Fear, as well as a roster of freelancers from around the world. The ImagineFX magazine team also pitch in, ensuring that content from leading digital art publication ImagineFX is represented on Creative Bloq.
