How to create beautiful cinematic environments
Veteran CG artist Seth Thompson shares his expert knowledge on how to create detailed environment scenes.
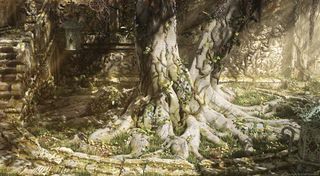
This article showcases my personal work entitled Unmystified, an art piece inspired by my love of the Uncharted video game series by Naughty Dog. I'm excited to share with you some of the tips and tricks I developed to create these images.
We'll look at using many handy ZBrush features here, including Panel Loops, Insert Multi Mesh and just why ray tracing renderers love 'Decimation Master' meshes. I'll also share my texturing process and how unified UVW mapping, procedural material mixing and camera projection can speed up your workflow.
01. Camera projection
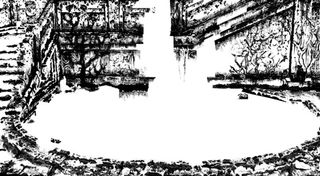
I begin with moss and dirt layered on top of stone objects with monochrome masks using the Camera Map Modifier in 3ds Max. Camera Projection mapping is a great and fast alternative to hand-painting texture maps in UVW space, allowing for quick iteration, enabling you to texture multiple assets simultaneously.
Traditionally trained artists will really enjoy Camera Projection as it is similar to painting onto a canvas.
02. Fast growth
I use the Ivy Generator plug-in created by Thomas Luft for procedural creation of vines and leaves. I substituted the default leaves with my very own uniquely modelled versions, and textured the meshes with real vine leaves that I had already scanned.
03. Composition
It's good to lay out a scene with models and shapes that direct your eye around the image. In this scene I intentionally positioned the stonework in a circular and angular layout to direct the viewer, as well as to frame the tree. Additionally, light and shadow are great tools for creating areas of focus.
04. Set dressing

Never forget the small details. In this scene leaves, clovers, grass, flowers, pebbles, broken pieces of stone, vines and various small plants were instanced throughout to help sell scale and create real-life details.
Get the Creative Bloq Newsletter
Daily design news, reviews, how-tos and more, as picked by the editors.
In addition to laying out models by hand I also used the 3ds Max Script called Ultimate Painter to help with distribution.
05. Many polys

V-Ray, along with most other ray tracing renderers, can easily process millions of polygons, which is a perfect reason to use ZBrush's Decimation Master tool. Access this from the ZPlugin drop-down menu to decimate your sculpt instead of extracting displacement maps from it.
Not only will your rendered mesh look identical to your sculpt file, but it will render faster than if displacement is calculated from an extracted displacement map at render time. Every stone sculpture here is a decimated mesh from ZBrush.
06. UVW mapping
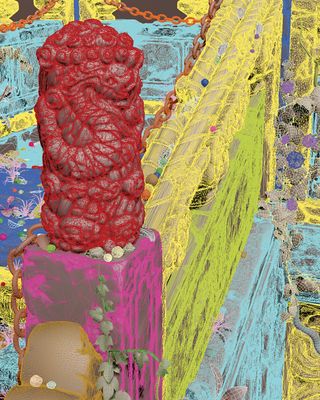
When using the decimated mesh workflow, be sure to UVW-map your mesh before sending it to ZBrush. UVW-mapping a large 100,000-polygon or higher decimated mesh is inefficient and very time-consuming. Also make sure to relax your UVWs after extracting your decimated mesh to avoid noticeable stretching with close-up renders.
07. Keep the flow
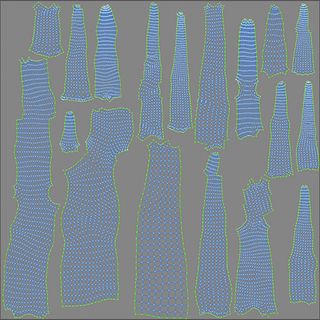
Arrange UVW maps to work in unison with texture maps. Vine textures and displacement maps can easily be created by laying out UVW maps vertically to follow the length and flow of the mesh, by using
a tileable map.
08. Insert Multi Mesh
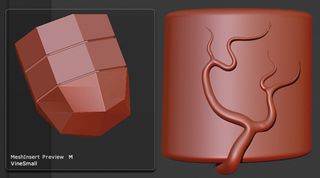
In addition to taking advantage of procedural vine creation with Ivy
Generator, I also manually created vines by making a custom Insert Multi Mesh vine brush in ZBrush.
You can learn more about how to use this in Pixologic’s ZClassroom, which is home to all manner of handy tutorials. It's a powerful feature and while it might take you some time to master it, you'll be glad you did in the long run as it will save you time and improve your workflow.
09. Stay to scale
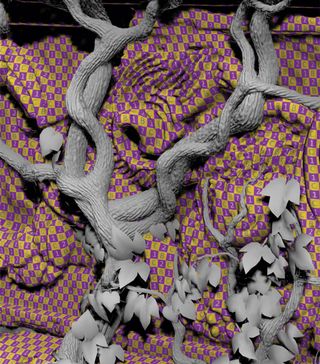
Unifying UVW scale for all assets sharing the same material type, combined with a tileable map workflow, can greatly improve the speed of your texturing process. As you can see here, all the stone meshes used in this scene have the same UVW scale.
10. Adding detail quickly
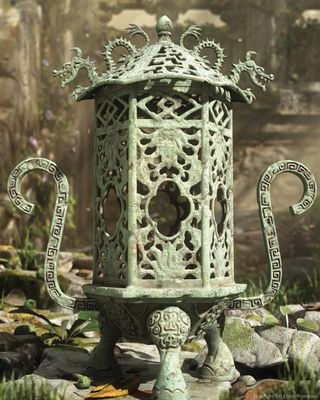
Use ZBrush's Panel Loops feature to create detailed latticework sculptures like this lantern, quickly and easily.
Words: Seth Thompson
Specialising in environment concepts, design and lighting, Seth Thompson lives in California working as a 3D environment and set supervisor for Blizzard Entertainment’s highly successful Cinematic team. This article originally appeared in 3D World issue 175.
Liked this? Read these!
- Discover what's next for Augmented Reality
- Help yourself to these free 3D models
- Check out these inspiring examples of 3D art

Thank you for reading 5 articles this month* Join now for unlimited access
Enjoy your first month for just £1 / $1 / €1
*Read 5 free articles per month without a subscription

Join now for unlimited access
Try first month for just £1 / $1 / €1
The Creative Bloq team is made up of a group of design fans, and has changed and evolved since Creative Bloq began back in 2012. The current website team consists of eight full-time members of staff: Editor Georgia Coggan, Deputy Editor Rosie Hilder, Ecommerce Editor Beren Neale, Senior News Editor Daniel Piper, Editor, Digital Art and 3D Ian Dean, Tech Reviews Editor Erlingur Einarsson and Ecommerce Writer Beth Nicholls and Staff Writer Natalie Fear, as well as a roster of freelancers from around the world. The 3D World and ImagineFX magazine teams also pitch in, ensuring that content from 3D World and ImagineFX is represented on Creative Bloq.
