How to build your own workstation
Got all the parts for your new workstation? Now it's time to put them all together. Just follow our step-by-step guide.
If you're in the market for some new 3D hardware that'll eat 3DS Max 2014 for breakfast and blaze through the toughest 3D art render without breaking a sweat, then you've come to the right place. We've already pointed you at all the components you'll need; now it's just a matter of putting them together. But first, some pointers:
- Have enough time to tinkerPutting unfamiliar components together, often with unclear instructions, isn't a fast process. Ensure you have time to confirm any questions on the web or with the manufacturer.
- Getting startedWork in a well-lit, clean environment, with ample non-metal tabletop space to lay things out. A small flashlight might be needed to see inside the case. An average-sized Phillips head screwdriver was the only tool we needed, but this can vary. Also, having an old-fashioned PS/2 keyboard and wired mouse is often needed.
- Good work habitsKeep your hands off contacts and other exposed electronic parts, like on the motherboard or underside of the hard drive. Wear a grounding strap to avoid passing a static charge to the parts. Wear rubber-soled shoes and try not to work over a carpet. Having said all that, the odds of you zapping and damaging components are very low.
- Read the manualsPlease keep in mind that the following build guide is not meant to replace the manuals that come with the components. It is also not meant to cover each detail of assembly - it is just meant to give you the basic understanding of the steps and a first-hand look at how easy it can be, as well as things to look out for in your journey.
Got that? All right then; let's go to work.
01. Start with the case
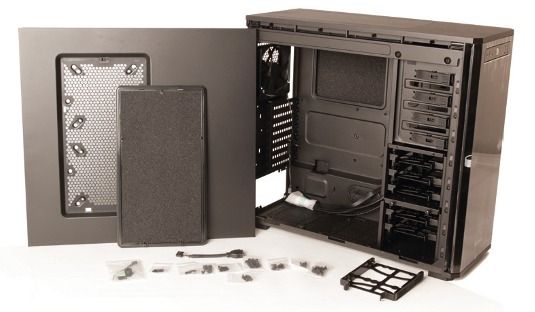
Unpack the case and open it up on your worktable. Take note of the sound-insulated cabinet and venting options. The PSU goes at the bottom, leaving plenty of room for the motherboard above. In this instance, the case only came with a quick-start manual.
02. Open the motherboard
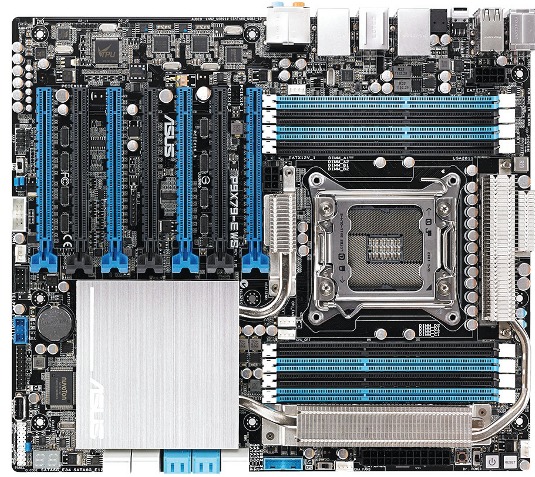
The manual that came with the motherboard is extensive and helpful. It also comes with a large number of extra parts, not all of which we will use in this build. Next, lay the case down and place the MB inside to see how things fit. I did this and at the time it seemed perfect, but read on. Remove the MB and clear some space to work on it.
03. Take care with the CPU
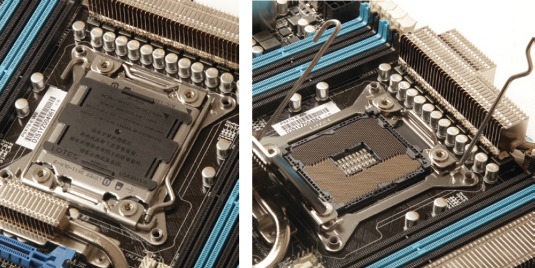
Open the CPU socket using the levers. Unpack the CPU and check for damage. Keeping your fingers on the edges, place it into the socket. Ensure the CPU is oriented so the corner arrow/triangle is aligned with the same icon on the socket. Put the cover back and swing the levers back. The cover will now pop off in this socket, leaving the chip exposed.
04. Prep the case
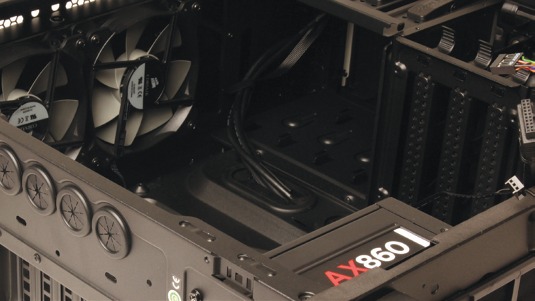
Next install the Corsair H100i liquid cooling system for the CPU. First screw the two fans to the underside of the radiator. After removing the case's top vent panel, screw the fan/radiator to that vent. Connecting the water pump/heat sink on the other end to the CPU will have to wait until the MB is installed. Put a rubber band around the pump's plastic cover to prevent it from falling off. Then install the power supply into the bottom of the case. Note that most mounts have noise/vibration reduction padding, so tighten but don't overdo it or you'll lose some of its benefits. Finally, snap the MB's rear faceplate into the rear of the case.
05. Pop in the drives
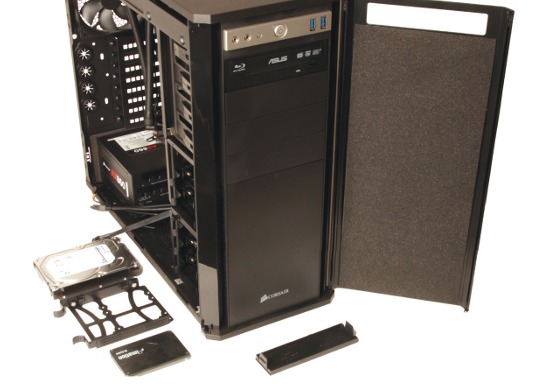
Slip the Asus optical drive into the form of the case and then screw down to the chassis from the sides. Then centre the three SSD drives and screw them down to their removable drive bay holders. The Seagate HD snaps into its tool-free drive bay holder. Then attach each drive to its own SATA cable; this will be connected to the MB later. Finally, attach each drive to a power cable.
Get the Creative Bloq Newsletter
Daily design news, reviews, how-tos and more, as picked by the editors.
06. Add the memory
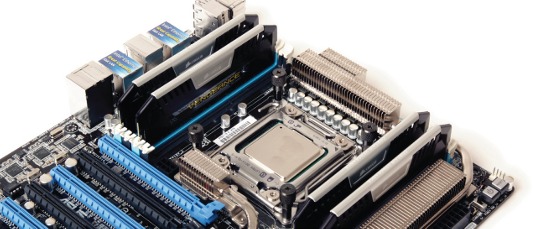
Go back to the MB to install the four modules of Corsair Vengeance Pro memory. Use the MB's manual to follow the proper configurations. Here, the four sticks needed to be installed in alternating slots. Look at the connectors and align any notches properly.
07. Place the motherboard
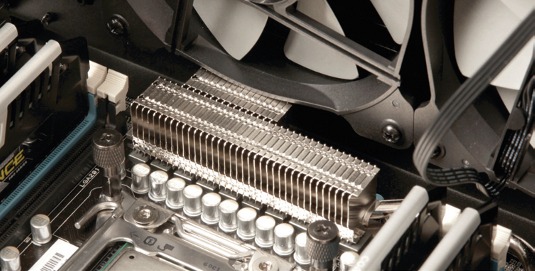
When it came time to put the MB in the case, I hit a snag: it wasn't fitting with the H100i cooler in place. I soon realised that if I removed the cooler and put the MB in first, the unit could then be put back in place. To fit, the plastic fan needed to butt against a silver heat dispersion unit on the MB. I wanted to be sure this was a safe configuration, so I contacted Asus who assured me it was. Always check - you don't want a dangerous computer.
08. Mount the motherboard
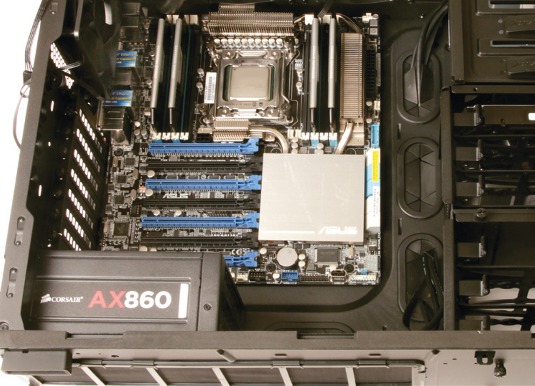
When mounting the MB in the case, work with the case on its side. Make sure the board is not touching the back metal wall. This is usually done using stand-offs, but the Obsidian 550 has stand-offs built in. Align the board with all the screw holes, and also make sure all the rear ports are in alignment, and then screw it down using most or all of the screw holes. Don't overtighten the casing.
09. CPU/cooler connections
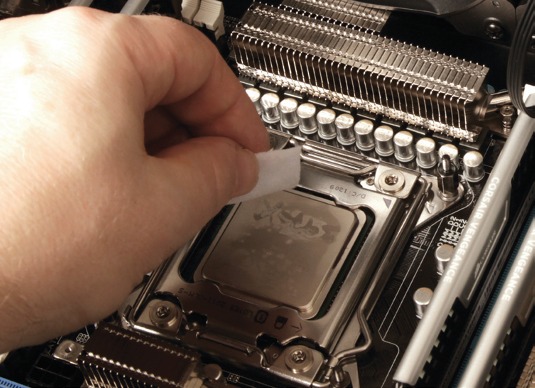
Next, connect the cooler to the CPU. After cleaning the CPU, put the mounting bracket over the head unit, carefully align it over the CPU without touching it, and go straight down for a firm contact. Place the corner thumb-screws on and tighten them by hand, then give an extra twist with a screwdriver. Then the cooler needs to have various power and controller connections made all over.
10. Power connections
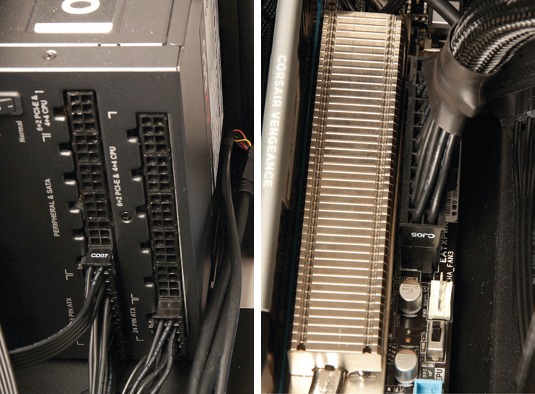
There are three power connections between the MB and the PSU. One in the main ATX 24-pin connector, that connects to the large plug along the right side of the MB (right), and then splits into two plugs to connect on the PSU side (left). Another (not shown) is the ATX 12V that attaches to the MB on the left of the memory sticks. This is hard to reach once the MB is in place and should be connected prior to mounting.
11. Other connections
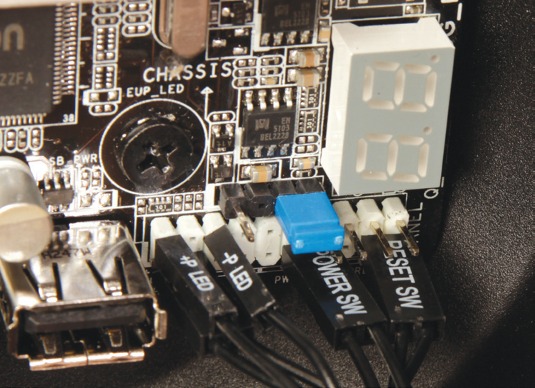
In the photo we see a row of front panel connections for the case. It wasn't until later that I realised there was an adapter block included with the MB that made these fiddly connections easier, but I left it as is. There was also a USB 3.0 plug that came from the case front panel, which received preference over one on an expansion port in back, and the audio connection's upfront too.
12. SATA/motherboard connections
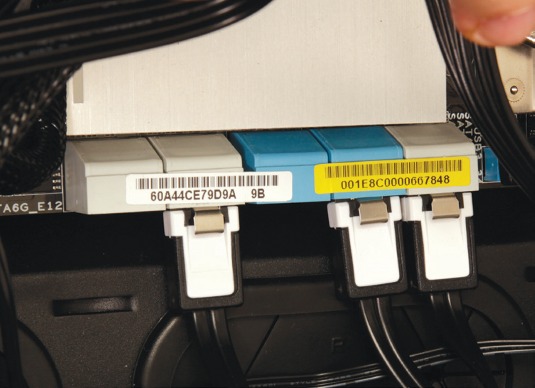
Finally, I was ready to connect all the drive's SATA cables to the MB and was stunned to find the lower row of SATA outlets (those closest to the MB) were blocked by a recess in the case designed to hold the MB. The upper outlet of each stack was accessible and allowed me to install all five drives in my build, with one to spare. But this was still a problem and I consulted Asus and Corsair. The upshot: The MB appears to be "larger than the standard ATX board, perhaps an EATX". It appears I should have gone with a larger case. If I want to use those extra SATA connections, I will need to swap cases or cut an opening to allow access.
13. Add expansion cards
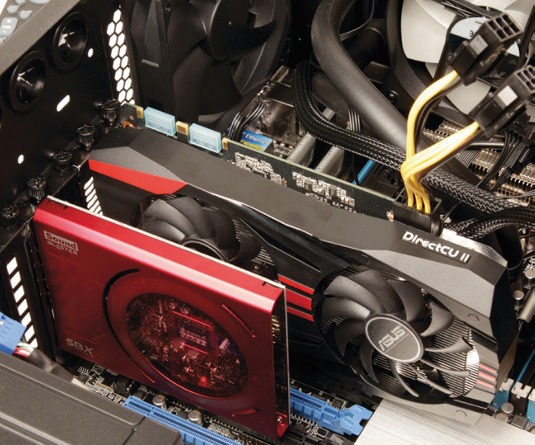
Now it's time for the expansion PCI-e cards to go in. I only had two: the Asus GeForce GTX 760/DirectCU II OC went in first, and I placed it in the uppermost slot. Remember it's double-wide taking the space of two slots even though it only plugs into one. It also needs additional power connections. I skipped one slot to leave room for the video card fan's exhaust to work unencumbered. The Creative Labs' Blaster Z card went into the third PCI-e slot.
All that remains is to install an operating system, which can be an adventure in itself. Follow the instructions; have a spare computer to hand so that you can search for drivers and software, as well as answers to problem, and you should be fine. Good luck!
Words: Lance Evans
This article originally appeared in 3D World issue 178.

Thank you for reading 5 articles this month* Join now for unlimited access
Enjoy your first month for just £1 / $1 / €1
*Read 5 free articles per month without a subscription

Join now for unlimited access
Try first month for just £1 / $1 / €1

The Creative Bloq team is made up of a group of art and design enthusiasts, and has changed and evolved since Creative Bloq began back in 2012. The current website team consists of eight full-time members of staff: Editor Georgia Coggan, Deputy Editor Rosie Hilder, Ecommerce Editor Beren Neale, Senior News Editor Daniel Piper, Editor, Digital Art and 3D Ian Dean, Tech Reviews Editor Erlingur Einarsson, Ecommerce Writer Beth Nicholls and Staff Writer Natalie Fear, as well as a roster of freelancers from around the world. The ImagineFX magazine team also pitch in, ensuring that content from leading digital art publication ImagineFX is represented on Creative Bloq.
