How to add textures to a basic game environment
In part two of our six-part series, Andrew Finch explains the steps to texture a professional-looking environment for a video game.
Daily design news, reviews, how-tos and more, as picked by the editors.
You are now subscribed
Your newsletter sign-up was successful
Want to add more newsletters?

Five times a week
CreativeBloq
Your daily dose of creative inspiration: unmissable art, design and tech news, reviews, expert commentary and buying advice.

Once a week
By Design
The design newsletter from Creative Bloq, bringing you the latest news and inspiration from the worlds of graphic design, branding, typography and more.

Once a week
State of the Art
Our digital art newsletter is your go-to source for the latest news, trends, and inspiration from the worlds of art, illustration, 3D modelling, game design, animation, and beyond.

Seasonal (around events)
Brand Impact Awards
Make an impression. Sign up to learn more about this prestigious award scheme, which celebrates the best of branding.
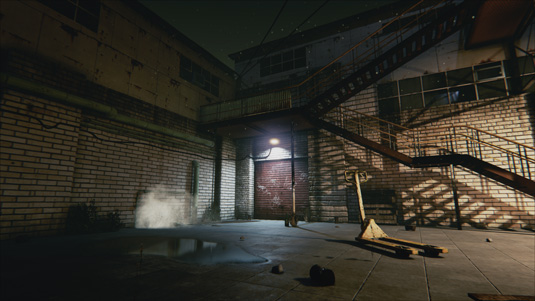
Part one of this series guided you through the process of creating a professional portfolio piece – a realistic environment – in a short space of time, with very basic assets, using the brand new Unreal Engine 4.
The next step is to create the textures for your assets, one of my favourite tasks in creating game art. In this part, we will cover unwrapping your assets' UVs to use the most UV space possible. This can be tricky to do, but it's important to get this part of the process correct in order to get the most pixel density for your textures possible.
UVs are also important in games engines because you can use a second UV channel for light baking, which Unreal uses when building the lighting – the more UV space used the higher resolution the shadows will be, which will in turn improve the end result of your work.
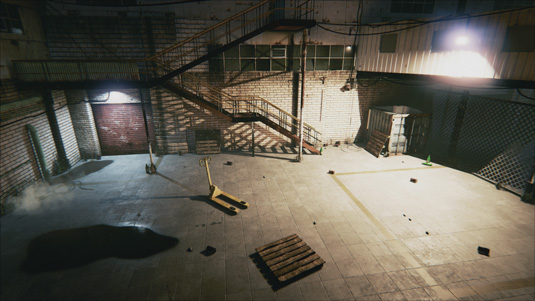
Textures for games engines are always made to the 'power of two' due to fundamental rules in the hardware of games consoles, so making sure your textures are sized at 1024x1024 pixels (for example) is very important.
I use two pieces of software for creating my textures, Photoshop and CrazyBump. I use Photoshop to manipulate photographs to create diffuse and specular textures. I tend to create most of my own textures but there are a lot of free photo galleries on the web that you can use to make your own images.
I use CrazyBump to create normal maps because it’s a powerful piece of software and is very good at converting normal maps from photo-sourced textures; via its user-friendly interface you can create a wide range of normal maps for hard or soft edges, making it ideal for environment artwork. This tutorial will cover unwrapping an asset for texturing and lighting and also the process of creating the diffuse, specular and normal maps used in the game engine.
Here are all the assets you need:
Daily design news, reviews, how-tos and more, as picked by the editors.
01. UV unwrapping
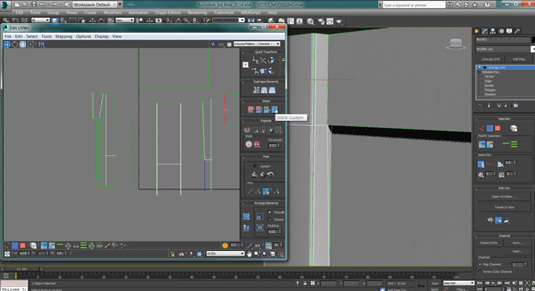
To unwrap an asset like this garage door modular piece, use the Flatten Mapping tool in the Edit UVs window. This automatically planar-maps the polys at certain angles to get you the flattest mapping possible.
Use Edge Stitch to weld the edges together and move the UV clusters to the correct place. Once the main chunks of the asset are welded together, move them into a suitable place and scale them to get the best pixel density for the textures.
02. Finalising UV unwrapping
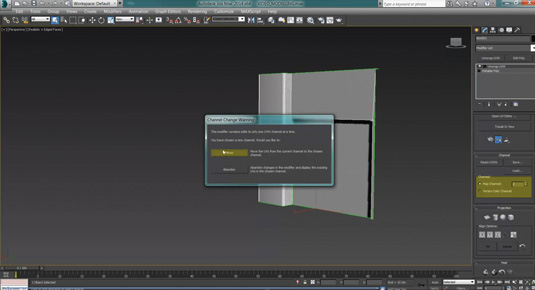
To finish the UV stage, you must unwrap a second UV channel – this is essential as Unreal bakes to this channel and we don’t want any overlapping UVs.
Luckily the first set of UVs are quite clean and no overlapping occurs, so we can just simply copy the UV channel 1 to UV channel 2. Add a second UVW Unwrap modifier and switch to Map Channel 2. You will be prompted to Move or Abandon the UVs; choose Move, as this will copy UV 1 to UV 2.
Pack UV clusters
The Pack tool is a time-saving tool that packs your UV clusters tightly into the UV space ensuring no overlapping occurs. It’s useful for UV mapping the light baking channel
03. Creating the Diffuse map
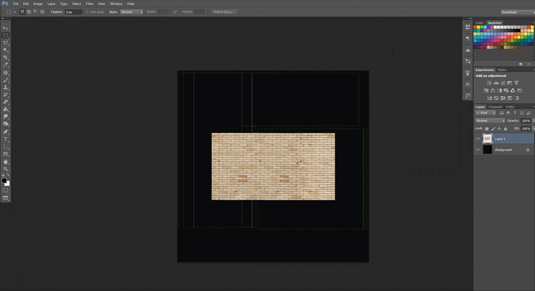
Render out the UVs from Max using the Render UV tool in the Unwrap modifier. I rendered to a 1,024x1,024 texture and imported this into Photoshop. Search for suitable free textures online and import them into Photoshop.
Here I used a brick wall photo. Using Clone, mask areas of the photo to create a seamless section of brick wall. Next, move the wall section to the 1,024x1,024 texture page and clone it until it fills the brick wall UV area.
Next page: more on how to add to your basic game environment with textures

The Creative Bloq team is made up of a group of art and design enthusiasts, and has changed and evolved since Creative Bloq began back in 2012. The current website team consists of eight full-time members of staff: Editor Georgia Coggan, Deputy Editor Rosie Hilder, Ecommerce Editor Beren Neale, Senior News Editor Daniel Piper, Editor, Digital Art and 3D Ian Dean, Tech Reviews Editor Erlingur Einarsson, Ecommerce Writer Beth Nicholls and Staff Writer Natalie Fear, as well as a roster of freelancers from around the world. The ImagineFX magazine team also pitch in, ensuring that content from leading digital art publication ImagineFX is represented on Creative Bloq.
