Get started with cloud rendering
See what advantages cloud render services such as Zync offer.

Using a cloud render farm can have a transformative effect on digital content creation workflows if used properly. They can help when deadlines are tight, save a huge investment – both in terms of hardware and maintenance of creating your own render farm – and can also enable the rendering of huge projects if you are away from your main workstation.
However, it can be complex managing assets and uploads that can potentially create a whole new range of problems.
Zync was already a leading cloud render service, with tight integration in Maya across a range of render engines such as Arnold and V-Ray, which allowed upload and checking from within Maya itself, minimising the pain of using a cloud render service.
Zync was bought by Google and are now offering excellent integration with software such as Maya and Nuke backed up by Google
Zync was bought by Google and are now offering excellent integration with software such as Maya and Nuke backed up by Google, who know quite a few things about computers and the internet apparently.
One of the key ways that a cloud rendering service can change the way you work is that it frees up your main work machine for other duties, which can be a huge timesaver – especially when animating.
By using a service like Zync, the artist has instant access to as many computers on the cloud as they need. With each frame rendered in parallel, rather than in sequence, as they would be on a single workstation, render times come tumbling down from hours to minutes.
This saves huge amounts of time meaning that each frame can be optimised for quality rather than speed. When used with a render engine such as Arnold, Zync can be leveraged in cross platform environments, whether the artist is at home or on site with their laptop, and even when the artist only has one Arnold license for their main render machine.
01. Set up the Zync account
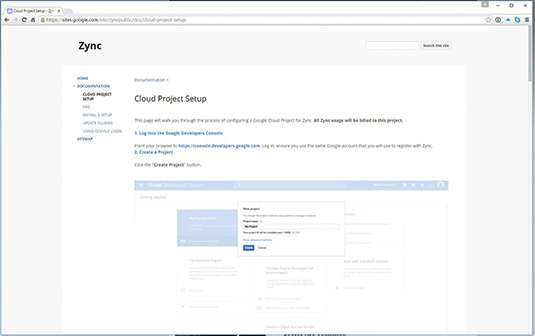
It's best to set up a render cloud solution at the beginning of a project. To set up your Zync account, you'll need a Google account to access the Google server, which Zync uses. You'll also need access to a credit card to set up your billing account, visit www.bit.ly/206-zync to find instructions on how to set up your Google Cloud render account.
02. Install Zync
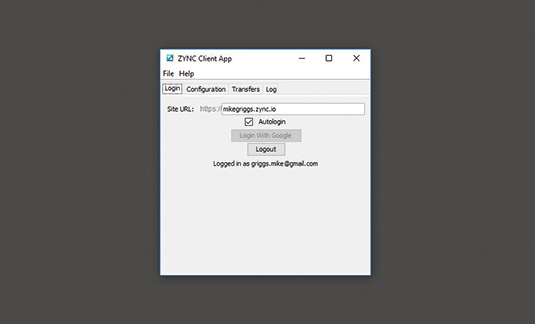
Zync works by installing a small application on your computer which manages the connection from your computer to the Zync cloud infrastructure. The faster your internet connection, the better and quicker Zync will be. The Zync application must be running for you to use Zync properly. The apps are free and are available at www.download.zyncrender.com
03. Install Zync plug-ins
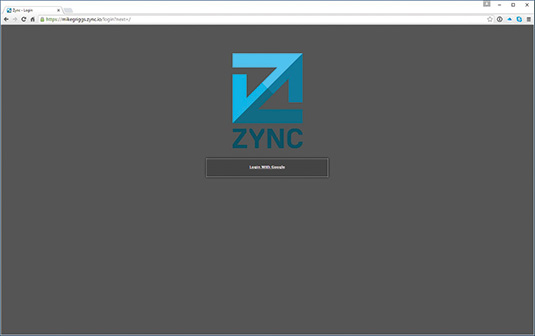
Once the main Zync application has been installed, install the plug-ins from the same page as the main Zync app. At this point you will need to access your main Zync project page, which you should have received an email about after your set up. This is in case you need to access Application API keys.
04. Set Arnold settings
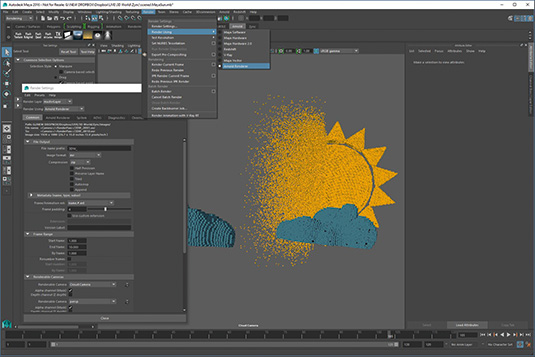
In Maya, ensure Arnold is set as your default render. Use the Arnold demo setup which creates watermarked renders if used on your local machine. This combination of Maya and Zync means even if you have one Arnold license on the work station and you're working on a laptop, you can still review your scene in Maya and send to Zync for final render.
05. Test frames
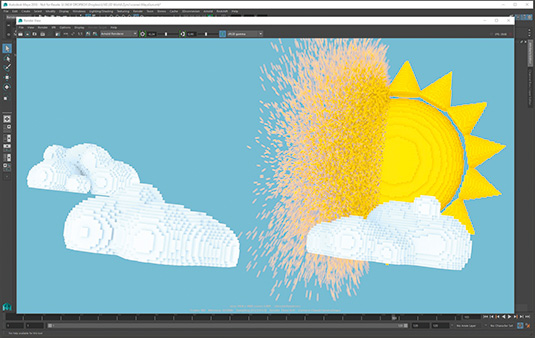
If you're running on a machine with a licensed copy of Arnold, it's good to run out test-frames of your animation on your local machine to check the render quality. In my case, a frame takes 10 minutes so it would take 20 hours for my machine to render the animation, instead of less than an hour than it would take using Zync from start to finish.
06. Create a low-res animation
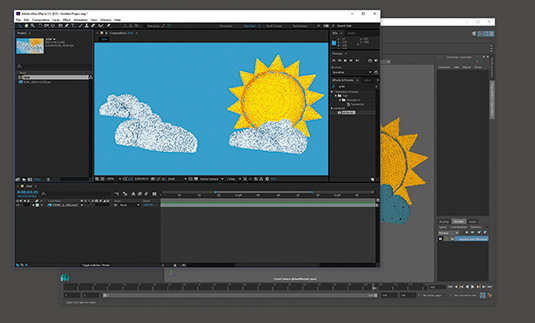
It is also a good idea to run a test animation using a lower image resolution size, and dropping back the Arnold AA samples to 1 or 2 so that the scene renders much quicker than the final version. Due to the way that Arnold renders your scene, you will still get an excellent impression of how your animation will work.
07. Open the Zync panel in Maya
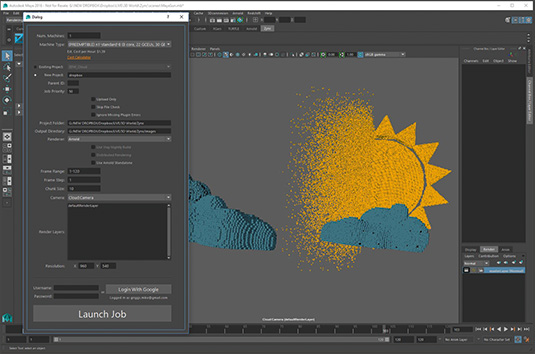
After the tests have run and the render settings are set back to the final render quality, it's time to send the animation to Zync. If Zync is installed there should be a Zync shelf in Maya. Press the Zync icon in the Zync shelf to open the Zync dialogue. Press the Login with Google button at the bottom of the panel to ensure Zync is working with your account.
08. Upload test scene to Zync
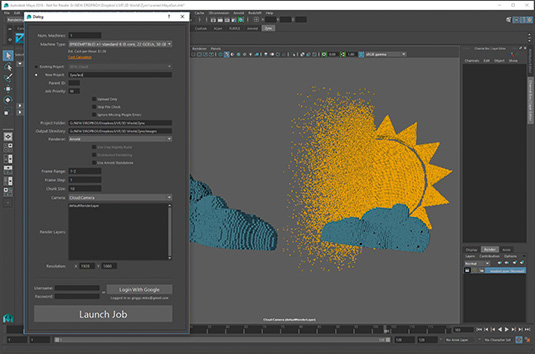
As with step 5, it is good to run a quick test sample to Zync to make sure everything is working, and it will also allow the final cost on Zync to be calculated for the main render. Create a New Project in the Project Settings of the Zync panel, set the frame range to a couple of frames only to test the render. Hit the Launch Job to send the Maya scene to Zync.
09. The Zync page
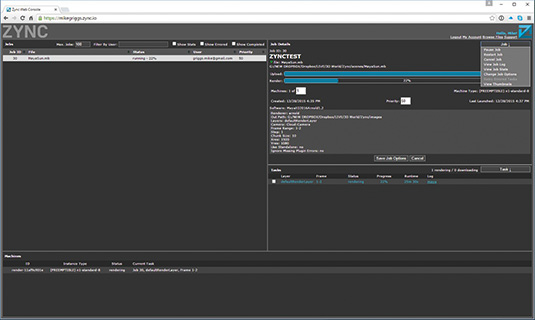
On the Zync Project page you will see the test job running. Use the Job dropdown at the top right of the screen to pause, cancel or even change the settings of the job itself, including the amount of machines that you are using, or the job priority.
10. Submit the final job
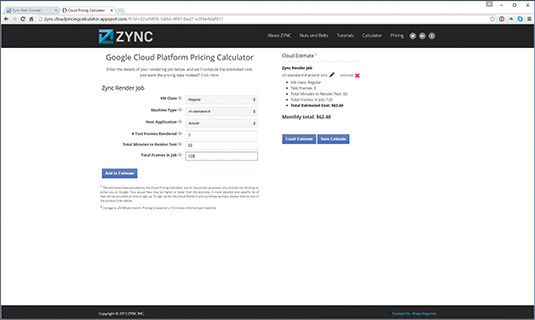
Once the test job has finished the renders will appear in your Maya images folder. Check on the Zync page to see how long the test took per machine and use this calculation to finalise your render cost. Redo steps 08-10 and just change the frame range to that of all the required jobs and submit the final scene to Zync.
This article was originally published in 3D World magazine issue 206. Buy it here.

Thank you for reading 5 articles this month* Join now for unlimited access
Enjoy your first month for just £1 / $1 / €1
*Read 5 free articles per month without a subscription

Join now for unlimited access
Try first month for just £1 / $1 / €1
Get the Creative Bloq Newsletter
Daily design news, reviews, how-tos and more, as picked by the editors.

Mike Griggs is a veteran digital content creator and technical writer. For nearly 30 years, Mike has been creating digital artwork, animations and VR elements for multi-national companies and world-class museums. Mike has been a writer for 3D World Magazine and Creative Bloq for over 10 years, where he has shared his passion for demystifying the process of digital content creation.
