Create the perfect 3D render of Hellboy
Rodrigo Sória’s Hellboy challenged the artist to perfect his rendering of hair, lighting and textures.
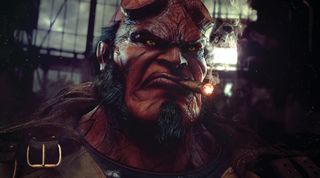
This interpretation of Mike Mignola’s comic book hero Hellboy took Rodrigo Sória 10 days to create. Some seriously impressive 3D art, the goal was to create a character with a strong and powerful expression defined by the elements in the scene as much as the model.
"I am passionate about images that play with striking lighting; ones that draws out the silhouette of the character," he says. "For me the effect of good lighting and well-configured materials help to convey personality and mood."
Currently Rodrigo is a senior artist at The Lab Image Group, Arizona. While experienced in hard surface modelling, textures and lighting, he only began working in 3D four years ago. "3D enables me to develop all my ideas that were too complex to produce in 2D," he says. "Today, when I have a cool idea, I immediately go to the computer to develop it. I can say with certainty that 3D has become my passion and my life."
01. Create a base model
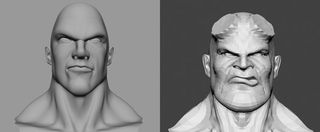
To develop Hellboy, first I made a simple base head in Softimage, just to get a notion of volumes and proportions. Then I took it into ZBrush to work up the silhouette of my base on the model of Hellboy. When the base was completed, I did the head. I opened up the UVs and the model was ready for texturing.
02. Focus the scene
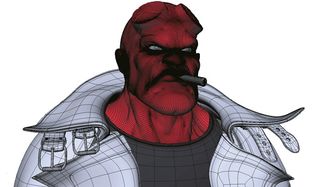
Since I only want my scene to show part of the character, I focus on the chest and head. Then I export the character’s head to Softimage again, and with correct proportions and volumes set, I start developing the clothing.
Next, I model it in Softimage and open the UVs piece by piece, putting each element of clothing - such as the buckle, accessories, shirt and coat - in a separate UV. Doing it in this manner means that the textures will be more realistic.
03. Details and refinements
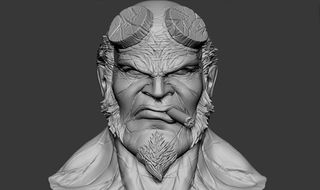
With the base model complete, the real ZBrush work begins, as I create a more detailed model. Detailing on the head becomes more refined as I carve veins, wrinkles and pores.
With the head finished, I export the Normal, Occlusion, Cavity, Displacement and base colour maps. I do the same with all the other parts of the model, exporting to ZBrush and then detailing each item before taking them into Photoshop for further refinement.
04. Start texturing
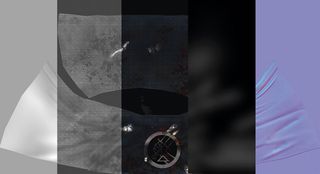
With all maps and model with UVs open, I texture each area of my model. I take pictures of each texture, such as leather, cloth and dust, and composite these textures, mixing dirt, scratches, cuts, in fact everything to make it look more realistic. Once everything is to my taste and textured in Photoshop, I can start to make changes to the final scene.
05. Setting the lighting
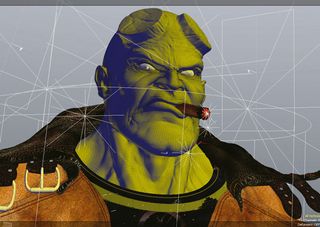
I use four lights to do the HDRI lighting. In this instance, there are three lights to the rear of the model with different intensities of warm and cool colours. I use a light directly in front of the model with a low intensity.
Next, I configure the subsurface scattering (SSS) materials, such as metal and clothing. The material can be a complicated to configure if you don’t want the model to absorb every detail of the maps that you’ve exported. For my character’s face, I utilise Normal and Displacement maps together - a method not widely used by artists, but I want to highlight the details of the face.
Next I generate the maps of the skin, using epidermis, dermis lower, upper dermis, oil, bump, reflection and specular maps. With all maps made and applied to the model, it is just a matter of taking some time to refine the materials and the appearance of the textures on the face. I apply the remaining textures (leather and metal) in the required areas of the model. With all the textures and materials set, I get to work on the lighting so that the materials and textures respond according to the camera direction to generate render passes.
06. Creating the hair
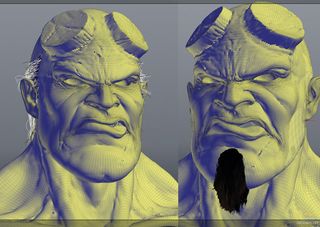
With projection planes assigned where the hair would be, I begin to
create the hair. I want something organic and only have three days to work on the hair and beards, so I generate in a local area on the character’s head - I do 20 tests until I get one I like. With hair finalised, I apply it to the final model.
07. Render passes
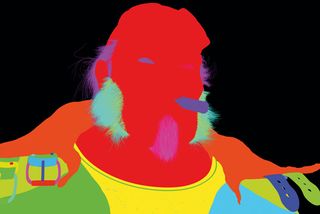
I set-up the render passes for the composition of the final image. There
are eight passes, alpha, surface ID, depth, total ilumination, specular shading, subsurface shading, ambient occlusion and beauty pass. Once rendered, I take them into Photoshop to refine the contrast, brightness, shadows and textures.
08. Photoshop refinements
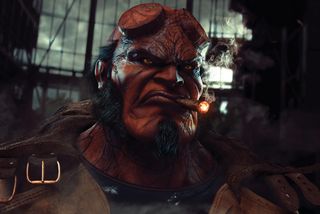
Using Photoshop, I apply fumes around the character’s cigar and digitally paint in smoke to unify the elements and amend some textures. I left the contrast 'aggressive', to add a certain feeling to the whole scene. Once I'm happy with the changes, I take the final render into After Effects to do some simple colour correction and adjustments to the lighting.
09. Adjust the lighting
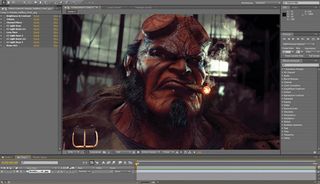
To bring everything together and add a little mystery to the image, I push the brightness and contrast a little, adding darker blue and green tones to the scene, with a little magenta and yellow. Then I take the image into After Effects and add a light effect to simulate volumetric light and intensify the light above the cigar to simulate sunlight.
As a final tweak, I add a subtle blur to the lights to reduce harshness. Then I create a final render and take this into Photoshop to add a final layer of dust to bring the scene together fully.
This article originally appeared in 3D World magazine issue 176.
Like this? Read these!
- The best 3D movies to look forward to in 2014
- Click here for brilliant 3D artists to follow on Behance
- Top free 3D models

Thank you for reading 5 articles this month* Join now for unlimited access
Enjoy your first month for just £1 / $1 / €1
*Read 5 free articles per month without a subscription

Join now for unlimited access
Try first month for just £1 / $1 / €1
Get the Creative Bloq Newsletter
Daily design news, reviews, how-tos and more, as picked by the editors.
The Creative Bloq team is made up of a group of design fans, and has changed and evolved since Creative Bloq began back in 2012. The current website team consists of eight full-time members of staff: Editor Georgia Coggan, Deputy Editor Rosie Hilder, Ecommerce Editor Beren Neale, Senior News Editor Daniel Piper, Editor, Digital Art and 3D Ian Dean, Tech Reviews Editor Erlingur Einarsson and Ecommerce Writer Beth Nicholls and Staff Writer Natalie Fear, as well as a roster of freelancers from around the world. The 3D World and ImagineFX magazine teams also pitch in, ensuring that content from 3D World and ImagineFX is represented on Creative Bloq.
