Ivan Mironenko shares his process for creating a captivating figure in a bewitching scene.
(Image credit: Ivan Mironenko)
The world of 3D character creation can feel a little like sorcery at times, especially when we’re creating figures such as witches! For this tutorial, I’m going to show you that you’re capable of conjuring 3D magic too, as I explain my process for creating a game-ready character model in ZBrush. (You may want to upgrade your laptop for 3D modelling, or look at a new iPad to use ZBrush for iPad.)
Every enchanting tale begins with a character, and my witch is no exception with her mysterious aura and potential for storytelling. After starting out by devising a project plan, we’ll then venture deeper into the creative process and discover the importance of imbuing our character with a distinct personality and presence. From the arch of her brow to the curve of her cloak, every aspect of my witch’s design is meticulously crafted to create a sense of wonder.
Of course, no spellbinding story would be complete without a captivating backdrop for our characters. The environment plays a pivotal role in shaping the narrative and enhancing the visual experience. With every stroke of our digital brush and every flicker of light, we can bring characters to life in breathtaking detail.
Although I’m demonstrating my workflow through my witch character, you can apply this process to any other character that you fancy building, so don’t be afraid to push the boundaries of your imagination. Explore new worlds, tell new stories, and unleash the magic. While I'm using ZBrush and Substance 3D Painter, with a little Marmoset Toolbag, you can apply the same ideas to the best 3D modelling software, or learn more workflows in our best ZBrush tutorials.
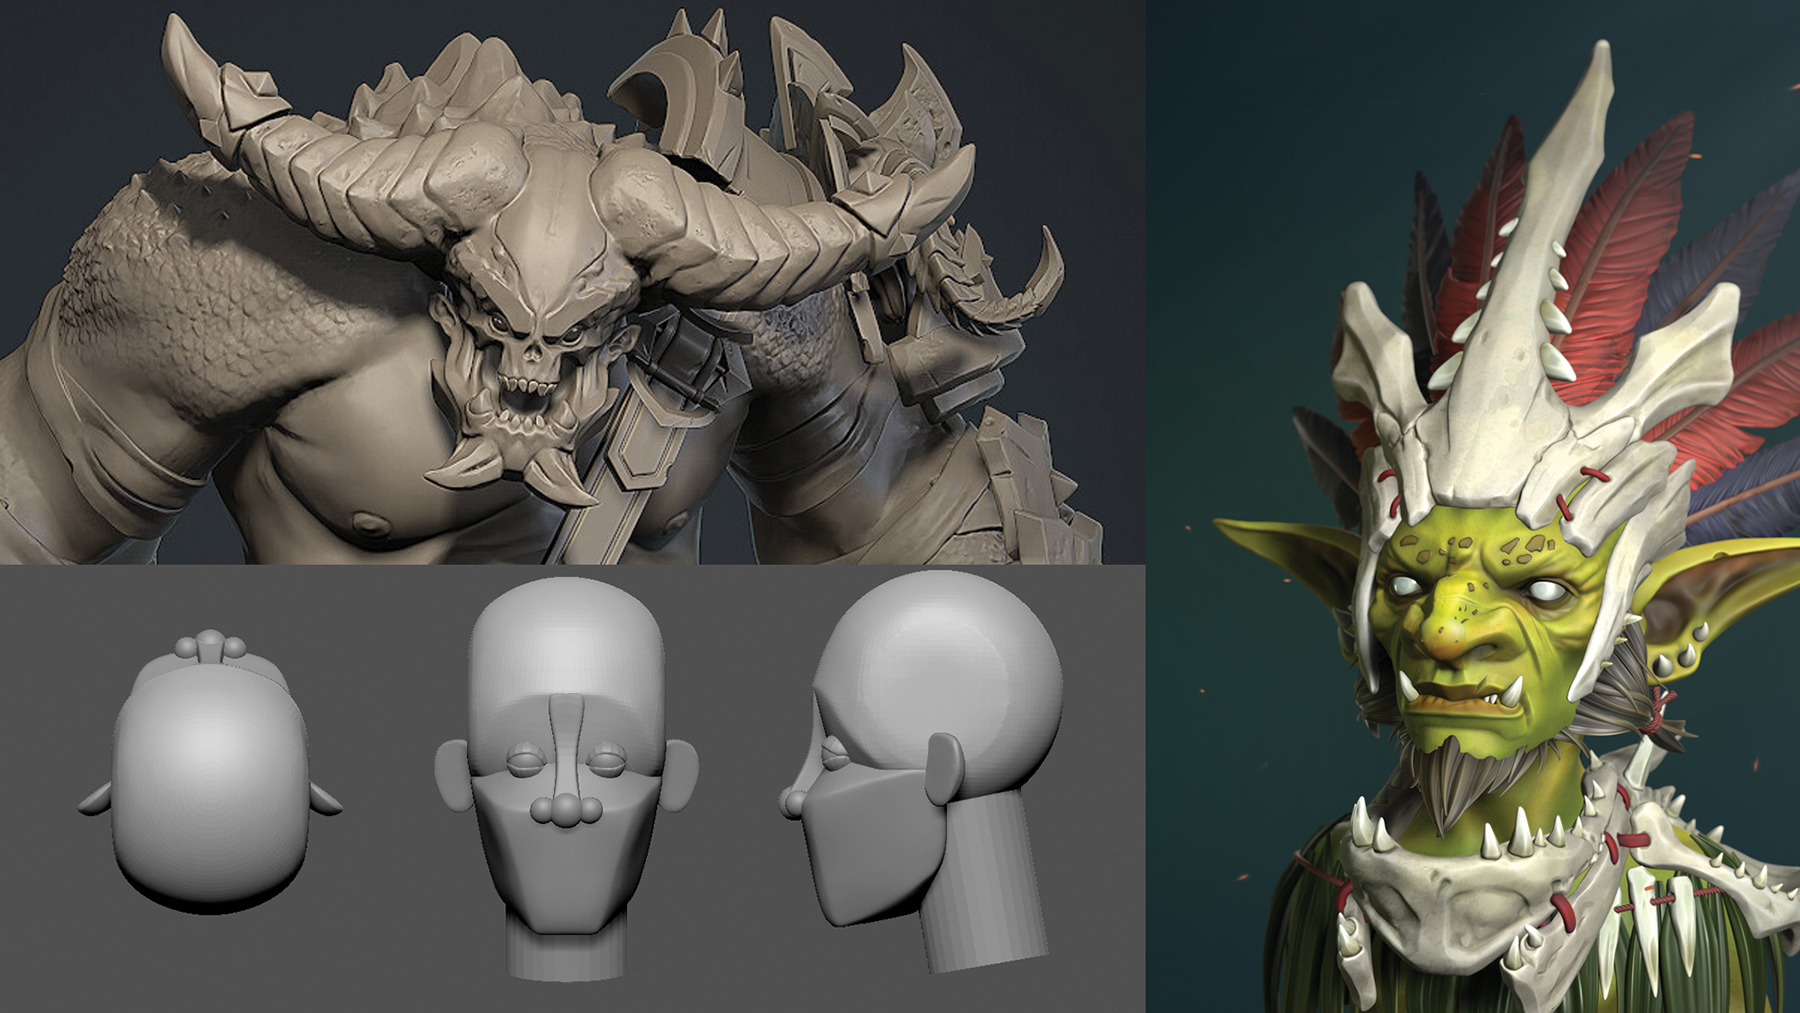
Before you start modelling, take a minute to create a PureRef file to collect images that inspire your project. Although your main goal is to conform to the concept, having a few good references such as clothing, a head, female anatomy, props and so on will help you set a course and save time. Every good 3D artist has their own collection of such references.
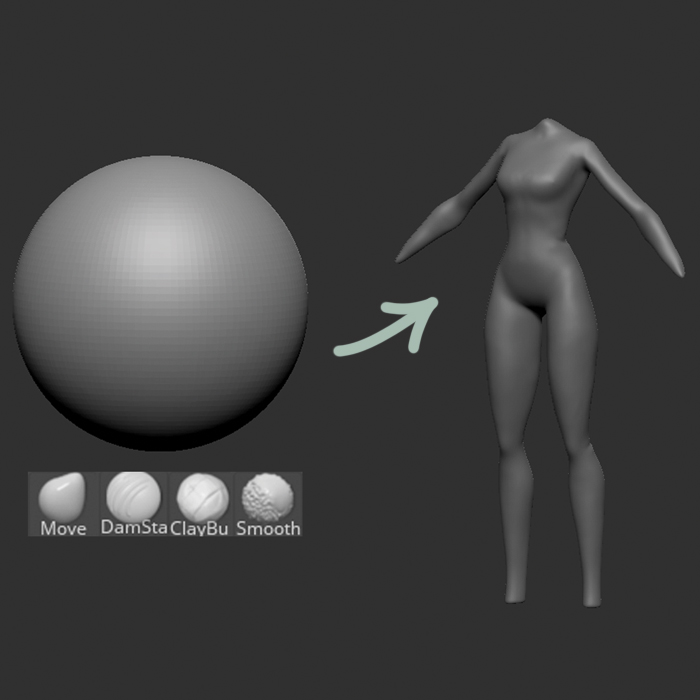
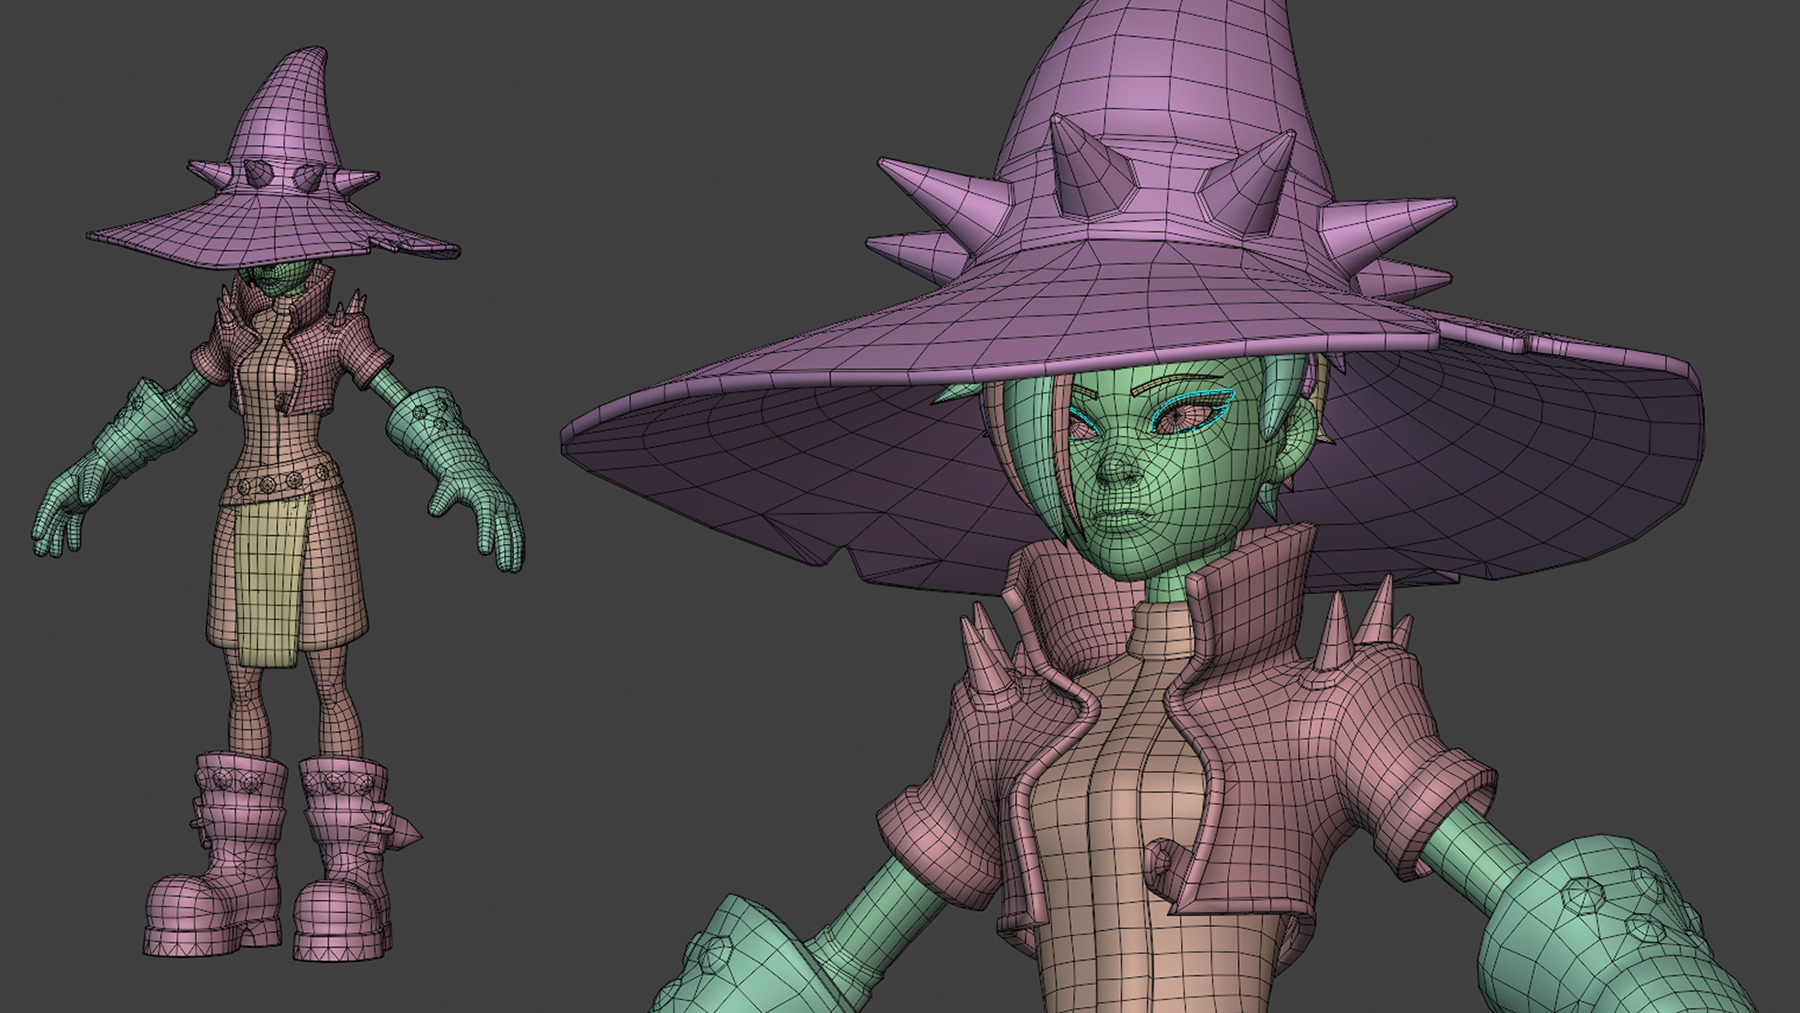
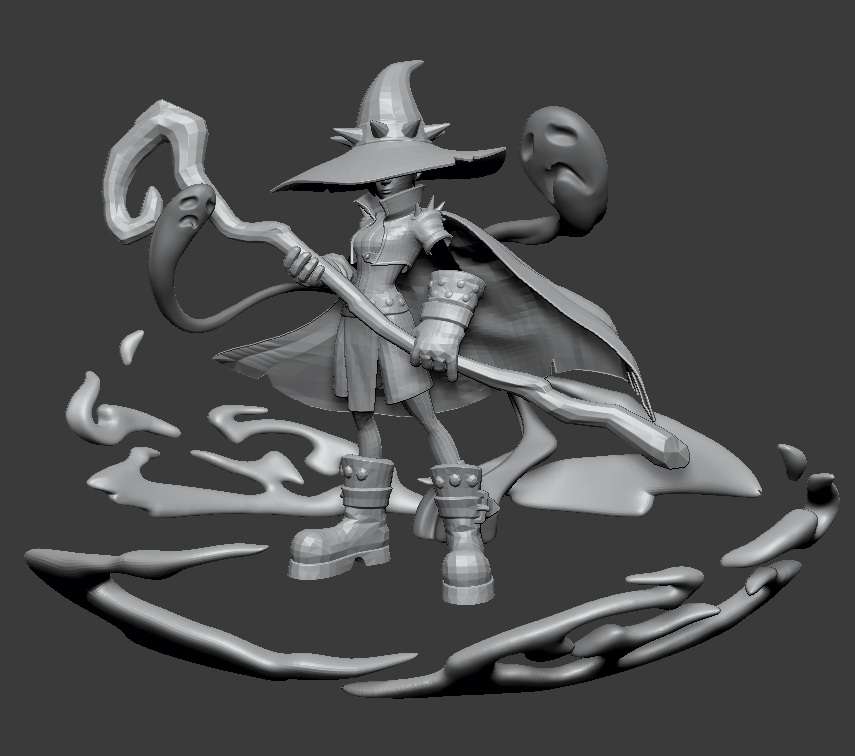
You can start by creating a sculpture from scratch, or use a ready-made base mesh that can be modified to fit the proportions of the concept. While working on this in ZBrush, I mainly use the Move brush, ClayBuildup to build shapes, Dam Standard to create depressions and folds, and Flatten for flat sections. Smoothing will help give the shapes an even look. It’s also important to use simple shapes, for example a belt is a cylinder and a head is a sphere.
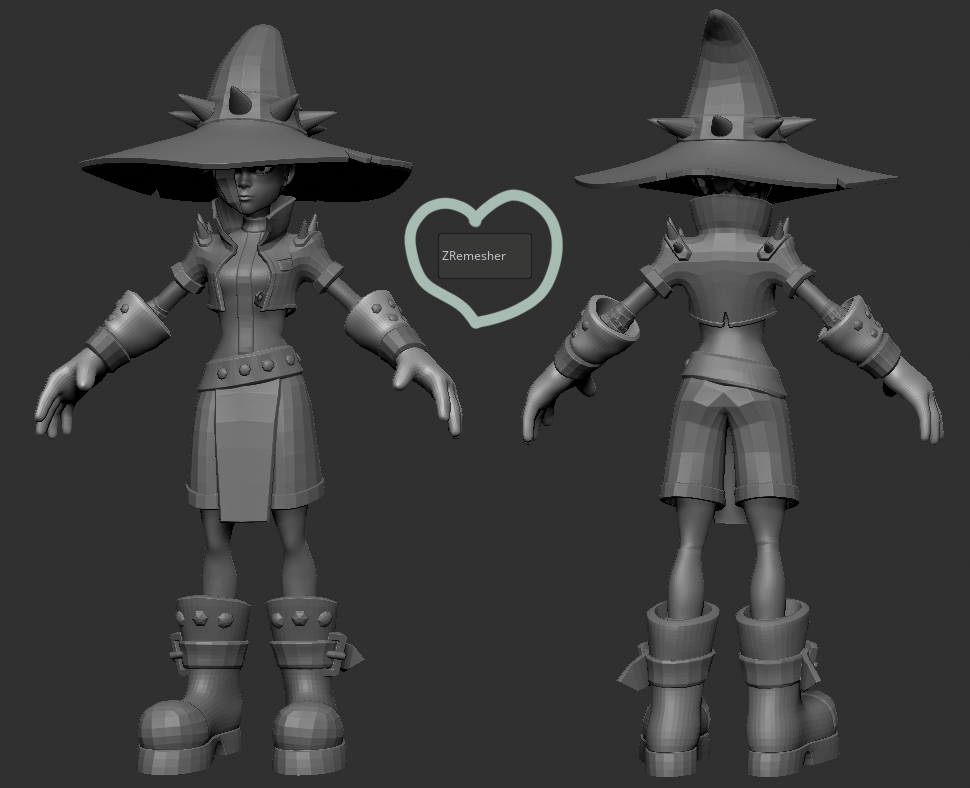
When the look is completed, start creating topology using DynaMesh where it’s needed, such as the fingers on the hands, and the connection of the arms, legs and body. This will allow you to connect the parts into a single model. You then need to edit and smooth out any problem areas. After that, you can apply ZRemesher. I recommend setting ZRemesher to a small value, as it’s much easier to work with a grid with few polygons.
Embrace an iterative approach to modelling and texturing, refining your work in stages and seeking feedback from peers or online communities to help improve your craft.
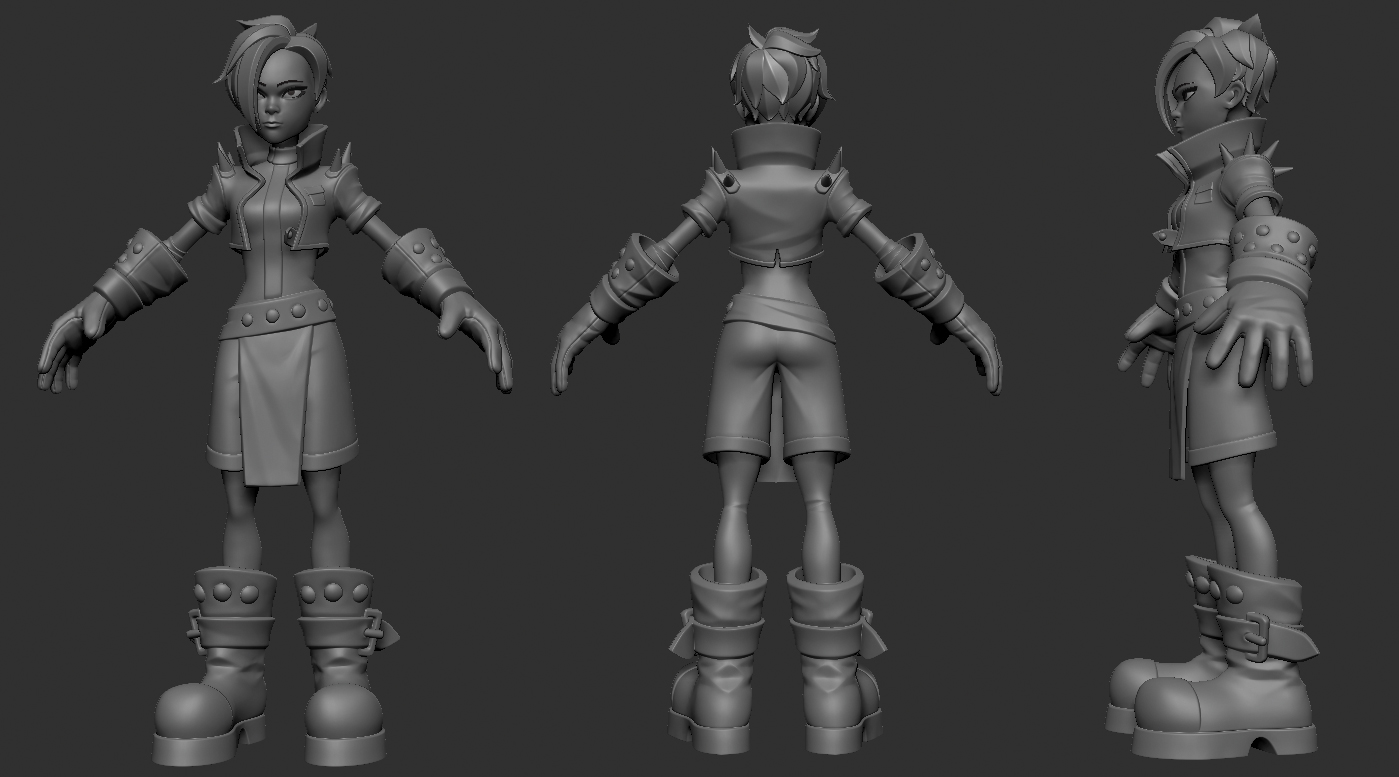
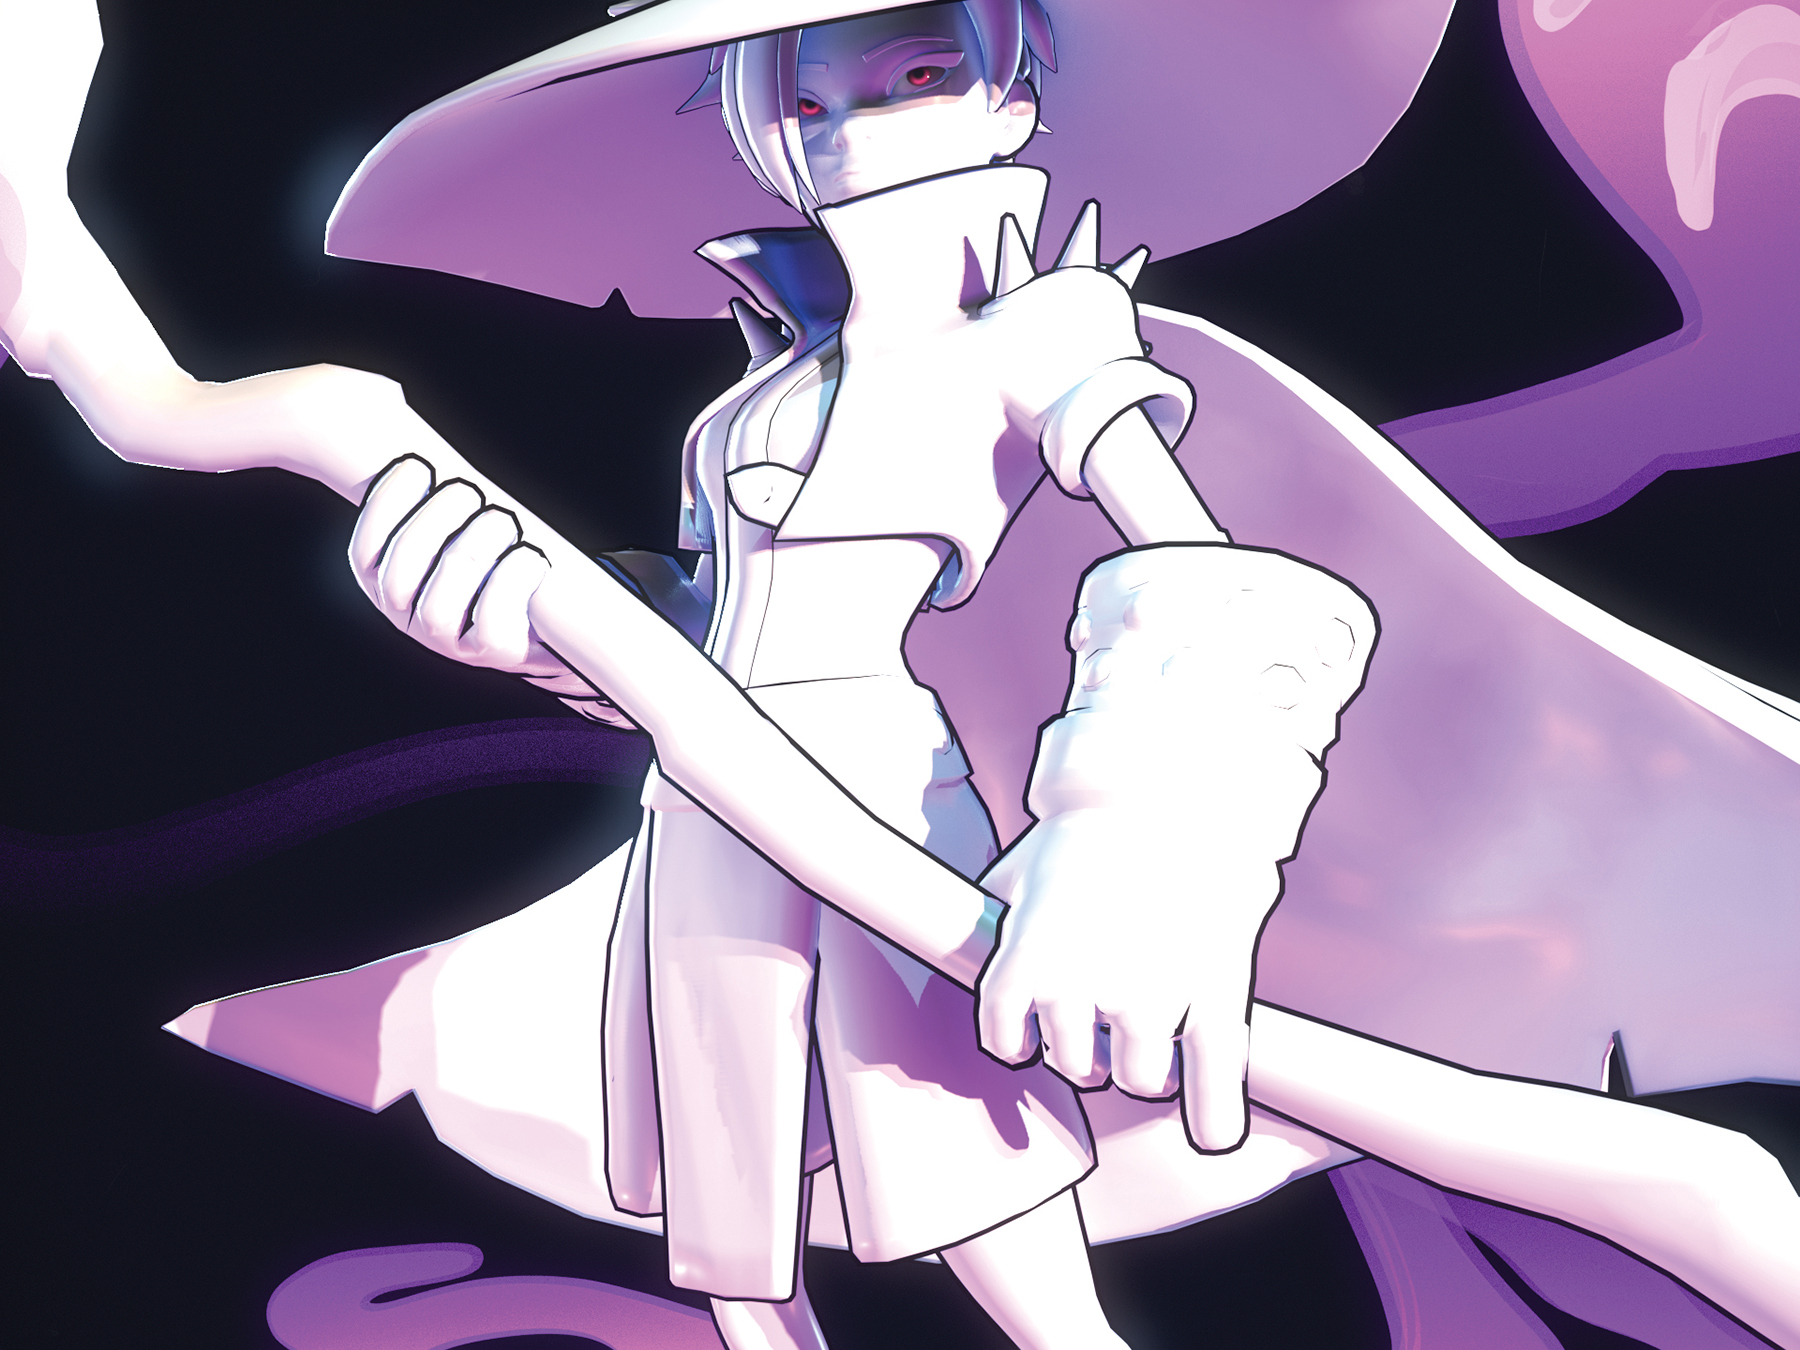
After rebuilding the grids and transferring all the details, start working on clearly defining the shape of the character. Develop the small details, making the lines of the shapes smoother. The main goal is that the model looks harmonious without any drop in quality or poorly defined elements. Using the Morph brush is great for this, as it helps to fix potential problems like bad folds in clothes. Also use the Dynamic function, which is handy for setting up simple shapes. Finally, you can’t do without the Dam Standard brush to get clear details.
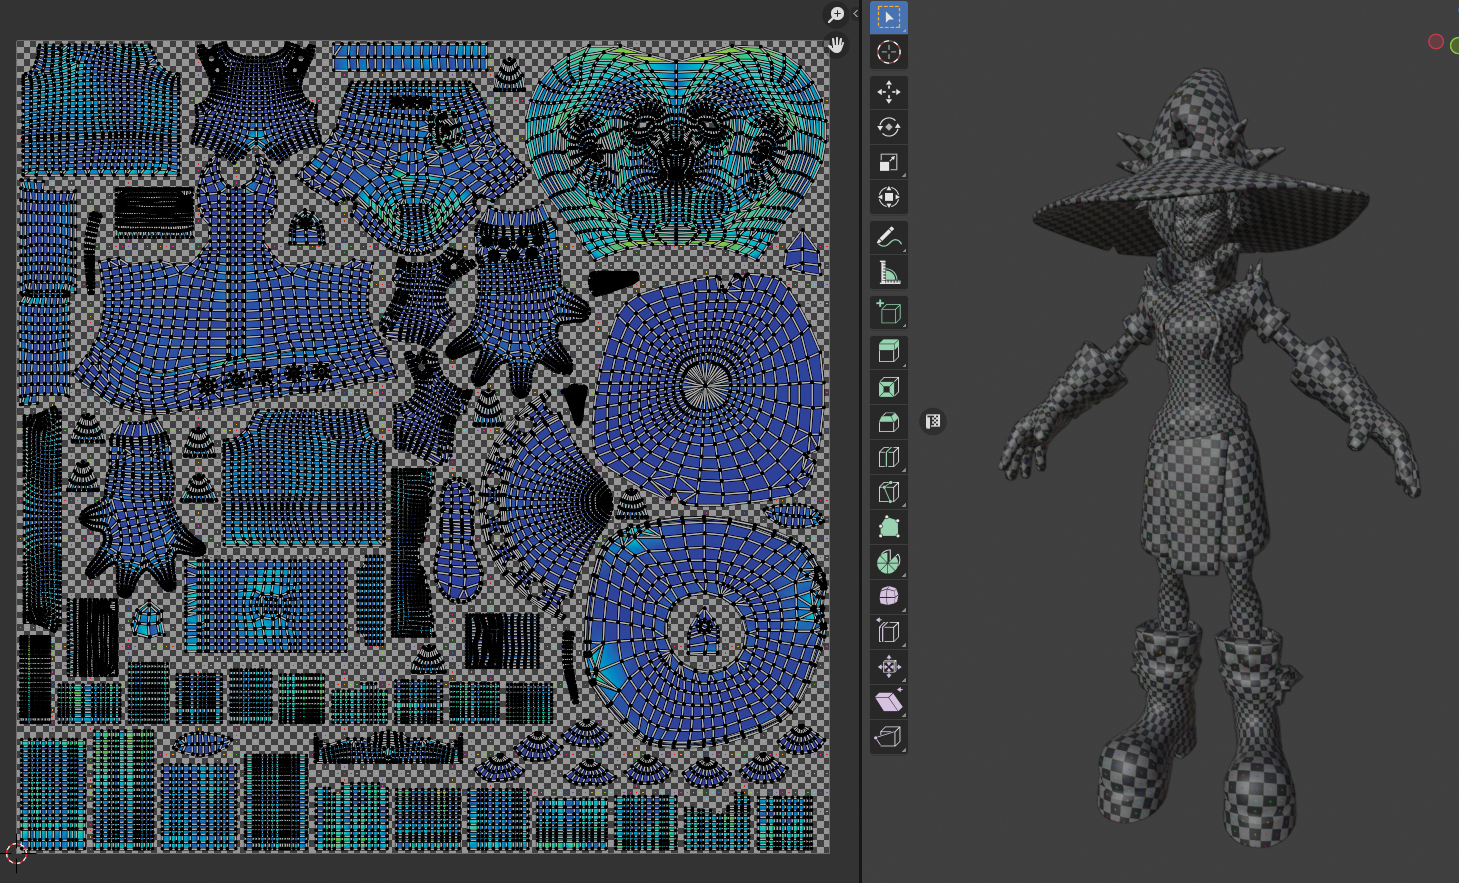
For a game-ready model like this, the retopology must be done manually. Blender add-ons such as RetopoFlow or SpeedRetopo are especially helpful here. The main rule to follow is that your polygons should be square rather than rectangular. Pay attention to the curves, arms, legs and face, and keep an eye on the topology. Avoid triangulation, though you can add forced triangulation where the polygon breaks into two triangles. Monitor shading in complex areas; if the shading looks poor, consider adding support loops, adjusting normals, or creating solid edges.
The approach to creating a UV scan is straightforward. Follow the basic rules: place your seams imperceptibly, double the size of the face compared to the rest of the elements, use overlaps for symmetrical elements, and fill the UV space as efficiently as possible. It’s good to expand the islands into a rectangle so that the seams are less noticeable on the texture. Ensure the texture’s alignment by referencing a chequered pattern to maintain consistency and accuracy in its application.
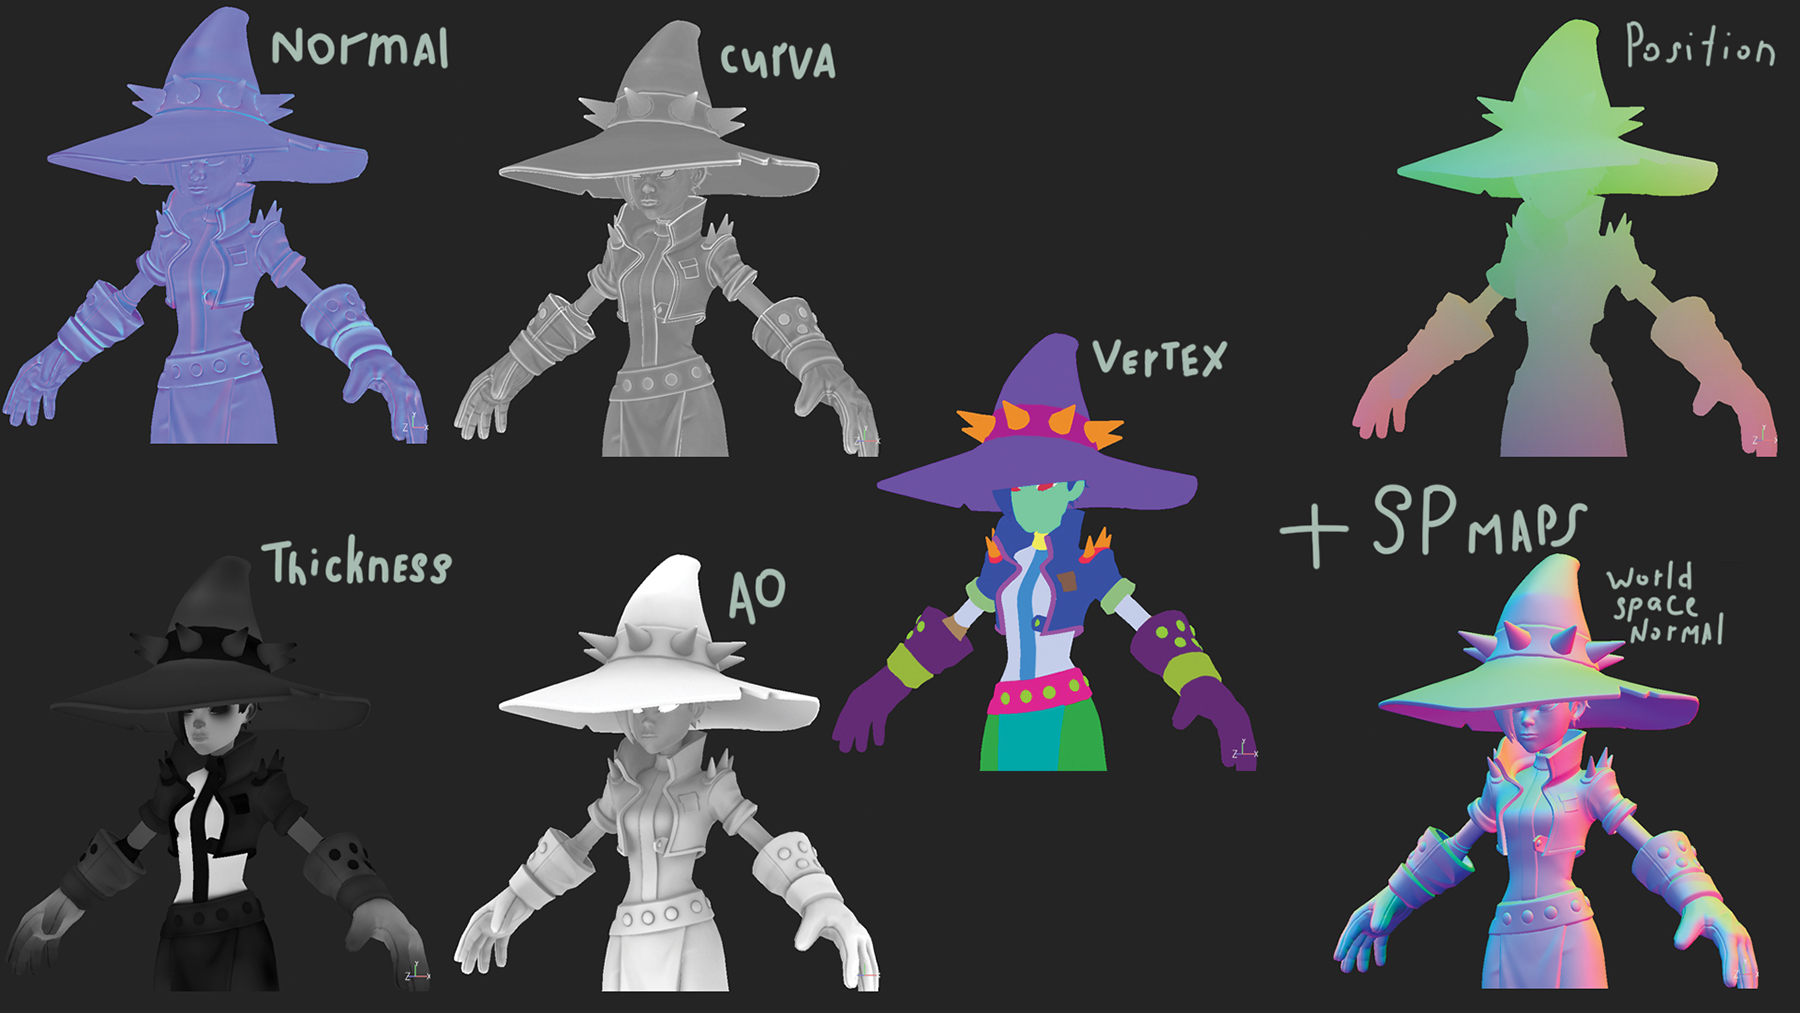
After creating UV maps, you can proceed to the baking process. Upload your model and textures to Marmoset Toolbag, making sure the scale of the high and low quality match. Customise the baking process according to your needs. It’s better to take a larger texture size as it can be reduced in Photoshop without loss of any quality. Export colour maps of normals, occlusion, curvature, thickness, and vertices, while ensuring each of the results meets your expectations and doesn’t contain artifacts, so your model will look detailed going forward.
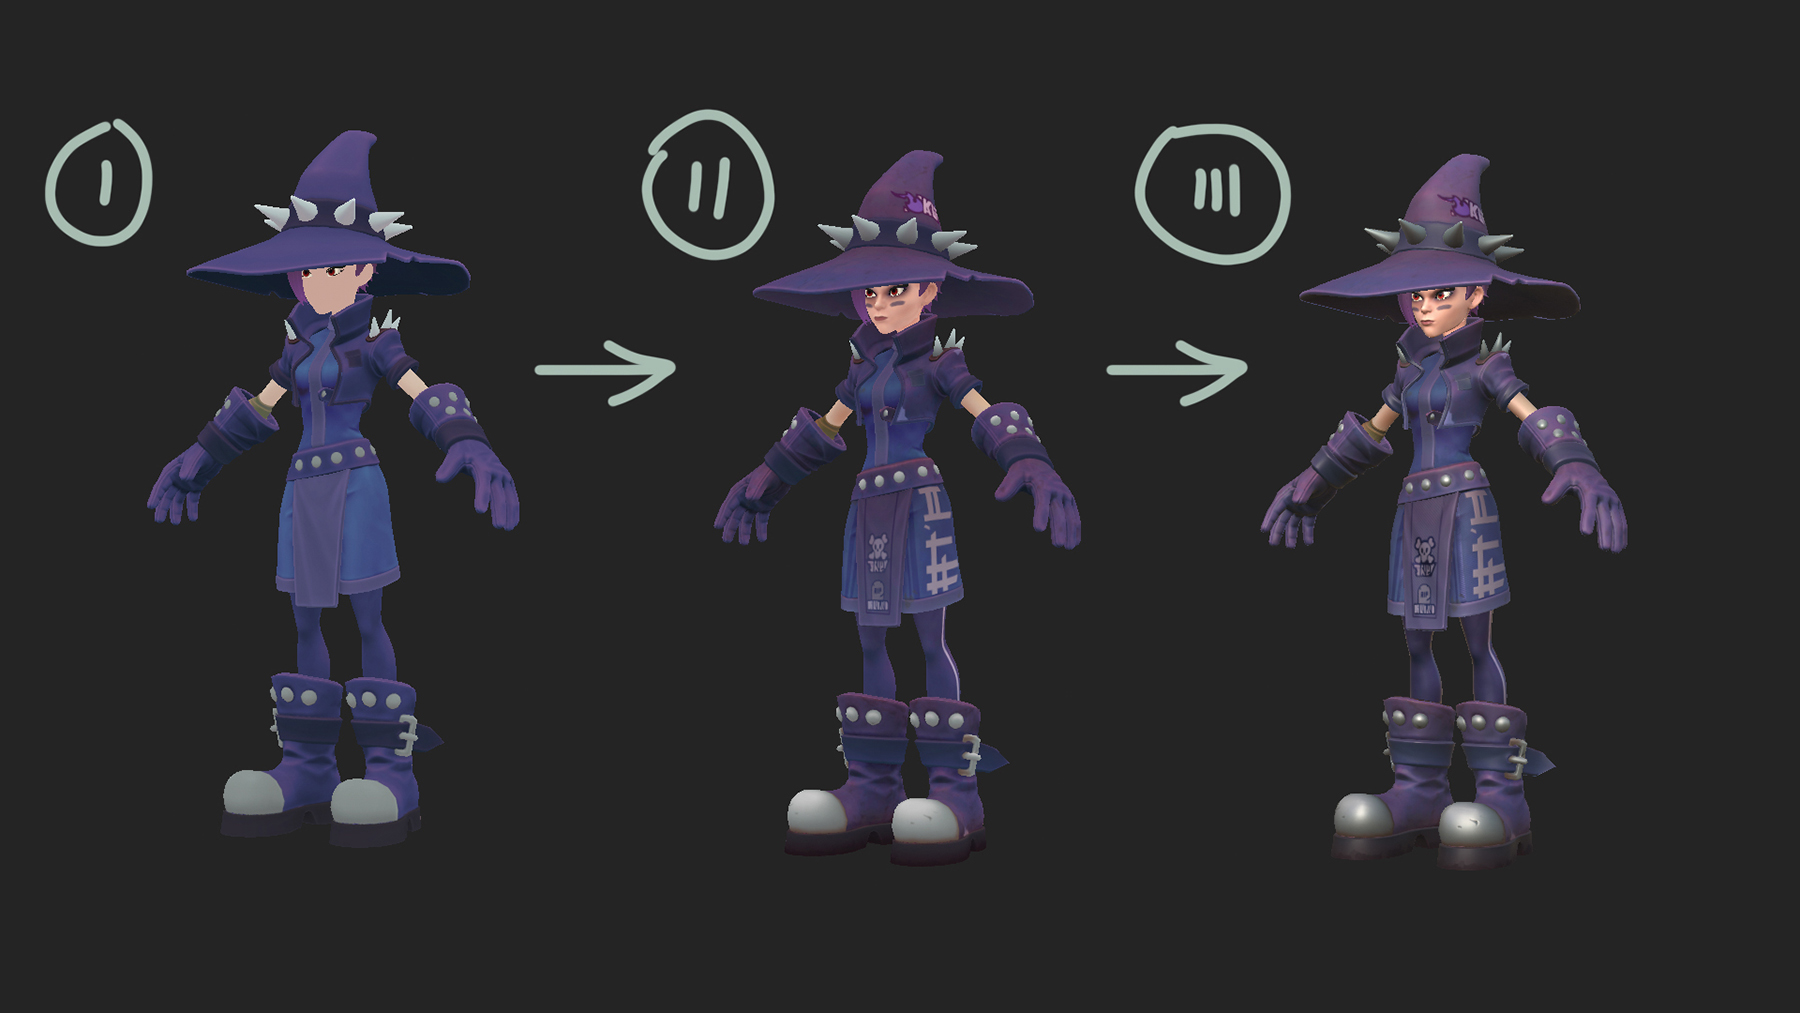
When the project is set up in Substance 3D Painter, you can start texturing. Divide the model into folders using the Vertex Color option, setting up each folder with separate parts. Adjust the material so that it matches the colour scheme of the concept, and then add textures and depth, using curvature generators and ambient occlusion, and avoiding black areas. Further jobs include adding textures of fabric, leather, latex, applying a gradient to each part of the model, and working with Roughness and Metallic. Repeat this process for all other materials.
There are two ways to pose a character: either using a rigging system or by employing a quicker process in ZBrush. Opt for the latter and establish a pose using masks and the Gizmo tool, then refine the pose with the Move brush if it’s needed. Be thorough in sorting any corresponding areas in the concept so your detailing is comprehensive from all perspectives. Pay particular attention to the fingers, shoulders and the pelvic alignment, as well as the eye direction and head tilt adjustments. References will help you to get this spot on.
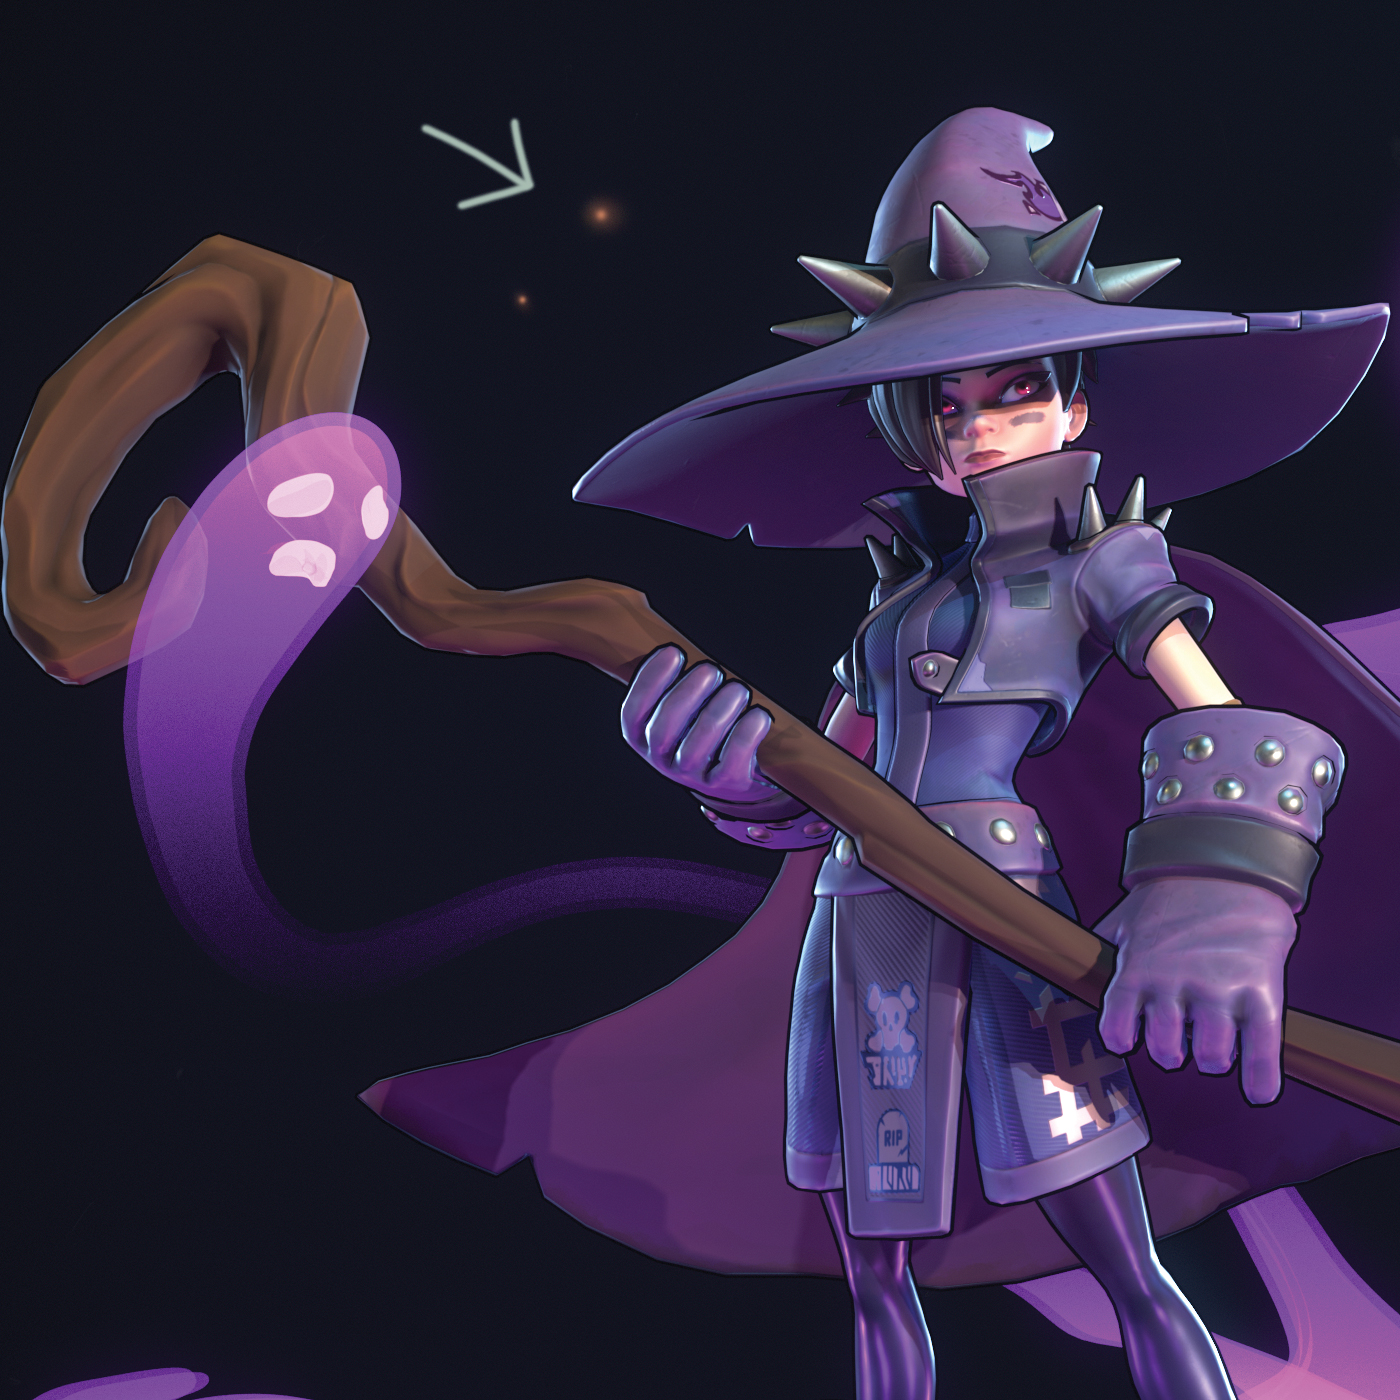
My preferred method for rendering uses Blender, although I decided to use Marmoset Toolbag for this particular character. Start by uploading your model to Marmoset and adjust the scale if necessary. Arrange each material in order while taking into account the differences from Substance 3D Painter, since a different HDR format is used. It’s also useful to emphasise the silhouette, which can be done with an outline. To do this, make a duplicate of the grid and turn out the normals, then adjust the black matte material in Marmoset. (Read our guide to the best rendering software for more advice.)
You can experiment with different lighting setups and techniques to get the desired atmosphere. For example, soft, indirect lighting can create a magical ambience and harsh, directional lighting produces a dramatic effect.
Let’s use a standard setup with three light sources. First add the main source, then one auxiliary light on the side, plus a contour backlight behind the model. Experiment with the direction and power of each light source, and you should be able to see how each works individually. In some places the lighting may not be enough, so you can also add small light sources, but don’t abuse this. At the end, install HDR lighting if it looks better.
As soon as the lighting is suitable, render the images from different angles and build a video. During the post-processing, you can add in effects such as a vignette, and perform blurring and sharpening. You could play around with the camera settings too. If necessary, the background can be changed in Photoshop, and atmospheric particles like dust and sparks can provide a little life. However, try to limit the use of such elements so that you don’t draw the audience’s attention from the character.
Apply composition principles such as the rule of thirds, leading lines and depth of field to enhance the visual impact and storytelling of your render.
Get the Creative Bloq Newsletter
Daily design news, reviews, how-tos and more, as picked by the editors.
Thank you for reading 5 articles this month* Join now for unlimited access
Ivan is a talented 3D artist with experience in creating stylised characters. He has a professional mastery of modelling tools to bring unique and memorable designs to life. Ivan has a deep understanding of anatomy, forms, and styles, ensuring high-quality results in every project.
You must confirm your public display name before commenting
Please logout and then login again, you will then be prompted to enter your display name.