Ever wondered if you can dive into poly modelling right from your iPad? Good news, you can, and this tutorial shows you how.
(Image credit: Glen Southern)
Polygon modelling, sometimes called box modelling and 3D sculpting, are two different techniques used to create models, each serving unique purposes and suited to different stages of the 3D design process. We’ve been able to model on a desktop or using the best laptops for 3D modelling for a lot longer than we’ve had the ability to sculpt. On a mobile device 3D modelling has only just started to become popular, firstly with Forger and now with a new app called Valence 3D. The upshot is, you can now use the best iPads for drawing to model and sculpt in 3D.
Firstly, let’s understand the primary differences between polygon modelling and 3D sculpting. Polygon modelling is a method where the artist creates a model by defining and manipulating individual polygons, edges and vertices in a 3D space.
Polygon modelling and sculpting are indispensable weapons in the creative arsenal of 3D artists
This technique is fundamental in creating structured and optimised models for various applications, particularly where a lower polygon count is beneficial. It often starts with a simple geometric shape, such as a box in box modeling, that’s then refined by adding, deleting, subdividing and merging the individual components. This offers high control over the shape and topology of the model, making it ideal for creating mechanical objects or any models where specific dimensions and shapes are required.
Models created by using polygon modelling are often more optimised for performance, which is crucial for real-time applications like video games and interactive media. We see this type of modelling in programs like Maya, Cinema 4D, Blender, Silo, Modo and similar. (Read our Maya tutorials and Blender tutorials for more details.)
3D sculpting, on the other hand, is much more akin to working with clay in the digital environment. This method is favoured for its intuitive approach to shaping complex, organic models. These sculpting tools allow for pushing, pulling, smoothing and carving a digital object much like clay. It typically starts with a basic form, which is dynamically subdivided and detailed as needed.
Expert tip: Scene hierarchy
(Image credit: Glen Southern)
Keeping track of all your individual model parts can be tricky. Use the Scene Graph on the left hand side of the screen to keep the parts in some sort of order and name them. I’m well known for being terrible at this!
Sculpting is especially good for organic and complex forms like human figures, animals and fantastical creatures. It enables artists to work in a more artistically expressive and less technically restrictive manner. High-resolution details, textures and realism can be achieved more easily through sculpting, especially with tools that support dynamic tessellation and high polygon counts.
So why would we need them both? Different projects will require different techniques. For example, a video game character might begin as a sculpt for the organic parts like the face and hands, then use polygon modelling for the gear and weapons. High-detail sculpts can be used to generate Normal maps for lower polygon versions of the model. This allows for highly detailed models to be efficiently used in performance-sensitive platforms.
Artists can choose the method that best suits their own workflow at any stage of the design process. For instance, rapid prototyping and concepting work might be done through sculpting, while precise adjustments and UV mapping are handled through polygon modelling.
Each of these techniques supports different stages of the creative and technical production process within 3D modelling, which makes them both indispensable weapons in the creative arsenal of artists and designers across a wide range of industries. Here, we’ll take a little look at what we can do using Valence 3D (read our guide to the best 3D modelling apps on iPad for more, including ZBrush for iPad).
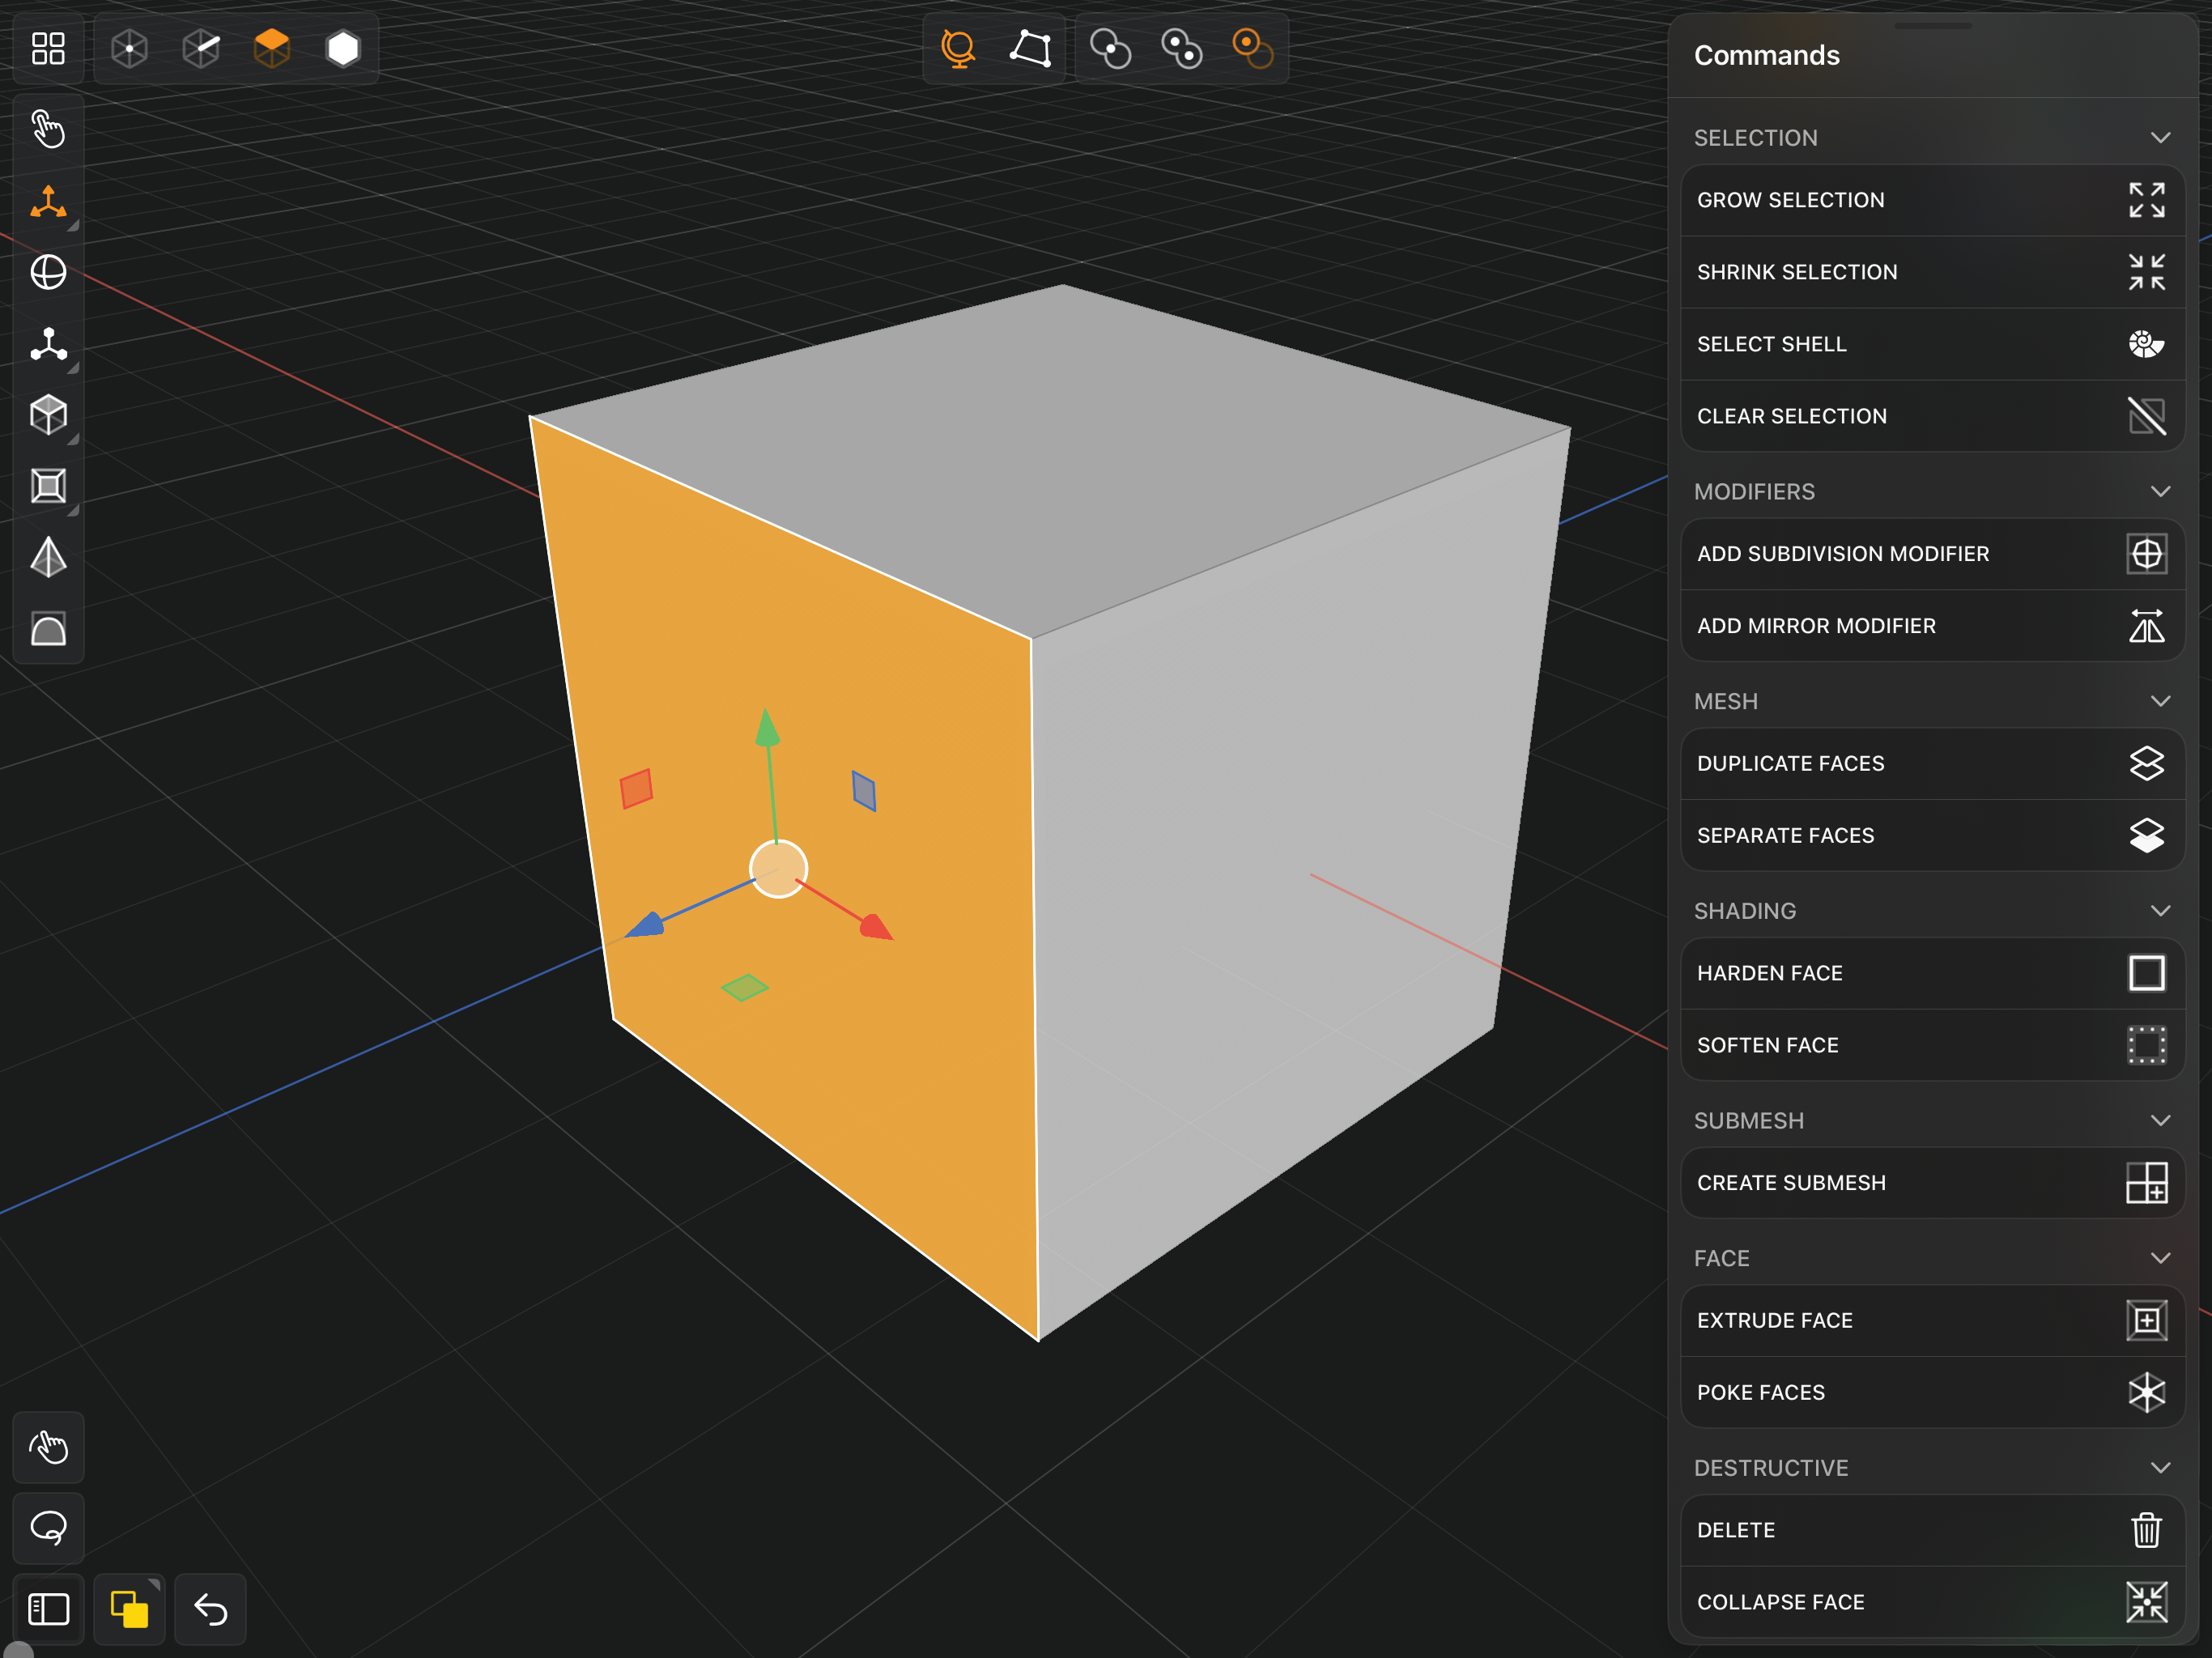
The core of a polygon modelling app is the ability to select and manipulate the individual components. Using the buttons at the top of the screen in Valence 3D, you can switch between faces, edges and points. Then with the buttons down the left-hand side, you can scale, rotate and move the selected items as needed. This is the basic way to form a shape rather than sculpting.
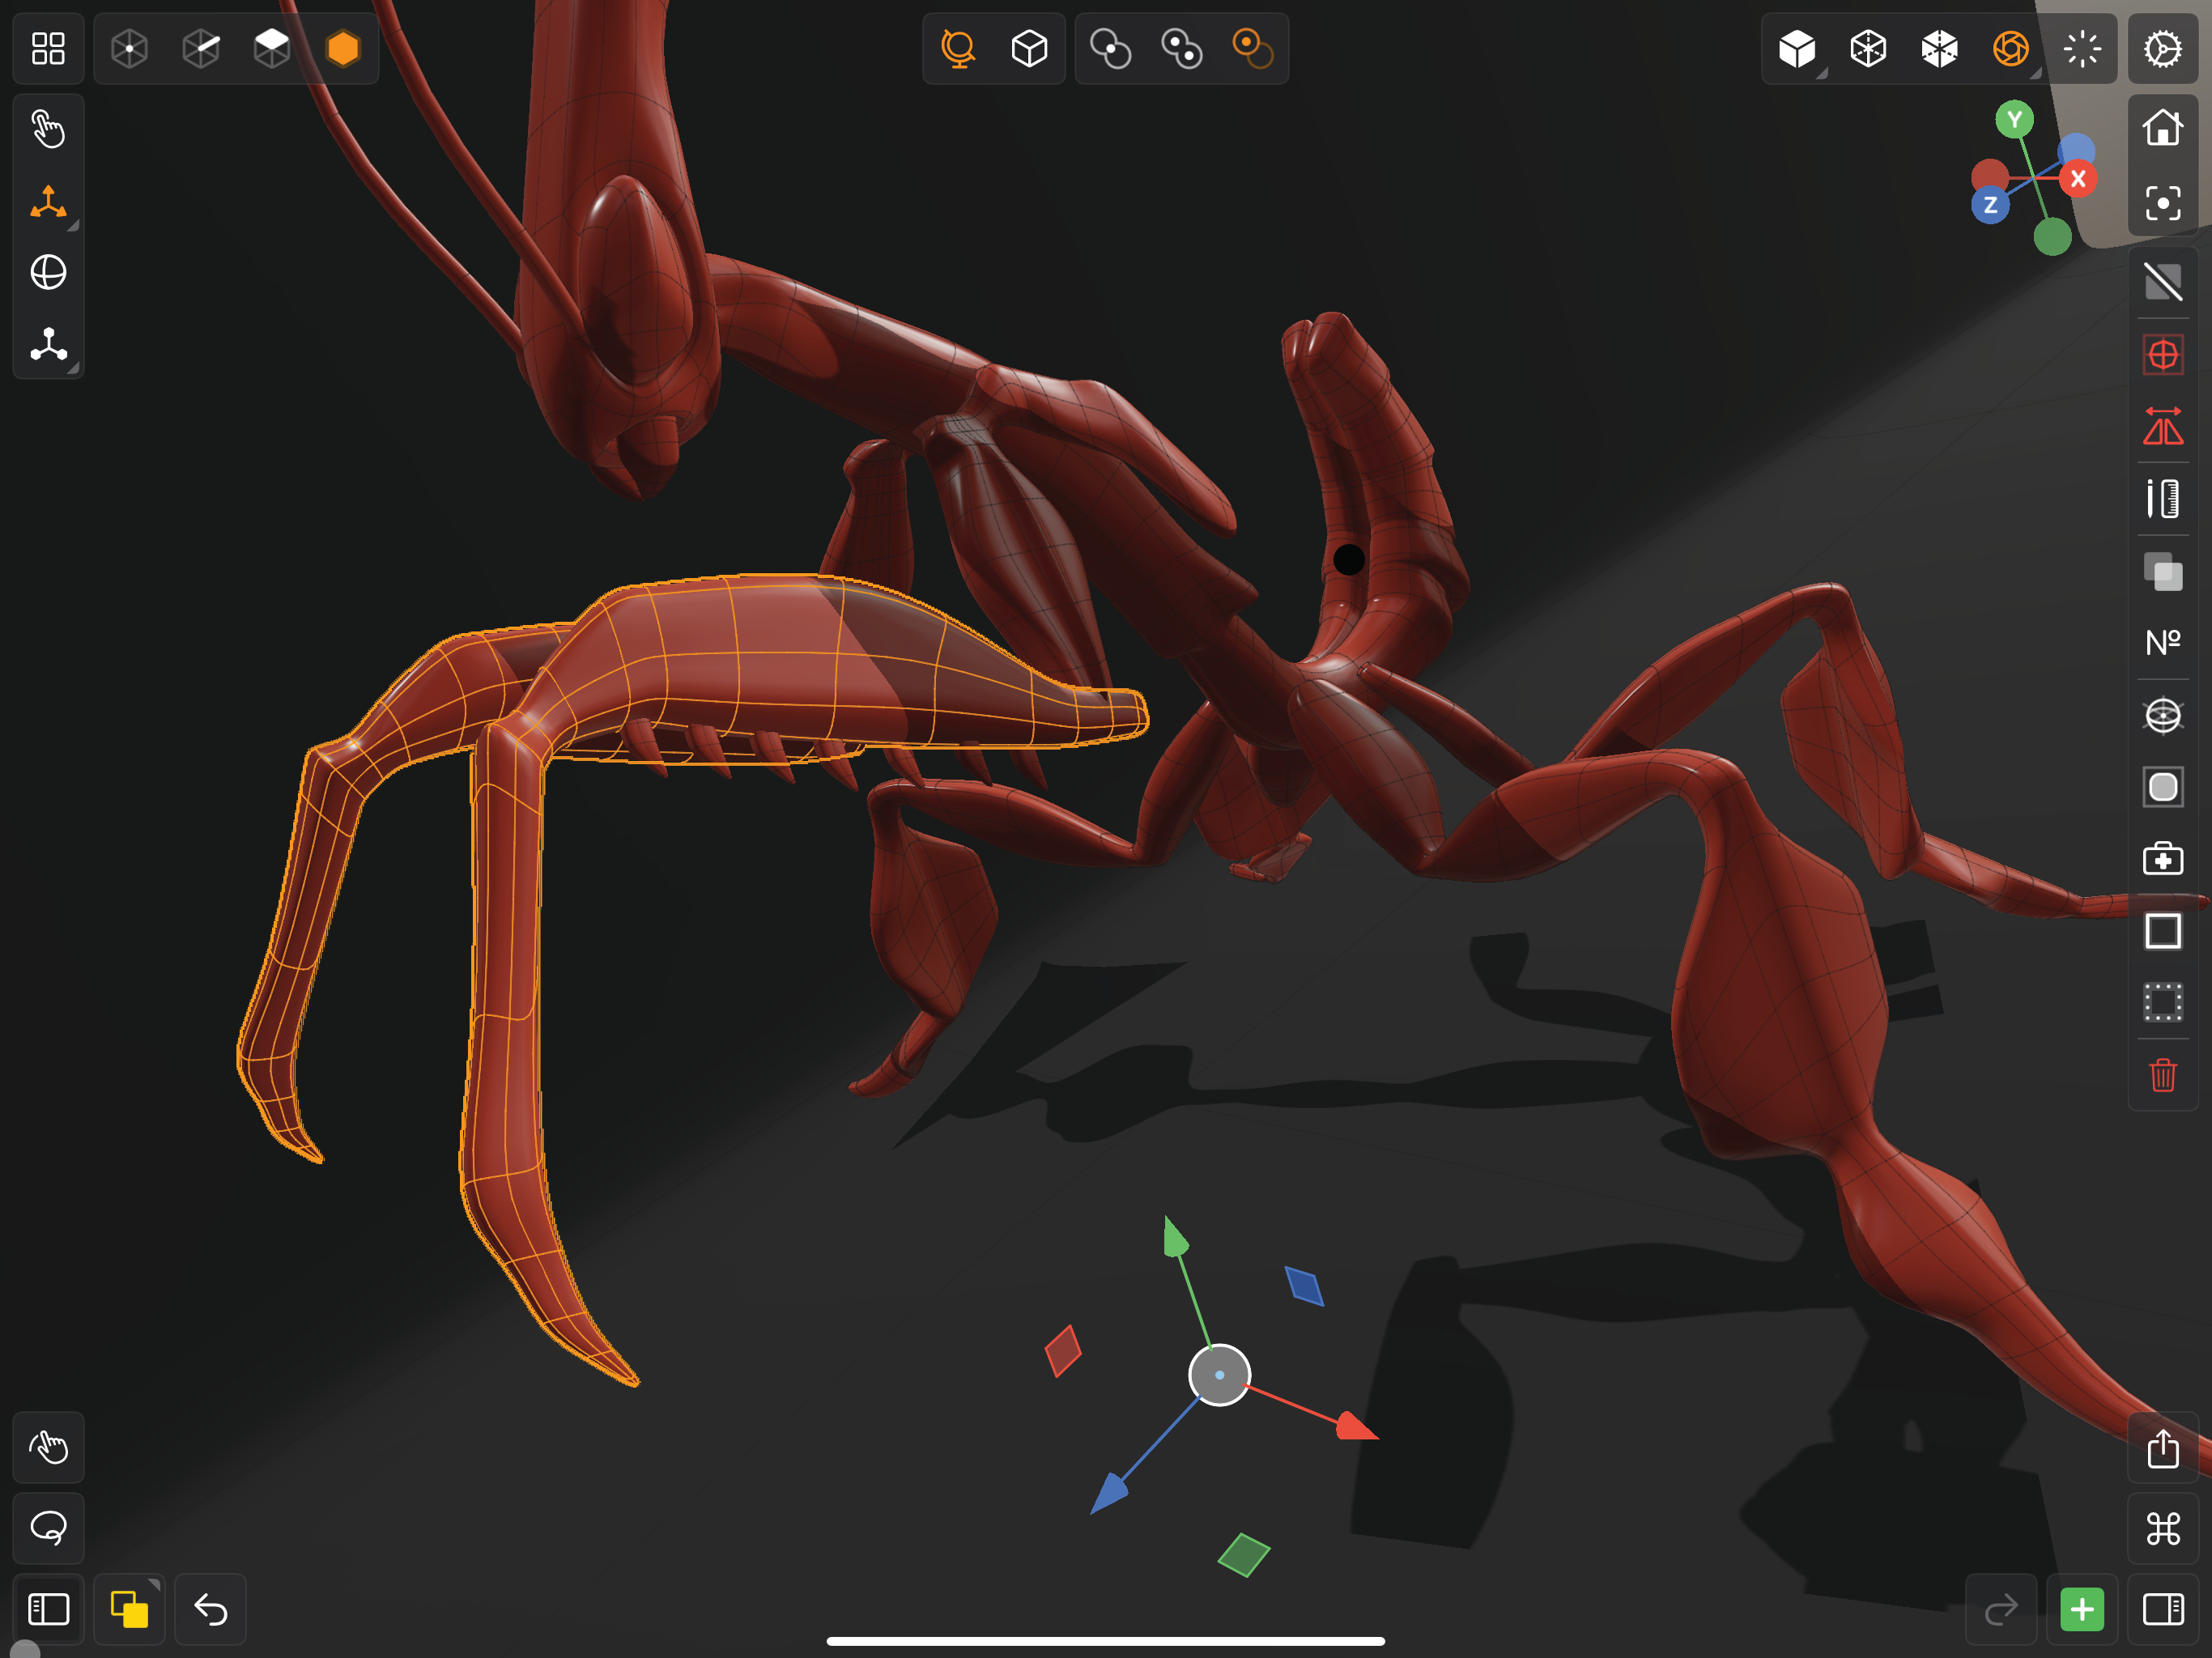
If you’re working with a model and have extruded faces to make complex parts that have ended up looking blocky, you can use subdivision to round the model off. There’s a red button on the right side of the interface that allows you to activate subdivision and then see the rounded result. It can be turned on and off to check the result.
When you’re beginning a model, it’s helpful to have some image references to work with. This could perhaps be a design you’ve drawn yourself, or a photographic reference. At the bottom of the Valence interface is a green button that enables you to look for an image you’ve saved. You can then move that around as per any other model and even lock it so you can't accidentally select it.
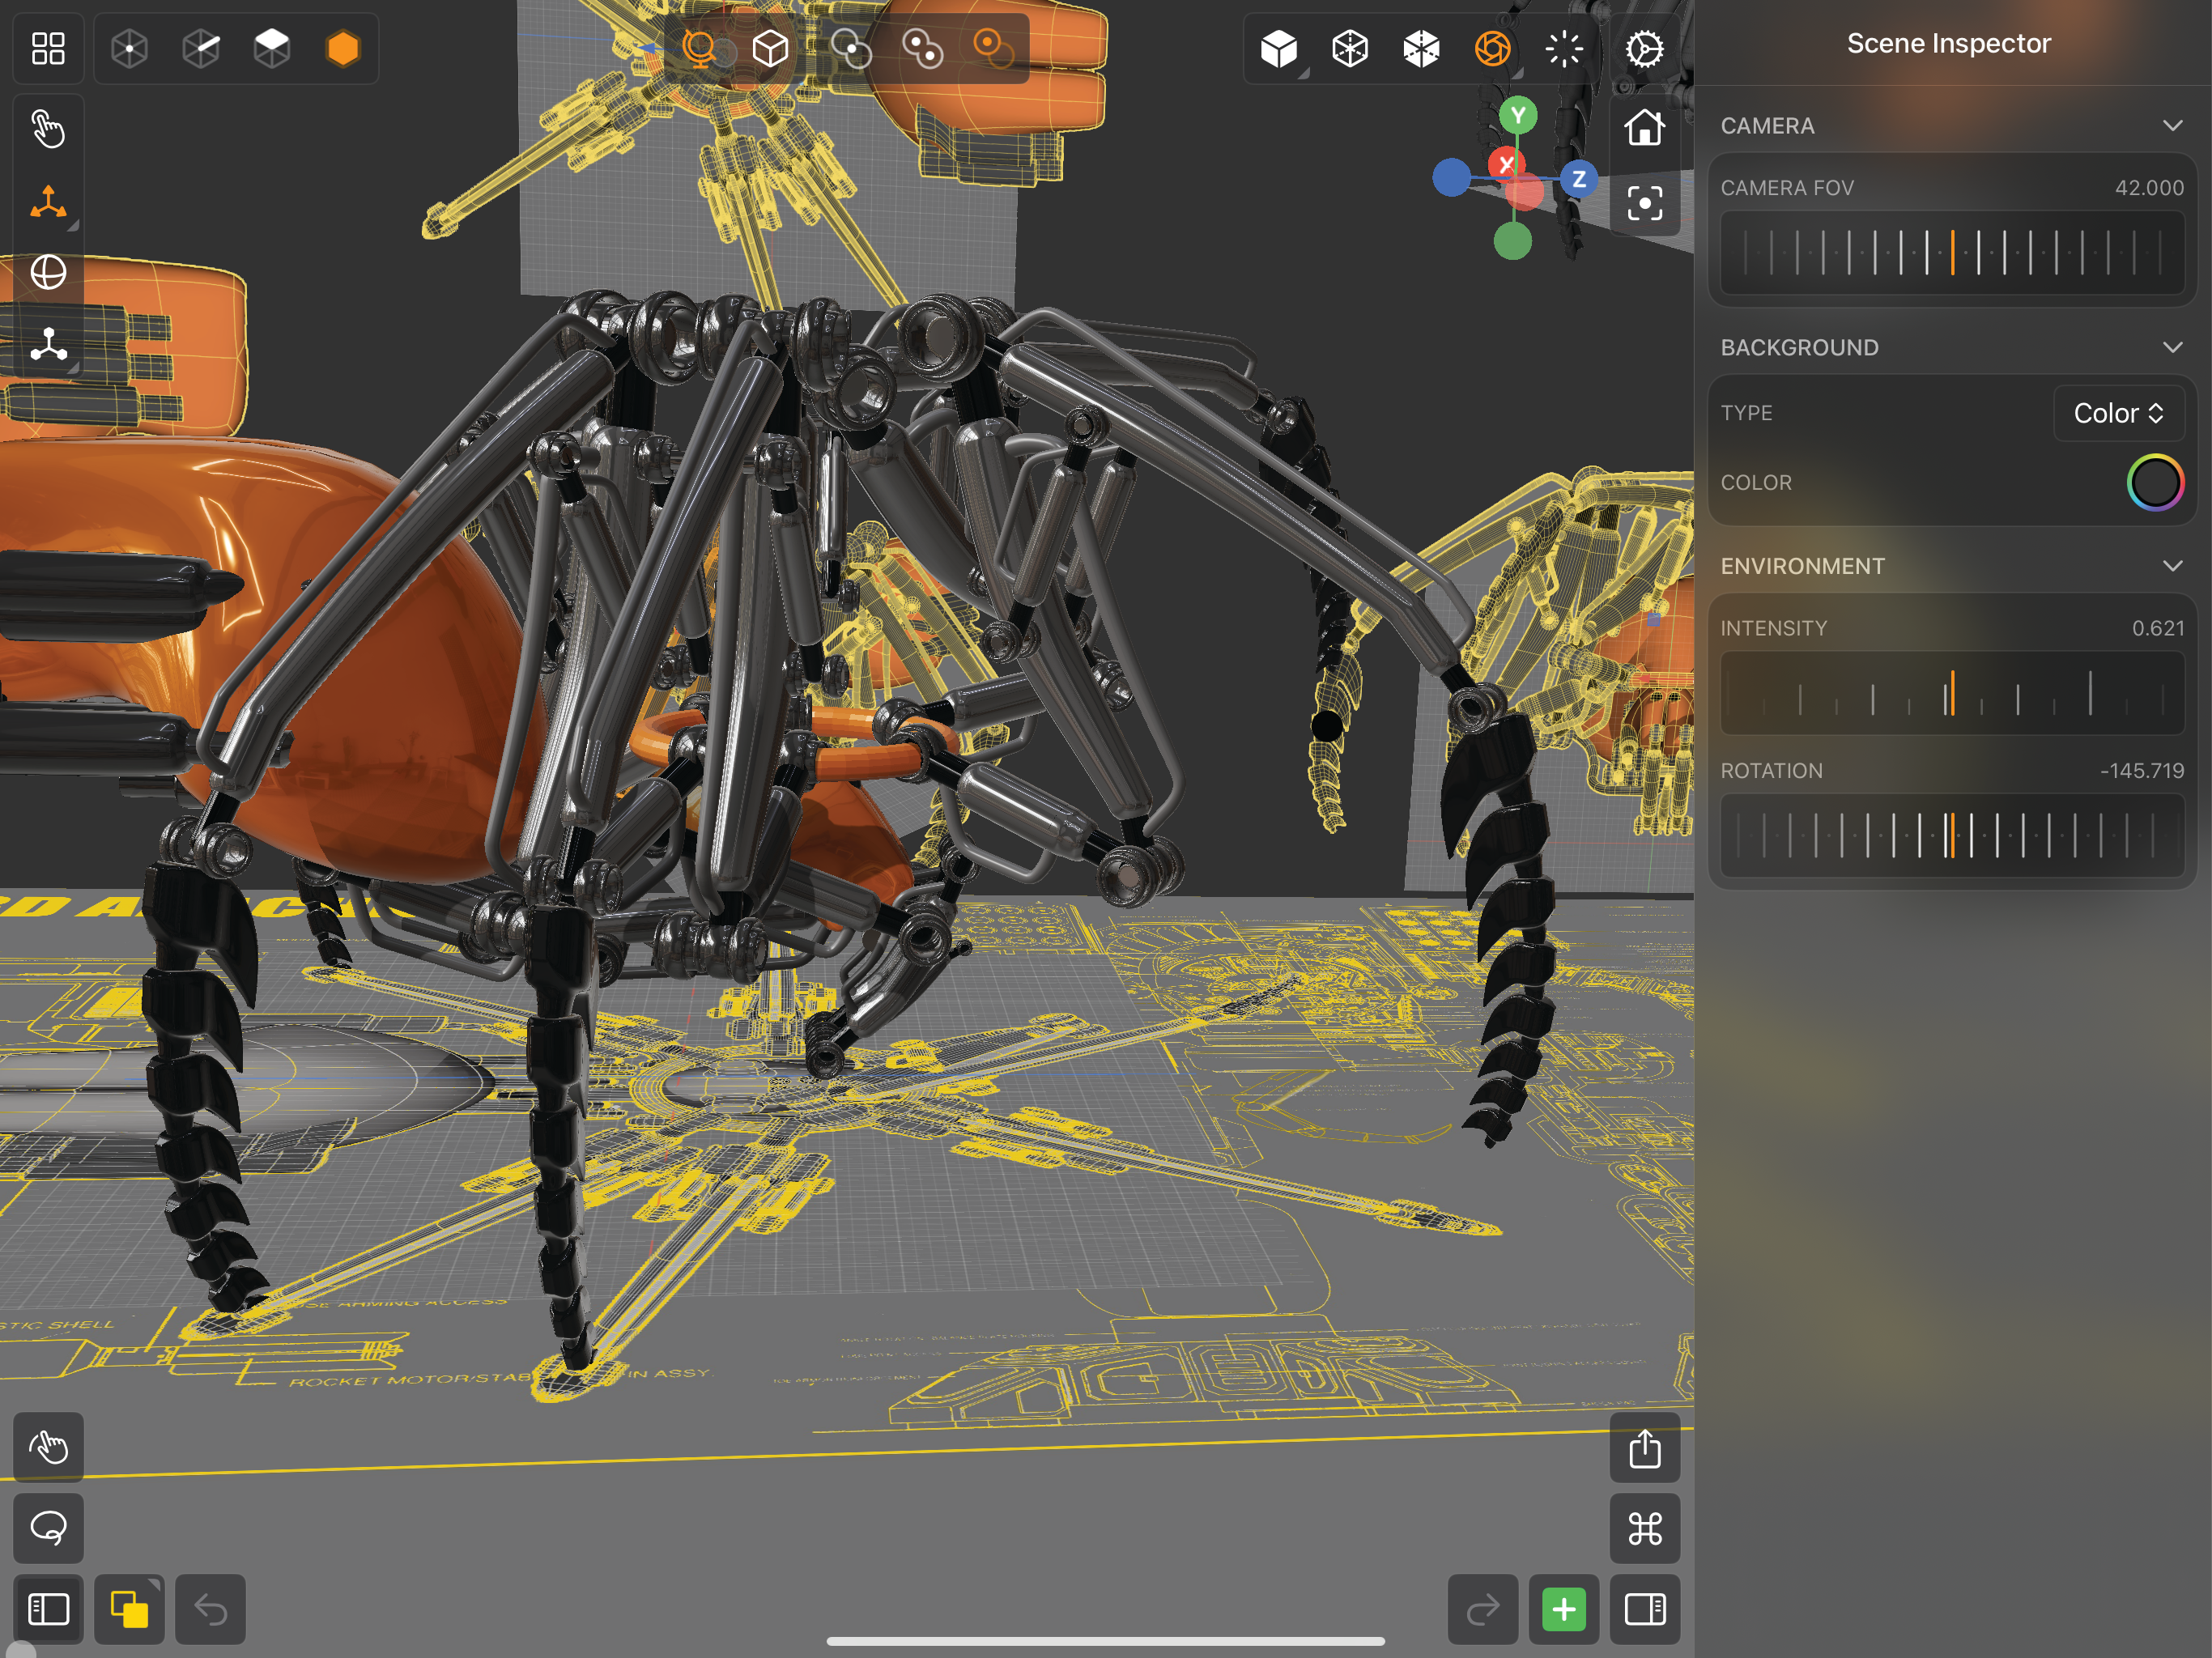
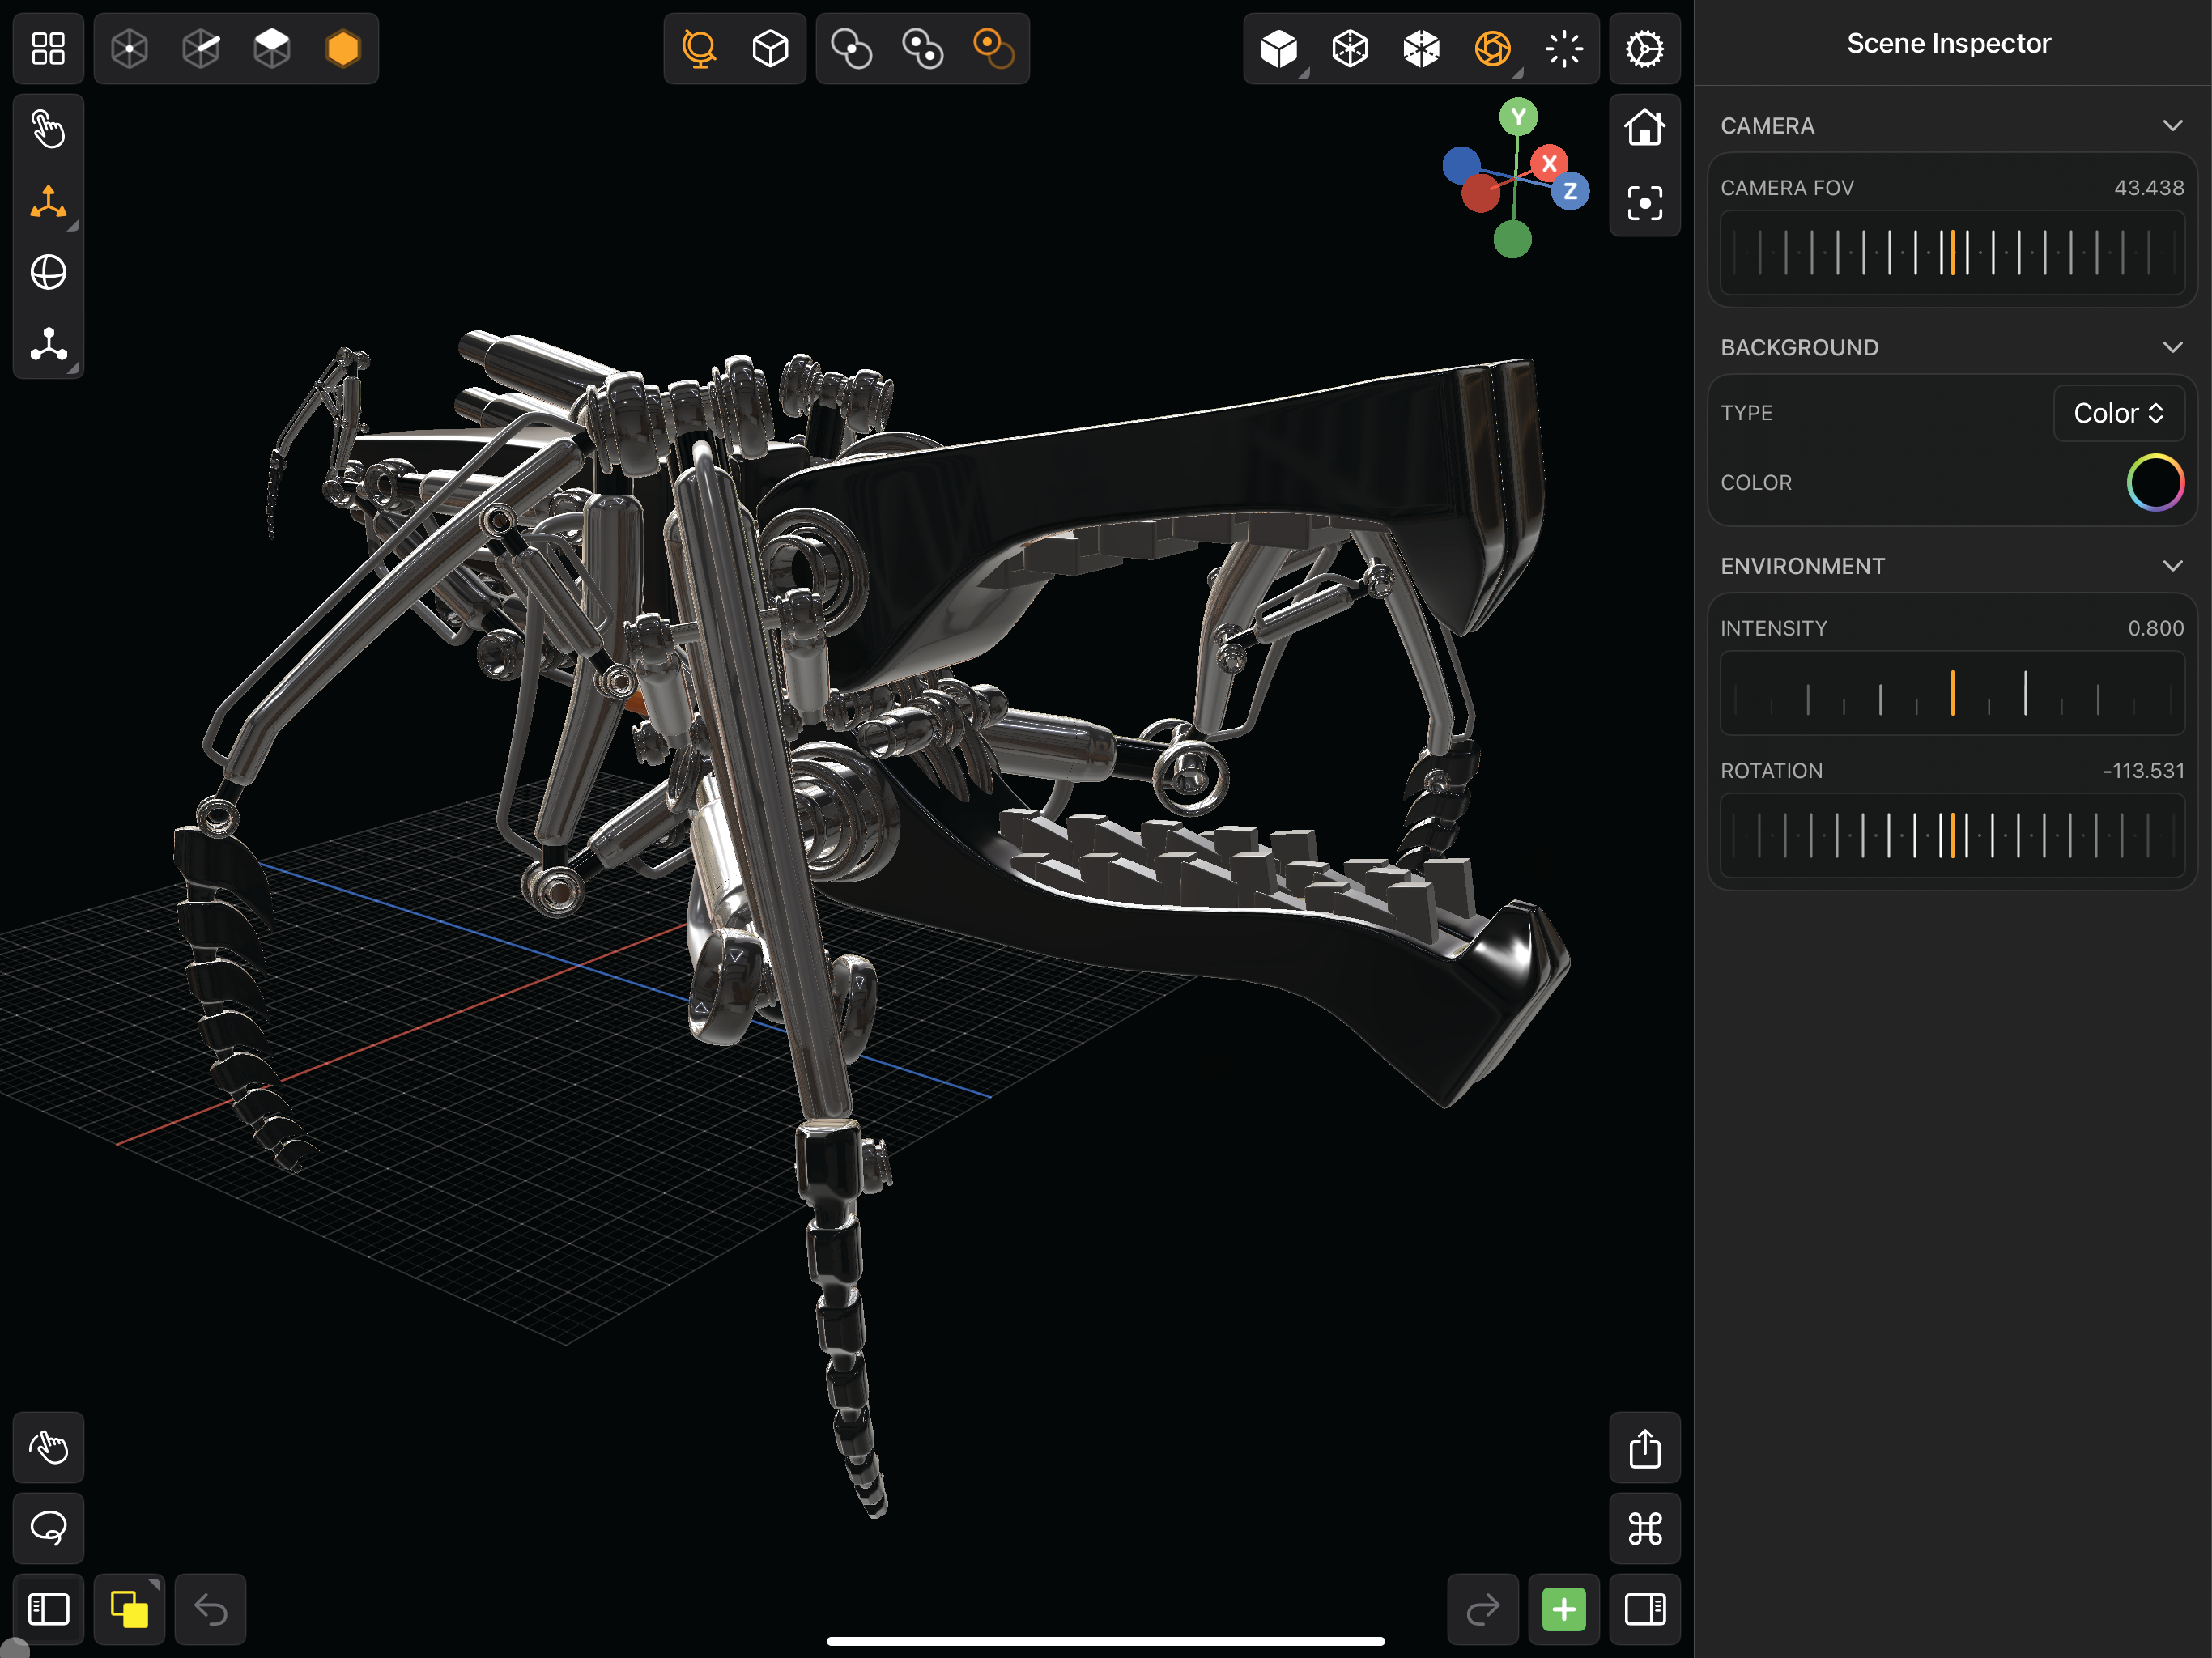
There are all sorts of render modes in Valence 3D including Diffuse, Wireframe, X-Ray, PBR and Path-Traced. It’s best to keep it to Diffuse most of the time, switch to Wireframe sometimes as you’re working, and occasionally check it in PBR to see and adjust colors and shader settings. If you use the full Path-Traced mode, you’ll find it a lot slower.
Do you have a 3D trick or hack? Share your advice in the comments below.
Thank you for reading 5 articles this month* Join now for unlimited access
Glen runs SouthernGFX, a small Cheshire-based studio specialising in character and creature design, which creates assets for TV and film. Clients include SKY, Wacom and Oculus Medium and the studio has an impressive project list that features 3D models for Game of Thrones' house sigils. He's been using and training ZBrush for over 15 years and is a Wacom Ambassador for the UK and Ireland.
You must confirm your public display name before commenting
Please logout and then login again, you will then be prompted to enter your display name.