Avatar artist reveals how to create a 3D nature scene
Alex Alvarez has worked on numerous hit movies, including Avatar and Super 8. Here, he goes back to nature to create a realistic-looking environment scene.
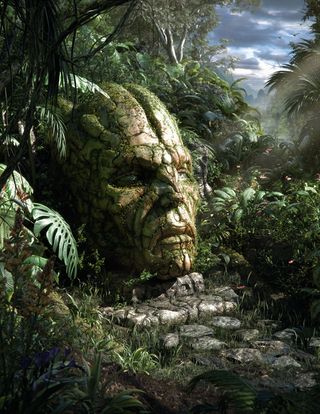
Creating 3D art requires a lot of detail, especially natural-looking 3D environments, which for a long time was difficult to achieve due to software and hardware limitations. Today, however, thanks to engines that can render billions of polygons with physically accurate materials and lighting, the process has become manageable.
The Onyx tree suite is a great collection of specialised apps for creating broad leaf, conifer and palm trees, with an excellent library. Xfrog also has a large library available online, some of which I have used in my work.
Ivygen is a free standalone app that enables you to grow ivy over any imported mesh. speedtree, a more recent development, is quickly becoming my tool of choice, however, due to its phenomenal levels of control and high-quality viewport, allowing for the development of textures and materials as well.
01. Initial design
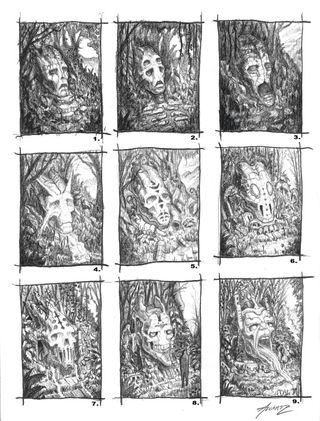
I was asked to create this piece exclusively for 3D World magazine. The brief was simple: A stone head in a jungle setting. Knowing my available time and deadline - three weeks at around 40 hours per week - I create concept sketches that I feel are realistic given the timeframe. I submit nine ideas to 3D World editor Ian Dean and, with a direction selected, it's time to begin layout.
02. Stone head and terrain
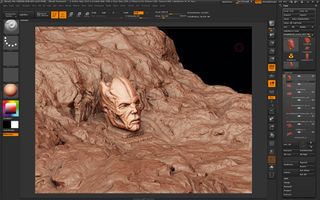
Given that the head is the focal point of the image, my first step is to sculpt the head in ZBrush. I then import it into Maya, load the approved sketch as an image plane, set up the camera lens, position and then align the head with the concept, while working at real-world scale.
With the head in place I now sculpt the ground from a poly plane using Maya's Sculpt Geometry tool, and export it into ZBrush for detailing. I have a large library of tileable rock and stone alphas that I create with FilterForge (an awesome Photoshop plug-in) that makes detailing ground and terrain a very quick task. However, for larger terrain masses I use a library of alphas I create with terrain generator, World Machine.
03. Blocking out
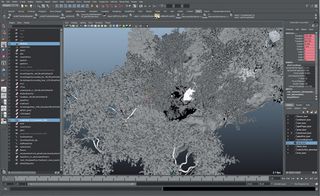
Using Mental Ray and the Sun and Sky system, I decide to block out the light and shadow areas for the scene before adding any plants. Once I settle on the light angle for the sun, then import a bunch of trees created in Onyx BroadLeaf.
Get the Creative Bloq Newsletter
Daily design news, reviews, how-tos and more, as picked by the editors.
Next I position them to create the desired patches of light, making sure that the stone head receives full sun. Almost none of these trees are visible in camera, but elements outside of the frame can play a critical role in the lighting and reflections of the elements that are.
04. Create plants and trees
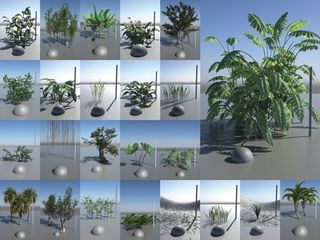
While I have a library of plants and trees from other projects, few would work in a jungle setting, so I have to create new assets. SpeedTree is amazing: I am able to create most of the necessary assets with presets and tweaking. As I get more comfortable, I am able to create some elements from scratch, including the hanging vines and Monstera Deliciosa plants - the latter by first modelling leaves in Maya and then attaching them to plants in SpeedTree.
The library of plants I create is then exported to Maya to create the Mental Ray mia_materials, to ensure they'll be easy to reuse in the future. The sphere has a mid-value, grey material as reference for the plant's colour and value.
05. Create moss brushes
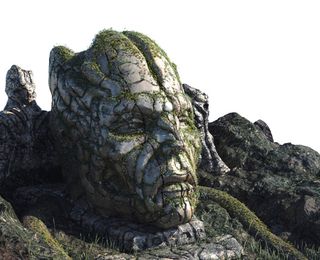
For the growth on the head, I create three different 'moss' brushes with PaintFX using custom settings and textures/materials. This enables me to 'paint' the moss onto the head while being able to interactively adjust the settings for scale, behaviour and density. Once done, I convert the PaintFX strokes to geometry.
06. 'Planting' the grass
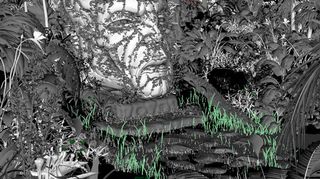
For the grass-like growth on the ground I create a simple library of about 40 unique grass blades in SpeedTree, and set all of them to the origin in Maya, with their pivot points at the base of the stem. Using the SP Paint script, I can instance-paint them onto the ground and around the rocks, and the script will randomise the rotation, scale and objectID as I 'geo paint'.
07. Quixel's Megascans
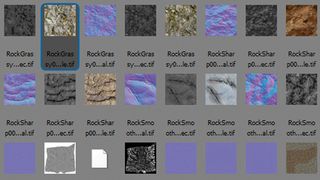
While not much of the ground is visible in the final image, I would still need high-res and high-quality textures of leaf-covered ground and mud that I could blend between. Megascans is a new online service from Quixel that has phenomenal texture quality including colour, spec, glossiness and normal maps. Quixel is kind enough to provide me with a texture set that matches my needs and the normal maps provided are exceptional.
08. Materials
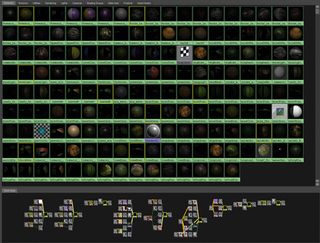
Once I have finished texturing, I move into Mental Ray to work on materials. I continue to use Mental Ray for natural environments due to its ability to crunch and raytrace huge amounts of polygons with transparency (such as leaves). I exclusively use the Mia Material for all elements. Translucency is achieved by turning it on, setting the value to 1, then using the Transparency attribute to control the intensity - it's non-intuitive, but it works very well.
09. Adding some insects
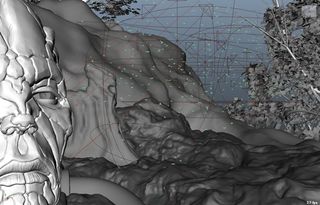
Towards the end of the project, I decide to add a few flying butterflies and smaller bugs to the scene. These are modelled, animated and then instanced onto particles using three volume emitters and a turbulence field.
10. 3D volumetric fog
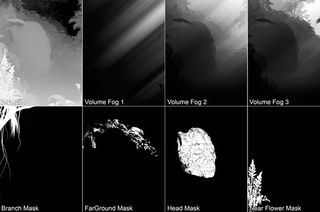
I create three different fog passes in Maya, using volume primitives. These allow for 3D volumetric fog that reacts correctly to scene lighting and can receive raytraced shadows. I create my fog passes by assigning Lambert materials to all elements with Matte Opacity set to Black Hole.
11. Post-production in Photoshop
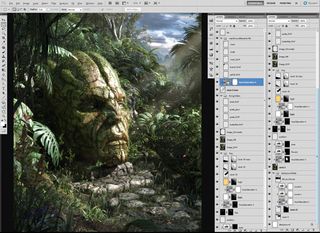
The final image is composited in Photoshop at 5K tall. Depth of field is added using the Lenscare plug-in. I also create some individual masks in Maya so I can isolate parts of the image for specific colour correction, such as making the head colour more saturated than what I had rendered from mental ray. Once I have the composite complete, overall colour grading is done in Photoshop using Magic Bullet PhotoLooks.
Words: Alex Alvarez
Alex Alvarez is the founder and director of the Gnomon School of Visual Effects. He also works on other projects, such as creature development for Avatar, Super 8 and Prometheus. This article originally appeared in 3D World magazine issue 176.

Thank you for reading 5 articles this month* Join now for unlimited access
Enjoy your first month for just £1 / $1 / €1
*Read 5 free articles per month without a subscription

Join now for unlimited access
Try first month for just £1 / $1 / €1
The Creative Bloq team is made up of a group of design fans, and has changed and evolved since Creative Bloq began back in 2012. The current website team consists of eight full-time members of staff: Editor Georgia Coggan, Deputy Editor Rosie Hilder, Ecommerce Editor Beren Neale, Senior News Editor Daniel Piper, Editor, Digital Art and 3D Ian Dean, Tech Reviews Editor Erlingur Einarsson and Ecommerce Writer Beth Nicholls and Staff Writer Natalie Fear, as well as a roster of freelancers from around the world. The 3D World and ImagineFX magazine teams also pitch in, ensuring that content from 3D World and ImagineFX is represented on Creative Bloq.
