5 top tips for sculpting a 3D character
Character artist Hector Moran shares his tips for sculpting a complex and customisable figure, ready for 3D printing.
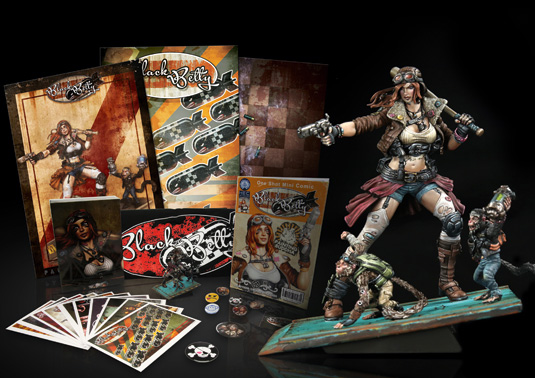
There are numerous free 3D models available online to aid in your creative projects. But if you can't find what you're looking for, you could always create your own, much like freelance character artist Hector Moran. Last year, Moran collaborated with Painting Buddha to create an original collectible miniature, Black Betty, with multiple customisation options.
The Mexican-born, Vienna-based artist's first 3D freelance gig came in 2012 when he was approached to make miniatures for Kingdom Death, and since then he's continued to freelance for companies like Hasbro, while working on his own projects – the first being Black Betty.
Black Betty is a complex but fun figure, created at a larger 75mm scale to decrease the paint job difficulty level, and sculpted in T-pose. "People avoid this as it's hard to achieve balanced and dynamic poses. I struggle with poses looking stiff at times, but like the transpose system in ZBrush and in other minis projects, it paid off to have the base character for alternate versions or re-posing," says Hector. "I designed Betty with a very layered outfit and went for a semi-realistic style that called for stitches, cloth tears and so forth."
One typical challenge of creating customisable figures is ensuring the different parts fit together. Betty has two alternate heads with different hair and facial expressions; two left arms with different weapons, and the option to wear either a skirt and shorts or just shorts. But Hector wasn't fazed. "I used her belt as a bridge section that could be swapped out for having the skirt or no skirt option. Arm and head options were easy enough due to the sections where I made the cuts."
Hector advises using natural seams and sections for custom parts. "Most figure sculpts have areas where it just makes sense to do the cuts, which you often have to do anyway for the mold/casting process. Those same cut areas can present great opportunities for a differently posed limb, alternate weapon, and even clothing options."
Follow Hector's tips for a successful sculpt:
01. Be bold, but realistic
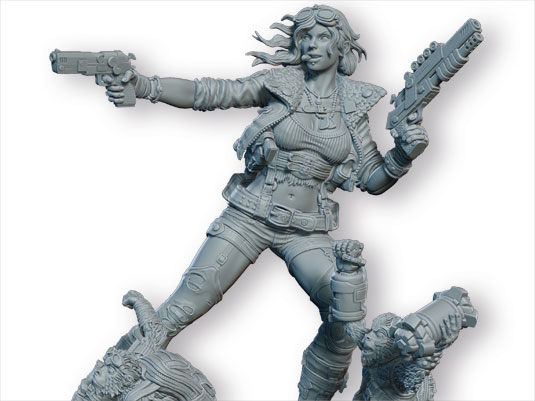
I really wanted to push myself with Betty, so I sculpted lots of details I wouldn't do for other scales. I wasn't sure if they would all print – even at the 75mm scale range – but I just went for it. However, while pushing all of that detail and cloth layering, I always kept a realistic cast and mold friendliness in the back of my mind. Be realistic about what you can finish on a reasonable timeline.
02. Keep it watertight
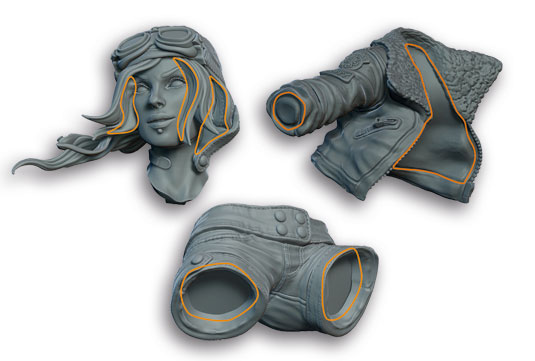
I sculpt minis to look as much like the concept art as I can. Once I get them there I do a pass of what I call minifying. To me that means plugging holes and undercuts that would make casting difficult. Hair strands that are too thin or loose to survive may need to be merged into more stable clumps, or moved closer to other surfaces so that they don't cause trouble. Another thing I do is make sure I don't leave any meshes open, so clothing sleeves and trouser legs are always plugged.
03. Keep scale in mind
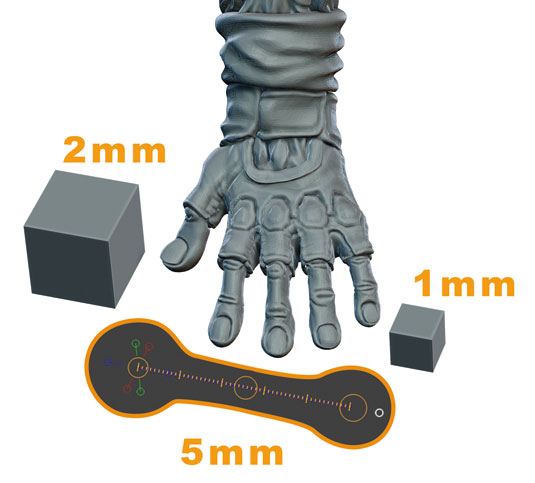
Final scaling is part of my minifying pass, once the concept is approximated enough. With smaller minis I always keep style and scaling in mind. Many styles allow lots of simplification and scale can't afford too much detail. Good use of transpose units is key, but seeing your work in print or final casts is also very helpful, so doing practice prints, if affordable, is great. If you have trouble judging scale then try to create a cube or measuring piece of geometry that you can decide is your world units reference.
04. Smart cuts and keys
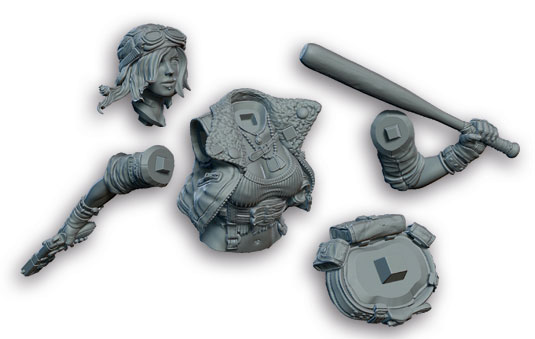
Be smart about where you choose to make cuts and keys by using natural transitions on the model. Clothing separations, wristbands, and even muscle definition lines are ideal. Avoid having a seam or cut where it will end up too visible after assembling. Once you choose where you want that cut you can use existing topology or masks, polygroups, group loops and DynaMesh to make your cuts and keys. The main idea is to make things easy and looking nice for the end users/collectors.
05. Involve your print/cast vendors
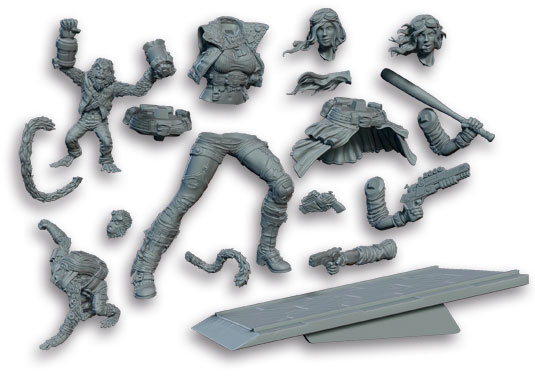
When planning cuts and keys you have to involve your casting vendor. If you're doing work for a client they may already have experience or a plan for cuts. If you're doing your own project then talk to your vendor about the cuts. These days a few vendors handle some, or all, of the cuts for you, but I prefer to collaborate. With Betty I did 90 per cent of the cuts, and agile manufacturing company Ownage made additional cuts based on what they found best for their molding process.
Words: Hector Moran
Mexican-born 2D/3D artist Hector specialises in character art and is based in Austria. This article originally appeared in issue 203 of 3D World magazine.
Liked this? Read these!
- Check out these inspiring examples of 3D art
- Be inspired by these creative resumes
- Browse through our how to draw collection
- How to improve your character drawing
- Learn paper craft with this simple guide

Thank you for reading 5 articles this month* Join now for unlimited access
Enjoy your first month for just £1 / $1 / €1
*Read 5 free articles per month without a subscription

Join now for unlimited access
Try first month for just £1 / $1 / €1
Get the Creative Bloq Newsletter
Daily design news, reviews, how-tos and more, as picked by the editors.

The Creative Bloq team is made up of a group of art and design enthusiasts, and has changed and evolved since Creative Bloq began back in 2012. The current website team consists of eight full-time members of staff: Editor Georgia Coggan, Deputy Editor Rosie Hilder, Ecommerce Editor Beren Neale, Senior News Editor Daniel Piper, Editor, Digital Art and 3D Ian Dean, Tech Reviews Editor Erlingur Einarsson, Ecommerce Writer Beth Nicholls and Staff Writer Natalie Fear, as well as a roster of freelancers from around the world. The ImagineFX magazine team also pitch in, ensuring that content from leading digital art publication ImagineFX is represented on Creative Bloq.
