3D sculpting tips: mastering hard surfaces
Titouan Olive shows you how to use ZBrush’s hard surface sculpting tools to create an asset for a still life.

Sculpting hard surfaces is not only much faster than modelling polygon by polygon, but it also saves an incredible amount of time when you're asked by a client or by your boss to create several quick 3D concepts for robotic characters or mechanical elements.
It was almost impossible to do that before in 3D using the old box or edge modelling method because it took much too long, as well as being really unproductive. However, since the introduction of new features to ZBrush exclusively dedicated to the task of hard surface modelling, the tool has become revolutionary.
The goal in this training is to sculpt a pair of headphones – which is a great subject for hard surface modelling. This object will be the main element of a still life scene so, with that in mind, we have to create a very detailed and accurate model since it will be featured up close.
We'll start from scratch to build the headphones blocking out the main shapes. We’ll then make use of some specific tools to sharpen the surface when needed. At the end we'll use some advanced functions and will refine the model, pushing the sculpt higher.
01. Load a sphere to start
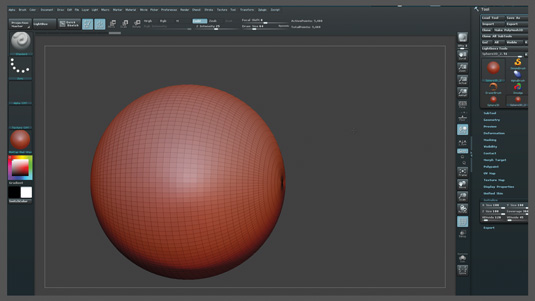
Start by searching for some good images – I can't imagine sculpting something from scratch without using references first. You'll find loads of pictures of headphones on the web.
Once you've found some, start by loading a sphere, hit Shift+F to display the wireframe and in the Tool menu click on Initialize to expand the options. At this stage you could change the number of edge loops around the sphere. I choose 120 in Hdivide and 45 for Vdivide.
02. Create a bevel
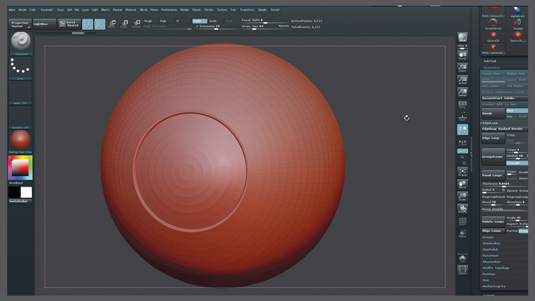
Click on Make Polymesh3D to make the sphere fully editable. Click and drag holding Ctrl+Shift to hide part of the sphere. Now under Geometry, expand the EdgeLoop section and click on Panel Loops to test it.
Get the Creative Bloq Newsletter
Daily design news, reviews, how-tos and more, as picked by the editors.
As you can see, it creates a bevel with several edge loops around your visible polygons. Undo your work (press Ctrl+Z and tweak the settings to create a nice bevel. I choose 0,0486 for Thickness 0,00 for Elevation and I also unchecked Double.
03. Cut the sphere
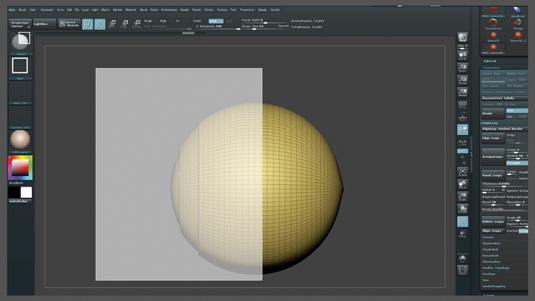
Next, repeat the same process to create a second bevel on the sphere. As you can see Panel Loops creates polygroups automatically, doing it this way makes it really easy to show or to hide them by holding Ctrl+Shift and clicking directly on them.
At this step, we need to cut the sphere to shape our headphones. To do this, select the ClipRect brush in the brushes menu. Hold now Ctrl+Shift and draw a rectangular selection to clip the sphere.
04. Create more bevels
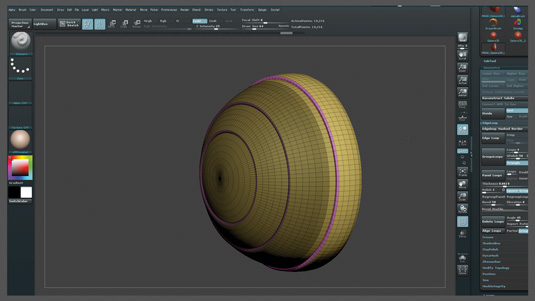
Create another bevel using Panel Loops. You'll need to make some tests and play with the settings before to find the right thickness. Once you're happy, draw a circular mask on the clipped surface.
To do this, hit R on your keyboard to enter Transpose mode, then hold Ctrl and click and drag on the plane surface. Now, sharpen your mask holding Ctrl+Alt and clicking on your mesh, inverse it (hold Ctrl and click and drag outside of your mesh).
05. Subdivide your mesh
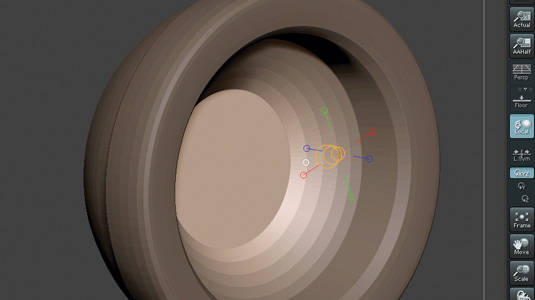
Under Deformation menu, use the Offset Slider to move your selection inside the sphere and repeat this operation another time. If your edges are too sharp, you can use the Polish Crisp Edges slider just above to smooth those edges.
Subdivide your mesh, draw another mask and use the Inflate, Size and Polish sliders to create the soft part around the ears (as seen in the next step) and use the Inflate and DamStandard brushes to add more irregularities.
06. Create a mirror object
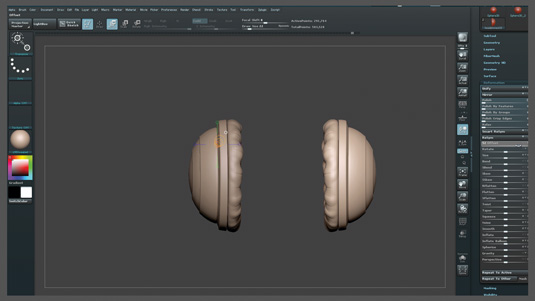
Now switch to the Move Brush and use it to create an oval look to your model, then use the same masking techniques to give a better shape at the base of the soft part (you can use the transpose line to scale or to quickly move the unmasked part).
When you're done, create a mirror object by clicking on Duplicate in the Subtool menu and place the new object just beside the existing one using the Offset and Rotate sliders under the Deformation menu.
07. Import a new sphere
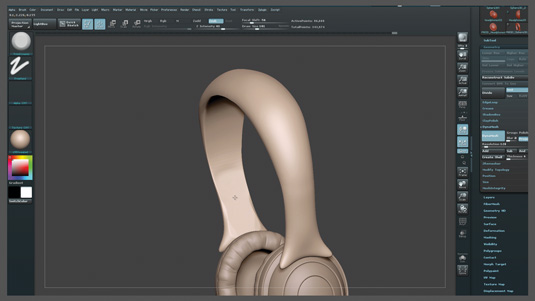
Under Subtool, click on the Append button and import a new sphere. Place it in the middle, above the two other objects. Under the Transform menu, click on Activate Symmetry and make sure X and Z axis are checked and also click on the L Sym button.
Use the Move brush to rough out the basic shape and activate DynaMesh. Continue to work using the Trim Dynamic brush on the surface under the arch – this brush is perfect for hard surface sculpting.
08. Create a polygroup
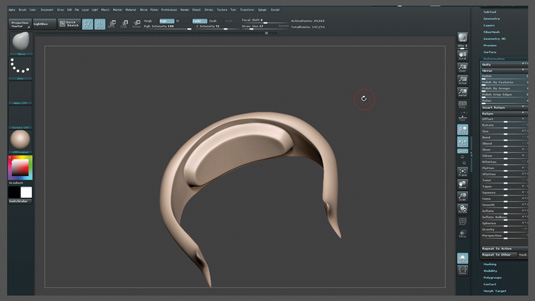
Draw a mask under the head band to shape the soft part, invert it (hold Ctrl and click on the canvas) and under Polygroup click on Group Masked. Select this new polygroup and play with the options in the Panel Loops section to get a good result.
Refine the work and use the Polish Crisp Edges slider under Deformation, if you need it. Check the proportions and sculpt each side with the TrimDynamic brush. Use the Pinch and Smooth brushes to refine further.
09. Add the screw
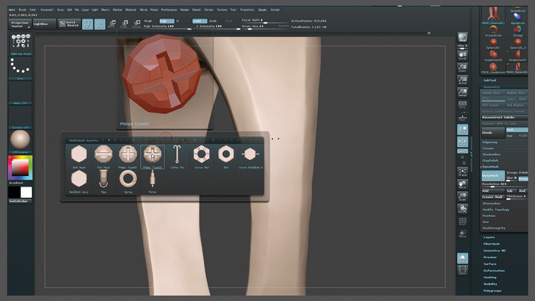
Increase the DynaMesh resolution. In the Brushes menu, select IMM Ind Parts, then press M and choose the screw. Place it on the model and update your mesh to insert the screw (hold Ctrl, and click and drag on the canvas).
Repeat the operation to create an articulation at the base. Draw a rectangular mask, invert it and use the Inflate slider to add relief. Insert a cylinder inside the new articulation to refine it. Rotate the other subtools and adjust the headset.
10. Use brushes to refine
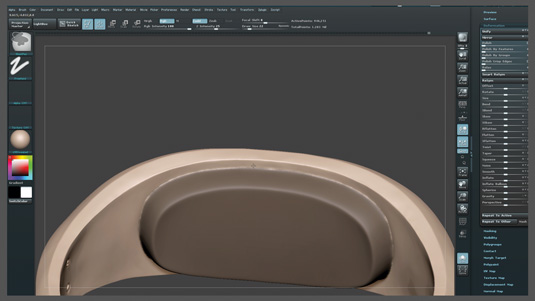
Mask the soft part of the headphones and draw some unmasked lines on it. If you want to draw regular lines, you can use the LazyMouse function. Press L on your keyboard to turn it on or off. Inverse your selection and use the inflate and polish sliders.
Refine the lines working on the soft part with sculpting brushes, such as Pinch or Inflat and insert another screw on the lower part of the model as you did previously.
11. Delete using a cube
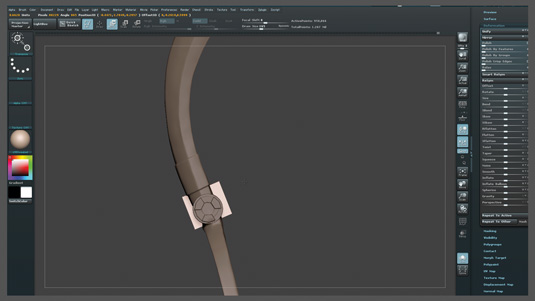
The true force of hard surface sculpting is that you can change anything at any moment without worrying about topology. Let's say you are not satisfied with the shabby look of the articulation. Here is how to simply erase and rebuild it: insert a cube at joint, but hold Alt as you insert it. Remember to place the cube correctly, because when you next update your mesh, everything inside the cube will be deleted.
12. Rebuild using a cube
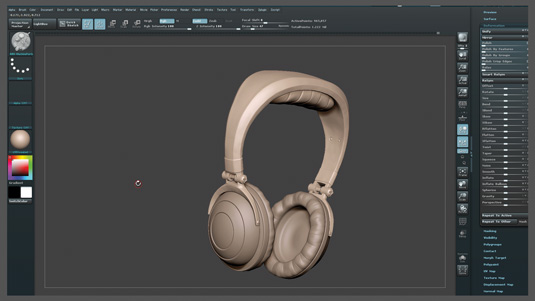
Next, try to improve the area between the articulation in a pleasant way by inserting another cube using the same technique, but uncheck the X axis before in the Transform menu. Now, reactivate the X axis button and insert cylinders to rebuild the articulation.
Now, choose the IMM MachineParts brush, select Piston02 and insert it between the cylinders. Don't worry if the edges of the model are still not completely clean yet, we'll arrange that soon.
13. Adding noise
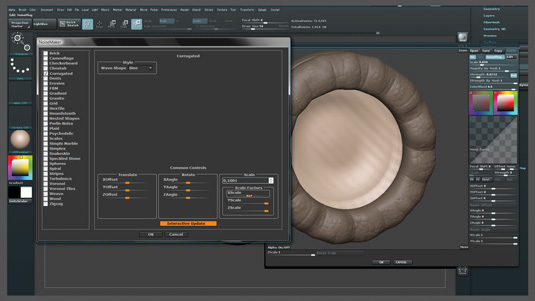
Add some noise to mimic the leather on the soft parts using the Standard brush, coupled with DragRect and Alpha 25. Select IMM_MachineParts, press M and choose HeatTransfer.
Insert this shape under the arch and insert the shape named Gear 14 on the half spheres. Next, use NoiseMaker to add some stripes inside the sphere and click on Apply To Mesh. Select the headset and click on Clay Polish under Geometry to clean the edges of the model.
14. Finishing touches
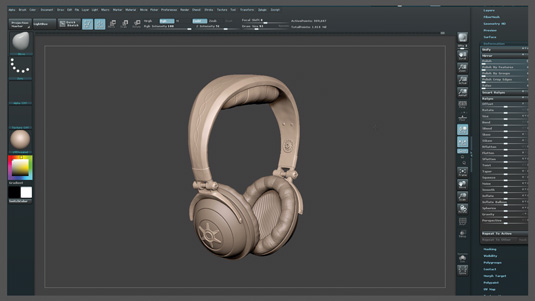
Finally, sculpt some decorations on the top and on the sides of your headphones to give them more style. Arrange the stripes inside the sphere if you feel you need it and duplicate this object to create a mirror exactly as you did previously at Step 6. And that's it. You can now export your finished headphones into a still-life scene to study lighting and rendering.
Words: Titouan Olive
Titouan Olive is a freelance lead character artist who specialises in creating mechanical characters in ZBrush for animated films and video games. This article originally appeared in 3D World issue 180.

Thank you for reading 5 articles this month* Join now for unlimited access
Enjoy your first month for just £1 / $1 / €1
*Read 5 free articles per month without a subscription

Join now for unlimited access
Try first month for just £1 / $1 / €1

The Creative Bloq team is made up of a group of art and design enthusiasts, and has changed and evolved since Creative Bloq began back in 2012. The current website team consists of eight full-time members of staff: Editor Georgia Coggan, Deputy Editor Rosie Hilder, Ecommerce Editor Beren Neale, Senior News Editor Daniel Piper, Editor, Digital Art and 3D Ian Dean, Tech Reviews Editor Erlingur Einarsson, Ecommerce Writer Beth Nicholls and Staff Writer Natalie Fear, as well as a roster of freelancers from around the world. The ImagineFX magazine team also pitch in, ensuring that content from leading digital art publication ImagineFX is represented on Creative Bloq.
