3D ray-tracing in After Effects
James Wignall shows you how to create a simple scene using After Effects’ new 3D ray-tracing feature.
- Software: After Effects CS6 and CC
- Project time: 2-3 hours
- Skills: Create 3D shapes and text in AE, enable 3D ray-tracing, render settings
For years now, After Effects users have tried to fake solid 3D shapes and text, extruding by duplicating lots of layers in 3D space and building elaborate setups of planes to try and make 3D shapes. Thankfully these laborious and time-consuming tasks are now a thing of the past with Adobe’s introduction of After Effects CS6 – no more late nights carefully placing your shots so you don’t reveal the wafer-thin layers.
- Check out this After Effects CS6 review
- Check out this After Effects CC review
With this tutorial we’ll take a look at how you can extrude shapes or text, and build a simple little scene using techniques that you can then apply to your own projects. A word of warning though: you really need a graphics card (a list of compatible cards can be found at www.adobe.com) to use the new 3D ray-tracing features. It is possible to forgo GPU and use the CPU-only option, however 3D ray-tracing can be extremely render-intensive.
Step 01
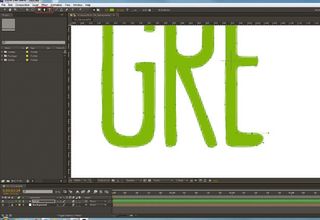
Open After Effects and create a new composition (Cmd/Ctrl+N). Choose any settings you’re comfortable with – I’ve used HDTV 1080 25 with a duration of 4 seconds. Next select the Pen tool and draw out a shape. In this case I opted for some typography. Alternatively you can import shapes from Illustrator, or take the easy route and just use the Text tool.
Step 02
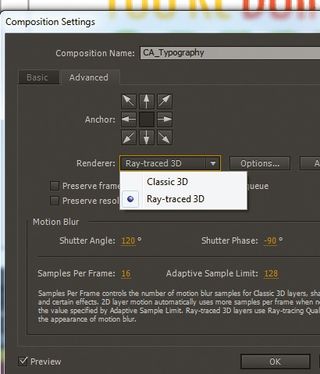
Once you’ve finished drawing your shapes or typography, make them into a 3D layer by clicking the empty boxes underneath the Cube icon to enable 3D. Now bring up the composition settings (Cmd/Ctrl+k). Under the Advanced tab you’ll see a drop-down menu. Change the renderer from Classic 3D to Ray-traced 3D. Click the Options button to bring up the quality settings. This is where render times can really stack up. I’d recommend working with low quality settings (Ray-tracing Quality: 4, Anti-aliasing Filter: Box) but changing them for higher settings when it comes to your final render.
Step 03
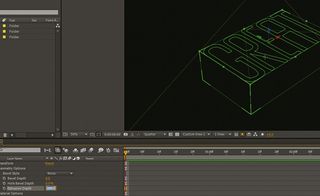
Now go back to your composition. Under your shape layers settings you will notice a new heading called Geometry Options – it’s here that we can extrude shapes. Click Extrusion Depth and set it to around 200.
Step 04
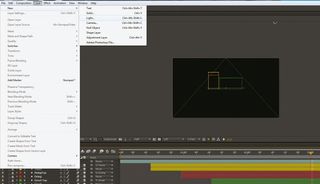
If you look at your shape’s extrusion, you’ll notice it just looks like a black solid without much definition. That’s because we need to add a light into the scene. To do this, go to Layer>New>Light. Remember though, more lights mean longer render times. In the Light Settings panel, choose your settings from the various options – I’ve gone for a Spot light type. Make sure you check the Cast Shadows tick box too, otherwise your shapes won’t have any shadow. You can alter the Shadow Diffusion value to change the sharpness of the shadows.
Step 05
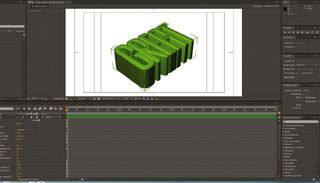
One of the nice new features of After Effects CS6 is that you can now bevel your objects in 3D. You can find this option under the Geometry Options tab within your layer. This includes various styles of bevel (Angular, Convex, Concave) alongside the Extrusion Depth and Hole Bevel Depth settings. Next is the Material Options tab, where you decide on how the material reacts to light. Ray-tracing lets you have proper reflections, internal refractions, transparency roll-off and all the good stuff – spend a bit of time playing with each one to see its effect.
Get the Creative Bloq Newsletter
Daily design news, reviews, how-tos and more, as picked by the editors.
Step 06
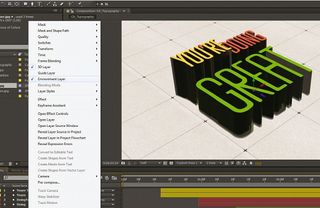
Although I haven’t used it in this project, another neat new feature in After Effects CS6 is the ability to add an ‘Environment’ layer. In basic terms, you can tell After Effects to wrap a layer into a 3D sphere around the scene so it can be used to create reflections within your objects – that’s pretty handy.
Step 06
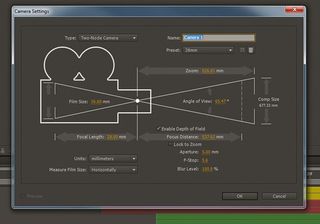
You should have now built a small scene, so let’s add a camera. Select Layer>New>Camera and the Camera Settings dialog will open. To make things easier for this tutorial, I’ve selected the 28mm preset from the drop-down menu.
Step 08
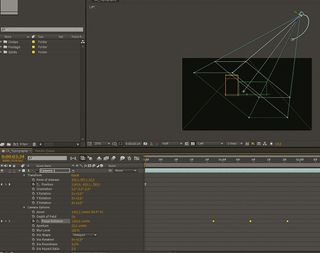
Let’s make a little camera swoop. You can animate the camera just like any other layer. Click the stopwatch icon to create a keyframe under the position heading at the start of the composition. Next, go to the end of the timeline and move the camera to make another keyframe.
Step 09
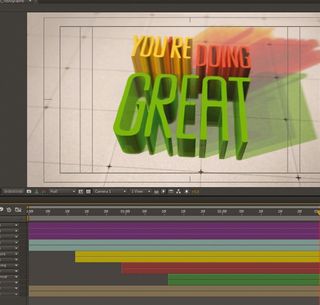
When you’ve finished the camera work it’s good to add some subtle effects to try and bed it all together. I’ve added a couple of Adjustment layers (Layer>New>Adjustment Layer) for Noise and Photo Filter and a subtle vignette to finish it off.
Step 10
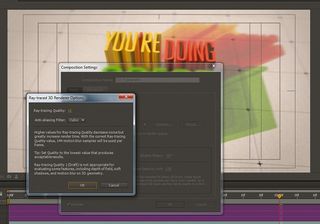
Remember when I mentioned changing the ray-tracing settings before rendering? Now is that time. After some trial and error I found that Ray-tracing Quality: 12 and Anti-Aliasing Filter: Cubic was a good mixture of speed and quality. If your shadows look ‘bitty’, you may need to increase the ray-tracing quality.
Words: James Wignall
AKA Mutanthands, James is an animation director based in London, working with MTV, VH1, Nickelodeon, Sony and Nike. He was recently chosen as an Art Directors Club Young Gun for 2011.
Liked this? Read these!
- Download the best free fonts
- Free Photoshop brushes every creative must have
- Free Photoshop actions to create stunning effects
- Create a perfect mood board with these pro tips
- The best Photoshop plugins
- The ultimate guide to designing the best logos

Thank you for reading 5 articles this month* Join now for unlimited access
Enjoy your first month for just £1 / $1 / €1
*Read 5 free articles per month without a subscription

Join now for unlimited access
Try first month for just £1 / $1 / €1
The Creative Bloq team is made up of a group of design fans, and has changed and evolved since Creative Bloq began back in 2012. The current website team consists of eight full-time members of staff: Editor Georgia Coggan, Deputy Editor Rosie Hilder, Ecommerce Editor Beren Neale, Senior News Editor Daniel Piper, Editor, Digital Art and 3D Ian Dean, Tech Reviews Editor Erlingur Einarsson and Ecommerce Writer Beth Nicholls and Staff Writer Natalie Fear, as well as a roster of freelancers from around the world. The 3D World and ImagineFX magazine teams also pitch in, ensuring that content from 3D World and ImagineFX is represented on Creative Bloq.
