“The challenge was to create a cool character design”: concept artist Marco Teixeira reveals the techniques and inspiration behind his superb 3D character render
Marco Teixeira explores a personal piece that resonates with Brazilian culture and influences to create an appealing portrait
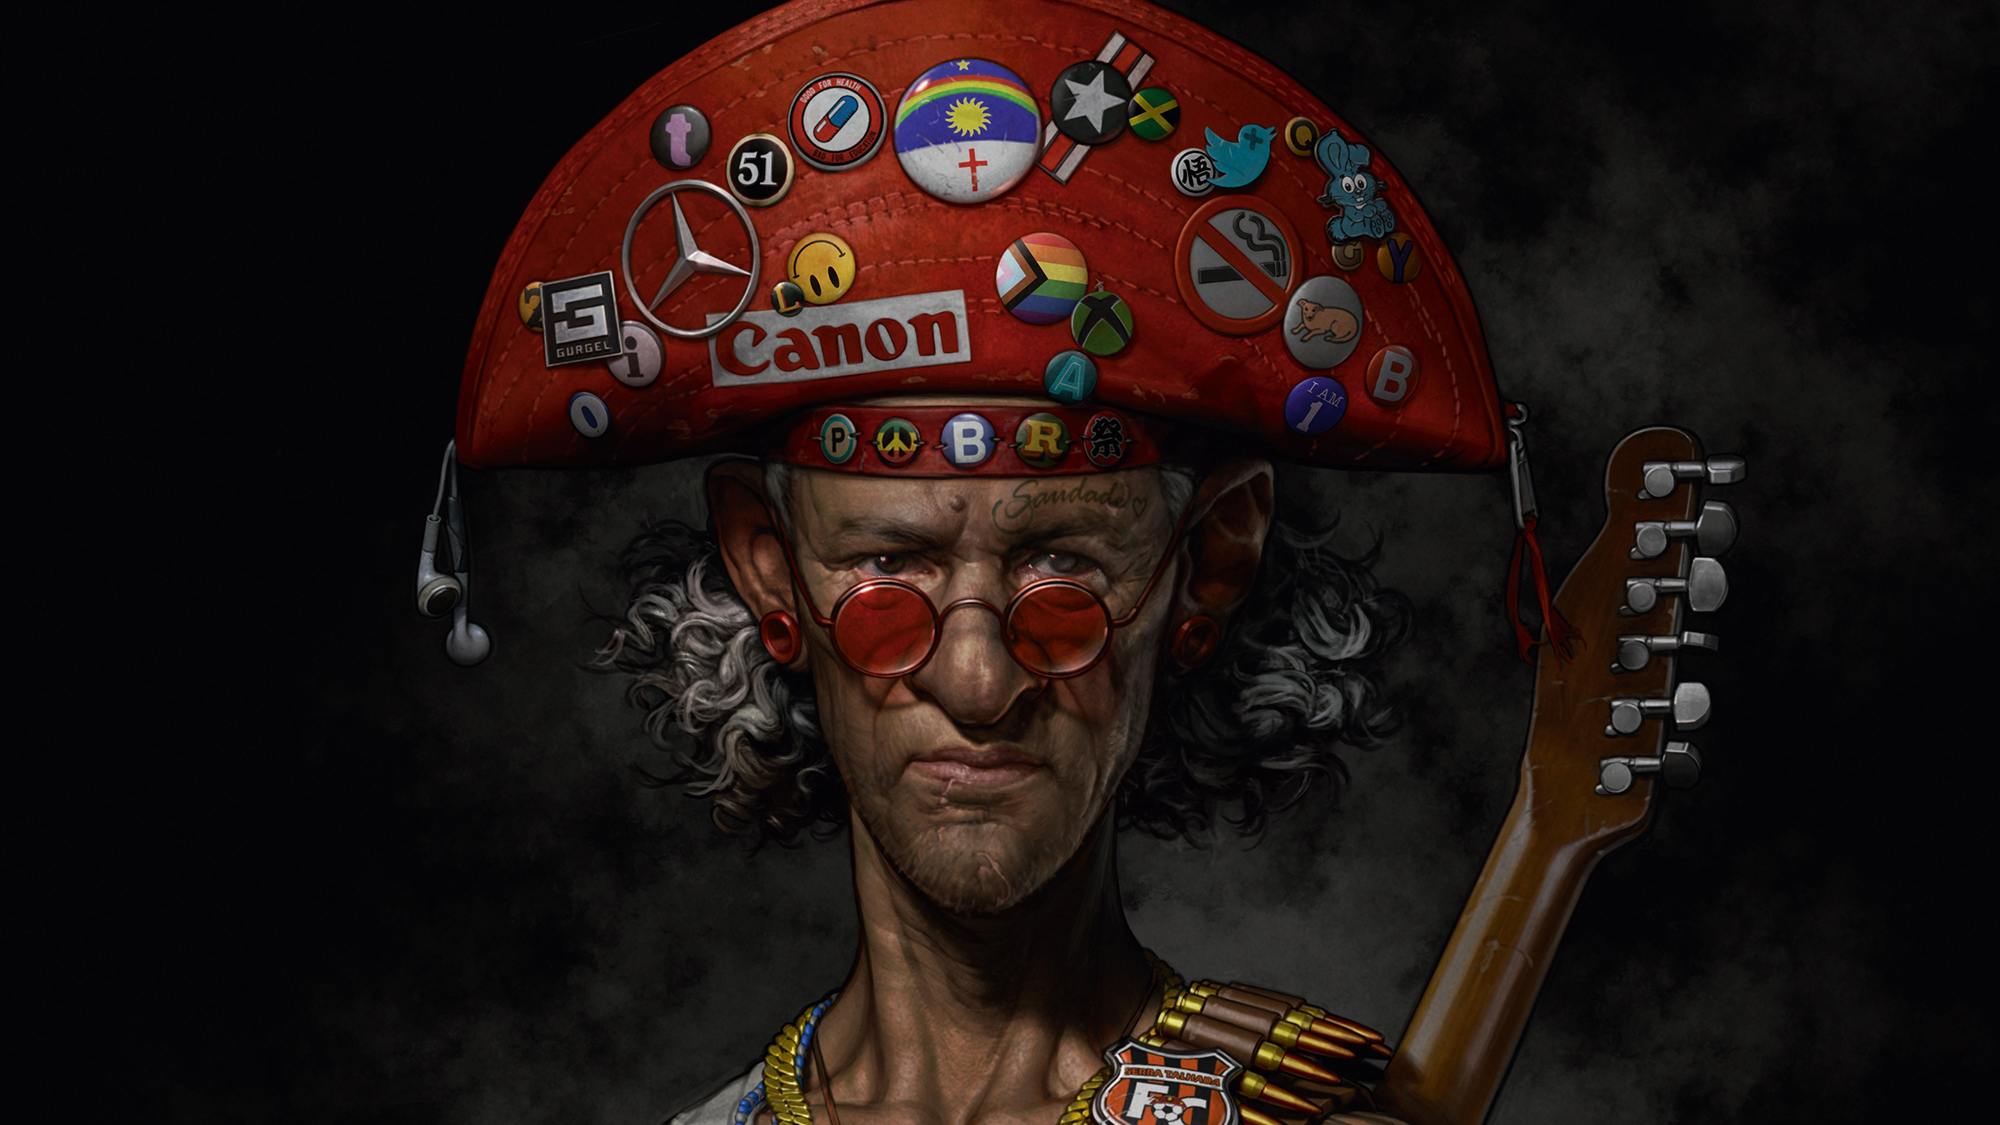
When I started to work on this image, it was only because I needed to introduce more 3D tools in my workflow. I’ve been interested mainly in ZBrush (for other options see this list of 3D modelling software) and how I could incorporate more 3D models as a starting point or base for my 2D design work.
Personally, studying a new tool becomes more compelling if I can turn the object of my study into a final piece. It helps me to learn the functionalities of the software, ZBrush in this case, based on what I need at a specific moment for a specific design concept. Knowing what I expect during the learning process gives me a mental guideline of what it can turn into as a final piece.
At some point during the modelling stages, I started to visualise what that study could become, which references I’d like to follow, and what character I should choose. Once I had an interesting base 3D model with basic lighting and shading, I was finally able to move on to the 2D painting process (see our best drawing tablets list if you need a new tool).
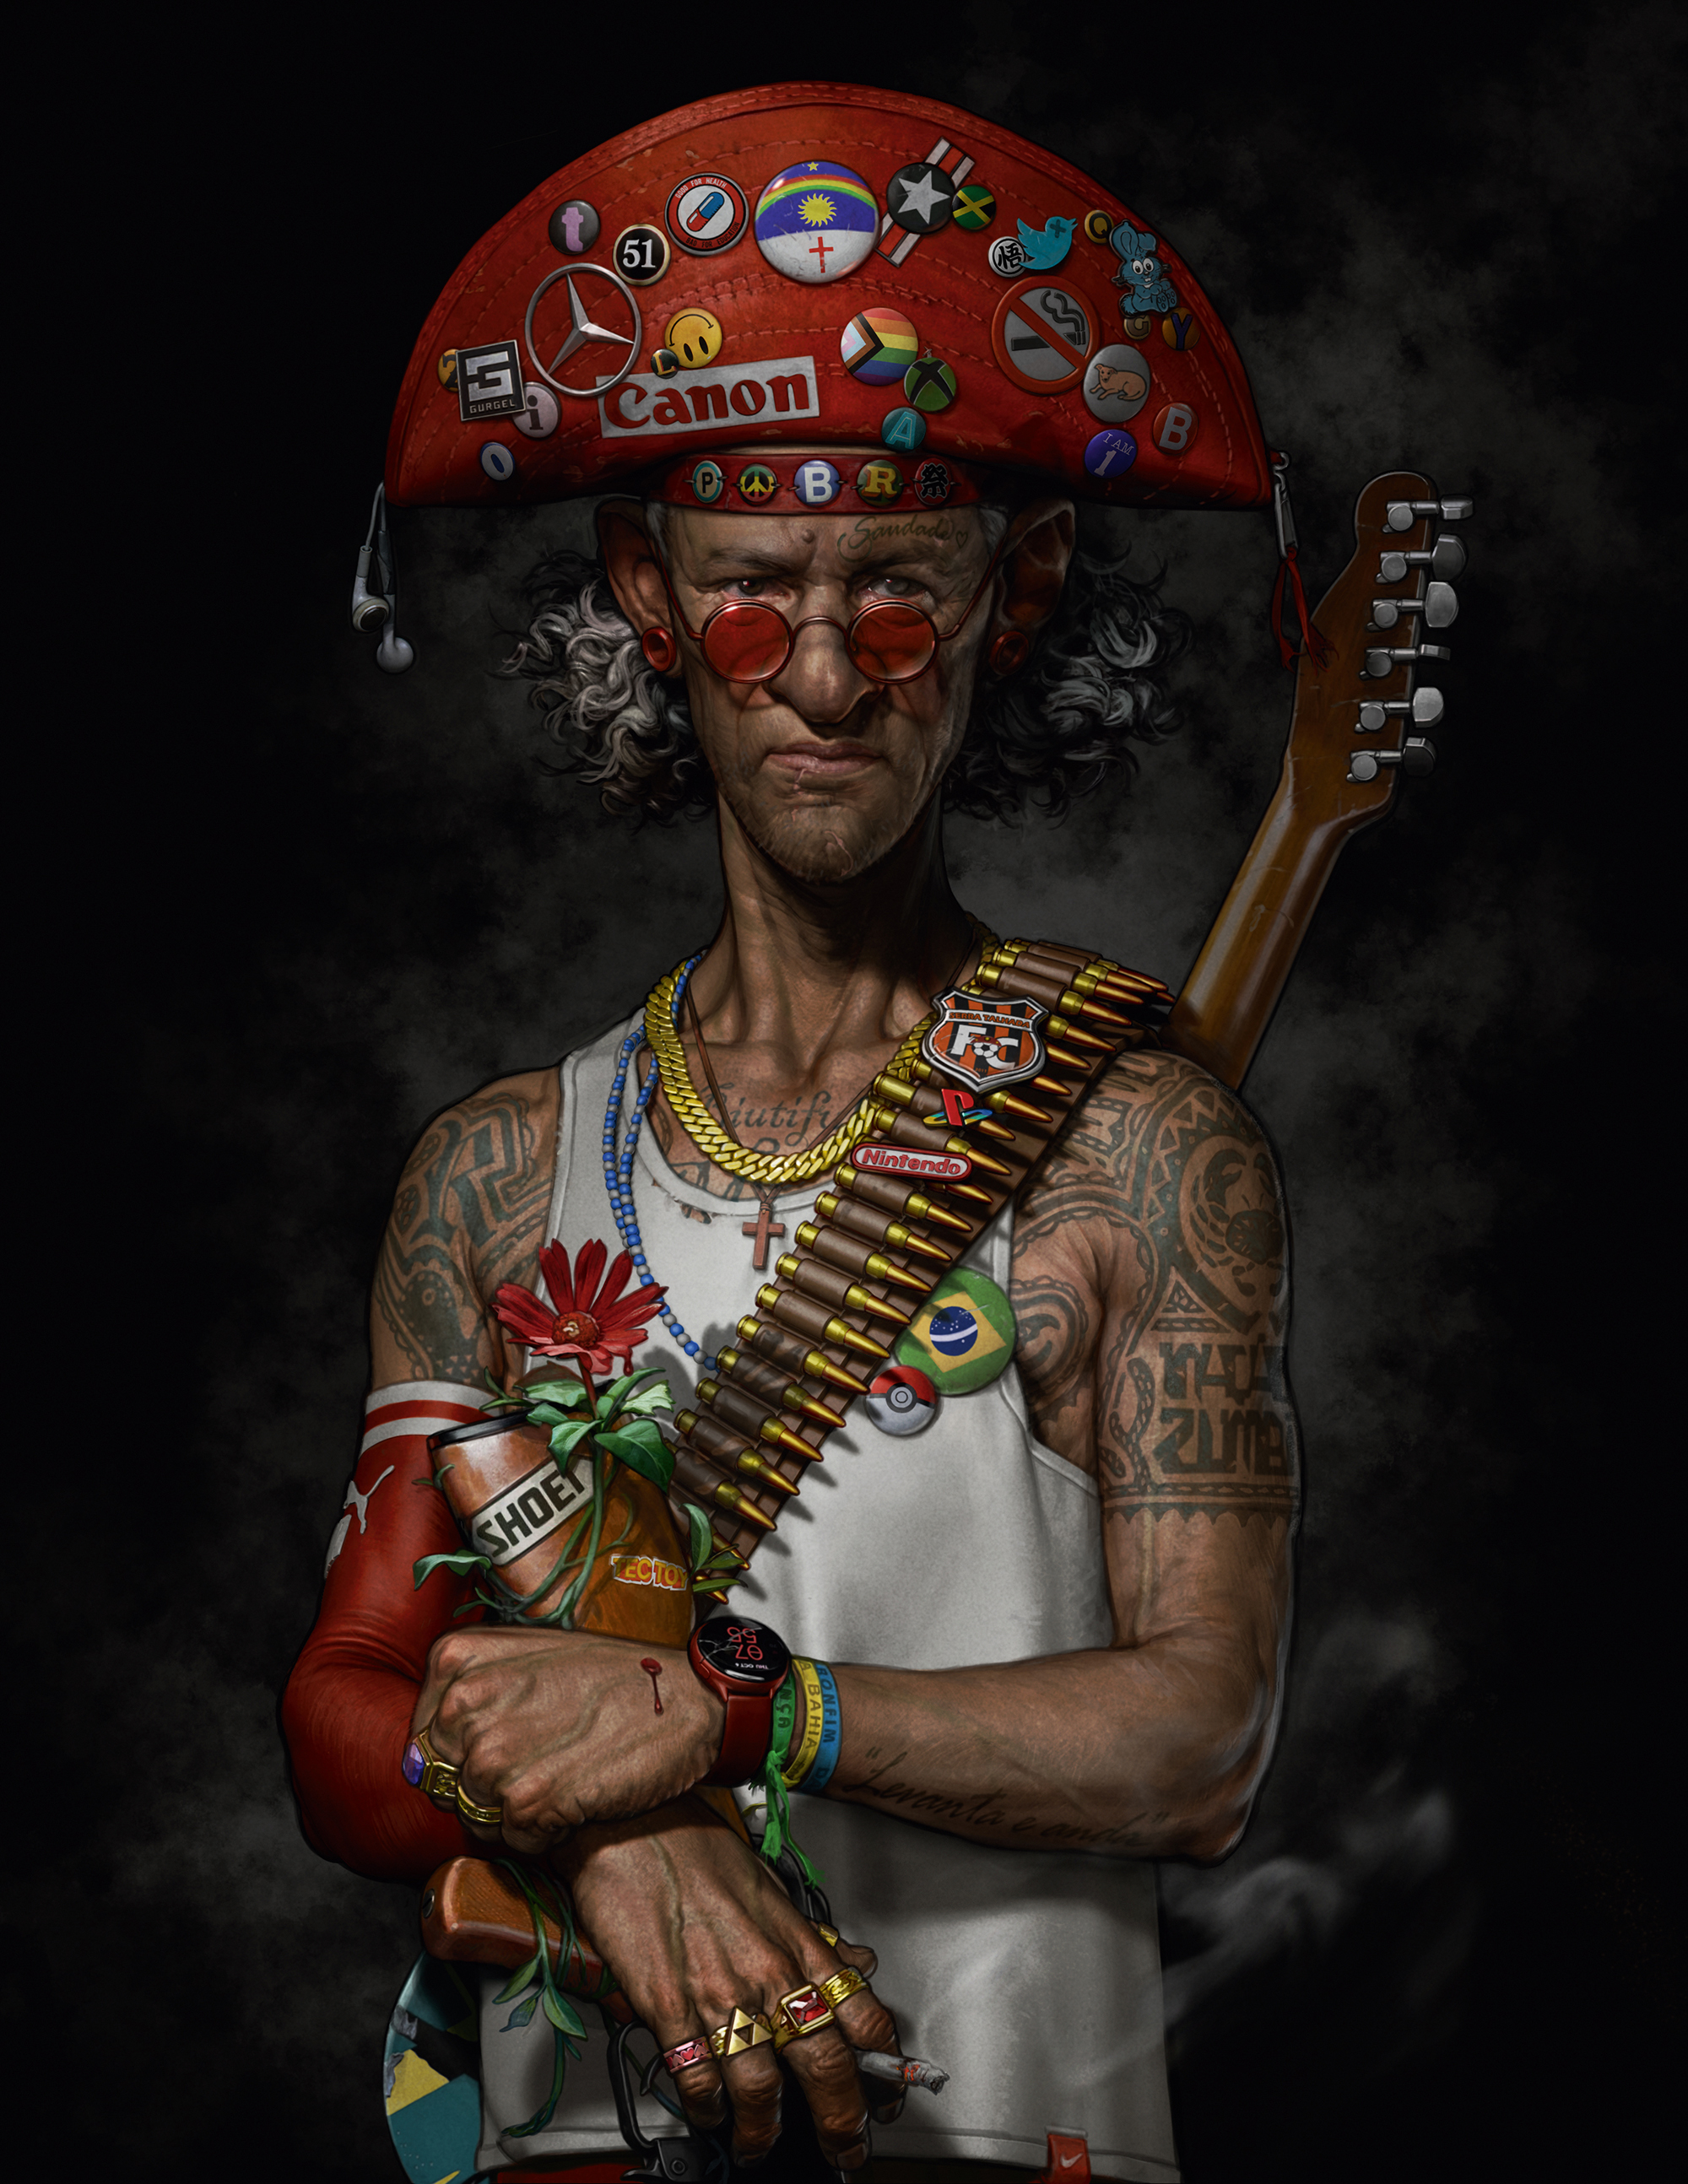
With the character, I was interested in including many aspects of Brazilian pop culture, from music to history, people and art, but also with many of my own influences. The challenge was to bring a balance and coherency to all those different elements and, at least for myself, create a cool character design.
I don’t use that many brushes; I’d say that I work with just one 99 per cent of the time. It’s usually a standard brush with minor tweaks to the shape, smoothing, hardness, transparency and so on.
Delving into history
My main reference for this piece is one of the best-known figures in Brazil’s history. In the north-east of the country during the late 19th and early 20th centuries there was a phenomenon known as Cangaço. This region of Brazil is known for being a particularly tough place to live. Cangaço was looked on as “social banditry” against the government of the time, leading to both men and women becoming nomadic, and roaming the arid landscapes in search of food, money, and revenge against the wealthier of the region’s society.
Crafting a centrepiece
Sign up to Creative Bloq's daily newsletter, which brings you the latest news and inspiration from the worlds of art, design and technology.
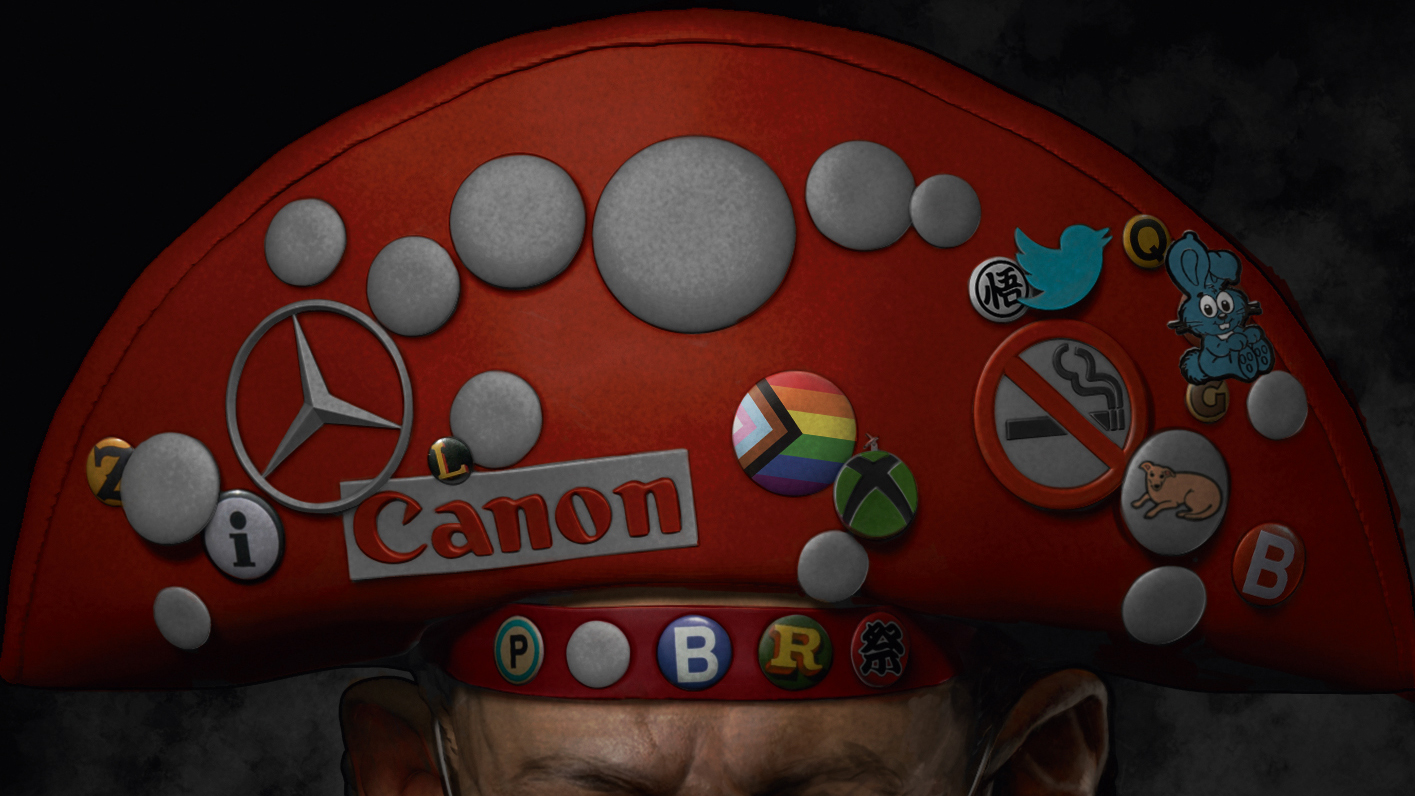
The cangaceiro’s hat is one of most recognisable elements in their outfit, usually very well-ornamented. On my design, I tried to bring the same iconography to that element. My intention was to use a big pool of references, with the central homage to Brazilian figures and pop culture combined with a myriad of icons from many places outside the country. The hat was the central piece where I could use most of my own references. One clear inspiration is Kaneda’s bike, from Katsuhiro Otomo’s Akira.
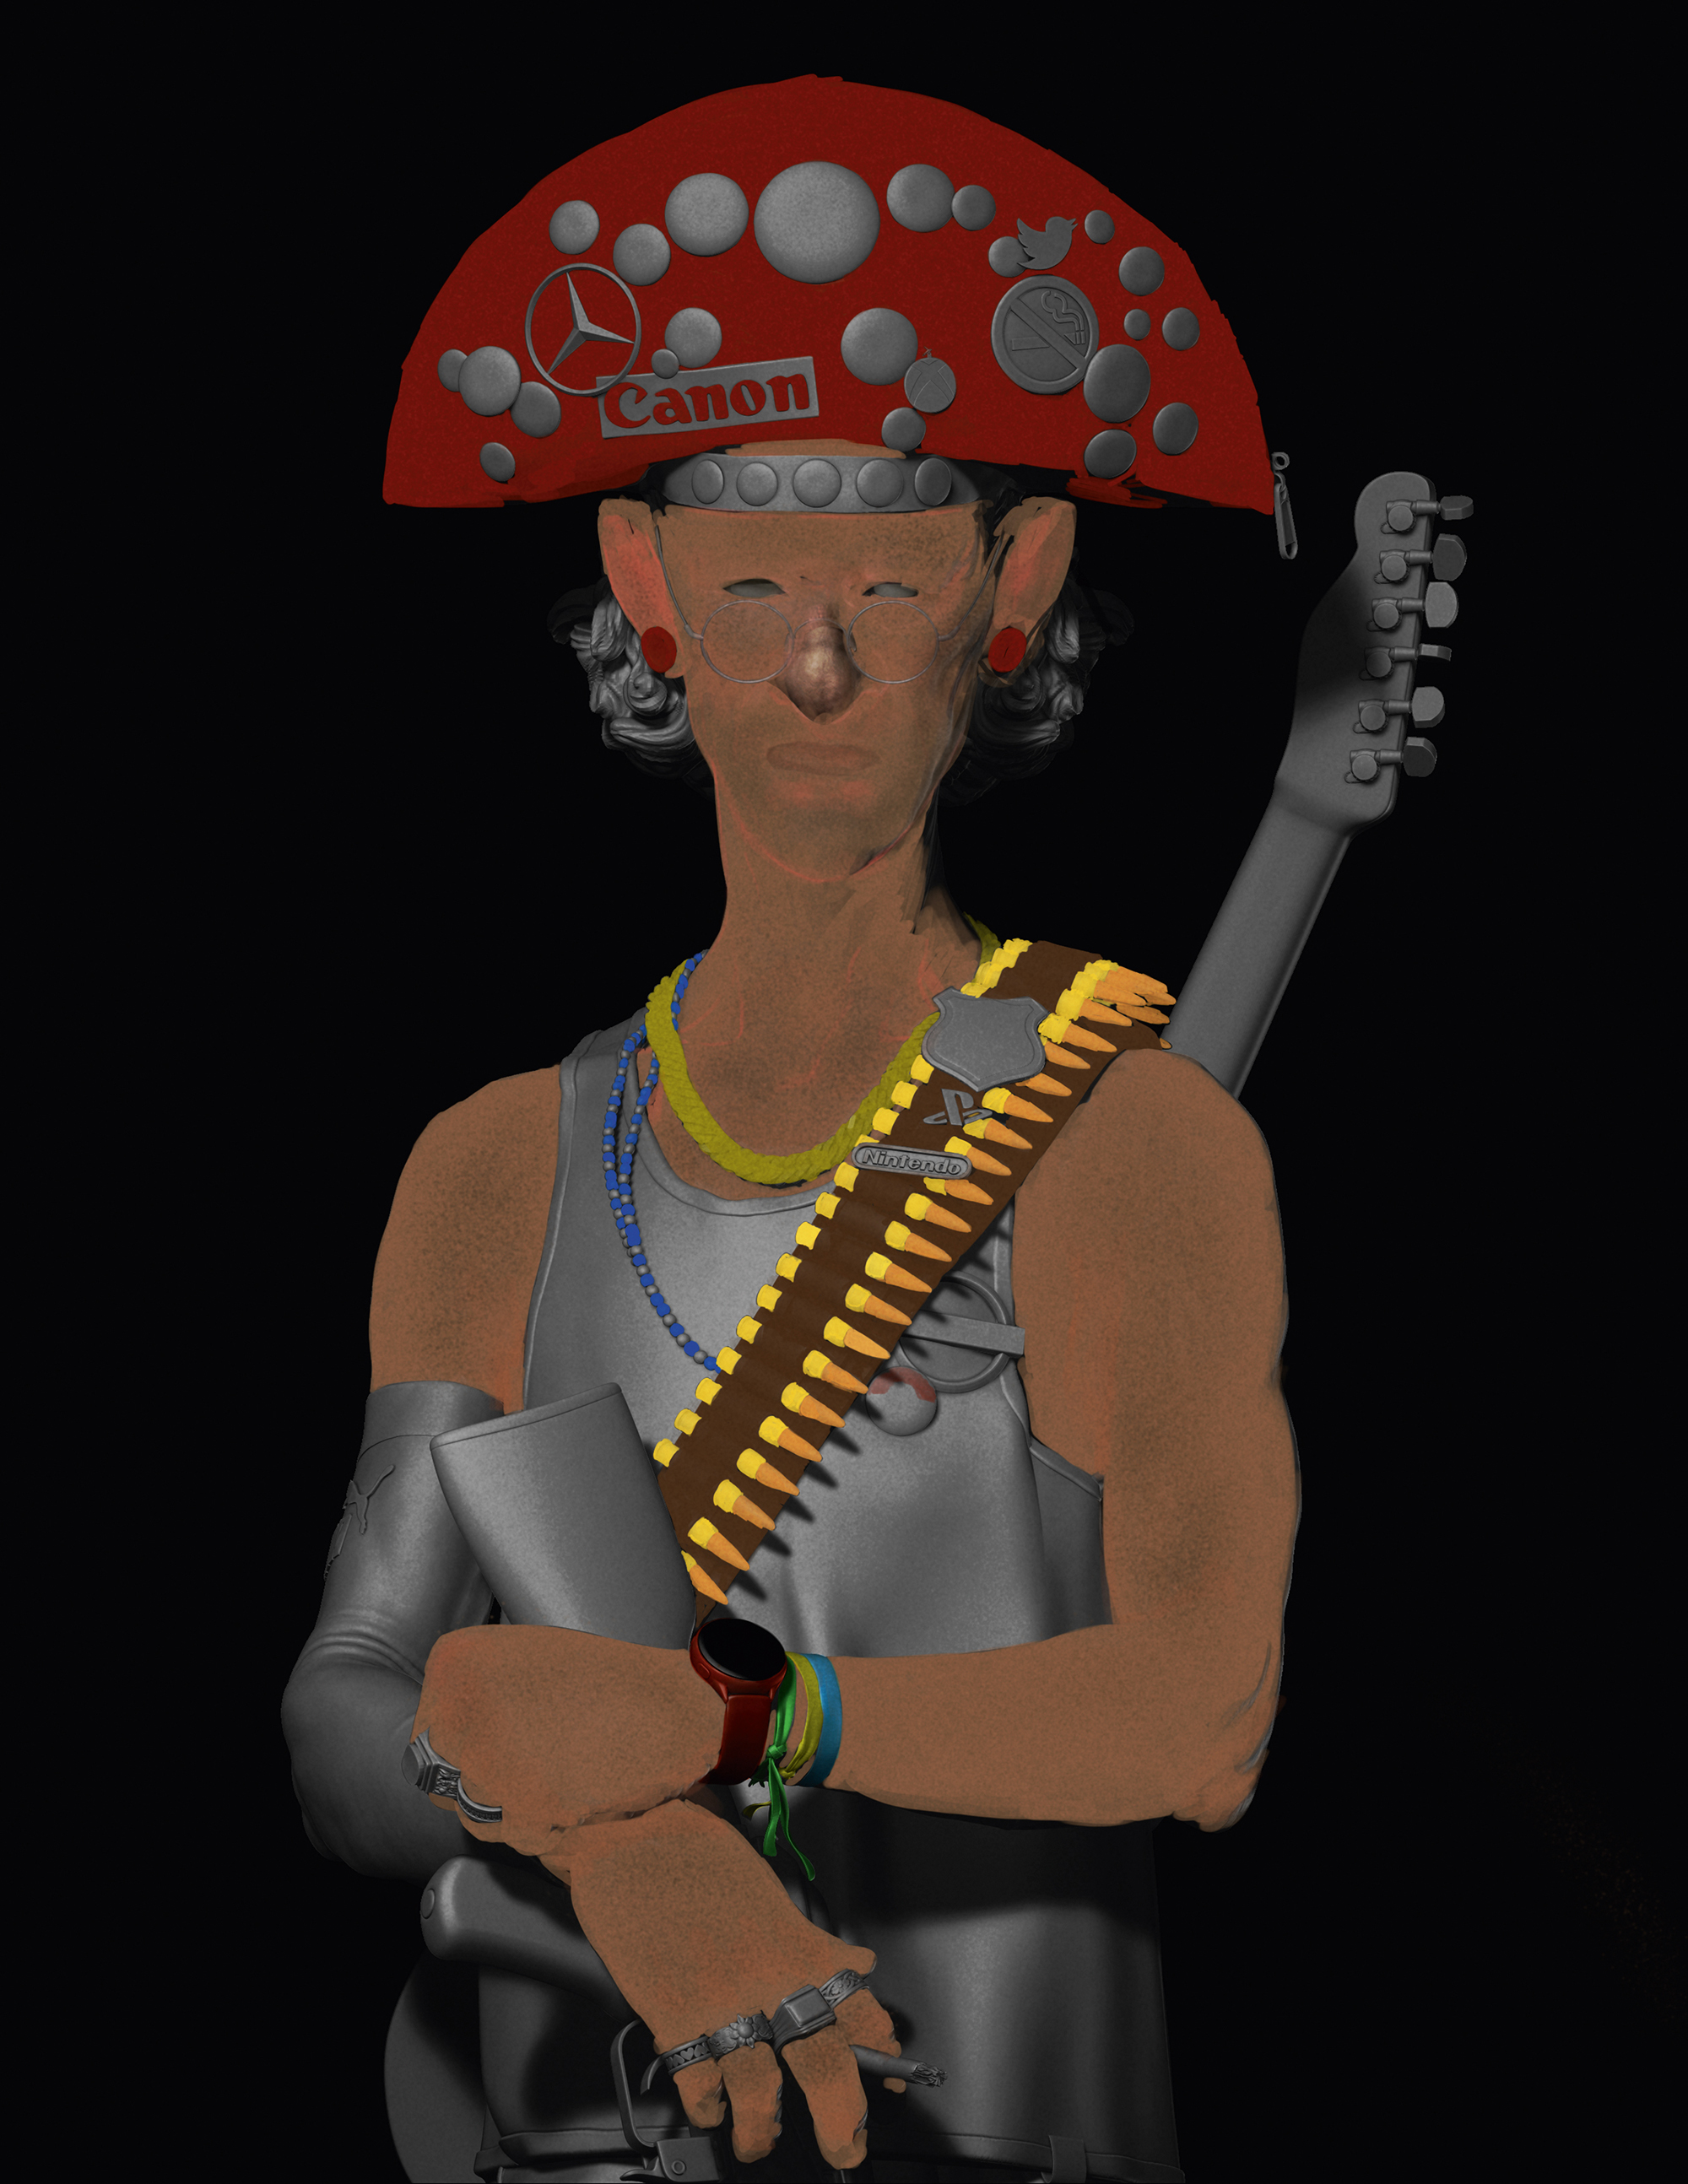
Initial colour blockout
Here’s an early example of how I usually block out my colours over a greyscale image, building colour with layer filters like Overlay and Soft Light. It’s something straightforward at the initial colouring stage before I start the proper painting. Many of the details are added in the latter stages, but sometimes I just can’t resist painting some of these early in the process. It helps me to look a bit further forward to what I want for the final render, such as any skin imperfections, scars or weathered materials.
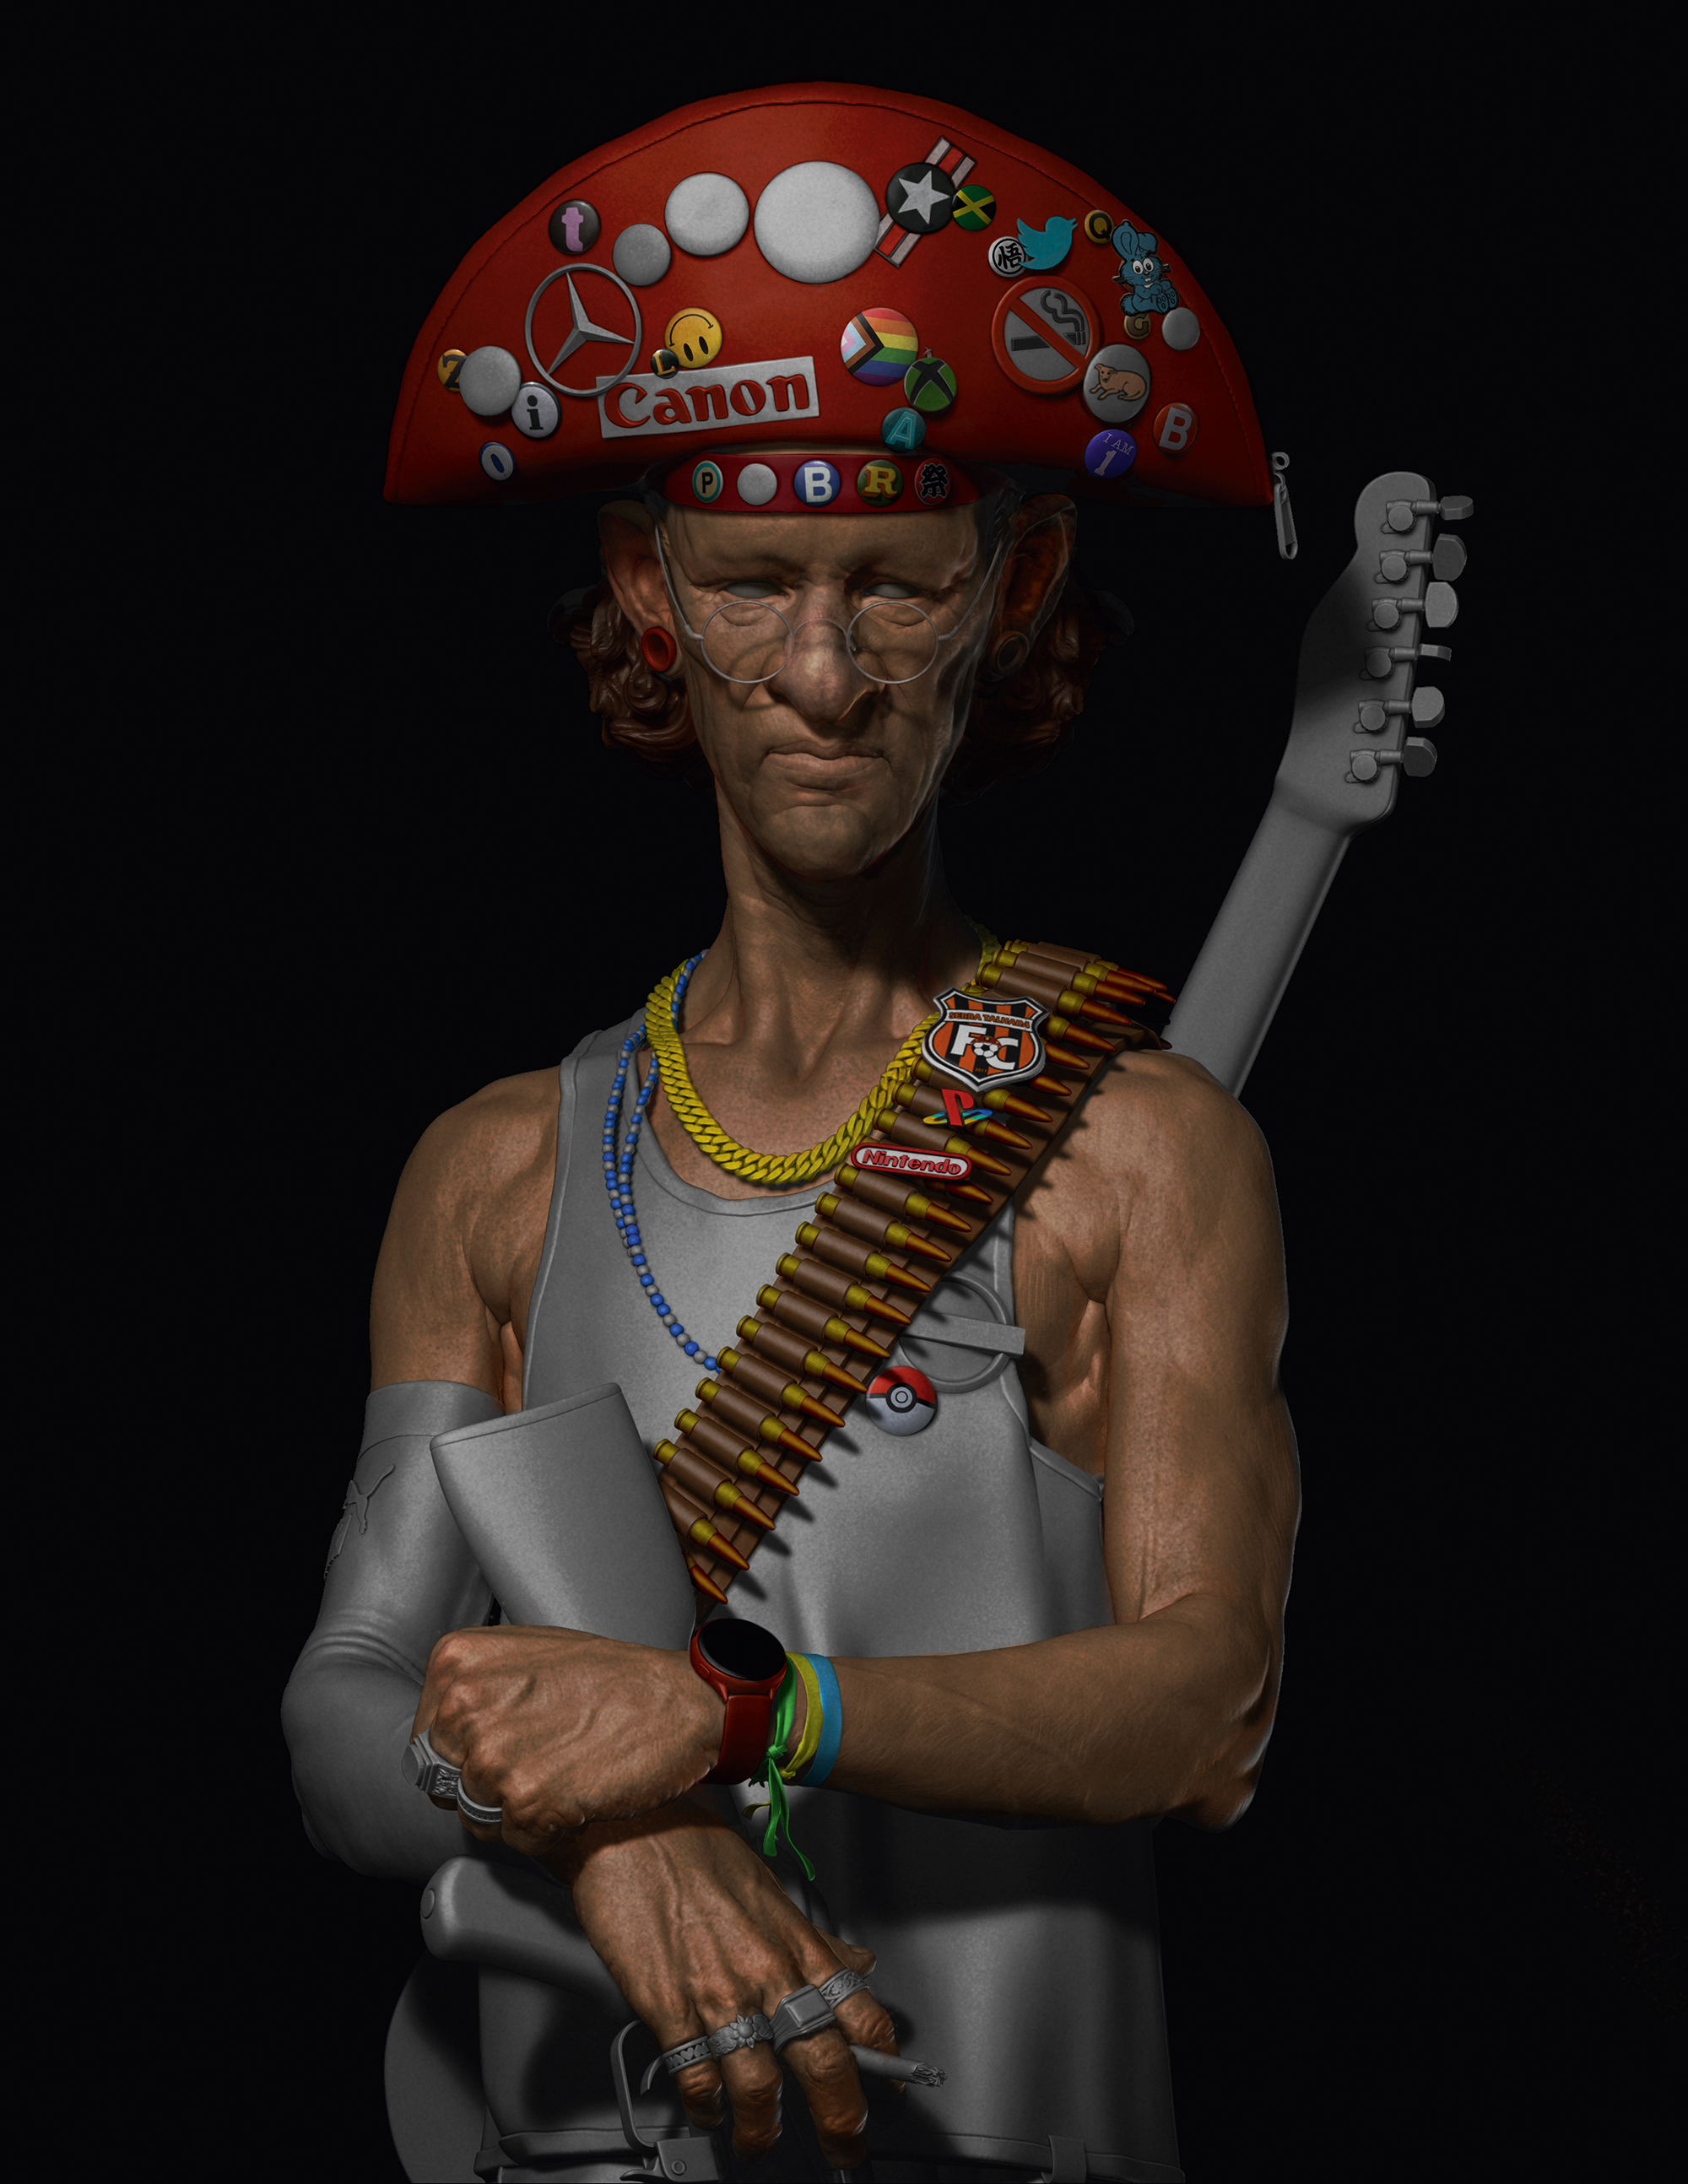
Paintover preparations
My primary objective with this piece was to paint something over one of my 3D model studies created with ZBrush. Once I was satisfied with the results in ZBrush and the basic render lights, I then moved across to Photoshop for the paintover. While I often try to add basic colours directly in ZBrush using the Polypaint tools, ultimately I preferred to work over the greyscale 3D model for this one.
Developing detail
01. Find balance
One of my main concerns while I’m painting is not to overwhelm the image with details, which is difficult for someone like me that likes to give every element of the image the same importance. Part of my process is to find the right amount of details and blank spaces to bring reasonable balance to the full image.
02. Breathing space
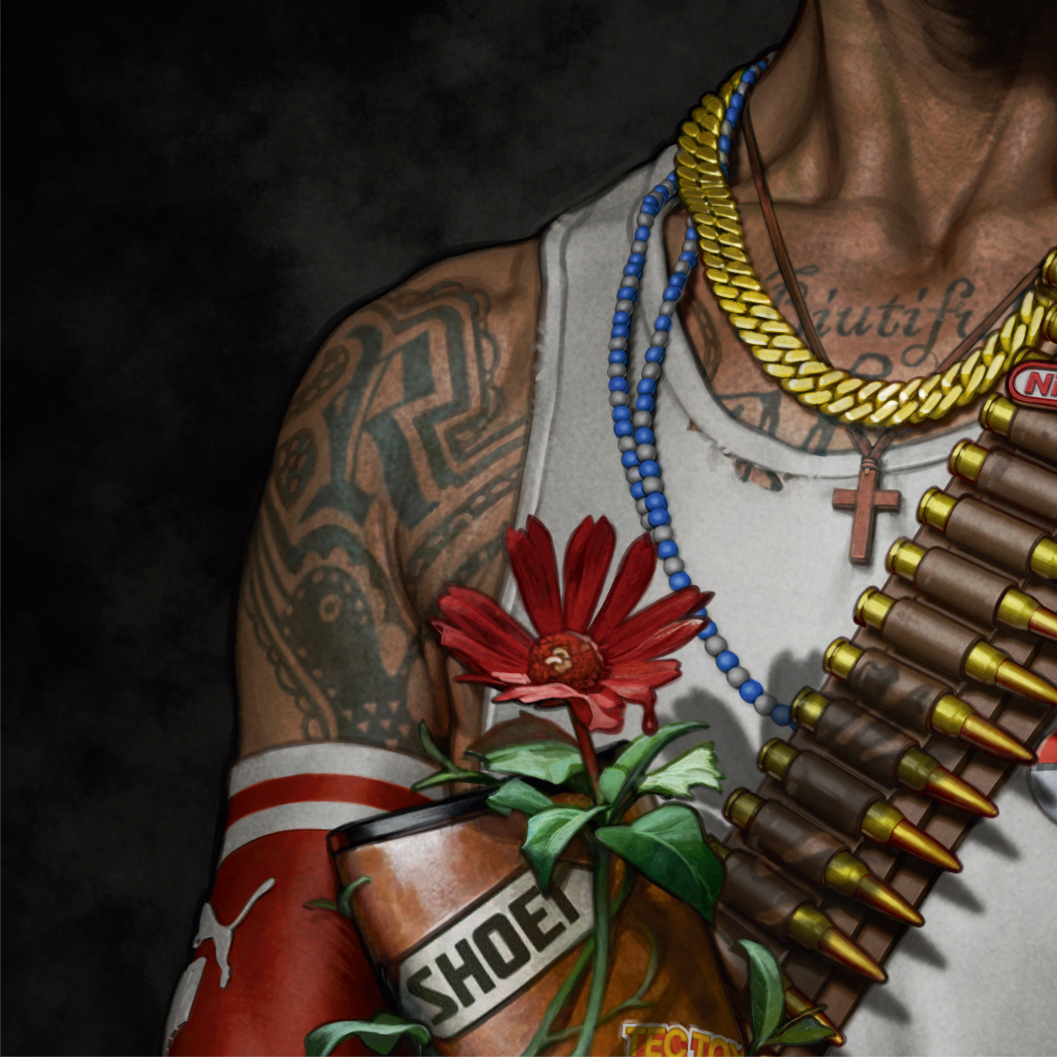
Blank spaces aren’t just unpainted areas of an image: they serve as breathing space between parts of the piece with a heavy quantity of details or elements. It’s about getting that balance in the painted motifs and not creating a noisy final piece. I chose to keep the shirt free from any kind of detail.
03. Create references
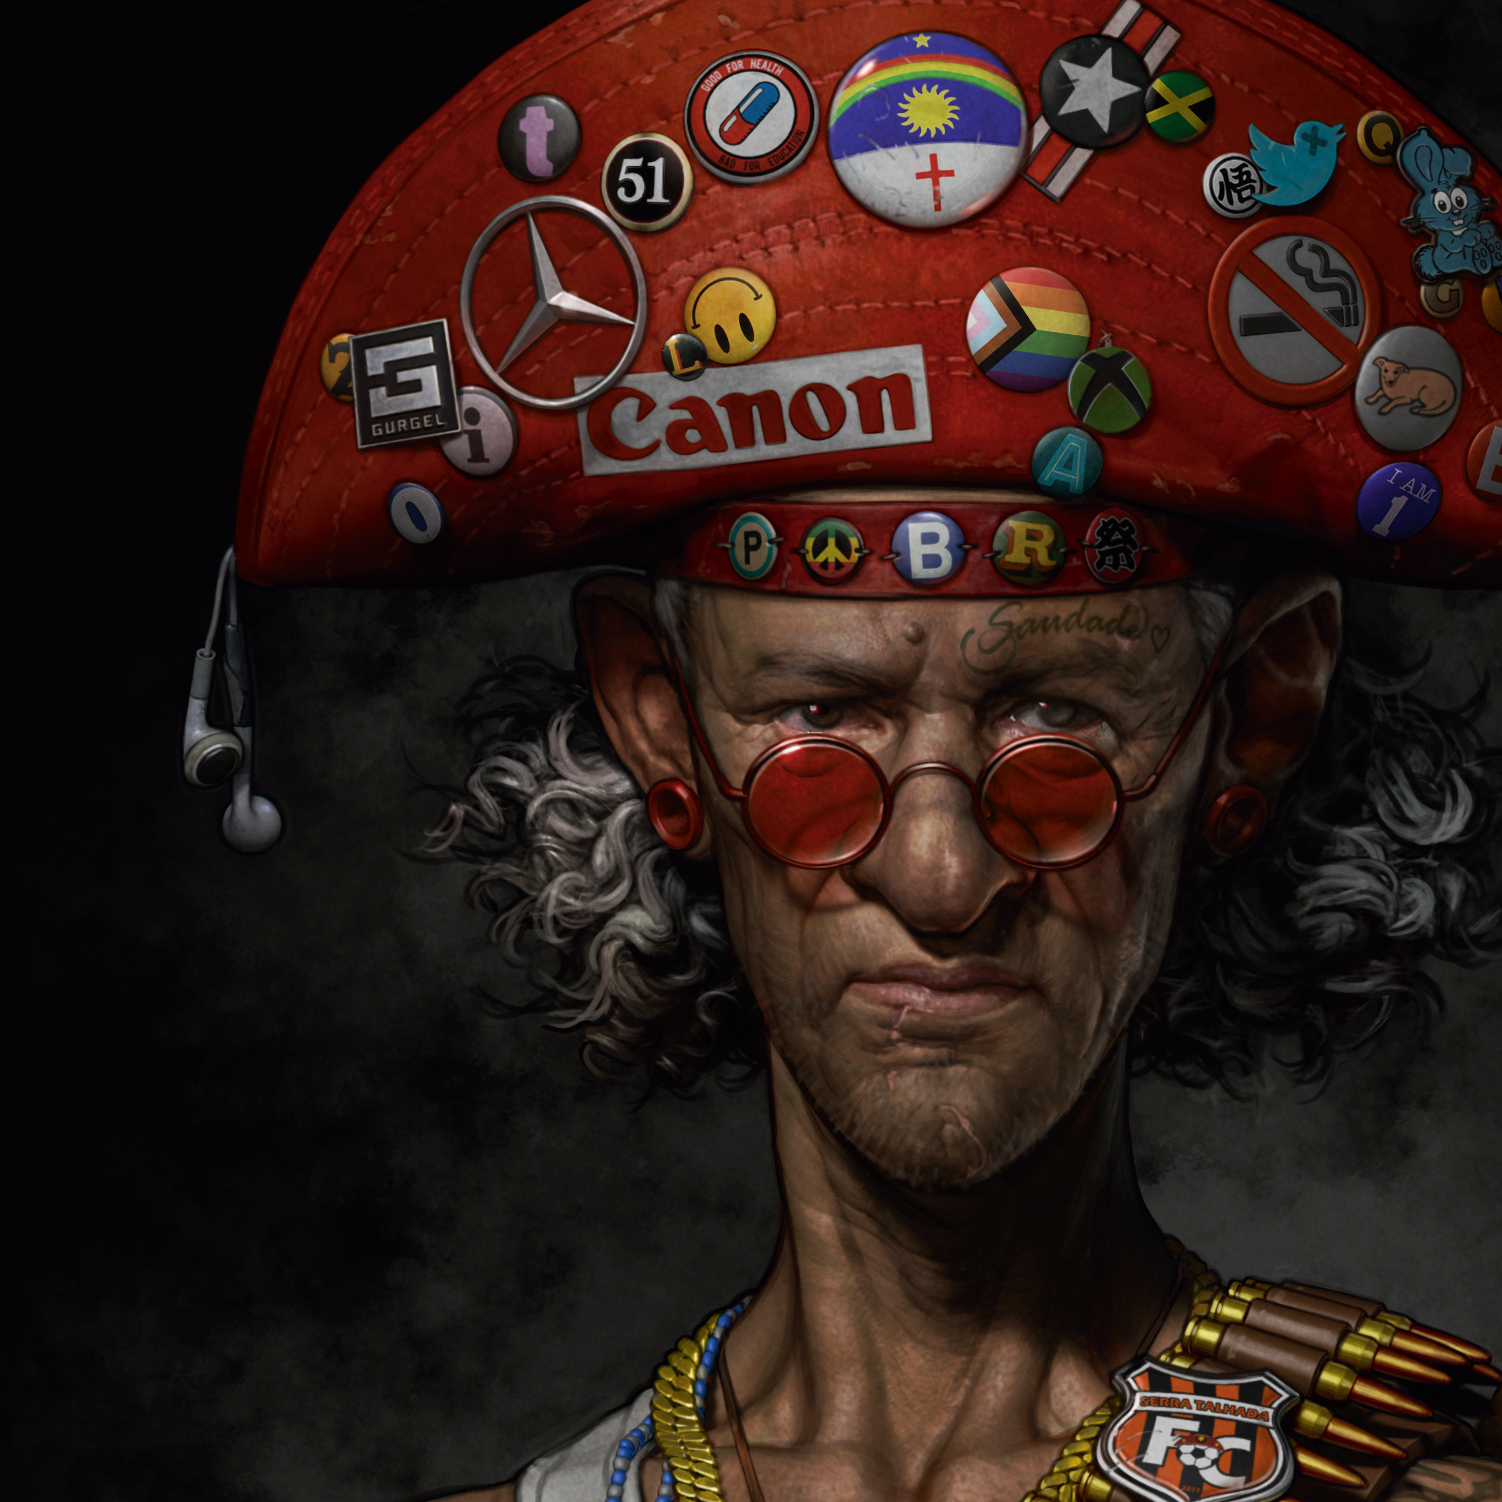
Details like the tattoos on the arms, bullet belt and so on work in tandem with the character’s hat, face and neck. Part of the concept behind this character was always to design his hat full of references and other elements. My intention was to keep his face, neck and hair as clear as possible from strong colours or elements to search for balance.
Details in the final render
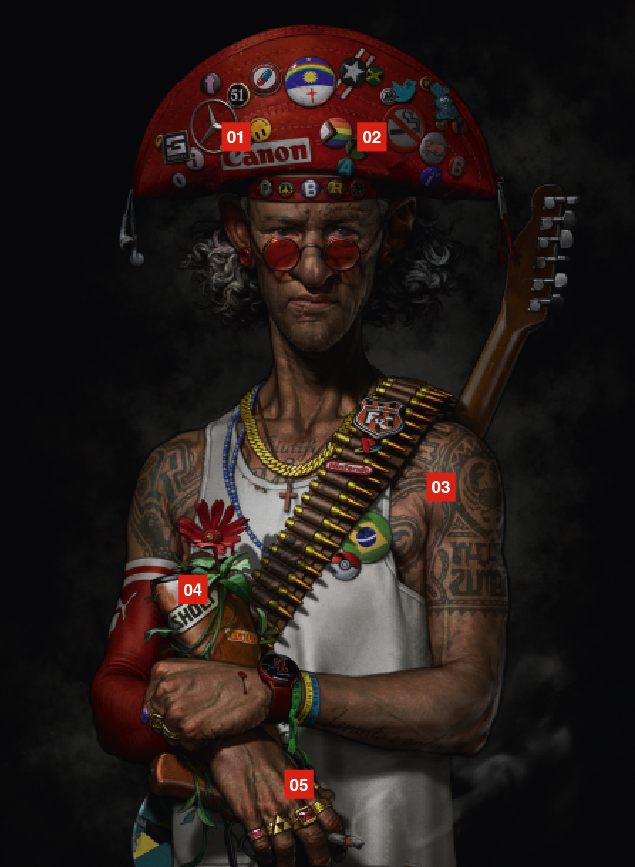
01. Colour scheme
From the beginning, one of my main references for this piece was Kaneda’s bike and his cool jacket from Akira. The red should be the main colour for the central element of the character: his hat. I usually like to work with just a few colours, but because of the nature of this piece with so many objects and coloured elements, it became a challenge to find a balanced palette for the overall image. I decided that elements like the pin badges, logos and jewellery should be colourful, and the outfit, hair and so on should be red, white and neutral colours.
02. Hold the details
During the 3D modelling, I was only interested in having a solid base for my paintover, so I left a lot of the details to be inserted later in Photoshop. Those elements are something I enjoy working on in 2D; for me, adding those minor details in a 2D render is usually a little faster to complete and change during the later stages of the painting.
03. Pop culture tattoos
The tattoos were another key part of the character that was always in my mind. They needed to look cool and make reference to traditional pop culture from northern Brazil like street artists, musicians and bands. Initially they covered much more of the arms, but at the end I reduced the amount of information conveyed to avoid the area becoming too noisy.
04. Rifle changes
This was added during the 3D modelling as it initially made sense with the nature of the Cangaço history. However, during the painting stages I started to feel that I didn’t like the idea of a gun in an artwork that had so many aspects that were meaningful to me and the history of my country, so I pondered on removing it. In the end I decided to keep it, but made it much less prominent by adding another element over it. The decision to add the flower in the final design stages wasn’t easy, as I still had concerns about striking the balance of how busy the image was without it becoming overwhelming.
05. Perfect bling
The rings are an example of how to use the 3D base as a starting point and interesting guide for my paintover, but not necessarily too close to the final vision. They had to be adapted, polished or changed to incorporate a new idea for a specific element on a number of occasions.
Marco Teixeira is a senior concept artist born in Brazil and currently living in Cambridge, UK. He has been working in the video games industry on projects including Senua’s Saga: Hellblade II, Diablo III and Bleeding Edge.
For new kit, see our list of the best laptops for 3D modelling.
This content originally appeared in 3D World magazine.

3D World was the best-selling international magazine for 3D artists, covering the fields of animation, VFX, games, illustration and architecture. It published from 2000-2024.
