“One of the best creative experiences of my life, working with such an amazing artistic crew” – how VFX artist Pejman Rajabi and friends created a heartfelt tribute to Super Mario
Pejman Rajabi explains how his crew of expert artists put their own twist on a classic video game character.
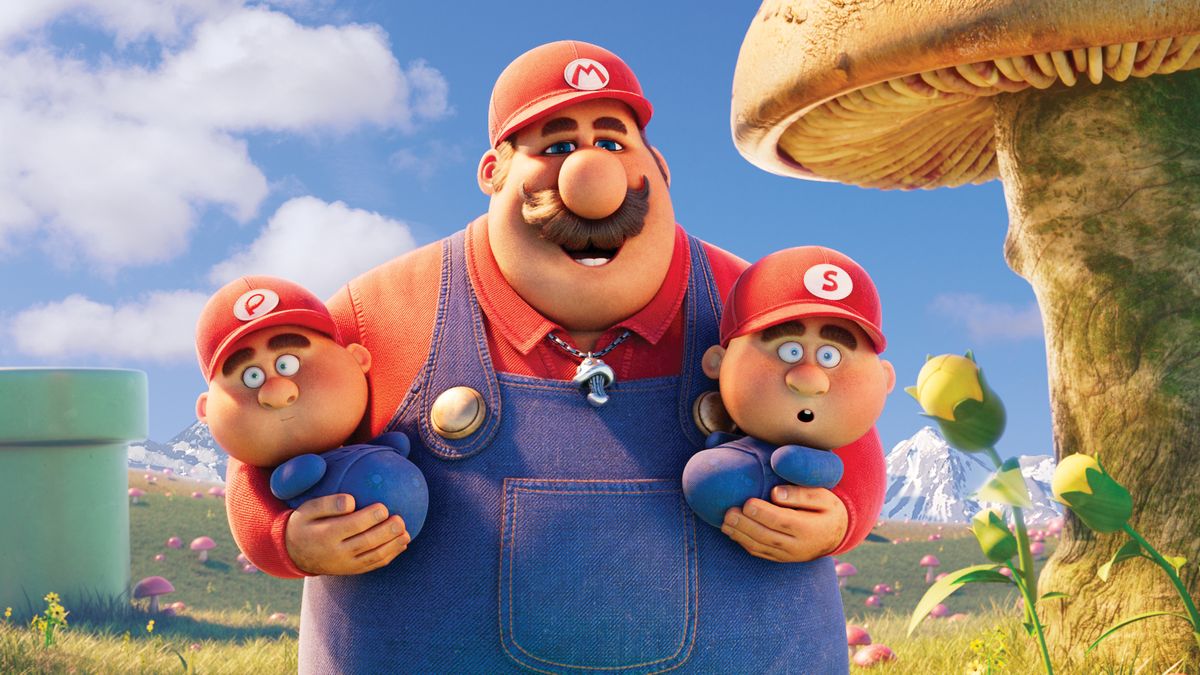
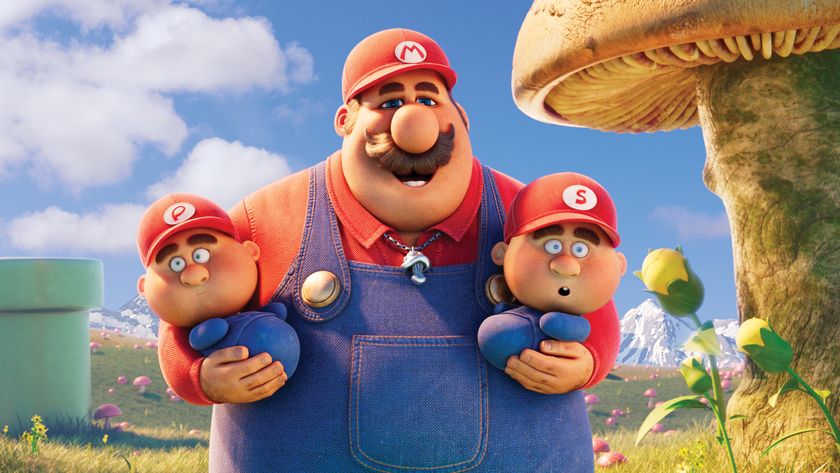
After seeing the trailer for The Super Mario Bros Movie, I decided to make my own rendition of a character that was synonymous with the childhood of so many people. I have lots of fond memories playing the Mario games as a child myself, and thought it would be cool to make him in my own style. A lot of us got into gaming through Mario, and the games bring back all kinds of nostalgic memories.
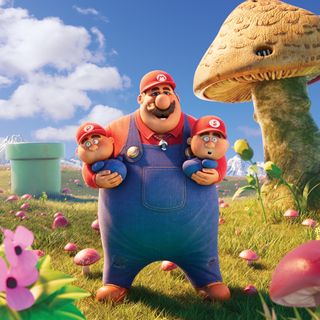
I decided to create this artwork with a team, so I invited my friends to contribute their own strengths to the project. I thoroughly enjoyed making this take on Mario, which was one of the best creative experiences of my life, working with such an amazing artistic crew. (If you want to do the same you'll need one of the best laptops for 3D modelling.)
01. Initial 2D concept
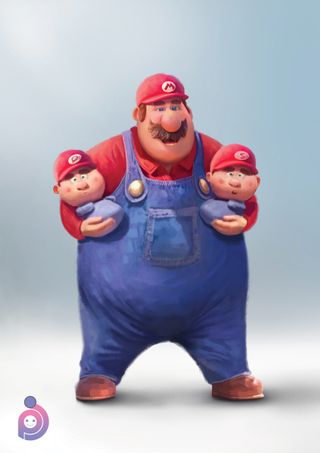
This artwork was based on a concept from my friend Pedram Jamadi, a visual development artist who has worked on concept designs for characters and more across video games, films and animation for a decade. His original artwork was made for a character design challenge. Part of his take on the character was to make additions not commonly associated with Mario, such as the babies. He also used a colour key for the characters and photobashed the background.
02. Modelling the character in 3D
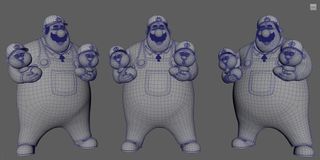
The modelling work was done by Ehsan Nouri. He’s a 3D character artist skilled in creating captivating and stylised figures for animation, films and VR, and is an expert in anatomy aesthetics and storytelling.
Ehsan used ZBrush and Maya to build the characters, first sculpting the blockout in ZBrush and gradually adding details, followed by working on the topology in Maya. The Quad Draw tool for Maya was used in conjunction with the Warp plugin, with Ehsan decimating the bodies in ZBrush and topologising half the body in Maya, before wrapping it across the opposite side. The model was finally returned to ZBrush for further development of the character’s form to restore the details lost during topologising, such as the inside of the mouth and eyelids.
03. Creating the 3D environment
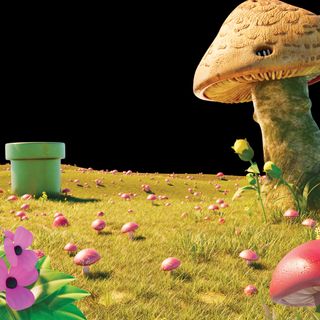
The original 2D concept was created without an environment. However, after seeing the movie I knew that we needed to create an attractive background for the characters, which was worked on by Shayan Takapoomanesh. He’s a senior modelling artist who has been working in animation and VFX for years.
Shayan started by building the ground plane using the sculpting tool in ZBrush, keeping it irregular to feel more natural, with details steadily built up. Next came the vegetation, which needed a fantastical feel to fit in with the Mario franchise. The main elements such as the grass, flowers and all-important mushrooms were modelled for scattering. The MASH plugin was used to scatter the elements in Maya for full control. Shayan likes to render his scatters to make sure they create the right mood for the scene.
04. Character grooming

Considering that Mario had a hat, we decided to create two hairstyles for the character, trying to get as close to the movie as possible. Experienced grooming and character modelling artist Siavash Arji carried out this stage of the project.
The work was done in XGen, heavily using noise dot maps and arbitrary noise to create clumps. Siavash placed five Clump modifiers and up to four Noise modifiers, including one for a flyaway. Given Mario was supposed to look a little stylised, it was important that the noise didn’t fully destroy the clumps.
05. Substance textures
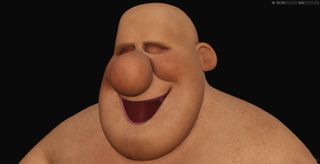
I handled the texturing myself, starting with carefully creating UVs of the characters and objects in the scene. Using Substance 3D Painter and Sampler, I began with the faces, creating the bottom layer of the skin followed by additional layers for sun damage and the like.
Given the stylised nature of the piece, I didn’t go over the top with the details. Natural texture was a key consideration for the clothes, with Sampler used to create patterns. With the characters finished, I moved on to the environment and individually textured each object.
06. Lookdev process
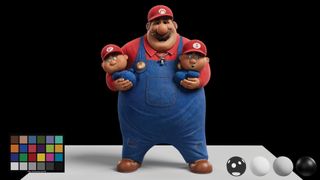
I also took care of the look development using Arnold. Texture maps were used to shade the characters and environments starting with the skin, which required subsurface scattering. Procedural maps were also used to get a better look, as well as a displacement shader. For the hair, I used AiStandardHair as I needed both brown and black colours for the desired look.
07. Lighting the scene
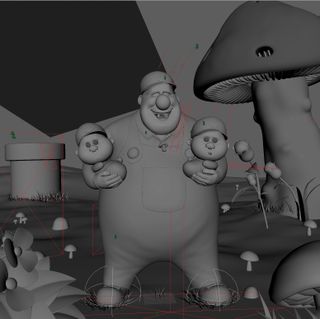
The goal of the lighting was to convey a dreamy mood to the audience, while directing their eyes towards the characters. I tested various angles for the lighting and found The Super Mario Bros Movie and Tangled to be good references. The setup used the sunlight as a rim on the characters, with a strong fill to bring warm colour. An area light also added some fake bounce light as if from the sun to lighten the underside of the mushroom.
08. Final compositing
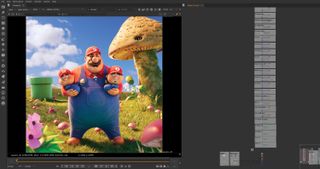
To finish the project, I did the compositing tweaks using Nuke, with the AOVs rendered in Maya to match the colours within Nuke. A depth fog was added to the shot, with each layer graded and LPEs used for the lights, while a ZDefocus node created fake depth of field to bring the viewer’s eye to the middle ground.
With all the passes edited, the final output was merged with a clean sky background, before the background and foreground colours were matched up with the help of Color nodes.
AlzahraVFX artist Pejman has worked professionally in texturing, lighting and look development for several years.
For other software options see our list of the best 3D modelling software options.
This content originally appeared in 3D World magazine.
Get the Creative Bloq Newsletter
Daily design news, reviews, how-tos and more, as picked by the editors.

Thank you for reading 5 articles this month* Join now for unlimited access
Enjoy your first month for just £1 / $1 / €1
*Read 5 free articles per month without a subscription

Join now for unlimited access
Try first month for just £1 / $1 / €1
