Building the characters of The Garfield Movie with Ziva Real Time
Thomas Hardy explains how DNEG Animation used Ziva on The Garfield Movie.

All the characters in The Garfield Movie had a large variety of designs and volumes. There were small, round characters like Garfield and large characters with huge volumes, such as Vic and Roland. It was clear from the off that it would be a challenge handling the range of designs. Our goal was to provide animation with a fast rig that had high degrees of volume preservation as well as overall deformation.
We felt that the traditional workflow of creating joint readers and corrective shapes would struggle with the broad volumes of our characters. We wanted to be able to create a more organic, natural result that usually comes from muscle simulations. Using Ziva Real Time was the solution to this problem.
Ziva RT is a machine learning tool that outputs a geometry deformer that runs in real-time. Using the full Ziva package, we set up dynamic simulation rigs and generated huge caches to feed into the trainer. The simulation would run thousands of frames, performing a series of technical poses on each joint and combinations of joints. The Ziva RT trainer ingested a stripped-down closed chain rig, along with the animation and sim caches to produce the final output. This allowed us to provide the animation team with a rig that behaved as though it had bones and flesh with natural sliding skin.
We were also able to deliver characters with deformations usually reserved for character effects passes this way. Following the Ziva RT workflow ultimately saved the artists time by avoiding manually sculpting correctives, and allowed us to iterate quickly on sim setups to improve results.
01. Range of motion

The animation we create to run the simulations on is crucial. This is where we’d need to define the full range of poses expected from the characters. We found providing a detailed animation produced much more stable results in the rigs.
We started by animating the individual joints like the elbows and wrists across the whole chain, then moved on to combinations of joints. The idea was to provide a dataset that encapsulated as much variety as possible. Once we had our first passes, we evaluated the results, identified any weaknesses, and added extra poses to the training to improve the results.
02. Ziva simulation
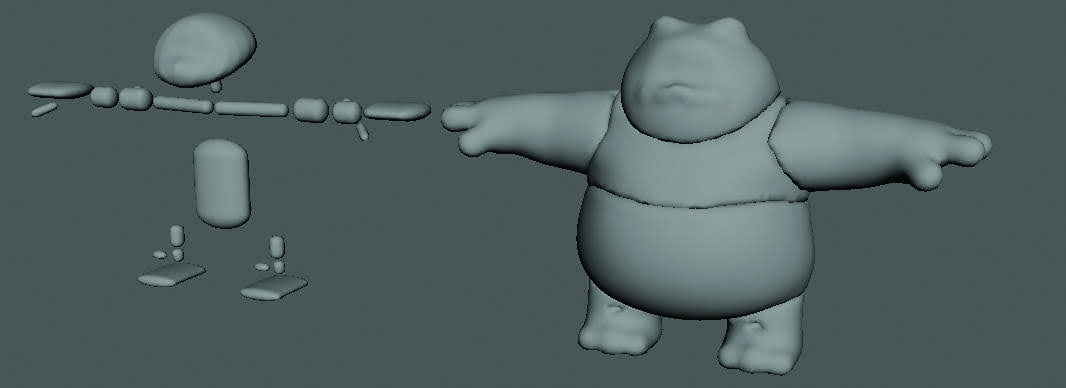
Next we created sim meshes and set up the Ziva simulation. We used internal bone meshes and flesh volumes, nothing that resembled anatomical muscles. Once we’d optimised the attachments and material layers, our work was almost done. We experimented with splitting the character into regions, which reduced sim times and simplified the setups. We continued splitting into regions for the animation and final Ziva RT deformers, then combined them in a final rig. The regions were split up like so:
• Torso: Spine/head/pelvis – Full simulation
• Left Arm: Clavicle/shoulder/elbow/wrist – Full simulation
• Right Arm: Mirror cache result from left arm simulation
• Left Leg: Hip/knee/ankle – Full simulation
• Right leg: Mirror cache result from left leg simulation
03. Sculpt
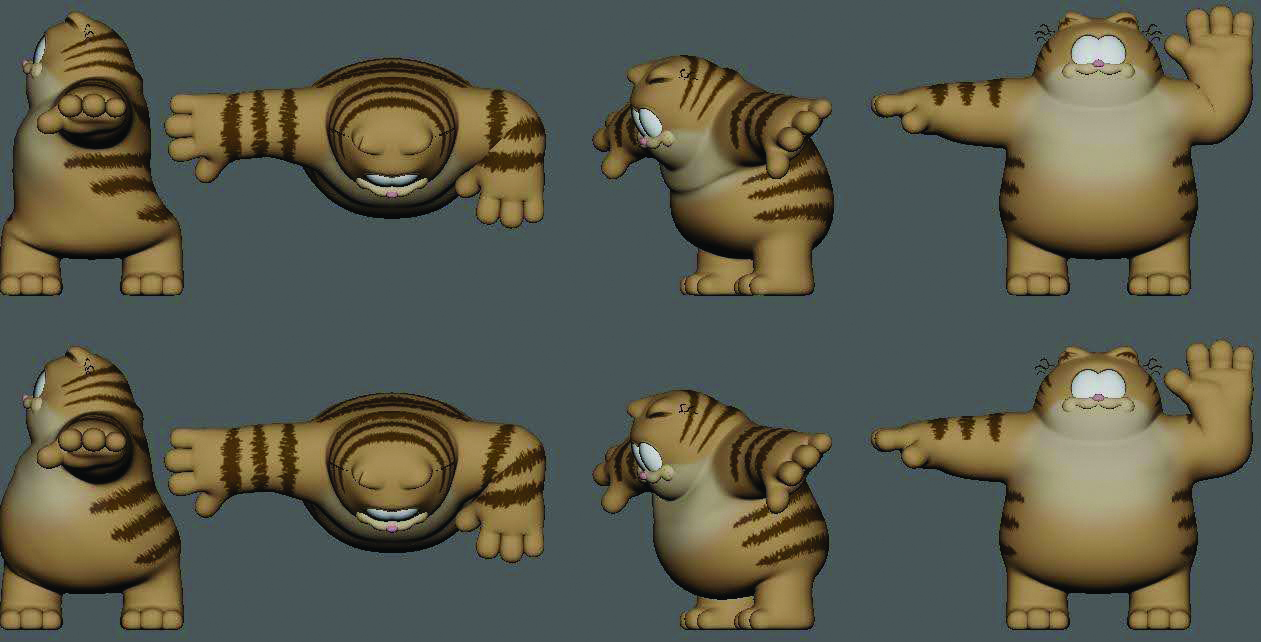
In some cases, we ran additional sculpting passes if we needed to art direct the results more than the simulation would allow. It was a minimal amount, but for characters like Vic there was a need to clean up the elbows and shoulders in some poses. As we developed sim setups, the need to clean up the sim cache reduced. We found that by adding more complexity to the sim, we could solve the issues more efficiently.
04. Create a ZRT solver
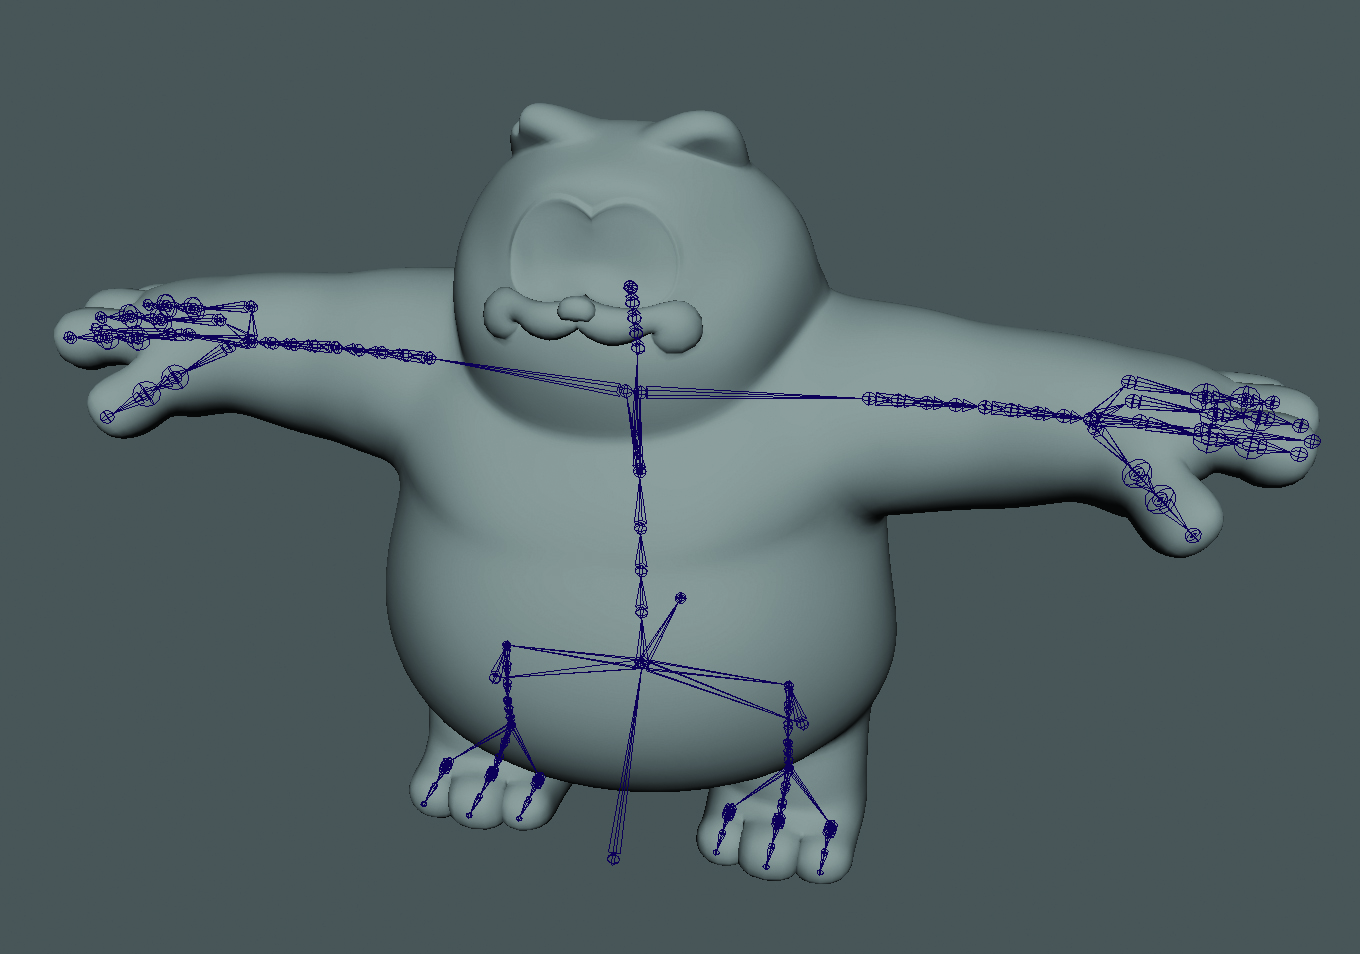
To create the Ziva RT solver we provided the trainer with a skeleton, anim ROM and sim cache. This produced the zrtPlayer node that runs inside Maya. Our workflow needs front-of-chain (FOC) blendShapes, which is where the face rig is connected. As such, we disabled the skinCluster element of the solver and were left with just the deltas. A solver for each region was produced and connected via geometry layers into the FOC blendShape. One advantage of this workflow was the ability to paint the blendShape weights, which gave us further control over the implementation of Ziva RT within the rig.
05. Wrap up The final rig

At this stage, the completed rig with Ziva RT embedded was now ready to use. As we treat the Ziva RT data as just typical front-of-chain corrective deltas, there was no change to our rigging setups, and all our existing deformation layers and setups worked with this addition of Ziva RT.
When the final builds were passed over, the animation team was thrilled with the fleshiness and volume preservation in the characters. The results had great appeal and looked very organic, and the animation artists felt they got the shapes and lines they had asked for in their draw-overs.
This content originally appeared in 3D World magazine, the world's leading CG art magazine. 3D World is on sale in the UK, Europe, United States, Canada, Australia and more. Limited numbers of 3D World print editions are available for delivery from our online store (the shipping costs are included in all prices). Subscribe to 3D World at Magazines Direct.
Get the Creative Bloq Newsletter
Daily design news, reviews, how-tos and more, as picked by the editors.

Thank you for reading 5 articles this month* Join now for unlimited access
Enjoy your first month for just £1 / $1 / €1
*Read 5 free articles per month without a subscription

Join now for unlimited access
Try first month for just £1 / $1 / €1

3D World was the best-selling international magazine for 3D artists, covering the fields of animation, VFX, games, illustration and architecture. It published from 2000-2024.
