25 tips for Unreal Engine 4
Learn some of the best tips and tricks for lighting, texturing and rendering in Unreal Engine 4.
Since public release in 2014, Unreal Engine 4 has set and raised the bar for third party engines. It's now free to use and there's no better time to get creating 3D art on your own.
Epic's engine is capable of producing truly incredible visuals. Its deferred rendering, custom materials and advanced lighting techniques are perfect for pushing the engine – and your art – to the next level.
I've worked professionally in Unreal 4 since its public release and have discovered some fantastic techniques for creating and presenting high-quality art in-engine. In this article I will share some of my personal tips and tricks I use on a day-to-day basis to help you light, texture, and render your own beautiful scenes within Unreal 4.
In 3D World's online Vault you can find video tutorials as well as models and textures to get started in Unreal 4 today.
01. Importing textures into Unreal 4
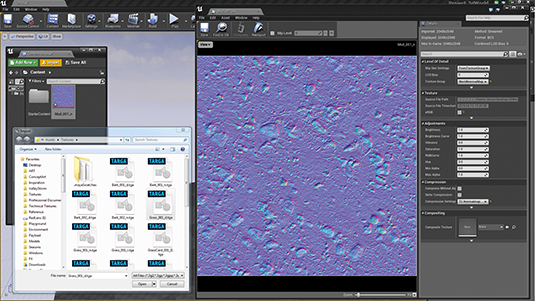
You can import textures via the Import button in the Content Browser. Unreal 4 supports a large variety of texture formats, from .tgas and .pngs to .psds and .jpgs. One important tip is to make sure normal maps are compressed as TC Normalmap to prevent visual errors in engine. Also be aware that if your texture dimensions do not follow the power of two, they won't stream or have mipmaps.
02. Save memory: Channel-pack textures
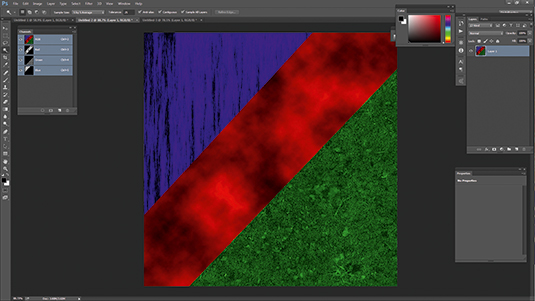
One of the fantastic things about Unreal is the large amount of control you get to have by creating your own materials. When you're creating multiple black and white masks for textures like roughness or transmission, you are able to save memory by hiding each mask into an individual channel of a texture image and then accessing each channel of that texture separately in your material.
03. Physically-based rendering
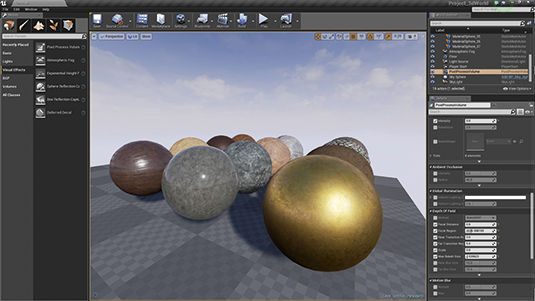
With the dawn of new rendering capabilities in new engines like Unreal 4, there has come the widely praised adaptation of physically-based rendering. This should definitely be worked with rather than against. Learning how to accurately represent the physical properties of materials with roughness and metalness masks can seem like a change from the way game engines worked last generation but can help keep materials consistent and believable across multiple lighting environments.
04. Texture reuse
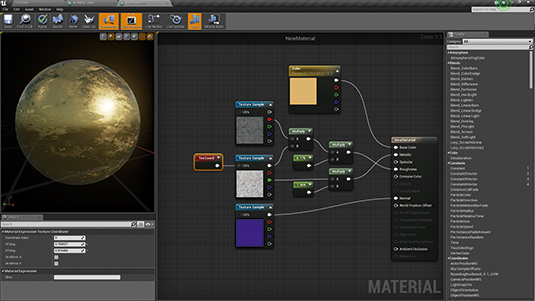
Another fantastic element of Unreal 4's Material Editor is that it allows for very intelligent texture reuse. This can not only save you memory, but also time. Sometimes a red channel from a rock albedo texture can make a great overlay for a roughness texture. A tiling cloud render texture from Photoshop could be useful for adding variation to a brick, but also to blend in a detail texture for some concrete. The possibilities are endless.
05. Don't make unnecessary textures
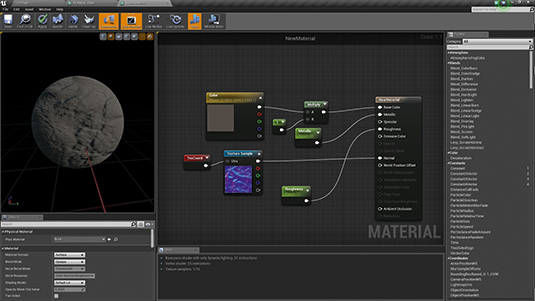
Occasionally certain textures are not needed and can be left out to save memory. For 100 per cent non-metal materials like wood or dirt, a metalness texture can be substituted in the Material Editor for a simple float constant with a value of 0. The same idea can be applied for multiple versions of the same material. Three slightly different coloured bricks don't all need different normal maps, but could share one.
06. Building a core material set
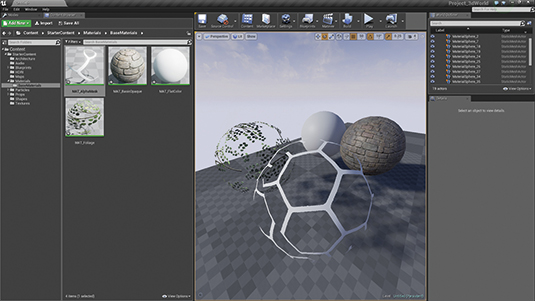
One way to save considerable time and work is by creating a basic set of materials that can be instanced out for different objects. When I start projects I create a base material for each type of object I'll need. For example, if I was making a nature scene I would want base materials for terrain, props and foliage. There will always be outliers but it helps with the bulk of the process.
07. Iterating through material instances
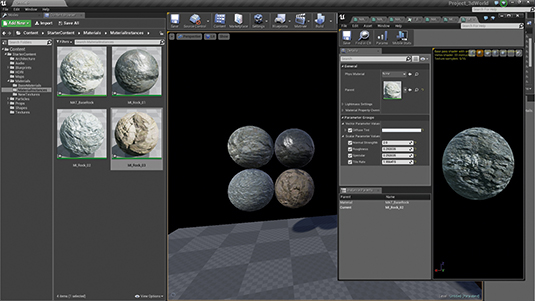
A great feature of a Material Instance of a base material is its ability to parameterise values that can be changed in real time. You can use these changes to rapidly test out many different values without having to recompile a material. Whenever I have a complicated material I always have a test material instance on the side. I use the test material instance to lock in more realistic base values for the final material.
08. Material comments and organisation
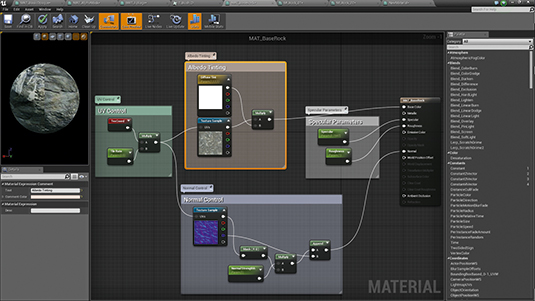
For very complex materials Unreal 4 brings some very welcome organisational tools to help. Selecting a group of nodes and pressing C puts those nodes into a comment, which can then be moved as a group and colour coded. The comments (and individual nodes) can have basic text explanations added to improve readability.
09. Material functions
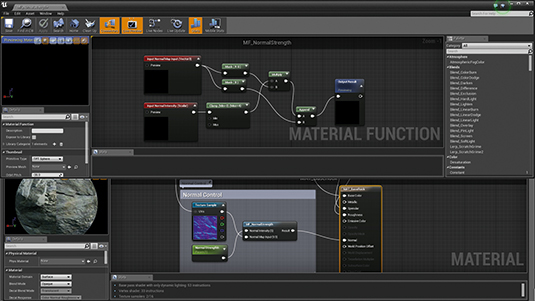
Material functions can be thought of in the same way real functions work in code – repeatable operations that can be called multiple times to perform a specific set of instructions. They are made outside of a material in the Content Browser, but can then be called on their own to help simplify materials. They can contain their own set of inputs and can be a fantastic way to save time when repeatable operations need to be called.
10. Foliage materials
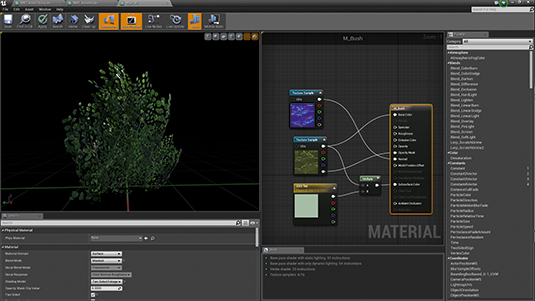
Foliage can be one of the trickiest things to ensure looks correct in any game engine. As of UE4 version 4.7, a Foliage Shading Model exists to help make that task easier. It is highly recommended as it supports sub-surface transmission, which most leaves benefit from. I also recommend adding sky light to your scene to help balance out some of the darker areas of a foliage mesh that could be in shadow.
11. Vertex colours
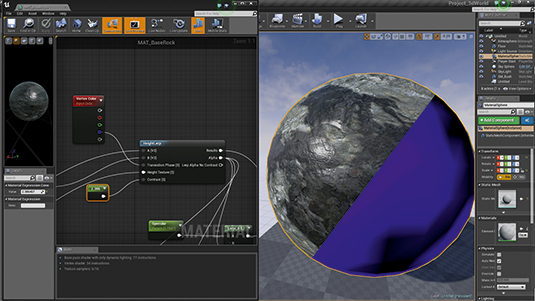
Having access to vertex colours in materials is one of my favourite features in Unreal 4. They can be incredibly powerful when used creatively. From ambient occlusion to masking out wind and world offset for foliage, their versatility is incredible. They're particularly useful in blending tiling textures together. Vertex colours can be imported from outside 3D software or imported and painted in editor.
12. Detail diffuse and normal overlays
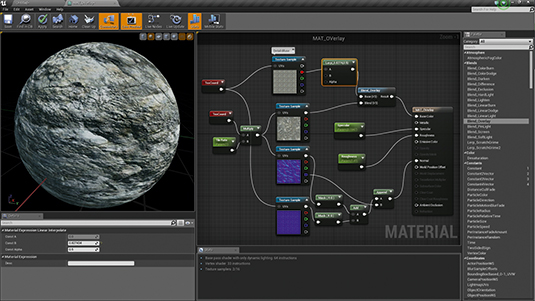
Because you can customise texture UV tiling rates you can increase the details of a material by blending in a secondary set of textures, usually diffuse or normal maps, then tiling them at a higher frequency on top of base textures. Diffuse detail can be applied with various techniques, such as the Overlay Blend Function, while detailed normal maps can be applied by adding the red and green channels to the base as normal.
13. Texture blending in materials
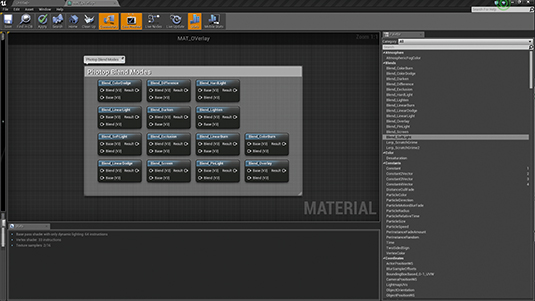
Want to combine textures in the material editor but only familiar with Photoshop's blend modes? Epic has it covered. Along with many useful material functions, they included the majority of blend modes that all Photoshop users are familiar with. From Overlay to Linear Dodge, they can be found in the Palette window inside the Material Editor. They can be particularly great for adding detail and variation to your materials.
14. Knowing your light types
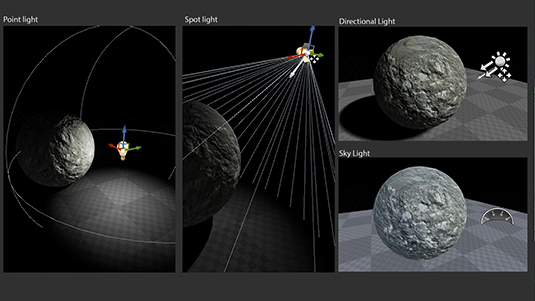
Unreal offers four different types of lights to use in the environment: Directional, Point, Spot, and Sky light. Directional lights are great for outdoor areas or any kind of extreme singular light source. Point lights are omni-directional and Spot lights are similar but have their limits defined by a cone. Sky lights can be used to add ambient light to your environment by capturing distant parts of your map. They also support custom Cubemaps.
15. Adding environment fog to your scene
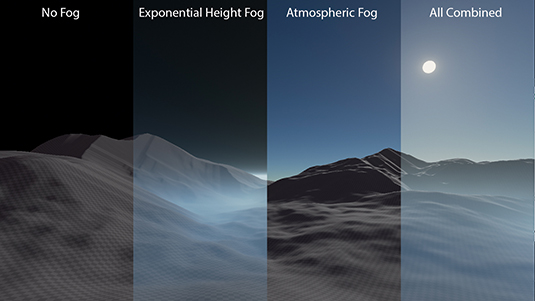
While close up fog can always be created with particle effects, Unreal 4 offers two other ways to add fog to your scene. AtmosphericFog reacts to directional lighting angles and intensity to create fog based on actual scattering of light in the atmosphere. Exponential HeightFog gives a bit more colour control and allows you to add a simpler fog effect that becomes less dense in higher parts of the map and denser in lower parts.
16. Creating clever light shafts
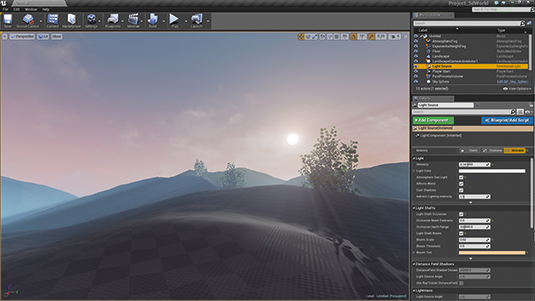
Light Shafts or 'god rays' can be a powerful visual tool and are created by particles in the air being lit by specific light sources. In Unreal 4 they can be created in a few ways. The most common way is by enabling them from the properties of a Directional light. They can also be made using geometry and clever materials. Epic's blueprint example project contains a good example of how someone could go about doing this.
17. Taking high-resolution screenshots
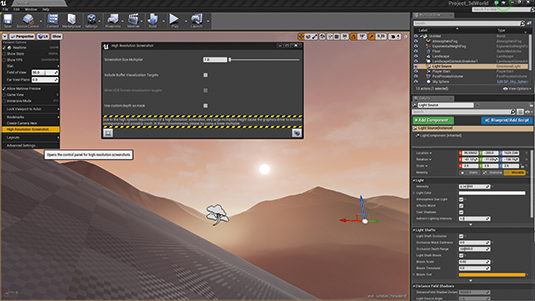
While custom resolution videos can be rendered out of Matinee, there is a quick and easy way to take high-resolution screenshots straight from the editor. By clicking the little downward arrow in the top left of your Viewport you can reveal a little drop down menu. At the bottom of that you can open up the High Resolution Screenshot window. From there high-resolution shots can be captured and sent to your project/saved/Screenshots folder.
18. Colour correction and look-up tables
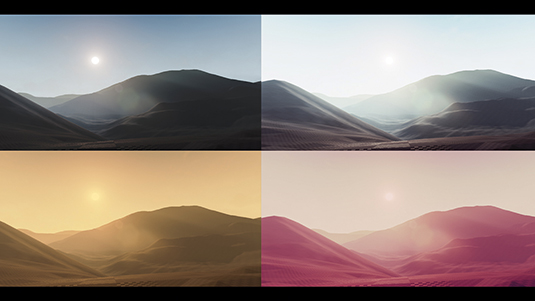
Using post-process volumes, final render colours can be tweaked and adjusted based on artistic preference. While options exist for basic settings like contrast and colour tinting, custom colour correction can be done using colour look-up tables. These tables allow for complex colour transformation and can be made with a base file available on Epic's Unreal 4 documentation site and Photoshop – or other image adjusting software suites.
Next page: More Unreal Engine 4 tips and tricks

Thank you for reading 5 articles this month* Join now for unlimited access
Enjoy your first month for just £1 / $1 / €1
*Read 5 free articles per month without a subscription

Join now for unlimited access
Try first month for just £1 / $1 / €1
Get the Creative Bloq Newsletter
Daily design news, reviews, how-tos and more, as picked by the editors.
