How to make a man and his mouse in 3D
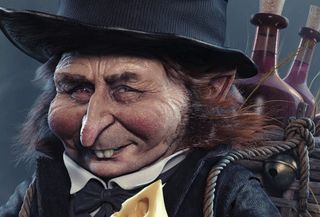
Seid Tursic explains how he made this tribute to Jean-Baptiste Monge’s illustration.

I am a CG artist living and working in Sarajevo, Bosnia. I've worked in different studios on some really interesting projects, but this is an educational piece that I did in my free time. It took about two months from the start to the final render.
I am a big admirer of traditional art and illustrations, so I tried to do something in this direction. Jean-Baptiste Monge's great illustration 'Little Master-Mice' was used as the concept for this image. I tried to capture the character and his little mouse friend as accurately as possible, translating it from the traditional illustration into a digital CG character.
Modelling
01. Making the base model
I always start by creating the base model in 3ds Max. I never use ZBrush at this stage because I'm more comfortable with box modelling. It gives me enough freedom and control to match the proportions and forms. It's a bit different with portrait modelling, because I always start heads in ZBrush with simple spheres, but since this character has stylised proportions, it was much easier to start in 3ds Max.
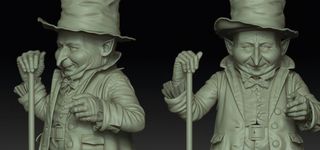
After I get the basic look of the head in ZBrush, I switch to 3ds Max and work on the base mesh with the required topology. After I have all the base meshes done with the right topology, I begin sculpting the high-res details in ZBrush. The mouse was modelled separately and added to the character later on.
02. Head and body detailing
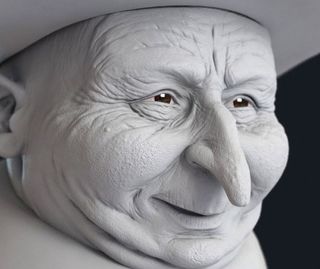
At this stage it's important to keep an eye on the forms and shapes. I zoom out often to get a better overview. I aim to get the head done with about 100,000 polygons in ZBrush. When I'm happy with it, I divide it a couple of times more for the small skin pores and wrinkle details. Higher subdivision levels are also important for the Polypaint later on - the more polys you have, the more colour information you can paint onto your head textures.
Texturing and rendering
03. Unwrapping the UVs

ZBrush's UV Master makes it very easy and fast to unwrap the model into UVs. On more complicated objects, I usually spend some time in 3ds Max to tweak the UVs.
04. Texturing
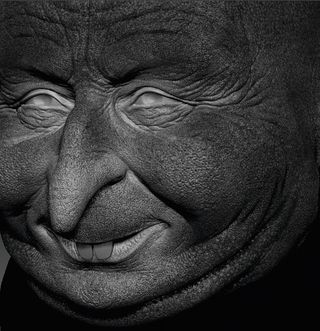
I did the texturing with a combination of Photoshop and ZBrush. Depending on the materials, I use different methods. I didn't use any photo references for the face - this was done entirely in ZBrush with its own brushes and alphas. I always try to stick with the most popular brushes, and extract as much as I can from their possibilities, rather than using custom-made brushes or alphas. Texturing in ZBrush feels very intuitive - it's like you have a physical canvas in front of you, and you just go on putting paint on top of it. Once I'm happy with the base colour, I use blending modes in Photoshop to add different patterns for materials such as fabric, leather and so on.
05. Lighting and rendering
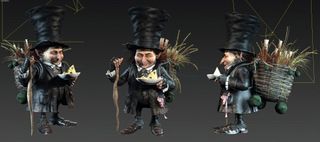
Before I go on to shading, it's time to make the first render previews. I try to find the right settings for all the test renders and previews so I don't lose too much time. On a flat grey material, I test all the lighting possibilities.
I wanted to stick with the look of the original illustration, so I decided to match the simple lighting of it and do less experimenting. I used VRayLights with some HDR images for the reflections. It was quite a simple scene set-up, but I wanted to show the whole character clearly.
06. Shading
Shading takes most of my time when doing cinematic characters, because of all the necessary renders to get the right materials. I usually tweak the lighting a bit so I have fewer shadows and a very clear view of the model. I extract several maps from ZBrush for the different materials. I used the V-Ray SSS2 material for the head because it gave the best results and could be tweaked in many ways.
You can make many maps for the head. I usually end up painting all the maps separately on the ZBrush model - bumps, reflections, SSS, colour and so on. I did the final tweaks to the materials on the render passes in Photoshop. This allows more creative freedom, and is very fast.
07. Hair and fur
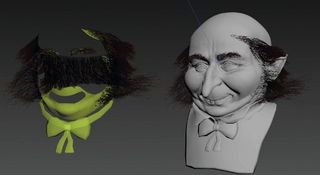
After thinking about the different tools and techniques I could use for the hair, I decided to use the standard Hair and Fur plug-in in 3ds Max. I also needed a mouse on the character's hat so I thought it would be challenging, but to my surprise it was simple. Hair and Fur offered all the control I needed to make everything for both of the characters.
08. Making the mouse
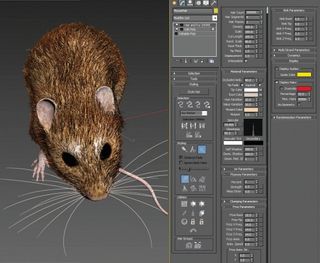
After spending a few hours modelling and texturing the mouse, I made the pose in ZBrush. I applied the Hair and Fur plug-in on the little character and searched for the right look and settings. I used the diffuse texture map for the fur colour. The mouse was rendered separately from the Mice Master scene and added later in compositing to make the scene handling easier.
Words: Seid Tursic
This article originally appeared in 3D World issue 169.
Liked this? Read these!
- The best 3D movies of 2013
- Discover what's next for Augmented Reality
- Free 3D software to download today
Have you created an amazing 3D image? Tell us in the comments!

Thank you for reading 5 articles this month* Join now for unlimited access
Enjoy your first month for just £1 / $1 / €1
*Read 5 free articles per month without a subscription

Join now for unlimited access
Try first month for just £1 / $1 / €1
Get the Creative Bloq Newsletter
Daily design news, reviews, how-tos and more, as picked by the editors.
The Creative Bloq team is made up of a group of design fans, and has changed and evolved since Creative Bloq began back in 2012. The current website team consists of eight full-time members of staff: Editor Georgia Coggan, Deputy Editor Rosie Hilder, Ecommerce Editor Beren Neale, Senior News Editor Daniel Piper, Editor, Digital Art and 3D Ian Dean, Tech Reviews Editor Erlingur Einarsson and Ecommerce Writer Beth Nicholls and Staff Writer Natalie Fear, as well as a roster of freelancers from around the world. The 3D World and ImagineFX magazine teams also pitch in, ensuring that content from 3D World and ImagineFX is represented on Creative Bloq.
