Create a futuristic composition in Photoshop
Per Gustafsson shares some pro techniques for adding mood to your Photoshop projects.
Software: Photoshop CS3 or later
Project time: Time needed 1-2 hours
Skills: Control Photoshop filters and tools, use patterns, fills and other effects to manipulate an image and create a futuristic look
Since 1996 and Photoshop 4.1, I’ve been developing and exploring different techniques in Photoshop. In this Photoshop tutorial, I’m going to break down the composition of a photo and then add some digital elements, showing you how to create patterns, layer effects and 3D objects to create a moody, atmospheric effect that – in this case – is rather futuristic. Once you’re familiar with the techniques covered here, you can experiment with them in your own projects to create different moods.
Step 01
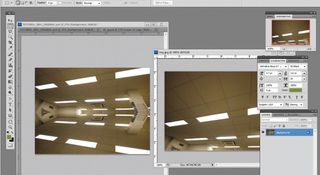
To create the futuristic effect seen here, start off with a simple photograph – in this case, an office ceiling, which we’ll add speed and action to through the advanced use of some Photoshop techniques. First duplicate your photo and expand the canvas vertically, then transform and mirror it to create a kaleidoscope effect.
Step 02
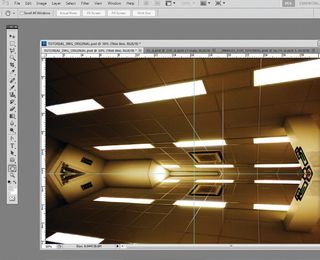
Now add more depth to the image by enhancing the feeling of perspective. Create a single line with the Pen tool on a new layer and then add some motion blur to it by selecting Filter>Blur>Motion Blur. Do this vertically only and the edges will become much more fluent. Select the layer with the Marquee tool and use the Transform command to place your new lines on the roof of the image.
Step 03
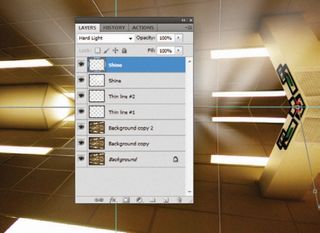
You can now add a light source to make it look like the lines are shining from the core of the image. I’ve chosen white and then painted onto a new layer before adding a lot of Gaussian blur to it. Next, transform the layer with the Perspective tool to keep it in line with the perspective we already have in the photograph. Now that there are lights and light beams following the photo, it makes our image feel much more realistic.
Get the Creative Bloq Newsletter
Daily design news, reviews, how-tos and more, as picked by the editors.
Step 04
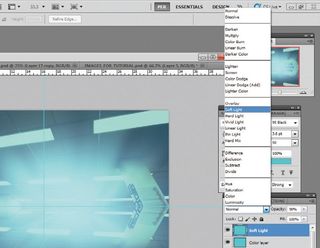
Now it’s time to change the colours. The easiest way to do this is to create several colour layers (multiple shades of blue and purple, in this case) and play around with them to get the look you want. Experiment with the Exclusion and light source tools on dark- and lightcoloured layers.
Step 05
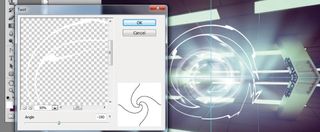
Now add some motion to the image. Draw a circular object, go to Filter>Distort>Twirl, and then add blur by going to Filter>Blur>Radial. Repeat and duplicate layers until you get the feeling you want.
Step 06
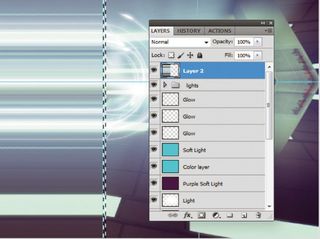
Now to add an element of 3D perspective to the focal point. Select the Marquee tool and, vertically through the centre of the image, mark an area 1 pixel wide and the height of your canvas. Go to Edit>Define Pattern, then create a new layer and select it with the Rectangular Marquee tool. Now Ctrl/right-click the image and choose Fill, open the drop-down menu, select Pattern and choose the new pattern you just created.
Step 07
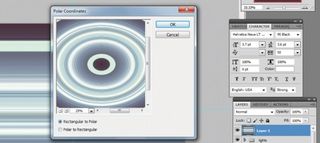
With this layer selected, go to Filter> Polar Coordinates to create a circular pattern. This filter can be used in other ways too, and your whole image doesn’t need to be filled. Play around and see what kind of effects you can create – why not try half-filling the pattern layer, for example?
Step 08
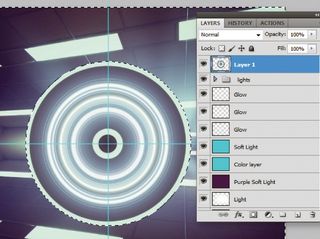
You can turn it into a symmetrical circle by selecting the Marquee tool, Ctrl/right-clicking and choosing Scale, depending on the dimensions of the image you’re working with. You can also use the Marquee tool with Ctrl/Cmd pressed down and View>Snap on, to mark a circle out of the centre of the image. Then go to Select>Inverse to delete all content outside this circle.
Step 09
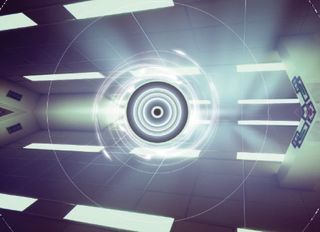
To integrate this element more fully into the picture, I’ve added thin, white-lined circles around the focal point. If you have Snap on and drag guidelines onto the work area, you can snap them as a cross in the centre of your image. This way, if you use the Marquee tool with Cmd/ Ctrl held down, the circles will be centred and look far more symmetrical.
Step 10
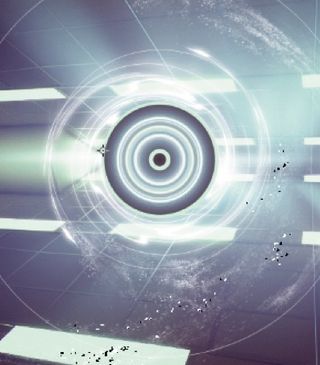
Finally, add some particle details by making dots with the Pen tool. Now add blur to the layer, duplicate it, move it, and scale it to a smaller size. This process can be repeated as many time as you like for more particles, but when you’ve finished, merge all the particle layers. To make them blend into the image use a bit of twirl, or add the Filter>Distort>Polar coordinates again.
Liked this? Read these!
- Adobe Photoshop CS6 hands-on review
- Free Photoshop brushes every creative must have
- Free Photoshop actions to create stunning effects
- The best Photoshop plugins

Thank you for reading 5 articles this month* Join now for unlimited access
Enjoy your first month for just £1 / $1 / €1
*Read 5 free articles per month without a subscription

Join now for unlimited access
Try first month for just £1 / $1 / €1
The Creative Bloq team is made up of a group of design fans, and has changed and evolved since Creative Bloq began back in 2012. The current website team consists of eight full-time members of staff: Editor Georgia Coggan, Deputy Editor Rosie Hilder, Ecommerce Editor Beren Neale, Senior News Editor Daniel Piper, Editor, Digital Art and 3D Ian Dean, Tech Reviews Editor Erlingur Einarsson and Ecommerce Writer Beth Nicholls and Staff Writer Natalie Fear, as well as a roster of freelancers from around the world. The 3D World and ImagineFX magazine teams also pitch in, ensuring that content from 3D World and ImagineFX is represented on Creative Bloq.
