120 Photoshop tips, tricks and fixes
Improve your skills with these great Photoshop tips.
Photoshop is an easy tool to use and a difficult one to master. Fortunately, help is at hand with our comprehensive list of tips, tricks and fixes for Adobe's showpiece software.
Whether you're looking for tips on using layers, advice on mastering the pen tool, a guide to using RAW, or ways to improve your brush work, it's all here.
Most of these tips were originally published in Practical Photoshop magazine – now part of Digital Camera World. If you're a photographer, we recommend making DCW a rest stop on your travels around the web.
Here are the best Photoshop tips, whether you're using an older CS version or the very latest Creative Cloud software. We've grouped them by category to make it easier for you to find the stuff that's the most relevant to your work right now, but be sure to check them all!
Let's get started…
Quick Photoshop tips
01. Easier marquee selections
Hold down Alt to start a selection at the centre point with any Marquee tool, and then hold Space to temporarily move the selection around.
02. Undo, undo, undo
You probably know that Cmd/Ctrl+Z is Undo, but you may not know Cmd/Ctrl+Alt+Z lets you undo more than one history state.
03. 1000 history states
Go to Edit>Preferences>Performance to change the number of History states up to a maximum of 1000. Beware though of the effect that this has on performance.
04. Cycle blend modes
Shift + or – will cycle through different layer Blend Modes, so long as you don't have a tool that uses Blend Mode options settings.
05. Rotating patterns

You can make amazing kaleidoscopic patterns with the help of a keyboard shortcut. Cmd/Ctrl+Shift+Alt+T lets you duplicate a layer and repeat a transformation in one go. To demonstrate, we've made a narrow glowing shape by squeezing a lens flare effect, but you can use any shape, image or effect you like. First, make an initial rotation by pressing Cmd/Ctrl+T and turning slightly, then hit Enter to apply. Next, press Cmd/Ctrl+Shift+Alt+T repeatedly to create a pattern.
06. Combine images with text
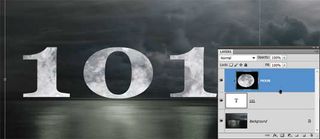
There's a really easy way to overlay an image on top of text. Drop an image layer over a type layer then hold down Alt and click the line between the two layers in the Layers Panel to clip the image to the text.
07. Bird's eye view
When zoomed in close, hold down H and drag in the image to instantly dart out to full screen then jump back to another area. One of the best Photoshop tips for viewing work!
08. Funky backgrounds
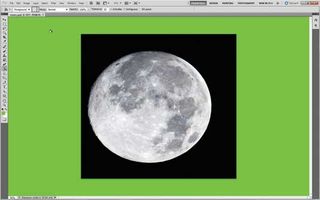
Want to change the default grey background to something more funky? Shift–click over the background area with the Paint Bucket tool to fill it with your foreground colour. Right-click it to go back to grey.
09. Close all images
To close all of your documents at the same time, Shift-click any image window's close icon.
10. Spring-loaded move
While using any tool, hold Cmd/Ctrl to temporarily switch to the Move tool. Release to go back to your original tool. Note that spring-loaded keyboard shortcuts work for other tool shortcuts, too.
11. Interactive zoom
For interactive zooming, hold Cmd/Ctrl+Space then drag right to zoom in, or left to zoom out. The zoom targets where your mouse icon is, so it's one of the quickest ways to navigate around an image.
12. Diffuse effects
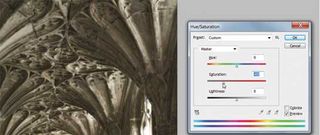
The Diffuse Glow filter can give highlights a soft ethereal feel, especially when you combine the effect with desaturation. Hit D to reset colours then go to Filter>Distort> Diffuse Glow. Keep the effect fairly subtle, then go to Image>Adjustments>Hue/ Saturation and drop the saturation down to complete the dreamlike effect.
13. Step by step: select sky with channels
A: Copy Blue Channel
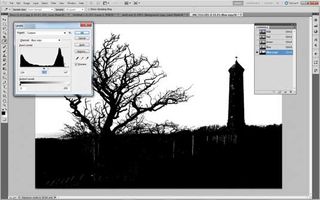
Go to Window Channel then drag the Blue Channel to the New Channel icon to duplicate it. Hit Cmd/Ctrl+L to access Levels, then drag the white and black point sliders in dramatically to make the sky totally white and the land black. Now use the Brush tool and paint with black to tidy any bits in the land.
B: Load a selection
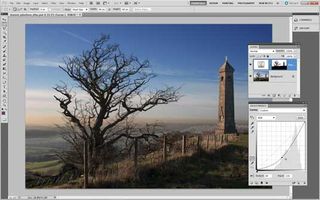
Hold Cmd/Ctrl and click the Blue Copy Channel to load a selection of the white areas. Click back on the RGB Channel then go to the Layers Panel and add a Curves Adjustment Layer. The selection is automatically turned into a mask. Drag down on the curve to darken the sky.
Next page: Essential Photoshop shortcuts

Thank you for reading 5 articles this month* Join now for unlimited access
Enjoy your first month for just £1 / $1 / €1
*Read 5 free articles per month without a subscription

Join now for unlimited access
Try first month for just £1 / $1 / €1
Get the Creative Bloq Newsletter
Daily design news, reviews, how-tos and more, as picked by the editors.
The Creative Bloq team is made up of a group of design fans, and has changed and evolved since Creative Bloq began back in 2012. The current website team consists of eight full-time members of staff: Editor Georgia Coggan, Deputy Editor Rosie Hilder, Ecommerce Editor Beren Neale, Senior News Editor Daniel Piper, Editor, Digital Art and 3D Ian Dean, Tech Reviews Editor Erlingur Einarsson and Ecommerce Writer Beth Nicholls and Staff Writer Natalie Fear, as well as a roster of freelancers from around the world. The 3D World and ImagineFX magazine teams also pitch in, ensuring that content from 3D World and ImagineFX is represented on Creative Bloq.

