Adobe Illustrator for beginners: 11 top tips
Master some cool tools in Adobe's vector illustration software with our quickfire guide.
Adobe Illustrator is a vector drawing tool, meaning you can create artwork that can be scaled infinitely without any loss of quality. It's a fantastic tool for logo design, creating complex vector artwork and playing with illustrated typography design. But coming from Photoshop you may not be savvy with Illustrator and its unique ways: so we're here to help.
From using Bézier points and curves to strokes and fills and adding a more natural look to your vector artwork, read on for some Illustrator secrets for those new to the application.
01. Get to grips with Bézier
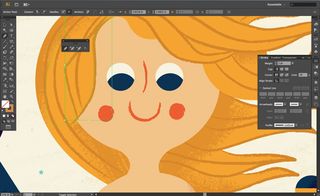
Bézier points and curves are the thing you need to master if you're going to be able to use Illustrator to create - well, just about anything. Whilst rather tricky to get to grips with at first, Bézier control points and curves offer the freedom to create just about any shape you can think of.
Manipulating points controls the curves, and using the Alt/Shift keys in conjunction with the pen tool (clicking on a curve to add more control points for instance using Alt) you can start to define complex organic shapes in no time at all. The best advice is to practice and discover for yourself how they work.
02. Bézier shortcuts
But a great tip for controlling Bézier curves with more accuracy is to use the Alt key after you've created a point. Hold down the Alt key after creating a point and you can position the next point without manipulating the curve.
In addition, holding down Shift will snap your next point to a 45-degree angle. By using these kind of shortcuts you can easily trace raster images in Illustrator (maybe for a logo design and so on).
03. Strokes and paths
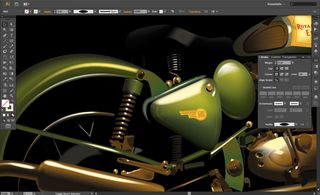
By default, Illustrator strokes your path (whether created using the Pen tool or a shape tool, etc) with a 1pt black (and fills your shape with white if you connect up the points). You can change the colour or fill using the swatches panel (or indeed the tool options bar at the top of the interface).
Get the Creative Bloq Newsletter
Daily design news, reviews, how-tos and more, as picked by the editors.
The small stroke and fill tool below the main tool panel lets you swap between the two when the object is selected. Using the Strokes panel you can adjust the weight and type of stroke, as well as where the stroke is applied (from CS6).
04. The Appearance panel
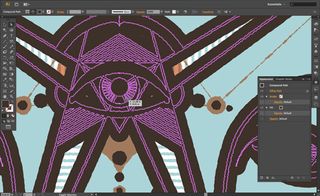
To get a quick overview of your strokes and fills at any time (along with any effects you've applied) use the Appearance panel. You can also quickly change the stroke and fill type and colour from here, including opacity. If you've applied an effect, you can quickly click the name of it to go back and tweak it. Incredibly useful.
05. Easy brushes
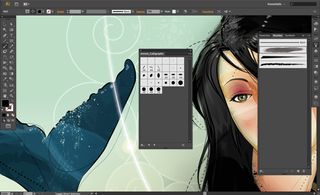
If you thought Illustrator and vector graphics was about solid shapes and non-natural media effects, think again. You can, using the Brushes panel and Illustrator's huge range of brush libraries, quickly apply, for instance, paint strokes to your lines.
Double-clicking the brush in the Brushes panel enables you to edit it - and these changes will be reflected automatically on your illustration. You can even create brushes from scratch using vector graphics you've designed. The possibilities are endless.
06. Use the Symbolism tools
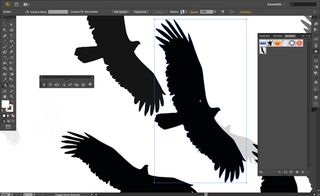
Similarly, Symbols are a great way of creating complex artwork quickly. Say you want a flock of birds. Simply draw one bird, then select it and using the Symbols panel arrow menu, you can turn it into a symbol. Next, select the Symbol Sprayer from the tool panel and spray it around your page.
You can then use the other Symbolism tools to resize, colour and rotate only certain instances of the symbol, giving a more natural effect. Try it, it's very easy!
07. Warp with ease
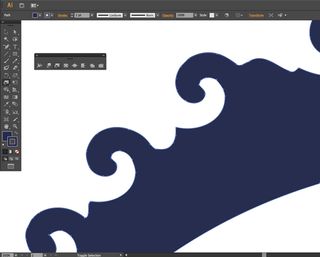
If your objects are looking a little uniform, you can use the effects tools to warp, roughen, pucker, bloat and generally subtly change their appearance.
In the Tool panel, click and hold on the Width tool to bring out the effects tools flyout. Then, use one or each tool (they are brush-based) to gently warp and tweak your object. By double-clicking on each tool in the flyout, you can change options - so experiment!
08. Quickly edit type
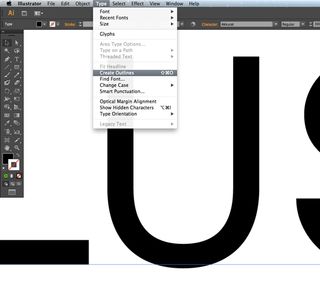
One of the great things about Illustrator is its fantastic type tools. It's great for laying out type as part of an illustration, but better for editing type. Type out a font, make it larger using the Character panel or Tool Options bar. Then select the box the type is in (not the text itself) and go to Type>Create Outlines.
You can now edit the letters as you see fit by adjusting the Bézier points. It's great for experimenting with new variations on standard fonts. And there's some even better stuff coming with Illustrator CC.
09. Selecting similar objects
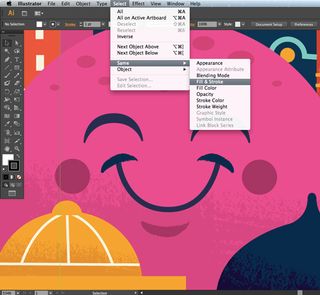
Once you've become accustomed to drawing more complex shapes in Illustrator and have built up an illustration, you may want to change the colour of many objects at once. But some of those objects may be partially hidden under others, and there may be absolutely loads of them!
So to make things easier, select one of your objects and then go to Select>Same and then choose the option you want (maybe Fill Colour). All your objects with that fill colour will then be selected and you can change them all at once by using the swatches panel.
10. Easy blends
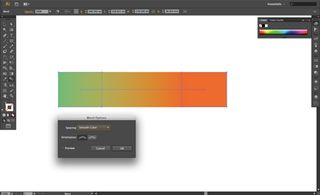
There are a few ways to create gradients in Illustrator (the Gradient panel and Gradient Mesh tools are worth experimenting with and getting your head around) but a great way is to use the Blend tool.
Simply create two shapes with different colour fills (for a gradient effect choose no stroke) and then, with the Blend tool selected, click on the first object and then the second. If you double-click the Blend tool in the Tool Panel before doing this you can change the type of blend it applies (and if you keep your blend objects selected it will apply the changes to that blend).
11. Use presets with the new Pencil Tool
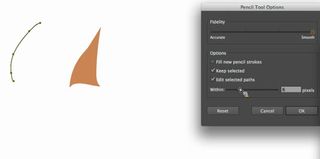
If you're using Illustrator as part of the Creative Cloud then the Pencil Tool now lets you use quick presets to create a smooth, fluid path with fewer points, or a path that more closely matches your drawing intent.
As well as curves, you can now use the Pencil Tool to easily draw straight lines too, which you can constrain to 0, 45 and 90 degree angles if you choose. Adobe's also added the ability to continue drawing from the end points of an existing path, and you can now close your paths with a curved or straight line. These two videos show how:

Thank you for reading 5 articles this month* Join now for unlimited access
Enjoy your first month for just £1 / $1 / €1
*Read 5 free articles per month without a subscription

Join now for unlimited access
Try first month for just £1 / $1 / €1
Rob is editorial, graphic design and publishing lead at Transport for London. He previously worked at Future Publishing over the course of several years, where he launched digital art magazine, ImagineFX; and edited graphic design magazine Computer Arts, as well as the Computer Arts Projects series, and was also editor of technology magazine, T3.
Related articles
-

-

-

-

