How to hold a pencil correctly
When it comes to drawing well, there's more to pencil grip than you might think.
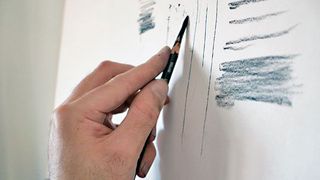
You can have the best tools in the world, but unless you know what to do with them, they're pretty useless. You're probably fairly sure you know how to hold a pencil, but are you holding it correctly for drawing? The grip most of us use for day-to-day writing can be very inefficient and will limit you in many drawing scenarios.
Quite simply, drawing from the fingers and wrist alone (which is the narrow range promoted by the standard hand writing grip) doesn't release the full potential of movement that drawing from the entire arm and shoulder affords us.
Learn to wield your drawing tool like a pro with these steps to pencil precision. Then, once you're confident in your grip, check out our essential pencil drawing techniques, arm yourself with the best pencils you can afford, and dive into our how to draw tutorials.
01. Learn the two basic types of grip
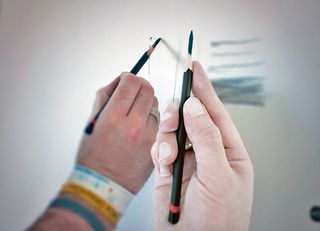
A better grasp of your pencil will literally lead to a better grasp of drawing, because once you gain greater certainty and control over any given drawing medium, the confidence to explore what can be done with it becomes more accessible.
There are several ways to hold a pencil. Most are variants of two main grip types; Tripod and Overhand. Both can be used when holding different kinds of drawing media, but you may notice a tendency to grip tubular media (pencils and ink pens) with the Tripod grip and bulkier media with the Overhand.
Both have their place, but the Overhand method is generally considered a more adept approach. Before we explain why, let's look at the Tripod grip.
02. Learn the Tripod grip
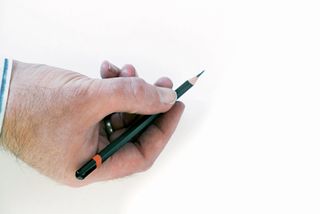
The Tripod grip is the grip we use when writing with a pen, so it's also known as the Writing method. You grip the pencil using the thumb, index and middle finger. The barrel of the pencil should rest naturally in your hand's web space.
Avoid closing the web space, as this forces the barrel to rest on the knuckle of the index finger and promotes strokes using finger gestures only. Avoid grasping at the tip of the pencil, too, as this can limit line length(s) and lead to hairy, less fluid continuous lines.
When to use the Tripod grip
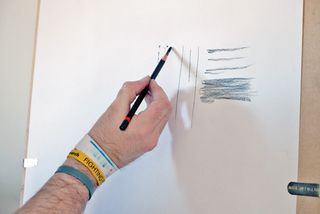
Although the range of movement of the Tripod grip is limited, it can be useful for detailing small sections of a big drawing. Try to move your grip as far up the barrel as you can to encourage articulation of the elbow and drawing from the shoulder.
The Tripod grip is more appropriately used when working in a small sketchbook – A4 or smaller. Try not to rest your hand on the paper, as this can hinder wrist articulation.
03. Master the Overhand grip
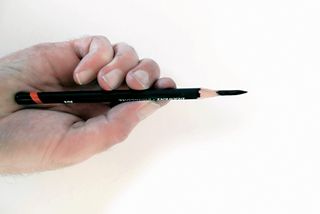
If you've never used the Overhand grip, it feels alien at first, but the benefits are worth the retraining.
Place your pencil down on a flat surface. Now with the thumb and all four fingers, pick up the pencil. All fingers should grip the outer side of the barrel while the thumb grips the opposing side, retaining a light grip at all times.
When to use the Overhand grip
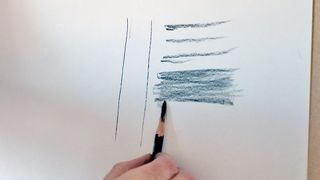
Overhand grip combined with a correctly sharpened pencil will increase the versatility and range of marks you can make by introducing the edge of the pencil.
For example, when drawing on a vertical surface (one of the best easels) holding the pencil vertically (and with the full edge touching the paper), pulling downwards creates a single line, but moving the edge horizontally left/right will lay down a thicker line of tone.
04. Get more from the Overhand grip
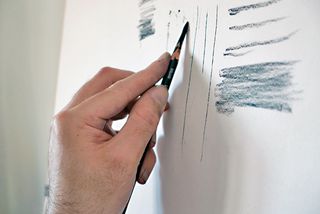
Move your index finger away from the outer edge of the pencil to the top of the barrel. This enhances your control of the pencil by acting as your pivot and pressure control.
Rolling the wrist forwards means less edge is in contact with the surface, leading to a thinner, sharper line weight. Roll back the wrist and you apply more edge to the surface, broadening and also softening the line quality.
05. Try these Overhand grip exercises
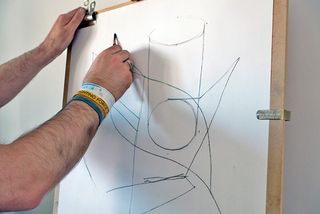
Another way to shift line weight is to introduce minor shifts in wrist angle, as you draw a continuous line start to twist the wrist to increase/decrease the amount of edge contact with the surface.
To build muscle memory try this exercise: Plot several Xs randomly over a surface; now begin linking these Xs with lines, some short, others continuous, fluctuating line weights as you go. Use four Xs close together (north, east, south and west) to practise drawing ellipses.
06. Make some marks
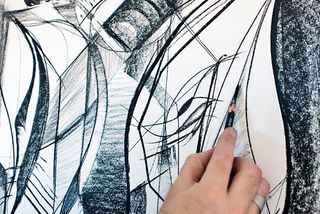
Gain confidence by exploring the type of marks you can make using this grip. The foundation of every drawing can be broken down into three basic components; line, shade and texture.
The more ways you have of creating these, the more varied your drawing vocabulary will become. Marks can be generated by the following factors; direction, angle, speed and pressure. Try filling a sheet of paper with experimental marks that capture these qualities.
This article originally appeared in the ImagineFX bookazine How to Paint & Draw.
Related articles:
- 22 incredibly realistic pencil drawings
- Watercolour pencils: The best you can buy
- 10 of the best watercolour tutorials

Thank you for reading 5 articles this month* Join now for unlimited access
Enjoy your first month for just £1 / $1 / €1
*Read 5 free articles per month without a subscription

Join now for unlimited access
Try first month for just £1 / $1 / €1
Get the Creative Bloq Newsletter
Daily design news, reviews, how-tos and more, as picked by the editors.
Related articles
-

-

-

-
