Turn photos into 3D animations with Photoshop
Use Photoshop's image editing tools, along with its timeline capabilities to animate a still frame, with added depth.

We all have a large store of memories taken as photos and it’s great to be able to reminisce. But what if you could go a step further and add a little life to those still images? Photo editors these days let us do just that.
Photoshop allows us to add depth to photos, even animating the results, to truly breathe some fresh air into our old still albums. With that in mind I’m using a simple old photo from a holiday for this tutorial (also see these these 3D animated graduation shorts for inspiration).
01. Choose the right photo
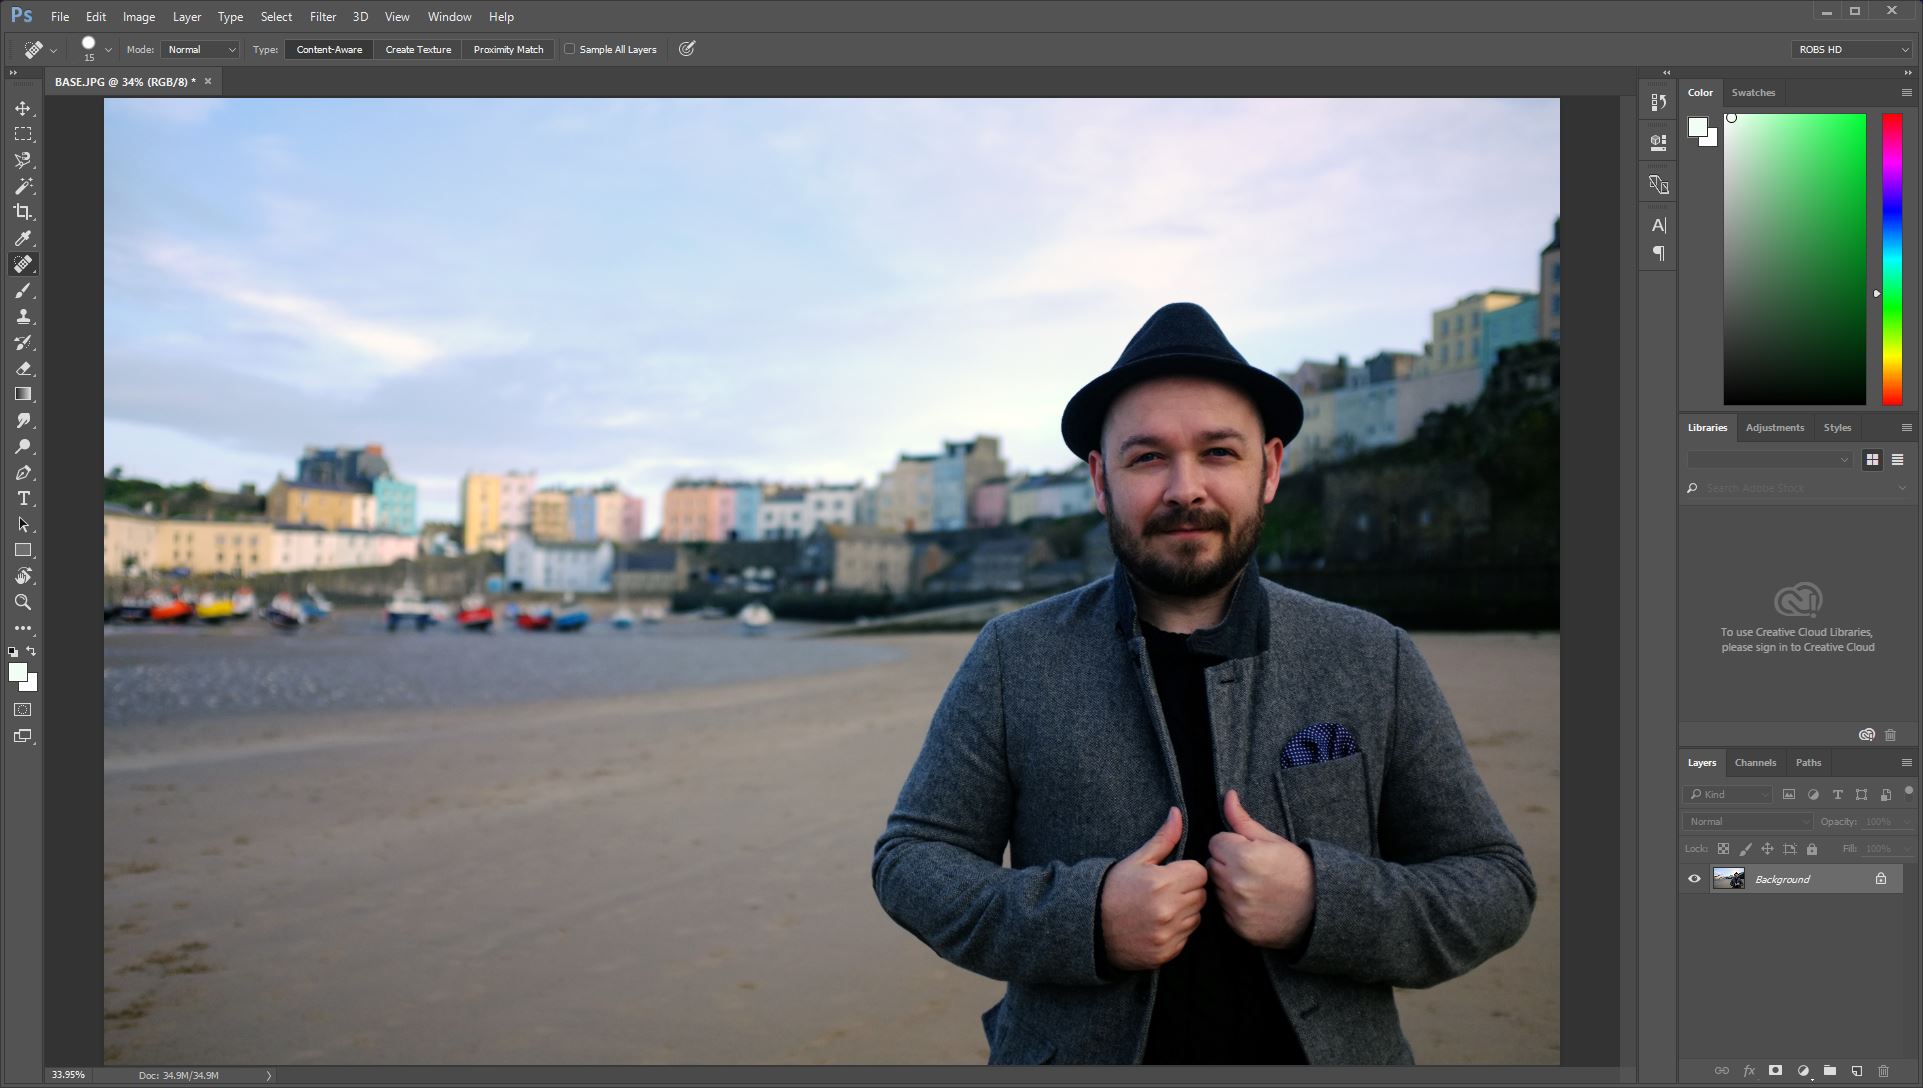
I’ve chosen a photo that will make it more obvious as I proceed through the tutorial but many shots can work. I suggest aiming for one with a distinct depth range, like mine, that has some separation between foreground and background. You can use shots with more levels of depth as well, repeating the process for each. Click the layers lock icon, so that you can work with it.
02. Mask off the foreground
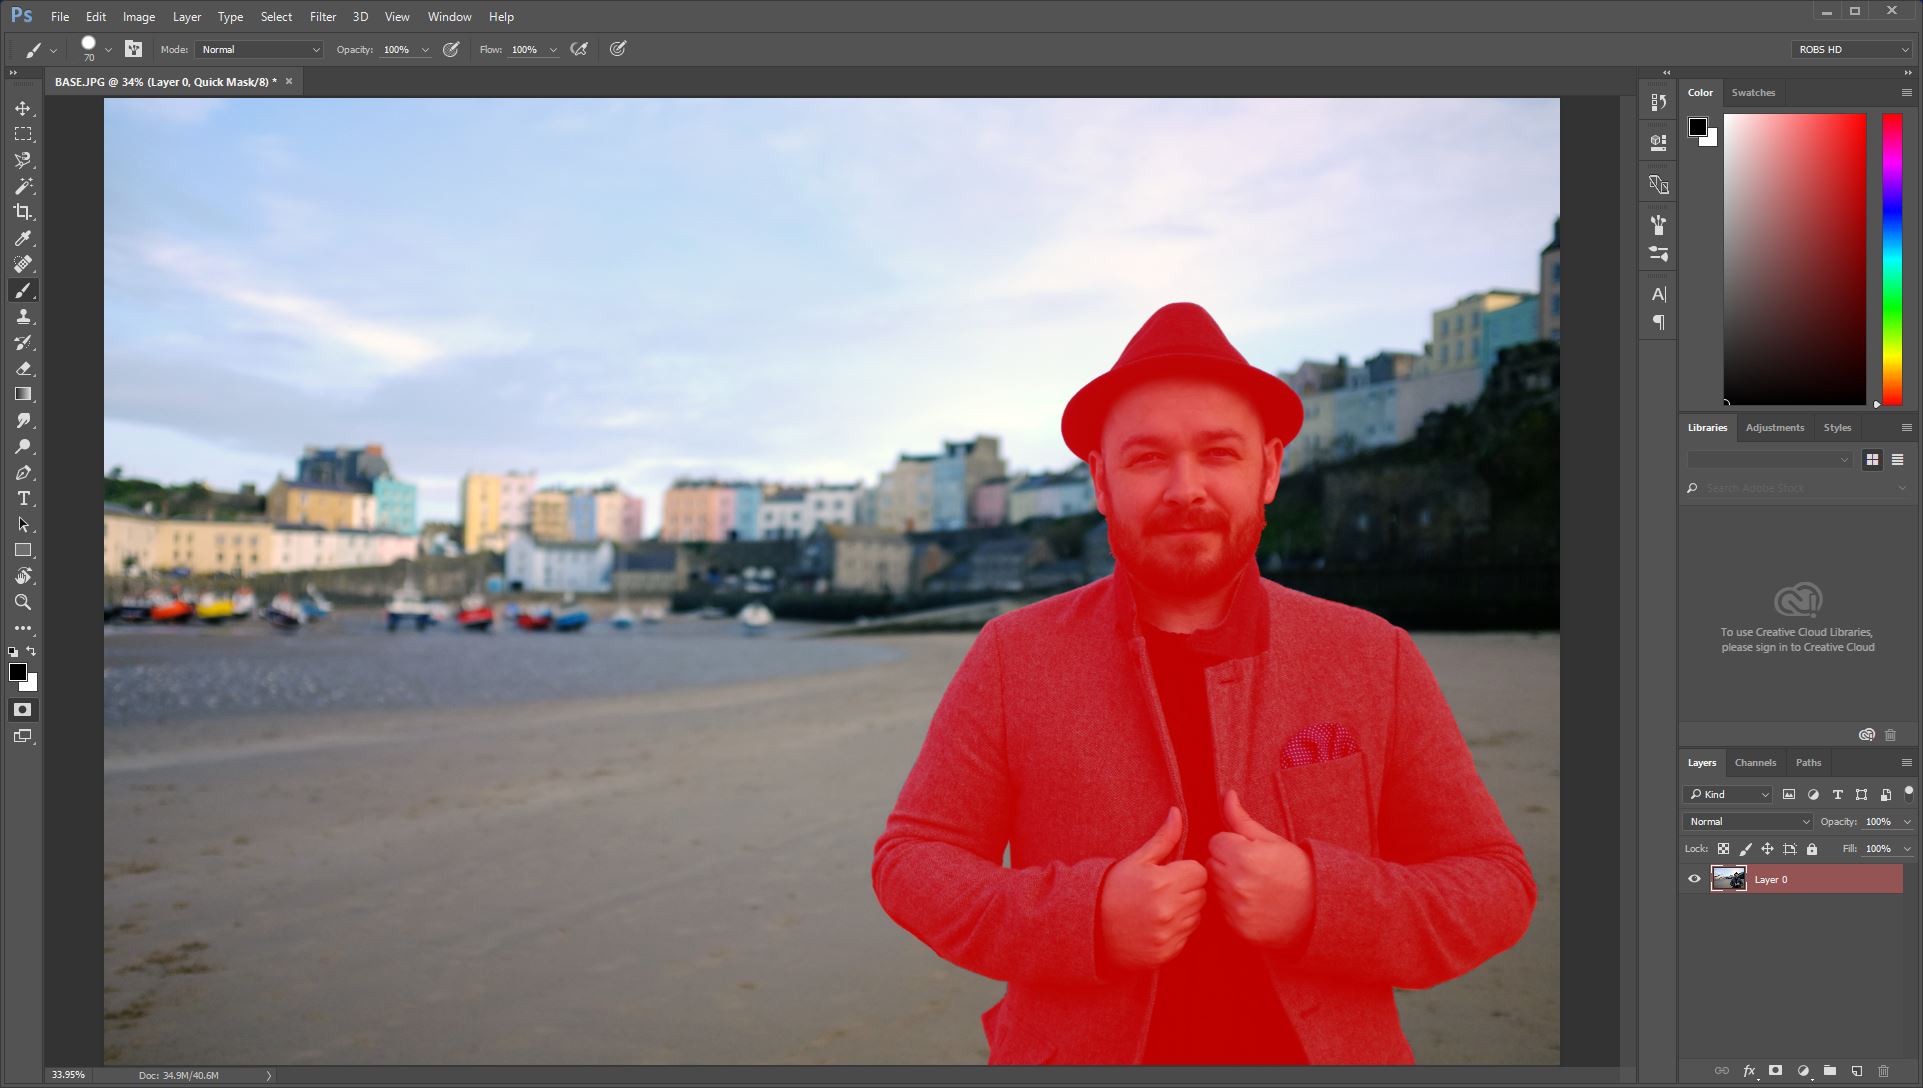
The first step is to mask off your foreground subject. The means you use to do this are not important, what you need to focus on is a clean mask that doesn’t miss any details. I used the brush tool to manually paint mine, but the magnetic lasso tool is a good option. Don’t forget, depending on your subject matter, you might be able to select by colour range or use the magic wand tool.
03. Hide foreground element
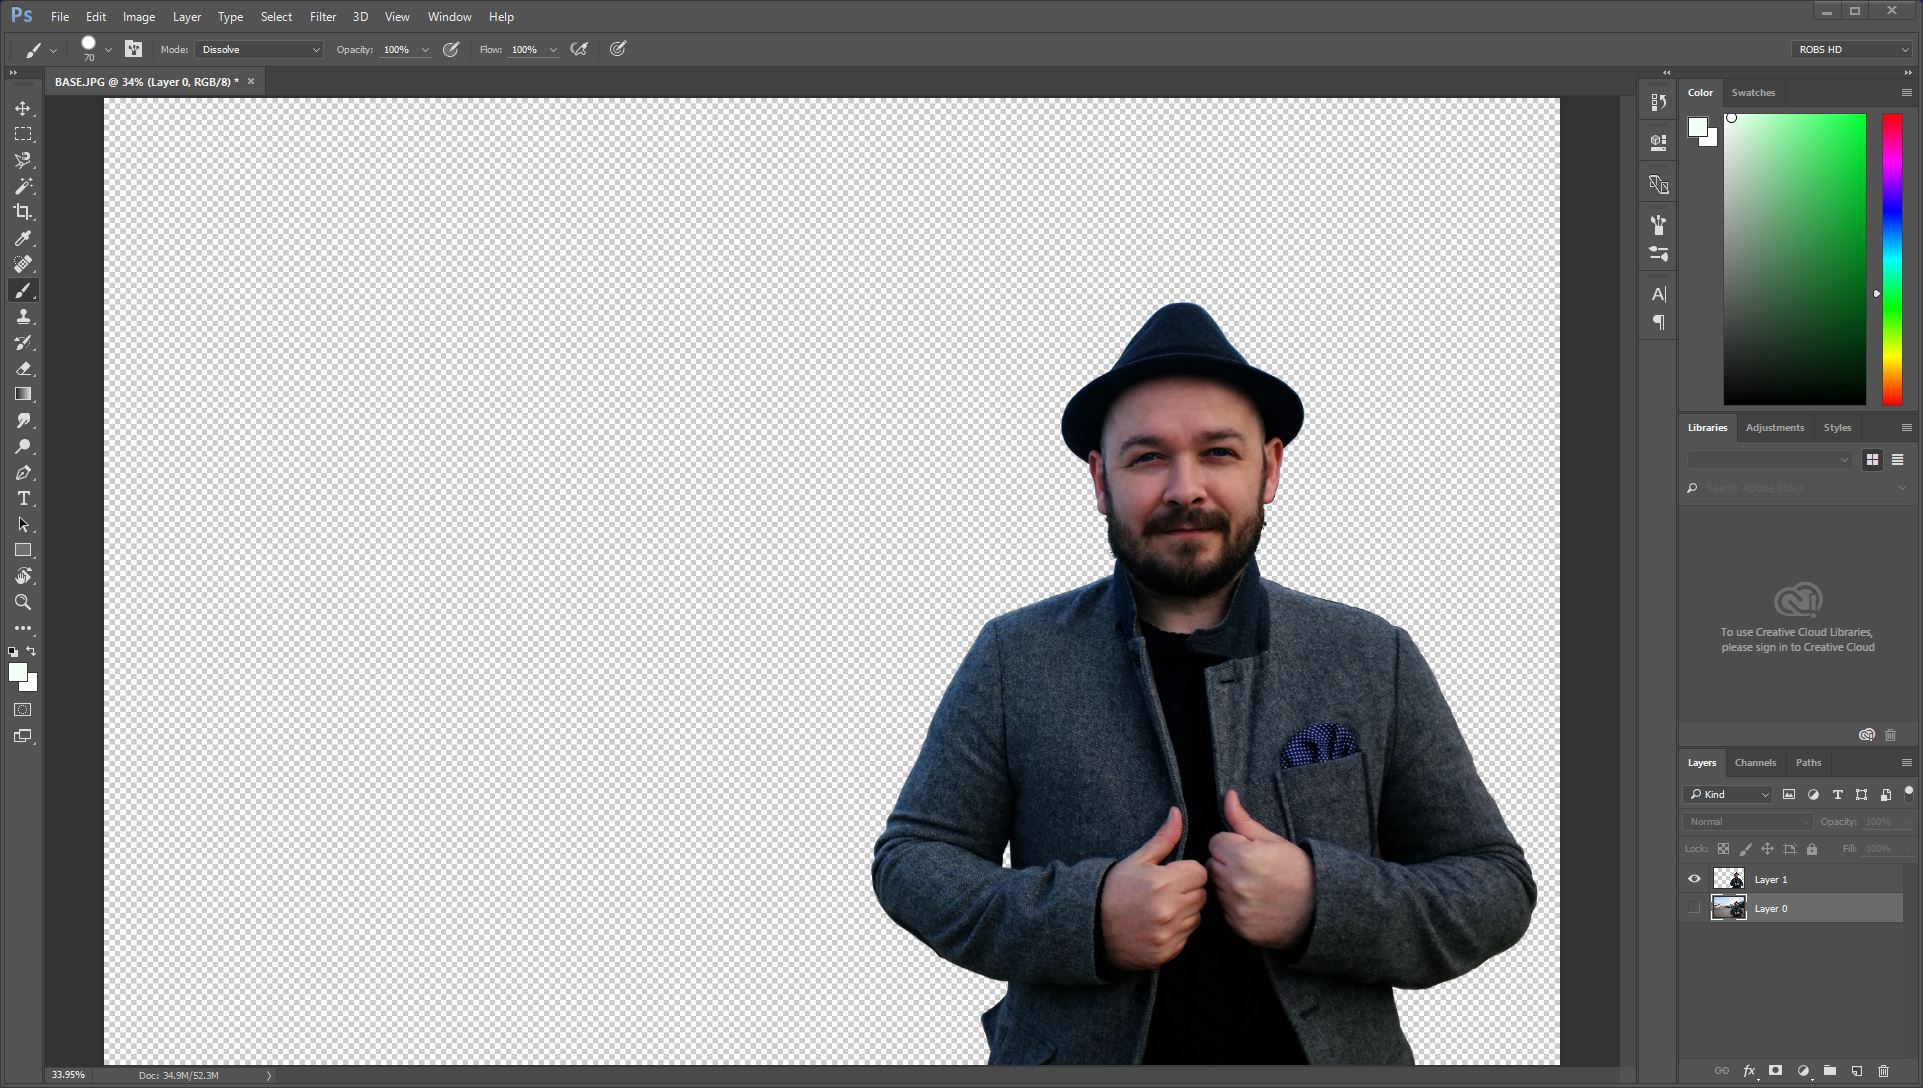
Copy this selection on to a new layer by simply hitting Ctrl+J, which will leave the fresh copy in the same location, before clicking the layers eye icon to hide it. The only thing to watch for here is whether the foreground or background gets copied. If needed, invert your selection by hitting Ctrl+Shift+I, before copying. Here you can see the pasted copy.
04. Fill in the background
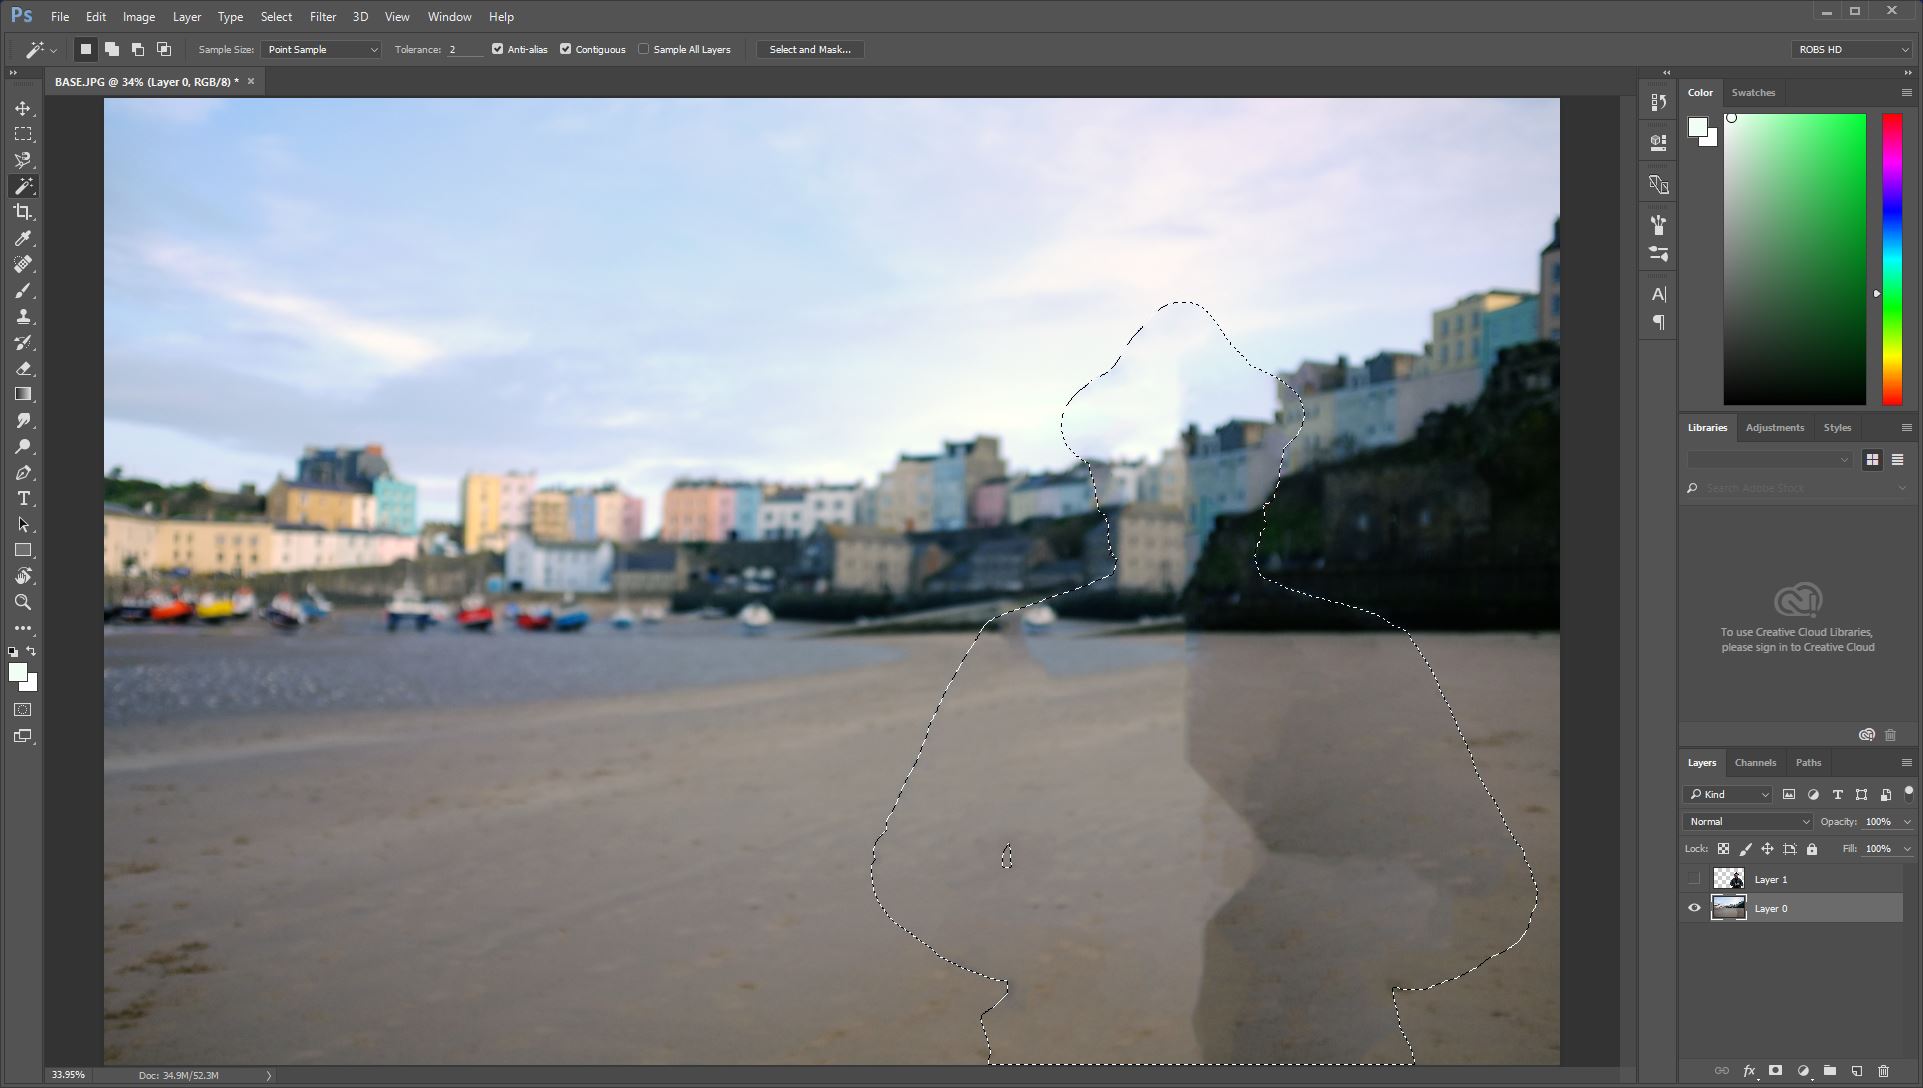
With your copy hidden, make sure your background layer is active and then click Ctrl+Shift+D to reselect your original mask. Then click Shift+F5 to open the Fill dialogue. From the contents menu choose Content Aware. This will attempt to fill the selection based on surrounding areas of the image.
05. Tidy up background
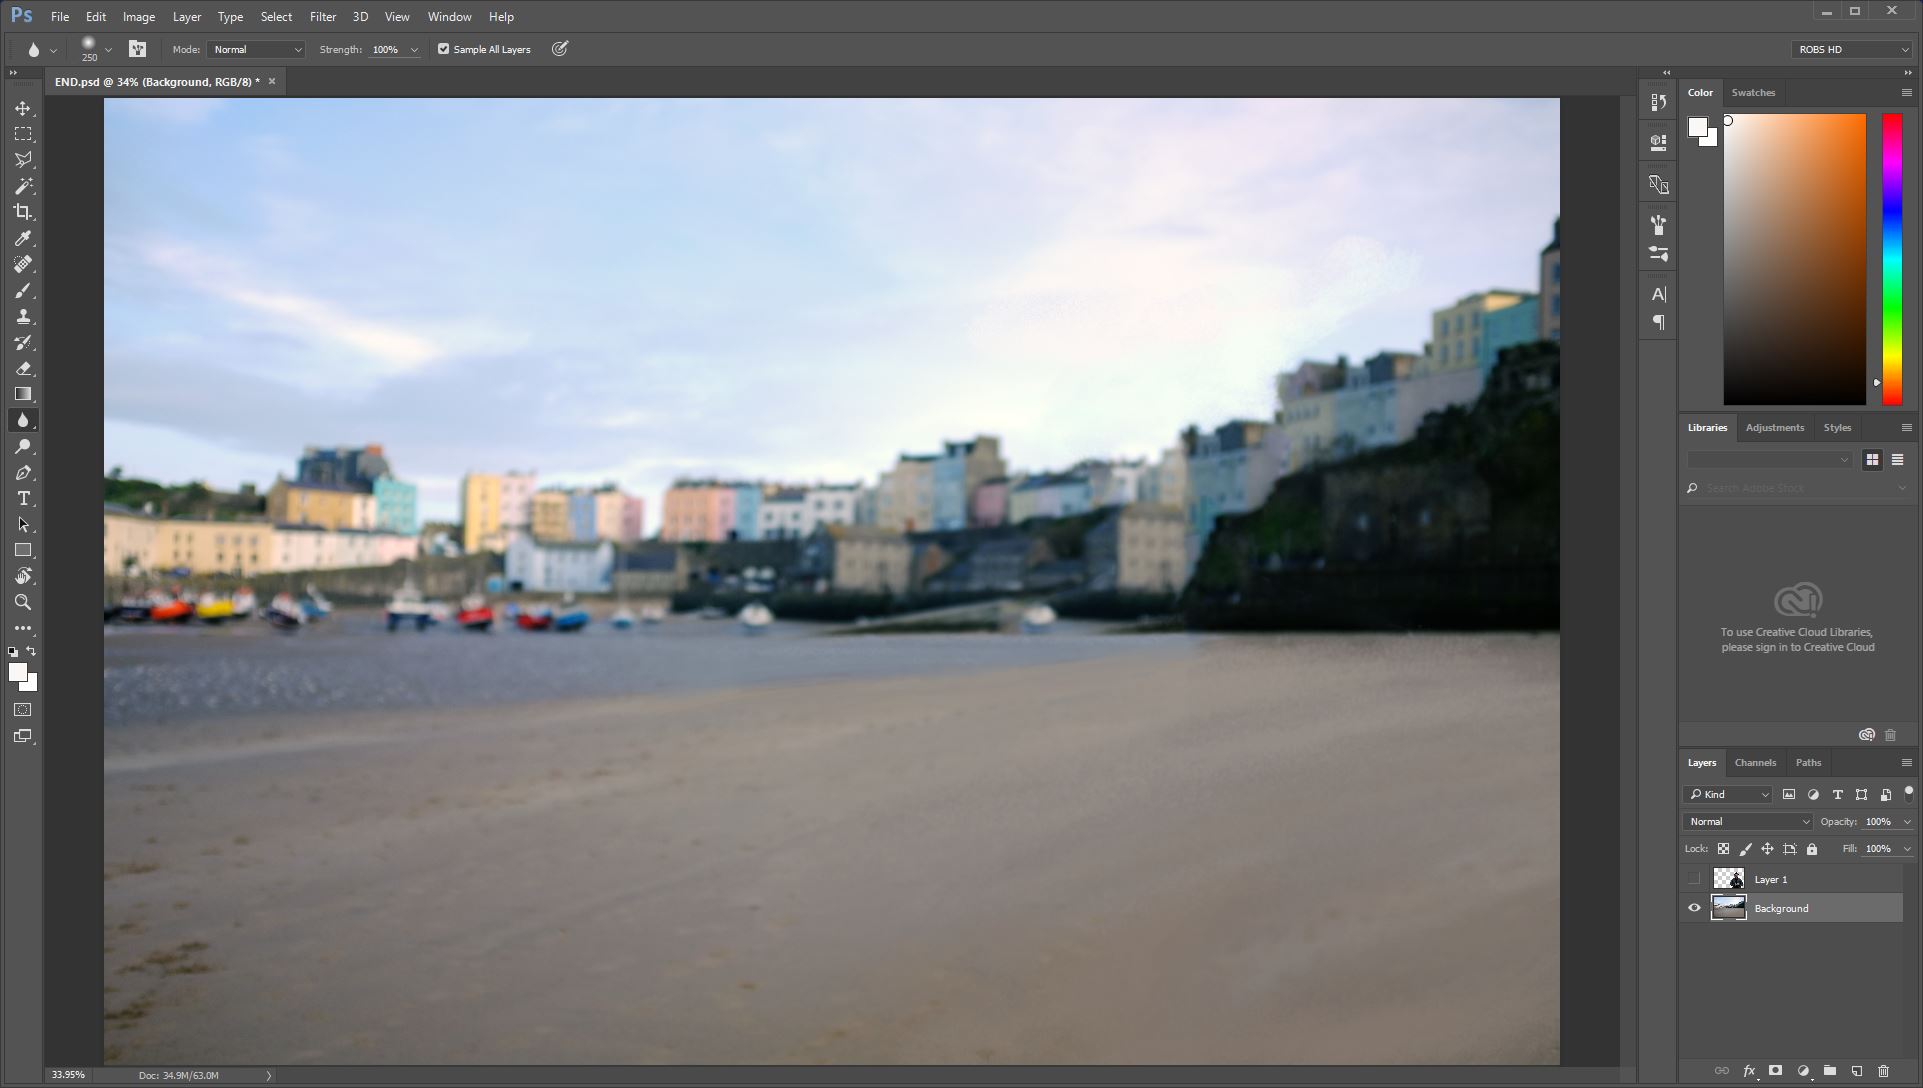
The results of the fill can vary and mine needs a little work. If you need to tidy areas of yours, I suggest using the clone stamp tool and/or the healing brush. This can handle selection artefacts easily.
Get the Creative Bloq Newsletter
Daily design news, reviews, how-tos and more, as picked by the editors.
If you’re having trouble, then concentrate your efforts just inside your selection, as they are the areas that might be seen once you animate.
06. Create video timeline
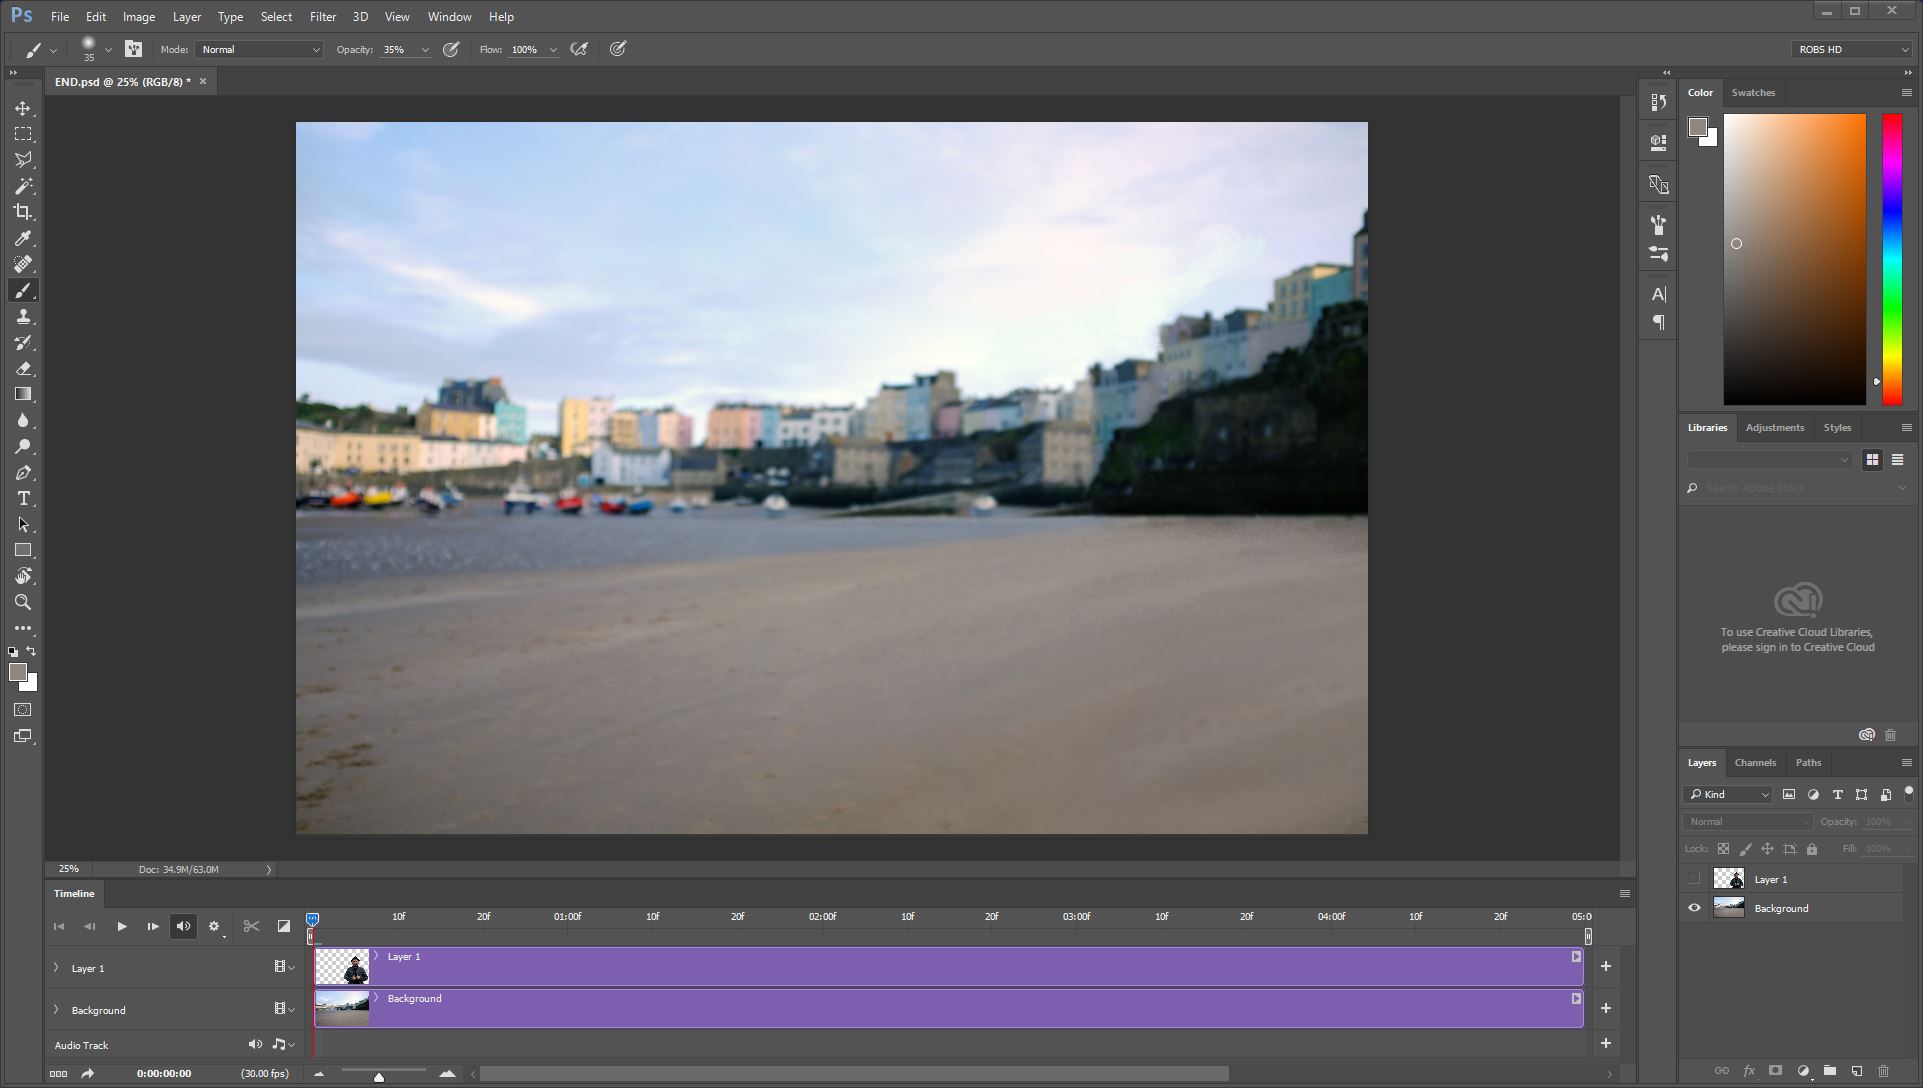
Now that we are prepared you can go to the window menu and check the Timeline option. A blank timeline will appear. In it, click the create video timeline button and your layers will each appear on their own separate section of the timeline. The default length is set to 5 seconds, which is fine for our purposes and is auto fitted to the available space.
07. Preview the image
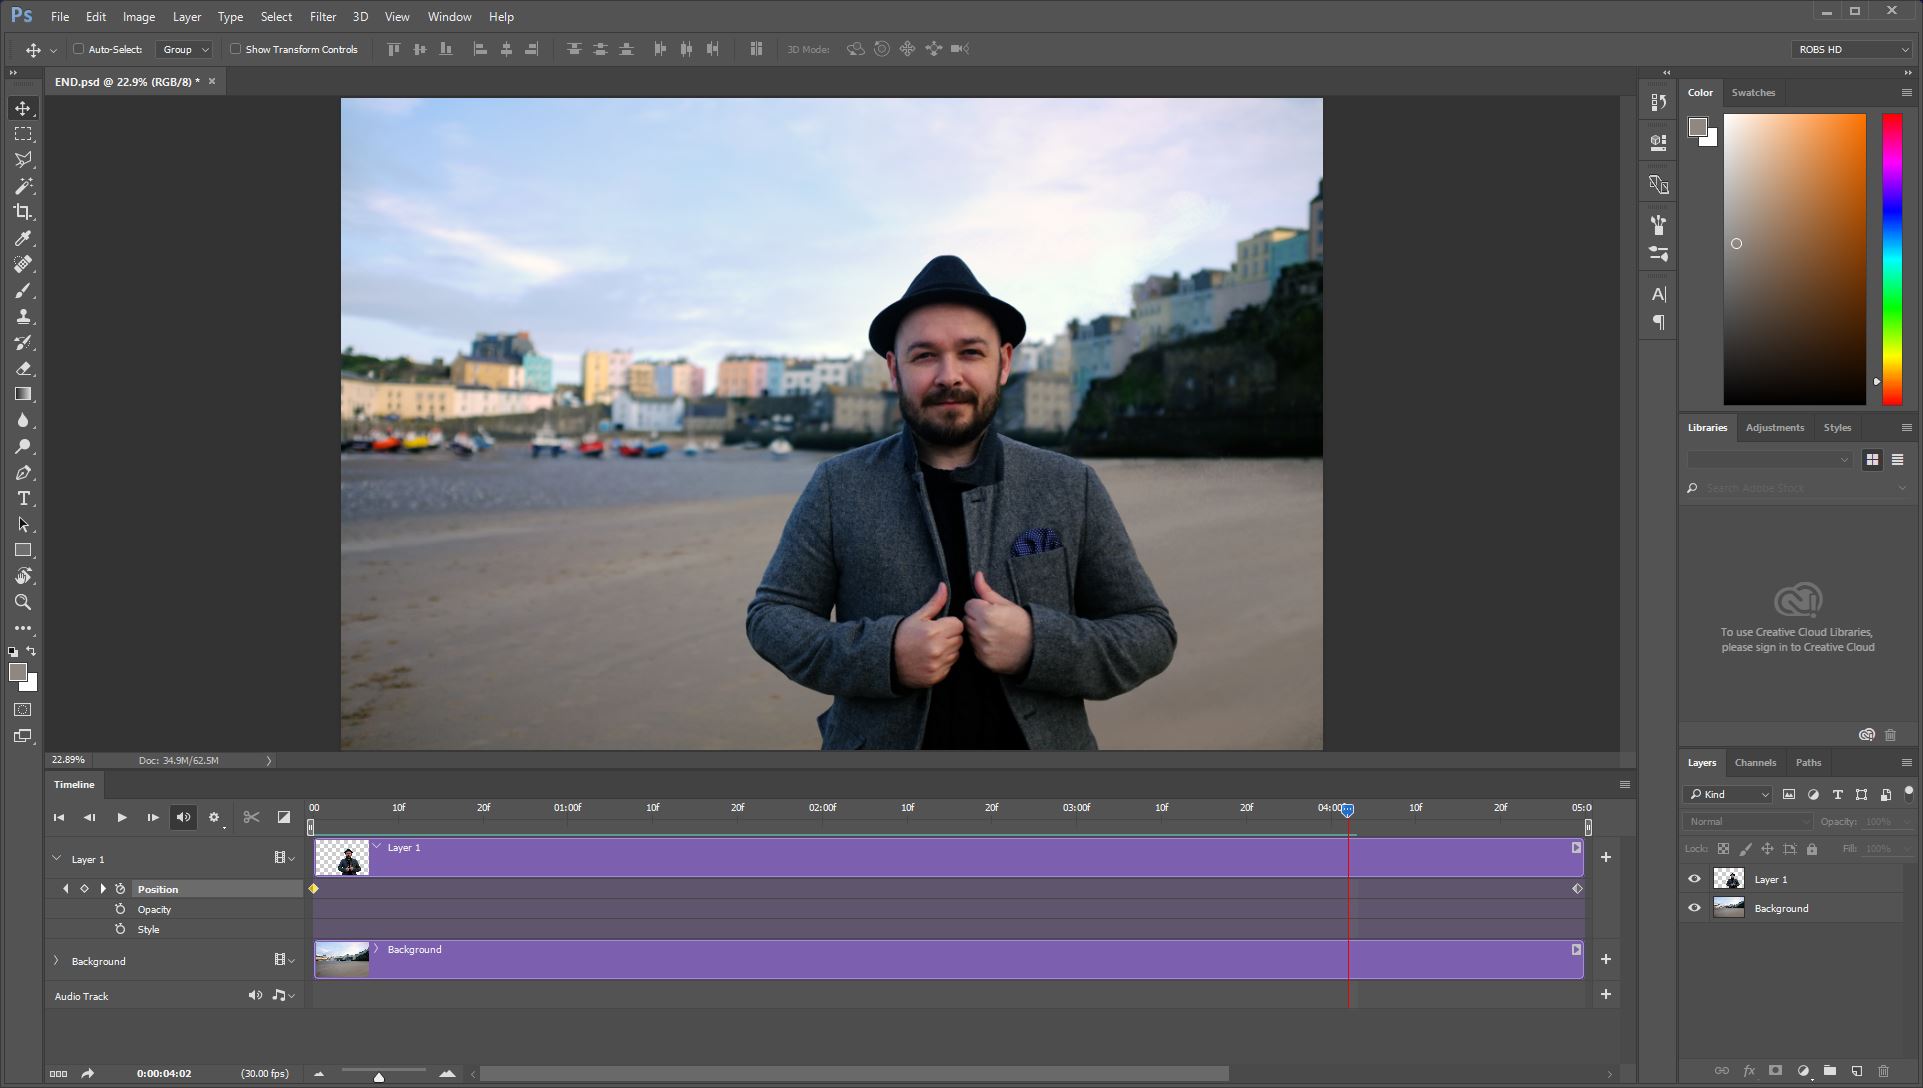
If you click the Right Arrow icon next to the layer preview on the timeline, it reveals the elements that you can animate. We will concentrate on the Position to start with. On frame 0 click the diamond icon, next to the word Position. This is the Add Keyframe button. Now go to the last frame, hit V and drag the layer to the left (I used the layer with me in it). A keyframe will be automatically added. Hit the play button to ensure your change in position was recorded.
08. Scale to fit
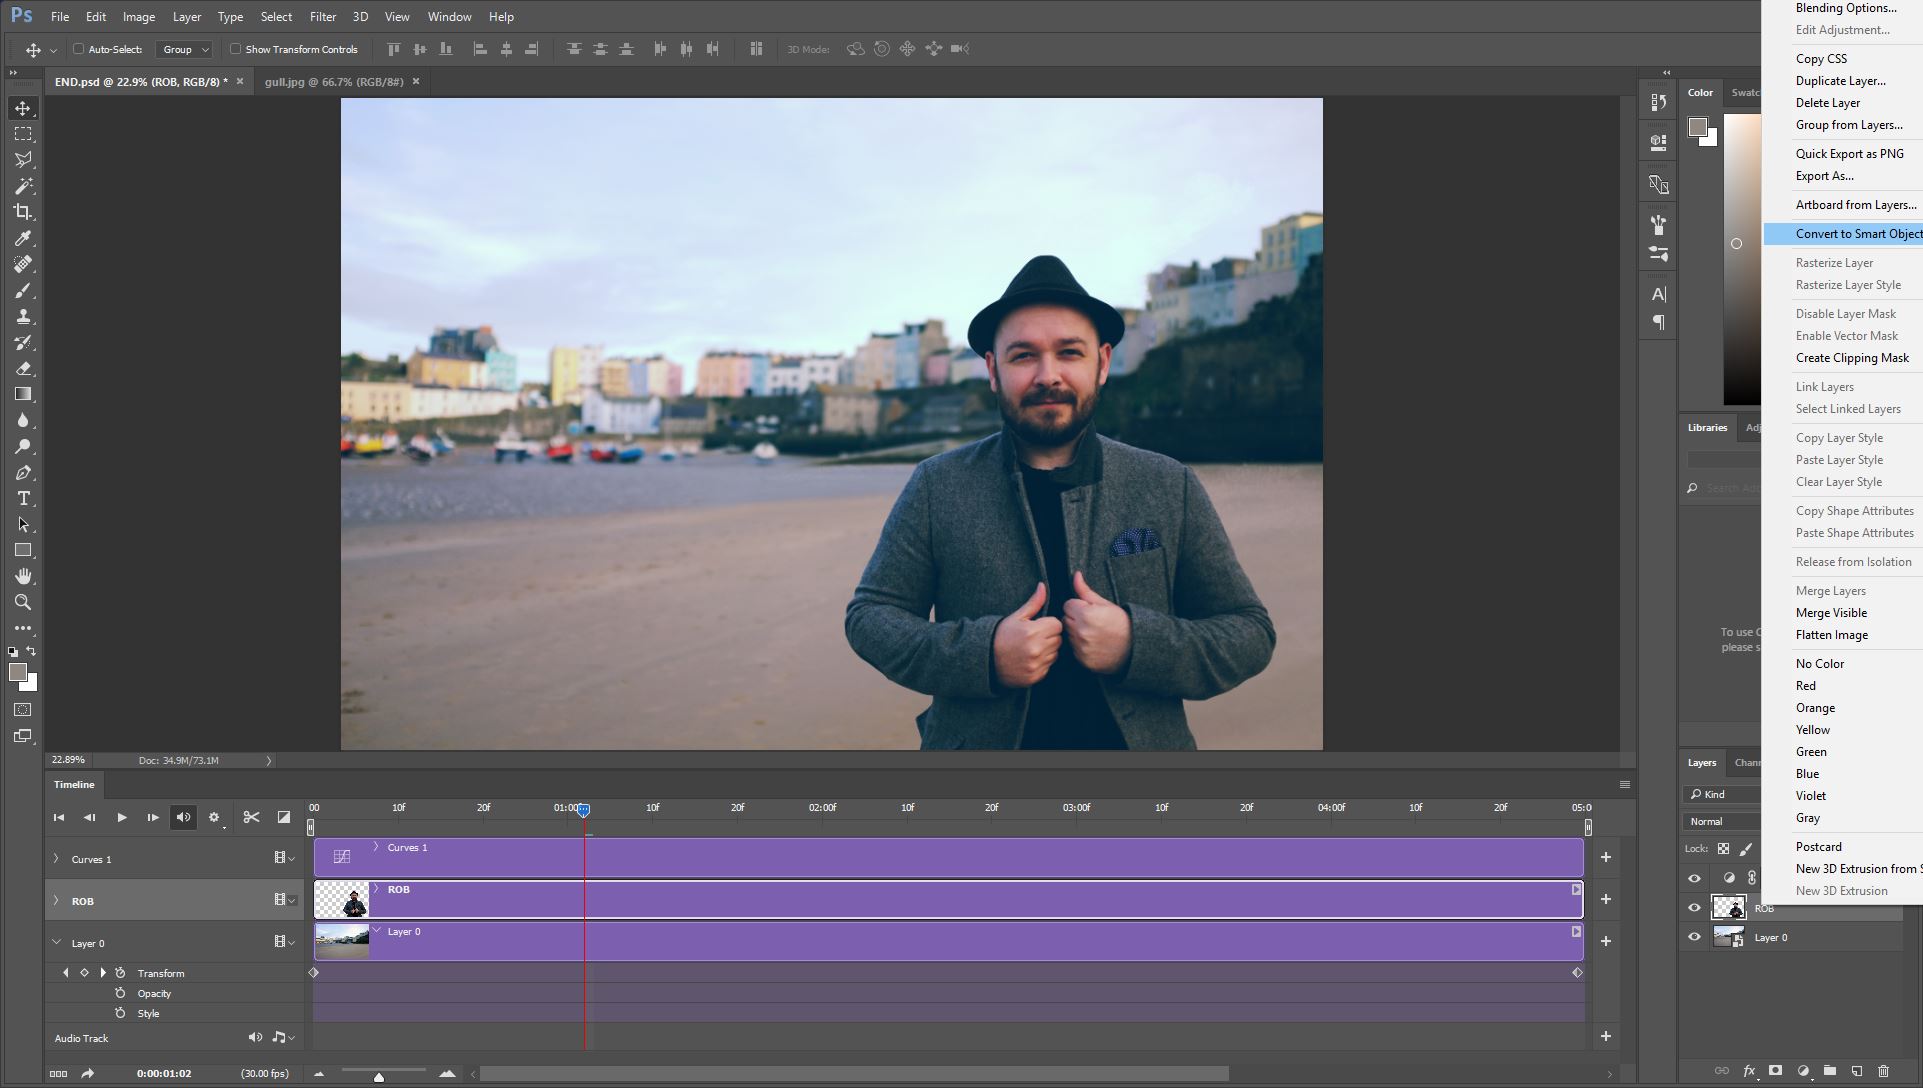
The background offers no options for scaling, which we need, so in the layer palette, right click it and convert to smart object. In the timeline you will now have a transform option. At Frame 0 add a keyframe as before. Then go to the last frame, scale the smart object up and add a new keyframe. Press play to see the results.
09. Finishing touches
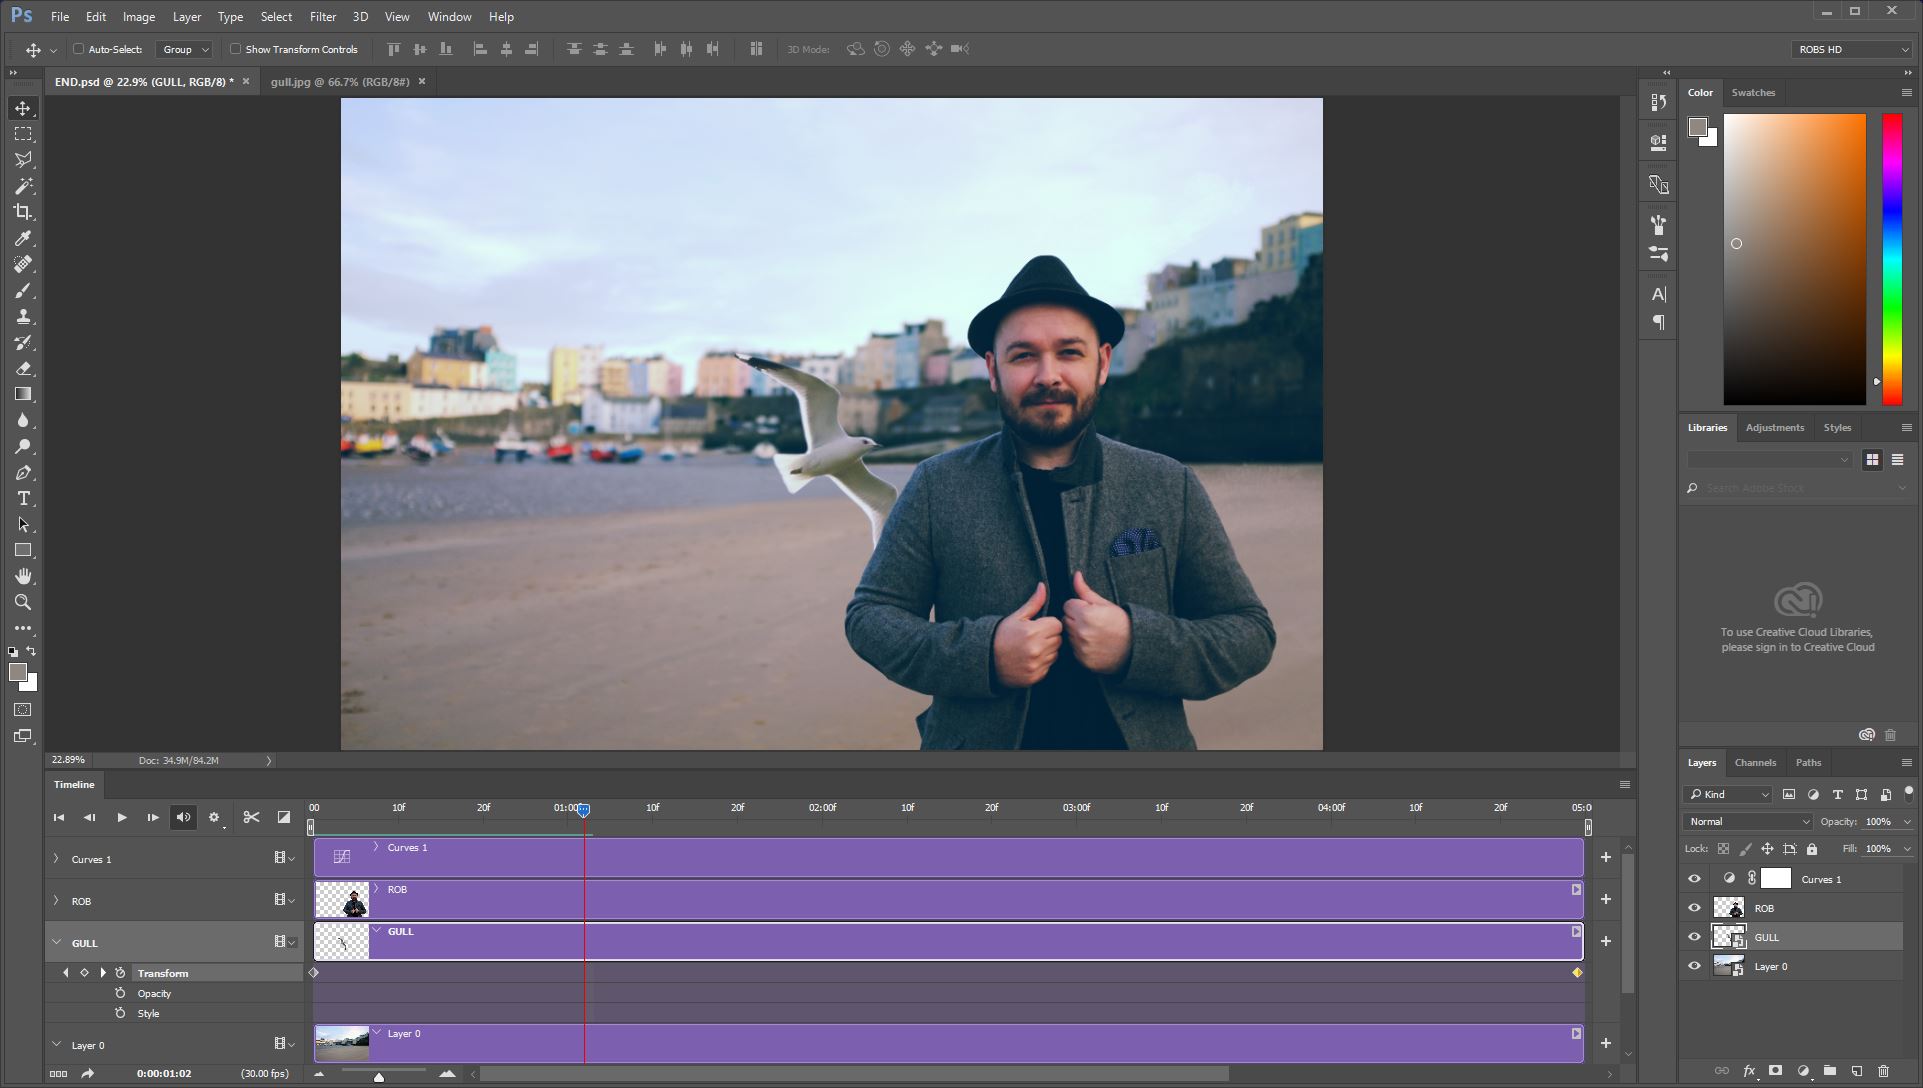
If you aren’t happy with any aspect, go to the appropriate keyframe, change the scale or position, then click the stopwatch next to the track, to overwrite the keyframe. Another option you have is to introduce elements that weren’t in the original photo. Treat this as you would any other Photoshop task and insert the new content on its own layer and animate accordingly, using the same tools.
10. Save and export
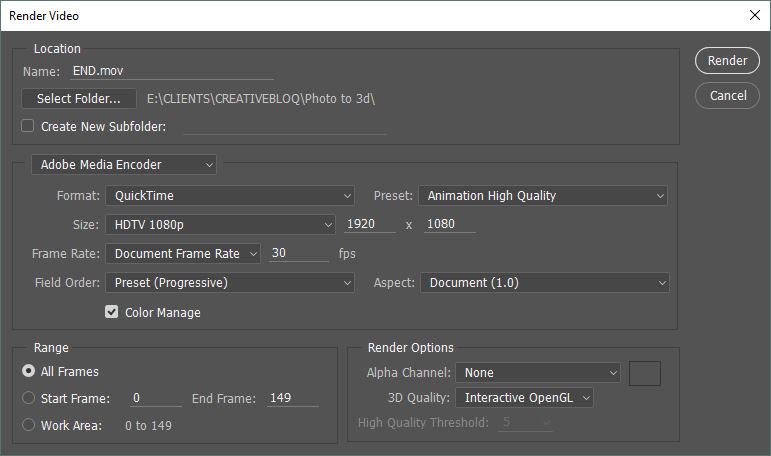
To save your video for use elsewhere, Click File/Export/Save as video. In the dialogue that opens choose a suitable format. I opted for a Quicktime file, at full HD resolution, which happened to be much smaller than the original photo. Of course if you prefer you could paste your items into a 1920x1080 document to start with.
Then all that’s left is to set a location for the video and hit the Render button...
Related articles:

Thank you for reading 5 articles this month* Join now for unlimited access
Enjoy your first month for just £1 / $1 / €1
*Read 5 free articles per month without a subscription

Join now for unlimited access
Try first month for just £1 / $1 / €1

Rob Redman is the editor of ImagineFX magazines and former editor of 3D World magazine. Rob has a background in animation, visual effects, and photography.
