7 essential Photoshop Blend Mode tips and tricks
Discover the most useful Photoshop Blend Modes and how they can help you in your day to day work.
Mastering Photoshop's extensive toolset is no easy feat, despite the amount of brilliant Photoshop tutorials now available. But once you've got the hang of them, they seriously simplify the life of a digital artist.
For this article, we're going to focus on Photoshop's Blend Modes. So, whether you’re dodging and burning, hand-painting or portrait‑toning, Blend Modes can play a part and make the job much easier. Here are seven of the best techniques...
01. Dodge and burn with Overlay
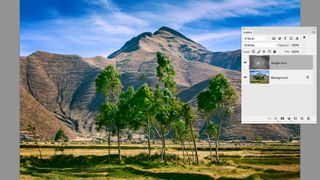
One of the best ways to lighten and darken non-destructively is by painting on a grey layer. Alt-click the New Layer icon in the Layers Panel. Set its Blend Mode to Overlay and tick the Fill With box to make a grey layer, then grab the Brush Tool and paint with white or black at around 10% opacity to dodge and burn selected areas of your photo.
02. Get the hand-painted look
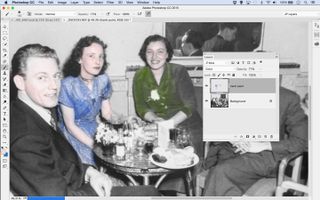
If you want to give some of your black-and-white images a hand-painted look, try making a new layer and setting its Blend Mode to Color. Now grab the Brush Tool, choose a colour and start painting. For best results, use a low opacity for the brush and build up the colours gradually. Patience gets the best results here.
03. Matching colours in montages
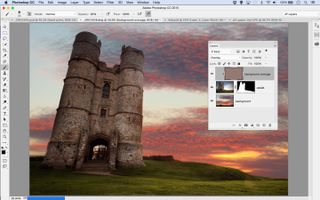
If you’re planning to merge two images to create a montage, here’s an easy way to match the colours so the shots look like they belong together. Duplicate the background image’s layer, then go to Filter > Blur > Average.
Drag this layer above the cut-out object layer, then right-click it and select Create Clipping Mask. Now change this layer’s Blend Mode to Overlay, and reduce the opacity until the combination looks right.
04. Make edgy portraits in seconds
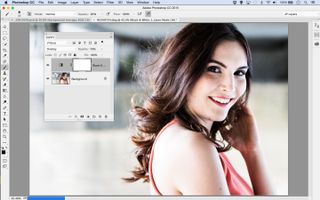
For a quick punchy look that works well for portraits, first add a Black and White Adjustment Layer, then choose the Soft Light Blend Mode. This creates extra contrast and slightly desaturates the colours. Adjust the layer opacity to control the effect.
05. Paint masks with Overlay
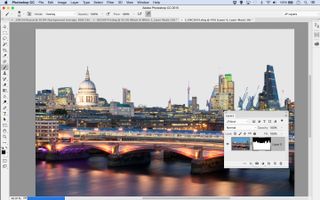
Cut-outs can suffer from fringing along the edges, but Blend Modes applied to the Brush Tool can help. Highlight the mask, grab the Brush Tool and set the brush Blend Mode to Overlay. Now you can paint with black to hide the fringes.
06. Blend with lighten
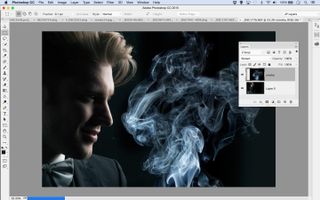
To blend bright subjects like smoke with other elements, shoot them against a completely black backdrop. Copy them into an image and change the Blend Mode to either Lighten or Screen to instantly blend the smoke with everything else.
07. Control colour brightness
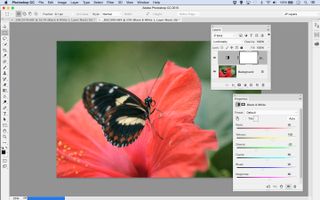
It may sound strange, but you can use the Black and White Adjustment Layer to fine-tune the look of colour images. Add the Adjustment Layer, then change its Blend Mode to Luminosity. Now you can drag the sliders to alter the brightness of different colour ranges, or grab the Hand Tool from the Black and White box then drag over colours in the image.
Related articles:

Thank you for reading 5 articles this month* Join now for unlimited access
Enjoy your first month for just £1 / $1 / €1
*Read 5 free articles per month without a subscription

Join now for unlimited access
Try first month for just £1 / $1 / €1
Get the Creative Bloq Newsletter
Daily design news, reviews, how-tos and more, as picked by the editors.
James Paterson is an expert in all aspects of the photographic process, from capture to post-processing. He has contributed to numerous photography publications, including Digital Camera, Amateur Photographer, PhotoPlus and NPhoto, and his work has also appeared in Computer Arts magazine as well as several books. He is the editor of Practical Photoshop magazine, and has a well-deserved reputation as an authority on all things Photoshop-related.

