Video tutorial: Fix frizzy hair with Photoshop’s Oil Paint filter
Tangled, frizzy hair getting you down? Ben Secret shows you how to fix it with CS6’s Oil Paint filter
This effect lets Photoshop work out how to smooth hair, and then reapplies the fine hair detail to avoid things looking too smooth and artificial. What we’re doing is creating a layer with an effect applied to it, then creating a top layer that is the original image minus everything that changed when the effect was applied.
One thing to note with the Oil Paint filter is that it darkens the image slightly. You can correct this by applying a Levels layer to the affected image and dragging the White Point slider.
If you’re working with particularly difficult hair, you can run this whole process twice. By the second pass, Photoshop will have an even better idea of how to make the hair smooth and straight – however it will look progressively less realistic.
The image we’re using here was taken by photographer Ruth Rose on location in Monaco. The dark skies are the result of using the Black & White filter trick from Computer Arts issue 194, which you can see here.
01 If you’ve used frequency separation before, you’ll recognise this step: after you’ve loaded your image and ensured you’re in 16-bit mode, create two duplicates (Cmd/Ctrl+J). Label the top layer ‘High’ and the middle layer ‘Low’, and make sure the Low layer is selected. Instead of the usual Gaussian blur, we’re going to use CS6’s Oil Paint filter from the Filters menu.

02 Oil Paint creates a very stylised painted effect. Behind this is a unique kind of smoothing effect. The first thing you want to do is take off the shiny oil effect by dropping the Shine slider down to 0. The main controls to use here are Stylisation and Cleanliness. You want to find a balance between realism and smoothness. I’m using 8.27 Stylisation and 6.05 Cleanliness.
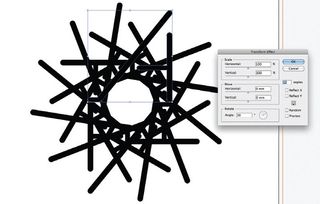
03 Once you’ve okayed that, you get a much smoother middle layer. Now you want to create your High Frequency layer, so select the High layer and go to Apple Image in the Image menu. For Layer, select Low; Blending: Add; Scale: 2; Offset: 0, and ensure the Invert box is ticked. OK that and change the High layer’s blending mode to Linear Light.
04 You should now have your original image perfectly reconstructed. The next step, with your High layer still selected, is to select the High-Pass filter from Others in the Filters menu. Using this, you can start to remove some of the image information that sits between the oil painting version and the detail from the original. I’m using a radius of 2.1. I’ve also turned the opacity down to 70%.
05 Now you should have a silky smooth version of our source image. You only want to use this effect on the hair, so create a Group layer, select the High and Low layers and add them to the group, and add a Hide-All mask to your Group layer – which you can do by clicking the Mask icon then inverting it with Cmd/Ctrl+I. Now use a soft, white brush on the mask to paint the smoothing effect in on the hair.
Surface Blur
The Apply Image technique can be used with most of Photoshop’s filters to create unusual, often powerful effects. Try this with an image of about 1,000 pixels in height or width: first create two duplicates of the image, label the middle layer ‘Low’ and the top layer ‘High’, then apply Surface Blur to the Low layer. I’m using a Radius and Threshold of 25. Now select the High layer. Go to Apply Image from the Image menu, and set Layer to Low, Blending: Add, Scale: 2, Offset: 0 and tick the Invert box.
You should get a ghostly image – this is everything Surface Blur took away. Now change the High layer’s blending mode to Linear Light and make the Low layer invisible. You should now have a very useful detail and feature-enhancing effect.
Get the Creative Bloq Newsletter
Daily design news, reviews, how-tos and more, as picked by the editors.

Thank you for reading 5 articles this month* Join now for unlimited access
Enjoy your first month for just £1 / $1 / €1
*Read 5 free articles per month without a subscription

Join now for unlimited access
Try first month for just £1 / $1 / €1
The Creative Bloq team is made up of a group of design fans, and has changed and evolved since Creative Bloq began back in 2012. The current website team consists of eight full-time members of staff: Editor Georgia Coggan, Deputy Editor Rosie Hilder, Ecommerce Editor Beren Neale, Senior News Editor Daniel Piper, Editor, Digital Art and 3D Ian Dean, Tech Reviews Editor Erlingur Einarsson and Ecommerce Writer Beth Nicholls and Staff Writer Natalie Fear, as well as a roster of freelancers from around the world. The 3D World and ImagineFX magazine teams also pitch in, ensuring that content from 3D World and ImagineFX is represented on Creative Bloq.
Related articles
-
-

-

-
