As the industry standard in digital sculpting, ZBrush boasts a toolset flexible enough to allow it's users to choose a 3D art workflow that suits them best. With so many options available it can be easy to miss less used or older features that might be perfect for a particular situation.
What follows are 10 things that you may or may not have known about ZBrush, mostly aimed at beginner and intermediate users - but there might be the odd one that is useful to seasoned users depending on your workflow of choice.
01. Sketching ideas in PaintStop
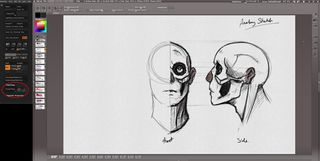
While Quicksketch mode may be more popular for roughing out ideas, ZBrush also has its own built in painting and drawing plug-in called 'PaintStop'. Pre-installed with all the latest versions of ZBrush, you will find Paintstop under Documents > PaintStop.
When launched you will be taken to a minimalist UI with Brush and Canvas settings along the top and the Brush types down the left hand side. While not as full featured as stand-alone apps such as Art Rage, Photoshop or Sketchbook Pro, PaintStop still has a wealth of natural media tools that allow you to sketch and paint out ideas. It has the added benefit of allowing you to load anything you sketch directly back into ZBrush for use as reference or as a texture.
02. Spotlight as a reference tool
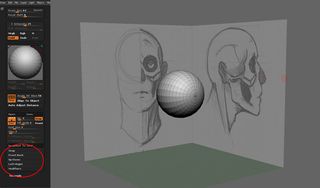
Although primarily a texturing tool, the Spotlight feature in ZBrush can also be used for reference images to aid in sculpting. This is particularly useful if you have limited screen real estate or don't have access to a secondary monitor.
Start by importing a reference image via Texture > Import, with the image loaded, click on 'Add to Spotlight'. Spotlight will appear with the image loaded, now go back to Texture>Import and add as many reference images as needed, they will automatically be added into the Spotlight Tool.
To ensure our sculpting brushes function normally we need to make sure the Spotlight Projection feature is turned off. This can be turned off by going to Brush>Samples>Spotlight Projection.
Get the Creative Bloq Newsletter
Daily design news, reviews, how-tos and more, as picked by the editors.
03. Using Transpose Move Tool for extrusions and non-uniform scaling
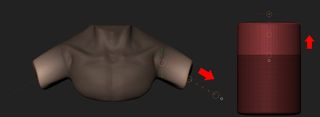
I use this technique when blocking out objects or characters and combined with the masking tools in ZBrush, it can be an efficient way to work. For example when blocking out a character using you could use the Move or SnakeHook brush to pull out the arms, or alternatively mask off an area, switch to the Transpose Move tool (W) and extrude out the shape.
When creating hard surface objects, combine this with the Shift key to ensure you get a straight extrusion. This technique can also be used as an alternative to the Transpose Scale tool (R) for non-uniform scaling and in many cases I find it more intuitive and quicker.
04. Rigging with ZSpheres
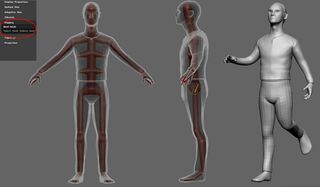
The Transpose tool is more commonly used for posing in ZBrush but it is important to note that you can also use ZSpheres to rig single and multiple subtools. As it is an older method of posing in ZBrush, new users may be unaware of it, but it is a powerful tool all the same.
The key to this is start with a single ZSphere and then go to Tool > Rigging > Select Mesh, pick the mesh you wish to rig and then start building up the skeleton using ZSpheres. It is similar to placing joints in other 3d apps like Maya and Softimage. Once you are happy with the rig, go to Tool > Rigging > Bind Mesh, now you are free to pose the mesh as required.
05. Customise the UI
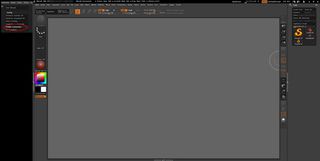
One of ZBrush's greatest strengths lies in how flexible it is as an artist's tool, allowing you to get to the same result in a way you find most comfortable for your style and workflow. This is extends to the UI, which can be customised in subtle ways, for example changing the colour of the UI to the more advanced options of creating a totally bespoke UI with custom menus and pop-ups.
To get started go to Preferences > Config > Enable Customise, this will turn on the Customise mode and allow you to rearrange and alter the UI. A quick internet search for custom Zbrush UI's will give you a wealth of ideas - personally I just change the UI colour, while leaving the layout at default.
06. Load multiple objects
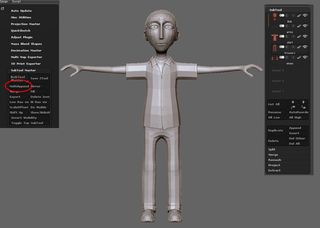
ZBrush comes pre-installed with a wealth of plug-ins that help improve productivity. One of the most useful is the SubTool Master, allowing you greater control over your various subtools which is a life-saver if you are working on a mesh with a lot of parts.
For example, if you have built a basemesh in an external app such as Maya and it is made up of a lot of separate pieces, loading these into ZBrush one by one can be tiresome. Subtool Master makes this process quicker, first start by loading one mesh, i.e. a characters head, now go to Plugin > Subtool Master > MultiAppend, this will let you select the remaining parts and load them all in at once.
07. Backface masking
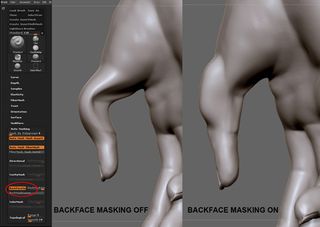
A common issue for new ZBrush users is when it comes to sculpting thinner parts of a mesh where the geometry will collapse in on itself. To fix this we have to turn on the 'Backface Masking' feature, this option automatically masks areas that are facing away from the camera, allowing us to sculpt on thinner meshes without problems.
To turn in on go to Brush > AutoMasking > Backface Masking. It is important to note, however, that this should only be turned on for certain brushes as it can have undesired effects with certain brushes, for example the Move Brushes (Move, Move Elastic, Move Topological) will not work as expected.
08. Initialize primitives
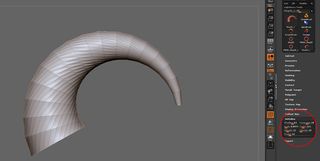
For new users moving from traditional polygon modelling apps it might be strange working with the ZBrush primitives as they work a little differently in ZBrush. It isn't immediately apparent that you can edit the primitive before turning it into a polymesh to be sculpted. The key to this is the 'Intialize' tab under the Tool menu.
Some primitives have more options than others but they will give you more control over how your base primitives start out and lets you create brand new primitives as well. For example, the Ring3D primitive can be edited into a more conical shape, that could be used as the base for an animal or creature horn.
09. Topology and polygroup masking
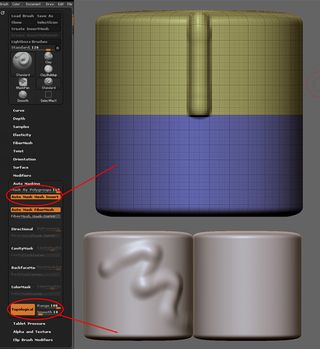
Earlier we looked at the Backface Masking feature but there are many other useful masking types that can be used to improve your workflow. Two that I use regularly are Topology and Polygroup masking, both of which are found under the Brush > Auto Masking menu. Polygroup masking will allow you to adjust how much influence a brush has over a Polygroup, with the setting at full, you will only be able to sculpt on the first polygroup you select.
With Topology masking if you have two separate objects that make up one subtool, this option adjusts if you can sculpt across one or both of the surfaces. With the setting at full you will only be able to sculpt across one of the surfaces. These options can be very useful when detailing your subtools, in particular for creating clothing seams or hard surfaces.
10. Setting up reference planes

If you are moving from apps such as Maya, Softimage or 3DS Max then you might miss the classic quad view that you can apply reference images to. While ZBrush only has a single camera, you can still set up reference images. Using the toolbar to the right of the canvas, turn on the X, Y and Z floor grids, now access the Draw menu and scroll to the Front-Back, Up-Down and Left-Right sections.
Here you can import and map images to the desired axis, there are also a number of options for adjusting the image in ZBrush, such as flipping the image if it is pointing the wrong way, negating the need to alter the images in an external app like Photoshop.
Book your Vertex 2018 ticket now
On 13 March we’re launching Vertex 2018: a one-day event in London for the CG community. Featuring a jam-packed schedule of inspiring talks from the industry’s most exciting practitioners, there will also be workshops, networking opportunities, a busy expo and lots more. Get your ticket to Vertex 2018 now.
This article was originally published in issue 231 of 3D World, the world's best-selling magazine for CG artists. Buy issue 231 here or subscribe to 3D World here.
Related articles:

Thank you for reading 5 articles this month* Join now for unlimited access
Enjoy your first month for just £1 / $1 / €1
*Read 5 free articles per month without a subscription

Join now for unlimited access
Try first month for just £1 / $1 / €1
Related articles
-
-

-

-

