10 VR tips for Unreal Engine
How to optimise Unreal renders to create stunning VR experiences without sacrificing performance.
When it comes to the game and film industry, technology appears to be advancing at a mind-blowing rate, creating show-stopping 3D movies, real-life gaming experiences and 3D art. But the hot topic right now is virtual reality.
Epic Games' Showdown demo was a popular VR showcase a few years ago, and with the release of Unreal Engine 4, Epic has made the entirety of the project available for anyone to download, deconstruct and use as desired.
In Showdown, the viewer is dropped into a scene where urban soldiers battle a massive rocket-wielding robot in slow motion. With 360-degree head tracking support for viewing the scene at many angles, and content that pushes Nvidia Maxwell-class GPUs, Showdown was crafted for the reveal of the Oculus Rift Crescent Bay head-mounted display prototype at the first Oculus Connect. It's built to test the limits of modern VR resolutions and framerates.
While we were focused on pushing the technological limits with Showdown, we were actually creatively constrained. We had five weeks to make the demo, with a content team of two and borrowed time from a few other folks, so we adapted content from two previous demos: Samaritan and Infiltrator. Since animation was scarce, we stretched seven seconds of actual content to fill two minutes of demo time – hence the happy discovery born of practical limitations: by slowing down the action all around you, we're able to accentuate the details of the scene.
What follows are the top 10 optimisation techniques that were used to maximise performance in Showdown. Each of these techniques can be applied to Unreal Engine 4-based VR projects to achieve the best performance possible. Showdown supports DK2 and up, so if you have access to a development kit, then download it from the Epic Games launcher and give it a go.
01. Make your content like it's 1999
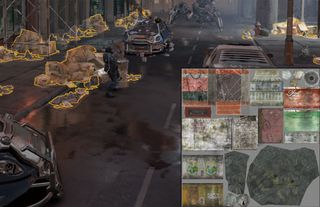
When you start to develop content for VR projects you might be tempted to be liberal with vertex counts, textures sizes, and materials, in order to produce the most immersive experience possible. Resist this urge and instead take a step back. First, develop a plan that allows you to maximise the use and reuse of each asset in the project.
Bringing back old school art techniques such as texture atlasing, or using static meshes to simulate expensive real-time reflections, are key to ensuring that your VR project can run as fast as possible, giving the user the best VR experience achievable.
02. If you draw it, it will be rendered
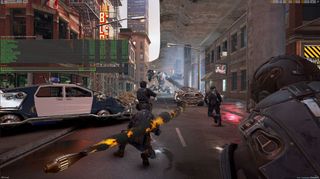
Setting a hard rule for how many materials a static mesh in your project can use is a great way to get a handle on performance early on in your project. This is because for each material a static mesh has applied to it, the rendering engine will have to render that object again.
To ensure that the scene is not becoming too heavy to draw, use the Stat Scenerendering command to see how many draw calls are currently being used. Showdown limited itself to 1,000 draw calls per frame, but remember, there are two draw calls per object because we’re in stereo! That means in monoscopic, we only have 500 draw calls per frame to work with.
Also, it is worthwhile to note that this will be less of an issue as instanced stereo rolls into the main development branch of Unreal Engine 4.
03. Activate Shader Complexity
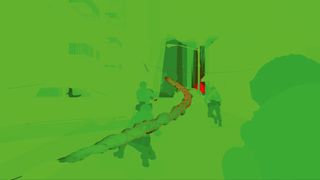
When determining which materials cost more to render than others it can be time-consuming to solve and difficult to track. Luckily UE4 offers a special view mode called Shader Complexity that can be used to determine which materials cost more than others. When you activate Shader Complexity using the shortcut [Alt]+ [8] your scene will be represented by varying shades of green, red and white.
These various shades of colour indicate how expensive a pixel is to render. Bright green means that the pixel is cheap, while red to white indicates pixels that are costing more and more to render. You can also activate Shader Complexity by pressing [F5] when the uncooked version of your project is running in-editor, or in a standalone window.
04. Do the performance profiling dance
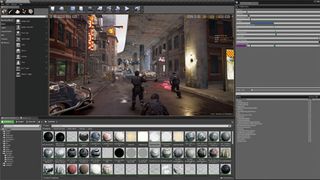
Profiling your project's performance early and often is a great way to ensure that artists and designers are following sound content creation rules. A GPU-bound project means that you are trying to render too many objects to screen at once while a CPU-bound project means you are trying to perform too many complex calculations, like physics calculations, per frame.
To determine if your project is CPU or GPU-bound, use the Stat Unit command and observe the numbers that are displayed. If the numbers are yellow or red this means your project is going to be, or is already, GPU or CPU bound. If the numbers are green then you are good to go. It is more common to be GPU-bound than CPU-bound.
If you determine you are GPU-bound you can drill down deeper to see the root of the issue by using UE4's native profiler. To activate the profiler, press [Ctrl]+[Shift]+[Comma]. Once the GPU profiler is open, you can then check to see which items in your scene are costing the most for the GPU to render, and then remove or optimise those objects. Make sure your lighting is built before running the performance profiler, in order to avoid any false positives.
05. Fake it until you make it
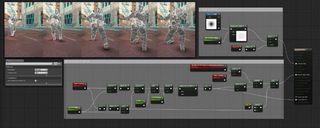
Finding clever ways to recreate expensive rendering options, such as dynamic shadows and lighting, can be a huge win for hitting your performance goals in VR. In Showdown, we discovered that using characters casting dynamic shadows each frame was too expensive, so we cut it.
While this initially resulted in characters looking like they were floating while moving, we fixed it by introducing fake blob shadows that could dynamically adjust their position and intensity based on how close the character was to an object. This gave the illusion of characters casting shadows when coming close to the ground or other objects.
06. Lightmaps to the rescue!
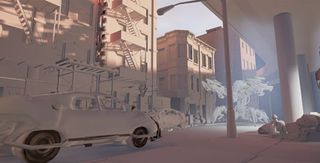
The idea of storing or baking complex lighting calculations into textures is nothing new in the world of computer graphics. This method of lighting – called lightmapping – works by calculating how complex lighting should look by storing those results into a texture and then using that texture to map the results to surfaces in a 3D world.
Showdown made heavy use of lightmapping for two reasons: firstly, lightmapping gives a level's lighting an interesting and dynamic aesthetic, and secondly – and more importantly – lightmapping is extremely cheap to use at runtime, freeing up resources for other rendering-intensive tasks.
07. Use reflection capture actors
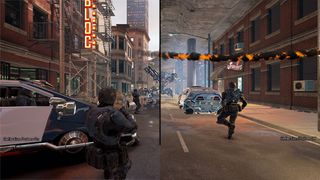
Reflections play a key role in helping 3D renders look more realistic. In Showdown, reflections were heavily used to give the world a more complex look and make it feel more grounded. However, the demo makes use of an interesting way to capture and display these reflections that is both cheap and easy to manage: reflection capture actors are placed throughout the level.
These actors work by recording parts of the level to static cubemaps, which can then be sampled by materials for use in their reflective parts. All of the reflections you see in Showdown come from just six reflection probe actors that were placed within the level.
08. Don't rely on VFX tricks
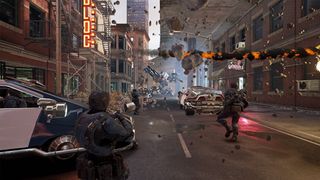
Visual effects play a huge role in helping the user become fully immersed in VR. However, certain old school tricks used to make VFX cheaper to render in real time, do not hold up well in VR. For example, using flipbook textures for smoke will make the smoke look like a flat sheet in VR, destroying the believability of the effect.
To get around this, Showdown primarily uses simple static meshes for VFX in lieu of techniques like flipbook textures. One added benefit of using static meshes in this way is that it opens the door for deploying near-field effects very close to the camera, which further pulls the user into the experience.
09. Adjust screen percentage
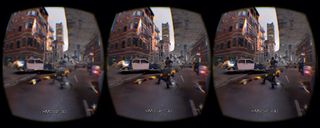
Adjusting your VR project's screen percentage can help make it run faster at the sake of visual fidelity. This is because screen percentage controls the size of the final render target displayed on the HMD. Your project’s screen percentage can be scaled down as low as 30 per cent the normal size or scaled up to 300 per cent the normal size.
To test how different screen percentage sizes look in-game, use the Unreal console command HMD SP [insert number]. Once you find a setting that works for your project you can put it into the DefaultEngine.INI by adding r.ScreenPercentage=[insert number]. Start small and go up carefully as you experiment with this feature.
10. Think about translucency
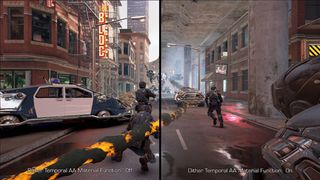
Showdown uses very little translucency due to the feature's high rendering cost per frame. As an alternative we opted to use a method that exploits the properties of temporal anti-aliasing, without the associated cost. To achieve this functionality and make an object appear translucent, you can use opacity masking in your project's materials alongside the Dither Temporal AA material function.
While it's not always a replacement for translucency, it can be a worthy substitute for scenes that need a translucent fading approximation. To use this feature, make sure that what you are using for translucency you input into the Dither Temporal AA material function before going into the opacity material input.
Read more:

Thank you for reading 5 articles this month* Join now for unlimited access
Enjoy your first month for just £1 / $1 / €1
*Read 5 free articles per month without a subscription

Join now for unlimited access
Try first month for just £1 / $1 / €1
Get the Creative Bloq Newsletter
Daily design news, reviews, how-tos and more, as picked by the editors.
Related articles
-

-

-

-
